Rumble is not your typical video game website. Founded in 2013, it has emerged as a unique video-hosting site and an upcoming live-streaming platform.
While platforms like Twitch or Trovo primarily cater to the gaming community, Rumble offers a fresh and distinct experience for its users. Recent developments, such as the multimillion-dollar deal signed by popular streamers KaiCenat and IShowSpeed, suggest that Rumble’s popularity is set to skyrocket.
Let’s delve into the viewership data and metrics from June 2023 to gain insights into Rumble’s growing success.
Rumble excels in June 2023 with 27.7M hours watched and a peak viewership of 475K. While Rumble’s hours watched are a fraction of Twitch’s,
Rumble boasts an average viewers per channel of 546, 1,900% higher than Twitch. Andrew Tate’s comeback stream attracts over 400K peak viewers, becoming one of the most-watched English streams. Compared to Trovo, Rumble enjoys 174% more watch time per hour watched. Rumble appeals to audiences while Trovo attracts more streamers.
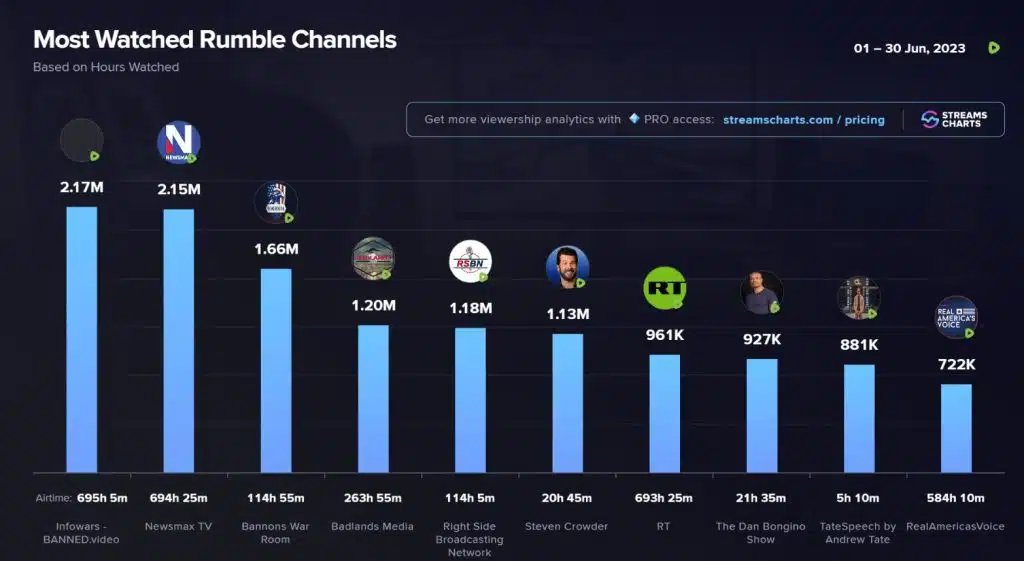
Most Watched Channels on Rumble by Hours Watched (June 2023)
Right-wing media dominates Rumble. Six of the top ten channels are American conservative organizations.
Personal channels of commentators like Steven Crowder and The Dan Bongino Show, along with RT and TateSpeech, make up the rest. InfoWars, Newsmax TV, and RT gather substantial watch time. InfoWars alone contributes nearly 10% of June’s total hours watched on Rumble. Andrew Tate’s channel, TateSpeech, stands out non-politically.
After facing bans, Tate moved to Rumble, becoming highly downloaded and ranking penultimate with just five hours of airtime.
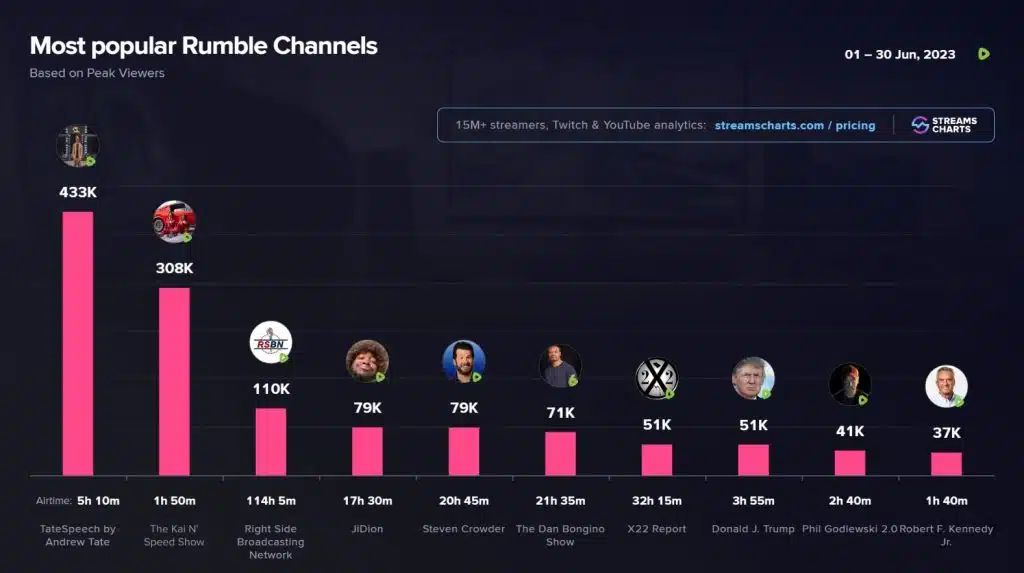
Most Popular Rumble Channels by Peak Viewers (June 2023)
Tate shines with 433K peak viewers on Rumble. The Kai N’ Speed Show follows with 308K viewers. KaiCenat and IShowSpeed sign multimillion-dollar deal, debuting at 133K viewers and peaking at 308K.
Independent right-wing creators like Steven Crowder find success with 79K viewers. JiDion, a non-political YouTuber, experiences 464% peak viewers increase. Rumble thrives as a platform for politics and campaign promotion, attracting Donald J. Trump and Robert F. Kennedy Jr.
Conclusion
In conclusion, Rumble’s unique approach to video hosting and live streaming, coupled with its growing viewership and popular channels, positions it as a formidable player in the online streaming sphere.
Maximize your Black Ops 6 rewards—Create highlights from your best gameplay with with Eklipse
Eklipse help streamer improve their social media presence with AI highlights that clip your Twitch / Kick streams automatically & converts them to TikTok / Reels / Shorts
Meet Tfue, the renowned streamer and Fortnite player who has captivated audiences with his gaming prowess. This article provides a glimpse into his personal life, streaming career, and impressive net worth in 2023.
Tfue’s real name is Turner Ellis Tenney. He was born on January 2, 1998, in Indian Rocks Beach, Florida, USA. He is a popular streamer who plays Fortnite Battle Royale.
There isn’t much information available about Tfue’s family. However, it is known that he has two brothers and a sister. One of his younger brothers is Jac Tenney, who is a professional surfer. Jac also has a YouTube account called JOOGSQUAD PPJT. Tfue initially started streaming on his brother’s account.
In the other hand, Tfue really enjoys skimboarding, surfing, and longboarding.
Tfue Streaming Career
Tfue started his gaming journey with H1Z1 and Destiny 2. He signed with Denial Esports in 2017 and mainly played H1Z1. Later, he joined ‘Rogue’ for PUBG and streamed Call of Duty on Twitch.
In 2018, Tfue joined FaZe Clan along with other members like Cloakzy, but this time for Fortnite. His time with FaZe playing Fortnite brought him widespread recognition in the gaming world. Despite some controversies towards the end of his contract, Tfue’s talent as a gamer was already highly regarded.
Currently, Tfue is not part of any esports organization as he prefers to be independent and play what he loves without restrictions. He continues to stream on Twitch, attracting an average of 9,069 viewers per live stream.
In 2018, shortly after his rise in Fortnite, Tfue’s account was permanently banned by Epic Games for allegedly selling accounts and rare skins in violation of their terms. In the same year, he faced accusations of inappropriate behavior involving a racial slur directed at a smaller streamer.
In 2019, the Tfue vs FaZe Clan dispute took place, resulting in a 15-month legal battle before the proceedings were settled. Despite the negative feedback, Tfue still received support from his fans and gained many subscribers along the way. In 2020, his long-standing dispute with FaZe Clan was finally resolved.
One of Tfue’s notable victories was in the 2018 Fortnite Fall Skirmish Grand Finals, where he became a world champion in both the Solo and Duo categories. He is considered one of the best Fortnite players alongside Tyler ‘Ninja’ Blevins.
Apart from Fortnite, Tfue also plays other battle royale games such as Fortnite Battle Royale (Epic Games), Apex Legends, PlayerUnknown’s Battlegrounds, Call of Duty: Warzone, H1Z1, and Destiny 2
Tfue Net Worth in 2023
Source: Kotaku
TFue is a popular Twitch streamer with over 10 million followers and thousands of subscribers. It’s no surprise that he earns a significant amount of money.
1. Twitch
On his channel called Purple Platform, Tfue has more than 10,000 subscribers who regularly donate to him. It’s estimated that he earns around $30,000 from subscriptions alone.
TFue streams live on Twitch, and one of his streams in October 2019 reached a peak of 316,000 concurrent viewers. This was his most-watched stream.
2. YouTube
Tfue’s YouTube earnings come from paid ads, views, and subscriptions. His YouTube channel has accumulated a total of 1,447,916,994 views (at the time of writing).
With almost 12 million subscribers and an average of one million views per month from ads, TFue likely earns around $40,000-$60,000 from YouTube ad revenue.
3. Fortnite
Tfue has earned over $700,000 from winning various Fortnite tournaments since his debut in 2017. Fortnite played a significant role in TFue’s rise to fame and wealth. In 2018, he won two titles in the Fortnite Fall Skirmish Grand Finals (Solo and Duo) alongside Dennis ‘Cloakzy’ Lepore. Additionally, he earned $50,000 by placing 67th in the Solo category during the 2019 Fortnite World Cup.
4. Merchandise and Sponsorships
Tfue has his own Faze Merch Store on the Etsy platform. He doesn’t have many specific brand deals or sponsorships, mainly due to his former contract with FaZe clan, which reportedly prohibited him from accepting such offers. However, as a top-tier partner of Twitch, TFue can still sustain himself well without major sponsorships.
Conclusion
Tfue’s journey from humble beginnings to gaming stardom has been marked by controversy and triumphs. With millions of followers, lucrative earnings from Twitch and YouTube, and notable victories in Fortnite tournaments, Tfue has solidified his position as a prominent figure in the gaming industry.
Maximize your Black Ops 6 rewards—Create highlights from your best gameplay with with Eklipse
Eklipse help streamer improve their social media presence with AI highlights that clip your Twitch / Kick streams automatically & converts them to TikTok / Reels / Shorts
Rumble is a video platform that aims to provide users with a more flexible and unrestricted experience when it comes to creating and watching content.
In this article, we will delve into the various aspects of Rumble and what sets it apart from other social networks. Whether you’re a content creator or a video enthusiast, read on to discover if Rumble is the right platform for you.
Rumble was founded in 2013 by Chris Pavlovski as an alternative to mainstream platforms like YouTube and Vimeo.
These platforms often imposed strict limitations on creators, resulting in video removals and restricted content. In response to these challenges, Pavlovski created Rumble as a space where users could freely express themselves. Initially, Rumble started as a website, but it has since expanded to include a mobile app available on both Android and iOS devices.
Over the years, Rumble has grown into a multibillion-dollar corporation, gaining both popularity and notoriety for its stance on minimal content regulations.
One significant milestone in Rumble’s success was the announcement of its plan to go public in 2021 through a merger with Cantor Fitzgerald’s CF Acquisition Corp. VI. With Rumble’s continuous expansion, it’s essential to gain a comprehensive understanding of what this platform offers.
Exploring Rumble’s Features and Functions
Rumble serves as a website dedicated to the exchange of videos. Let’s explore the key features and functions that make Rumble unique.
1. Watch Content on Rumble
On Rumble, users can watch, like, and comment on videos, as well as subscribe to their favorite channels.
Popular channels such as Reuters, Russel Brand, and America’s Funniest Videos (AFV) can be found on the platform. Additionally, users can discover popular content creators on Rumble, such as RiceGum, iShowSpeed, and KaiCenat. By entering specific keywords into the search box, users can access numerous related videos on various topics, ranging from baking and fitness to comedy and politics.
Rumble offers filtering options to help users sort and find videos based on relevance, views, date, duration, and more.
2. Create and Share Your Content
Rumble encourages users to share their own videos, which can be licensed and monetized.
To ensure the success of your channel, it’s important to choose an engaging niche and learn effective video editing techniques. Once you publish your content on Rumble, you gain access to analytics that allow you to track your channel’s performance. You can also manage your videos, payments, referrals, and more through the platform.
3. Rumble Analytics and Tools for Content Creators
Rumble offers a range of premium subscriptions, including free and business packages. Depending on your investment, you can enjoy perks such as increased storage and bandwidth, ad-free viewing, unlimited live streaming, and API access. These features are designed to help content creators maximize their potential on the platform.
4. Express Yourself Freely on Rumble
One of Rumble’s main advantages, as previously mentioned, is its leniency compared to other services regarding the type of content users can post.
While platforms like YouTube have reporting options for inappropriate content, Rumble does not provide that feature. However, Rumble still has policies in place to ensure that certain content is rejected.
For instance, videos that violate rights such as privacy and copyright, contain offensive or criminal material (including comments), or include links to problematic content are prohibited on Rumble.
Who Is Rumble for and How to Make the Most of It?
Rumble attracts video lovers and small creators who face content restrictions on other platforms. Join Rumble for diverse videos, potential followers, and income.
Create captivating content for your target audience. Research trending topics like Google’s Year In Search for popular subjects. With 39 million active users by Jan 2022, you can gain exposure. Note that Rumble offers diverse content without strict censorship. Viewers should choose preferred platforms if Rumble’s content doesn’t suit their taste.
Can You Livestream on Rumble?
The short answer to it is you can, but you need to meet certain eligibility before you can start live streaming on Rumble. To use the live streaming feature on Rumble, you must meet specific criteria:
Paid Rumble Publisher Account: Users with a paid Rumble publisher account can access live streaming features without any additional requirements.
Accounts with More than 5 Followers: If you don’t have a paid Rumble publisher account, you can still live stream if your account has more than 5 followers.
Livestreaming on Rumble offers a dynamic way to connect with your audience, share live events, conduct Q&A sessions, and much more. By leveraging this feature, you can enhance your content creation capabilities and interact with your viewers in real time.
Please note that the specific features and requirements for live streaming may be subject to change, and it’s always advisable to refer to Rumble’s official documentation or support channels for the most up-to-date information.
Conclusion
In conclusion, Rumble offers a unique video-sharing experience, empowering creators to share their content freely and engage with a diverse audience.
Whether you’re a content creator or a video enthusiast, Rumble provides a platform where you can explore a wide range of videos and potentially find your niche. By understanding its features, policies, and alternatives, you can make an informed decision about whether Rumble is the right choice for you as a content creator or viewer.
Maximize your Black Ops 6 rewards—Create highlights from your best gameplay with with Eklipse
Eklipse help streamer improve their social media presence with AI highlights that clip your Twitch / Kick streams automatically & converts them to TikTok / Reels / Shorts
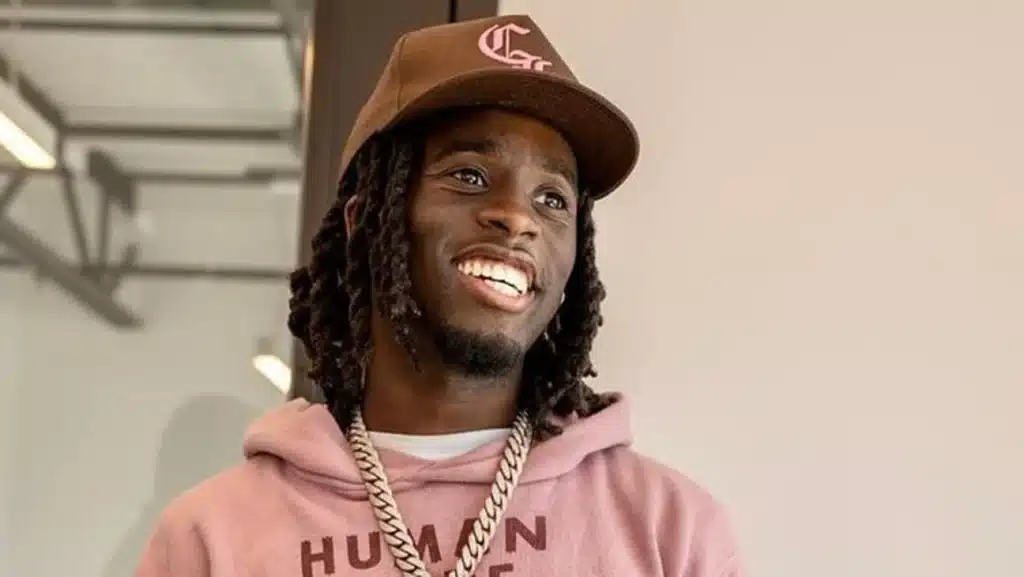
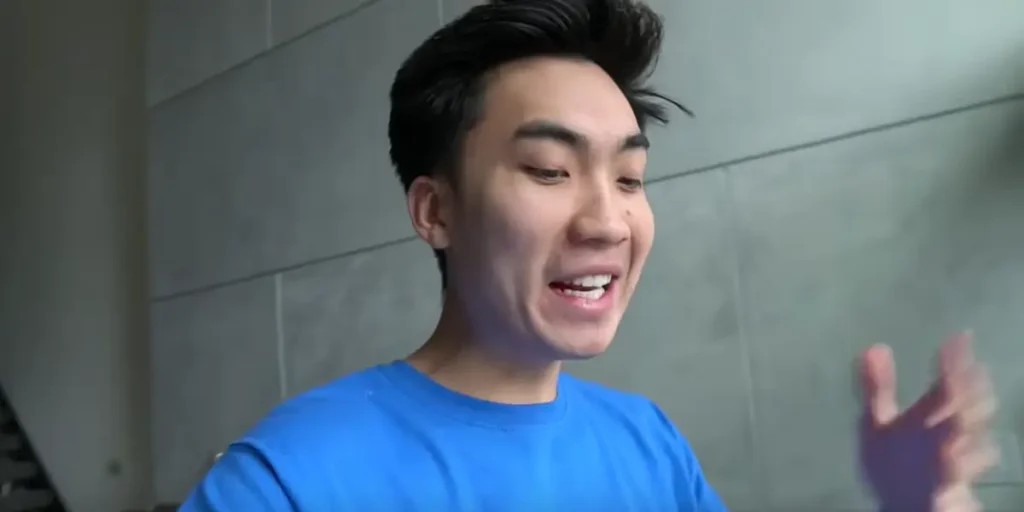
Meet Kai Cenat, a New York City native who skyrocketed to fame through social media. Starting his YouTube channel in 2012, Kai aimed for 1 million subscribers while considering a career in dance. Focusing on social media instead, he attended Frederick Douglass Academy and dropped out of college to pursue his entertainment career. Let’s explore Kai’s journey to success.
Kai Cenat was born on December 16, 2001, in New York City, New York. He started his YouTube channel in 2012.
When he was in middle school, Kai had a goal of reaching 1 million subscribers on YouTube. However, he also briefly considered becoming a professional dancer.
Eventually, he decided to focus on building a career in social media while attending Frederick Douglass Academy in Harlem.
Kai began posting videos on his official YouTube channel in 2018 while he was studying at Morrisville State College. However, he later dropped out of college to pursue his entertainment career.
Kai has kept his personal life and relationships private. He hasn’t confirmed any official romantic partners yet. Currently, he is single and not dating anyone.
There have been rumors and speculation about Kai having flings and hookups with various women, but he hasn’t officially confirmed any of them.
Kai Cenat Career Journey
Source: Dot Esports
In 2018, Kai started making videos on his YouTube channel, focusing mainly on vlogs and pranks. However, it took some time for his channel to become popular.
Things started to change for Kai in 2021. In July, he had 800,000 subscribers, but by August, his subscriber count reached 1 million. This boost in popularity happened when he met rapper Lil Uzi Vert in Italy and created a lot of videos with him.
During the same year, Kai also started his Twitch channel. He gained even more followers when he invited rapper Bobby Shmurda to learn the Woo Walk dance together.
In 2022, rapper Lil Baby appeared on one of Kai’s streams. After the stream reached 225,000 viewers, Kai gifted Lil Baby with $80,000.
In November 2022, Kai announced that he would participate in a Call of Duty: Modern Warfare II tournament with a prize of $250,000. This came after he became the most subscribed Twitch channel.
Currently, Kai Cenat has 3 million followers on Twitch and 3.07 million subscribers on his YouTube channel.
Kai Cenat Net Worth
Kai Cenat now holds the title of the second most subscribed Twitch streamer, just behind Casimito, and he has the potential to claim the top spot from the Brazilian streamer. Kai Cenat’s estimated monthly earnings from paying subscribers range from $66,995 to $136,133. With such figures, he is expected to easily generate an annual revenue of over $1 million.
On YouTube, Kai’s main channel receives over 10 million views every month, which translates to an estimated $500,000 in ad revenue. Additionally, he supplements his income with various brand deals. As a result, Kai Cenat currently has a net worth of $2 million.
Conclusion
Kai Cenat’s determination paid off as he became a popular YouTuber. In 2021, his subscriber count surged after collaborating with rapper Lil Uzi Vert. Kai expanded to Twitch and gained millions of followers. With a net worth of $2 million, he has firmly established himself in the digital realm. Kai Cenat’s story is a testament to the possibilities of pursuing one’s passion.
Maximize your Black Ops 6 rewards—Create highlights from your best gameplay with with Eklipse
Eklipse help streamer improve their social media presence with AI highlights that clip your Twitch / Kick streams automatically & converts them to TikTok / Reels / Shorts
In a surprising twist, RiceGum has officially switched to the Rumble platform, leaving his fans amazed after hinting at a major change on July 4.
This unexpected decision caught many off guard, as there were speculations about him joining Kick. However, RiceGum opted for Rumble, highlighting its competitive advantages and his growth aspirations.
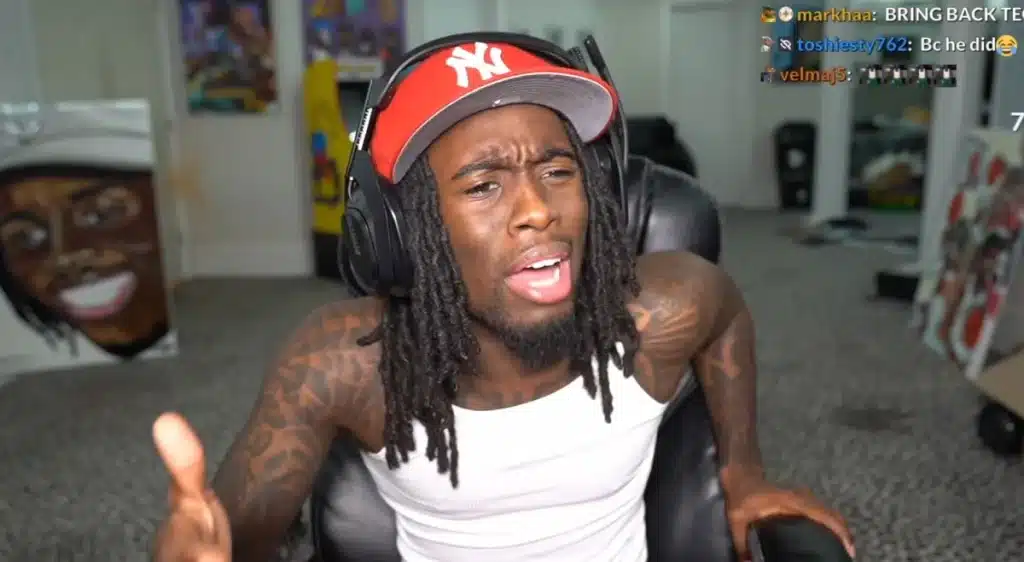
Bryan ‘RiceGum’ Le, known for his captivating YouTube content, has recently ventured into streaming on Twitch, gaining an impressive following of over one million fans. This expansion across multiple platforms demonstrates his commitment to engaging with a wider audience.
Teasing a Platform Switch
On July 4, RiceGum sparked anticipation among his supporters by sharing a mysterious image. The picture showed him examining hats adorned with logos from various streaming sites, leaving fans curious about the upcoming change.
RiceGum Chooses Rumble: Embarking on a New Chapter
To the surprise of many, RiceGum announced on July 5 that he had officially signed with Rumble. This partnership involves creating exclusive content for a set number of hours each month. The move solidifies his dedication to providing exceptional entertainment and signifies a fresh start for his online presence.
The Lucrative Deal and Reasoning Behind the Decision
When asked about choosing Rumble over Kick, RiceGum revealed that the former offered a more favorable deal.
Financial incentives played a significant role in his decision, as Rumble’s offer provided greater monetary compensation. In contrast, Kick required him to engage in gambling activities for a month to maximize his earnings.
Expressing his excitement for the new venture, RiceGum shared,
“The Rumble deal looked better. I could stream there, but to make the most possible on Kick, they wanted me to gamble for 30 days.”
Clearly, he found joining Rumble more appealing, emphasizing their impressive financial support and growth opportunities.
“I’m just excited to focus again. This is exciting for me, in my opinion. Rumble had the financial backing, bro. I didn’t realize Rumble had that kind of financial support.”
A Growing Trend: Creators Flocking to Rumble
RiceGum joins the ranks of other influential creators who have made the switch to Rumble. Earlier this year, both Kai Cenat and IShowSpeed moved to the platform, where they secured their own shows. This migration of talented content creators highlights Rumble’s increasing popularity and allure within the streaming community.
Conclusion
In conclusion, RiceGum’s decision to join Rumble marks a significant milestone in his career, showcasing his adaptability and ambition.
With his large following and commitment to creating engaging content, his move has the potential to reshape the streaming landscape. As Rumble continues to attract prominent creators, it solidifies its position as a rising force in the world of online streaming.
Maximize your Black Ops 6 rewards—Create highlights from your best gameplay with with Eklipse
Eklipse help streamer improve their social media presence with AI highlights that clip your Twitch / Kick streams automatically & converts them to TikTok / Reels / Shorts
Game streaming is a big thing now, especially among gamers. Live streaming, as it is commonly known, involves broadcasting your gameplay in real-time on various streaming platforms. What makes live streaming captivating is the ability to interact directly with your audience, creating an interactive and highly engaging experience.
You might be wondering why people choose to watch others play games instead of playing themselves. The reasons are quite simple, actually. Many viewers tune into live streams for the following purposes:
1. To gain new insights
2. To gather extra knowledge about specific games
3. And enhance their own playing experience.
Moreover, live streaming offers more than just a glimpse of the gameplay itself; viewers also get to witness the unique personalities and entertaining traits of the streamers.
There are several popular platforms for live streaming: 1. Twitch is known for its focus on gaming content and has a large and dedicated gaming community.
2. YouTube Live offers a broader range of content, including gaming, music, and vlogs.
3. Facebook Gaming combines gaming streams with the social media features of Facebook. 4. Kick is a more social livestreaming platform than Twitch or YouTube, and it offers a variety of features that make it easy for viewers to interact with streamers.
While these platforms share similar functionalities, each has its own distinct features that cater to different preferences and needs.
Live streaming: A great opportunity for new streamers
So, let’s talk about why you should consider diving into live streaming. Starting your own live streaming journey can be an exciting and rewarding for several reasons:
1. Additional Income Opportunity: Live Streaming offers gamers the potential to earn income. Platforms like Twitch, YouTube, and Facebook Gaming provide monetization features, allowing streamers to generate revenue through advertisements, sponsorships, donations, subscriptions, and merchandise sales. By growing your audience and creating engaging content, you can turn your passion for gaming into a source of income.
2. Flexibility and Freedom: provides flexibility in terms of scheduling and content creation. As a streamer, you have the freedom to set your own schedule and decide when to go live. This flexibility allows you to balance your streaming activities with other commitments and obligations. Additionally, you can choose the games you want to play and explore different genres based on your interests and the preferences of your audience.
3. Direct Audience Interaction: enables real-time interaction with your audience. Through chat features, viewers can engage with you, ask questions, offer feedback, and participate in discussions. This direct interaction creates a sense of community and allows you to build relationships with your audience. Engaging with your viewers enhances the overall experience and makes your streams more interactive and enjoyable.
4. Monetizing Your Passion: allows you to monetize your passion for gaming. By sharing your gameplay and entertaining your audience, you can turn your hobby into a rewarding venture. Making money doing what you love provides a sense of fulfillment and motivation to continue growing your channel and improving your streaming skills.
5. Creative Expression: offers a platform for creative expression. As a streamer, you can showcase your personality, unique style, and entertaining traits to captivate your audience. You have the opportunity to create a distinct brand and cultivate a loyal community of viewers who appreciate your content and enjoy spending time in your streams.
6. Networking and Collaboration: opens doors for networking and collaboration within the gaming community. You can connect with other streamers, collaborate on joint projects, participate in community events, and exchange knowledge and experiences. Building relationships with fellow streamers helps you expand your audience, gain exposure to new viewers, and learn from others in the industry.
7. Personal and Skill Development: provides an avenue for personal growth and skill development. By consistently streaming and engaging with your audience, you can improve your communication skills, public speaking abilities, and adaptability. It also offers opportunities to learn about video production, content creation, and audience management. Over time, you can refine your streaming techniques, develop your own unique style, and become a more confident and skilled content creator.
Starting a livestreaming journey enables you to blend your love for gaming with opportunities for earning and personal development. By committing yourself, staying consistent, and prioritizing captivating content, you can build a presence in the livestreaming community and share your gaming adventures with people worldwide.
What else can you do with live streaming?
Alongside live streaming, it’s important to recognize the value of creating Video on Demand (VOD) content. VOD involves sharing pre-recorded gameplay or highlights that viewers can watch at their convenience. Consistently uploading VOD content not only broadens your audience but also enhances your viewership. By offering your audience the opportunity to watch highlights from your live streams, you ignite their curiosity and motivate them to join your live broadcasts, ultimately increasing your viewer numbers.
Conclusion
In conclusion: 1. Game streaming has revolutionized the gaming industry, providing a unique and interactive platform for gamers and viewers alike.
2. Live Streaming enables gamers to share their passion, entertain their audience, and even generate income.
Whether you choose to broadcast on Twitch, Kick, Youtube, Facebook Gaming and more. The world of game streaming awaits you. So why wait? Start your livestreaming journey today and let your gaming skills shine.
Source: Blog Eklipse - how to get ps4 clips on iphone
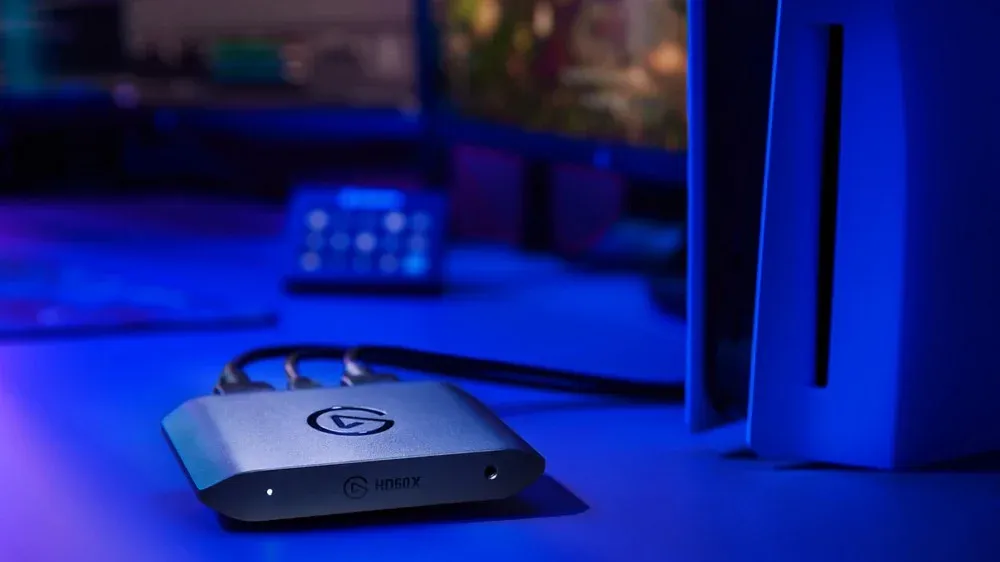
Streaming gameplay on platforms like Kick has become increasingly popular, allowing gamers to share their experiences with a wide audience. If you’re an avid PlayStation 4 (PS4) user and want to stream it to Kick, you’ll need a capture card can greatly enhance your streaming setup.
In this guide, we’ll walk you through the steps of connecting your PS4 to a capture card and streaming to Kick using OBS (Open Broadcaster Software).
To begin, you’ll need a capture card, which acts as a bridge between your PS4 and computer. Follow these steps:
Connect your PS4 to the capture card using an HDMI cable.
Connect the capture card to your computer using another HDMI cable or a USB cable, depending on the type of capture card you have.
Step 2: Audio Setup with Capture Card
If your capture card has dedicated mic and headphone connections, follow these steps:
Connect your headset and controller directly to the capture card.
This allows for seamless audio integration during your streams.
However, if your capture card lacks these connections, follow these steps:
Use a mic/audio splitter.
Connect the splitter to your controller and headphones.
Connect the splitter to the capture card.
In this setup, you’ll need to connect a standalone microphone to your computer for commentary.
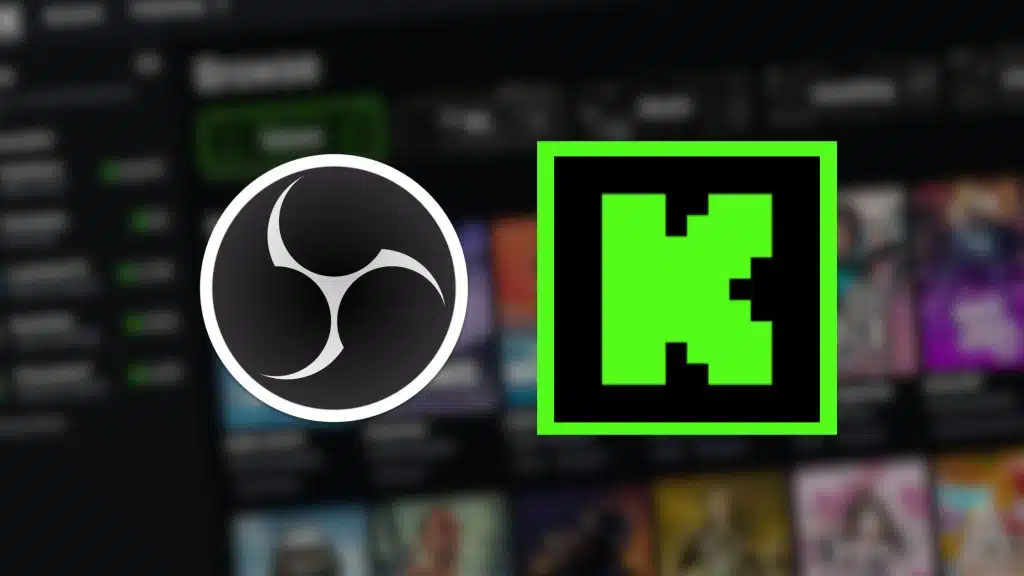
Step 3: Setting Up OBS
OBS is a popular streaming software that offers a wide range of customization options. Follow these steps to set up OBS for Kick Stream streaming:
Download and install OBS on your computer.
Open OBS and navigate to the “Settings” option.
Click on the “Stream” tab and select Kick Stream as your streaming service.
Connect your Kick Stream account using the required credentials.
In the “Advanced” tab of the Settings menu, ensure that your Process Priority is set to High or Above Normal.
Adjust your video and audio settings in the “Video” and “Audio” tabs. Remember that Kick Stream supports a maximum resolution of 1080p and a maximum frame rate of 60 fps.
Once you’ve completed the setup process, you’re ready to start streaming:
Add your capture card as a source in OBS. This will allow OBS to receive the video and audio signals from your PS4.
Arrange the sources within the streaming window to create new scenes. This step enables you to add overlays, a webcam, a chat window, or other elements to enhance your stream’s visual appeal.
Double-check that everything is set up correctly.
Click the “Start Streaming” button in OBS to begin your stream.
Streaming your PS4 gameplay to Kick Stream using a capture card and OBS opens up a world of possibilities for connecting with your audience.
By following the steps outlined in this guide, you can ensure a smooth setup process and create engaging streams with high-quality video and audio. So, grab your controller, connect your capture card, and get ready to share your gaming adventures with the world on Kick!
Maximize your Black Ops 6 rewards—Create highlights from your best gameplay with with Eklipse
Eklipse help streamer improve their social media presence with AI highlights that clip your Twitch / Kick streams automatically & converts them to TikTok / Reels / Shorts
Kick, a fresh streaming platform, provides creators with a profitable program, offering them a remarkable 90% revenue share per subscriber.
Within this platform, you have the ability to craft brief Kick clips, approximately 30 seconds in length, which serve as excellent showcases for the thrilling highlights of your live streams. These clips can be repurposed as captivating Reels content to promote your Kick Channel.
Wondering how to effortlessly transform your Kick clips into the vertical-style format of Reels? Explore this quick guide detailing the five-minute process of editing Kick clips into engaging Reels content.
In this guide, we’ll explore Eklipse to help you create Reels from Kick Clip.
Eklipse is an AI tool that effortlessly clips your stream. Additionally, it also has an online video editor to easily edit Kick clips into Reels for Facebook or Instagram.
On your “Home” menu, click the “Start Converting” button on the right side of the interface, and you’ll be redirected to studio.eklipse.gg.
Upload your Kick clip by clicking the “Upload Clip” button.
Or, you can copy the URL of your Kick clip to import it into Eklipse.
Choose a template and edit your layer for facecam and gameplay.
You can also trim your clip duration during this process.
Add a final touch to your clip, hit “Confirm” when you’re done.
You can add a channel name sticker, auto-caption, or even custom text to your Kick clips.
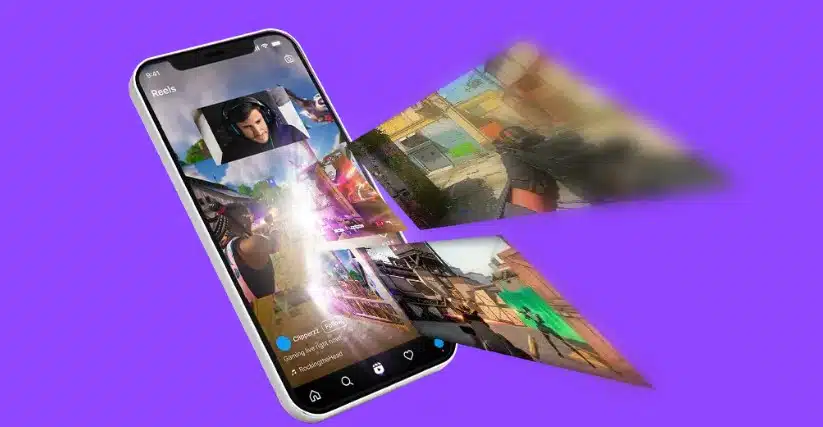
Why You Need to Repurpose Kick Clip for Reels
As a streamer, when you create gaming Kick clips featuring popular titles like Call of Duty, Fortnite, and Valorant, you’re already displaying your impressive gaming skills.
To expand your audience and improve your social media presence, it’s important to adapt your Kick clips for different platforms, including Reels vertical format (whether it is for Facebook or Instagram).
Reels is a highly popular social media platform with over 2 billion active users, especially among younger people.
By repurposing your Kick clips for Reels, you can connect with this large and enthusiastic audience, gaining new followers who may not have found your content on Kick.
Conclusion
In summary, if you’re a gaming streamer creating Kick clips for games like Call of Duty, Fortnite, or Valorant, editing your content into Reels format can help you reach a wider audience.
By using a simple video editing tool such as Eklipse, you can edit your Kick clip into Reels format using a drag-and-drop video editor, complete with templates, stickers with your Kick channel name, auto-captioning, music, and more.
So, let your creativity shine and make your video stand out from the rest. Share it
The world of live streaming has witnessed numerous remarkable achievements, particularly in terms of viewer numbers on platforms such as Twitch and YouTube.
In this article, we explore the highest peak viewers ever recorded on livestreams, both on Twitch and YouTube. Showcasing the monumental success achieved by various content creators.
Twitch has been the go-to platform for video game livestreaming, and it continues to hold the crown, although YouTube is fast catching up. Let’s take a look at the record-breaking Twitch streams:
1. Ibai: Setting New Benchmarks
The name that stands out among the most viewed Twitch streams is Ibai. He is a Spanish streamer known for his captivating content.
He broke records with his event, La Velada del Año II, which attracted an astonishing 3,442,725 viewers. Not only that, but Ibai managed to surpass his own record in 2023, during the third installment of the event, with La Velada del Año 3, reaching an incredible peak of 3,356,464 concurrent viewers.
His remarkable success solidifies his position as a leading figure in the world of livestreaming.
2. TheGrefg: A Fortnight to Remember
Another Spanish streamer, TheGrefg, secured the second position on the list with his captivating livestream where he unveiled his own Fortnite skin. His stream attracted an impressive viewership of 2,470,347, solidifying his status as a prominent content creator on Twitch.
3. Diverse Range of Streamers
Apart from the Spanish streamers, other notable names have left their mark in the realm of Twitch livestreams.
The list includes popular streamers such as ELXOKAS, ELEAGUETV, PlayStation, Squeezie, Riot Games, DOTA2TI_RU, Gaules, Zerator, Fortnite, Tommyinnit, PGL, LCK_KOREA, Ninja, Auronplay, ESL_CSGO, and more. These diverse creators have garnered immense popularity, captivating millions of viewers worldwide.
YouTube Peak Viewers Record
While Twitch dominates the livestreaming landscape, YouTube has made substantial strides and is becoming a fierce competitor. Here are the notable record-breaking peak viewerships achieved on YouTube livestreams:
1. CazéTV: World Cup Wonders
During the 2022 World Cup, CazéTV, a Brazilian streamer, hosted watch-along streams for matches, which attracted a staggering 6.1 million live viewers during the Brazil vs Croatia match. This exceptional achievement cemented CazéTV’s place in history.
2. SpaceX: A Journey Beyond
SpaceX, the private aerospace manufacturer, previously held the record for the most viewed livestream on YouTube. The launch of a test flight into space on May 27, 2020, provided viewers with a captivating view inside the cockpit and attracted a remarkable audience of 4 million.
3. Other Influential Streams
Apart from the notable achievements of CazéTV and SpaceX, several other streams managed to captivate the attention of millions of viewers on YouTube.
Prominent examples include Apple, Law & Crime Network, Fluminese Football Club, NEXT Sports, BTS, Sidemen, VTV Thể Thao, Dynamo Gaming, Deddy Corbuzier, Bein Sports, Sandy & Junior, Jorge & Mateus, NASA, FLA TV, Gusttavo Lima, Bruno E Marron, Free Fire Esports India, and many more.
Conclusion
The records for the highest peak viewers on livestreams continue to be shattered, with both Twitch and YouTube witnessing extraordinary achievements.
Streamers like Ibai and TheGrefg have become household names, captivating millions with their engaging content. While Twitch remains the preferred platform for gaming livestreams, YouTube is making significant strides, enticing viewers with its own array of exciting content.
As the world of livestreaming evolves and gains more popularity, we can anticipate further breakthroughs and the rise of new streamers who will strive to leave their mark on this ever-growing industry. Stay tuned for more updates and new records as they unfold, and prepare to witness the captivating future of livestreaming.
Maximize your Black Ops 6 rewards—Create highlights from your best gameplay with with Eklipse
Eklipse help streamer improve their social media presence with AI highlights that clip your Twitch / Kick streams automatically & converts them to TikTok / Reels / Shorts
YouTube star RiceGum has fans eagerly anticipating his potential move to Kick after teasing a significant career switch on July 5. With over 10 million subscribers on YouTube and a Twitch channel boasting 1.2 million followers, RiceGum has remained influential in the content creation sphere. Let’s delve into his life and career journey.
RiceGum, an American YouTube personality, gained fame through his funny music videos and controversial comments that stirred up the internet. He was born as Bryan Quang Le on November 19, 1996, in Las Vegas, Nevada, USA. He has Chinese and Vietnamese heritage and currently resides in Los Angeles, California.
Bryan Le has been in relationships with Abby Rao, Sommer Ray, and Teanna Trump. But now, he is currently dating Ellerie Marie. In a recent video, it was confirmed that Marie had unfortunately given birth to a stillborn child.
This heartbreaking news was revealed after a series of clips and photos documenting their journey towards parenthood, including baby shower pictures and heartfelt wishes from friends and family for the baby.
RiceGum Career Journey
RiceGum began his YouTube career in 2012, and a year later, he started his Twitch career.
In 2016, RiceGum took a risk by leaving college to become a full-time YouTuber. Despite the gamble, he proved it was worth it. At just 25 years old, he’s already living the dream that many people desire in Las Vegas.
Initially, RiceGum focused on making commentaries on Call of Duty gameplay videos. After a year on YouTube, he joined Twitch and began streaming online. At first, his channels didn’t gain much attention until he switched to comedy.
Once he found his niche in comedy, RiceGum gained popularity. One of his famous videos, “These Kids Must Be Stopped!” earned millions of views. He followed that up with a music video called “Every Night Sis,” a parody of Jake Paul’s “Every Day Bro,” featuring Alissa Violet, Jake Paul’s ex-girlfriend. The music video reached #80 on the Billboard USA Hot 100 chart, catapulting RiceGum’s fame.
Building on the success of “Every Night Sis,” RiceGum continued to release more singles in the same year, such as “Frick da Police” and “Naughty or Nice” in 2017. He also streams games on the Purple Platform. Some of his most streamed games include:
Fortnite Battle Royale
Grand Theft Auto V
Call of Duty: Warzone
Call of Duty: Black Ops Cold War
Among Us
NBA 2K20
How Much is RiceGum Net Worth?
Source: Insider
RiceGum earns income from ads shown during their live streams, through paid subscriptions, donations from viewers, sponsorships, and exclusive contracts with streaming companies or famous brands.
Twitch
RiceGum has made money through donations, advertisements, and paid subscriptions. However, in July 2021, he took a break from Twitch and are currently streaming exclusively on YouTube.
YouTube
RiceGum earns mainly through ads shown during their streams. He has a main channel with over 10 million subscribers and more than 2.17 billion total views. With such a large audience, Ricegum can earn a significant amount of money, at least $50,000 per month from ads alone. Additionally, he has an undisclosed exclusive contract on YouTube Gaming, which adds to their earnings.
Ricegum also has another YouTube channel called ‘Ricegum Extra’ on RiceLive. Combining the income from their Twitch and YouTube channels, Ricegum’s monthly earnings are estimated to be around $180,000, with an annual income of approximately $2 million.
Merchandise
Apart from their online content, Ricegum sells merchandise through online stores like RedBubble and SpreadShirt. However, their merchandise is currently unavailable on Amazon.
Sponsorships
One notable sponsorship was with a website called “Mystery Brand,” which was rumored to be a dishonest and fraudulent site. Ricegum was allegedly offered a lucrative deal of $100,000 to promote the website. In response to the backlash, Ricegum gave away free Amazon coupons as a way to appease those who were upset about the situation.
Conclusion
RiceGum began his YouTube career in 2012 and later ventured into Twitch streaming. Through funny videos and comedic content, he gained popularity and even charted on the Billboard Hot 100. With a significant following, RiceGum earns money from ads, sponsorships, and merchandise sales. Despite controversies and personal challenges, he continues to entertain and inspire millions of fans worldwide. Will he join Kick to continue his career? Let’s see.
Maximize your Black Ops 6 rewards—Create highlights from your best gameplay with with Eklipse
Eklipse help streamer improve their social media presence with AI highlights that clip your Twitch / Kick streams automatically & converts them to TikTok / Reels / Shorts