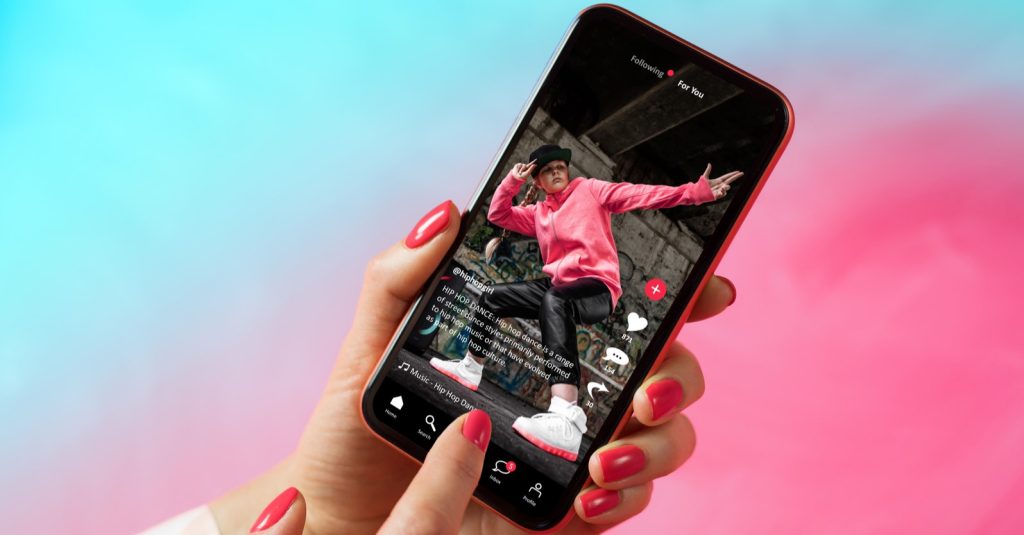
Are you a content creator looking to make it big on TikTok? Wondering how to go viral and reach a massive audience? Well, you’re in luck! We’ve got five proven TikTok strategies that can help streamers like you skyrocket to fame.
TikTok video from @lyxxacampos can be one of the good examples of how the “how-to content” should be
Want to keep your TikTok audience hooked? One of the TikTok tricks that you need to know is by creating “How-To” videos and tutorials that offer valuable insights without sounding too promotional. Establish yourself as an authority in your niche by sharing useful content that keeps your persona at the top of viewers’ minds.
So you can create the content easily, you can always use the AI highlights feature from Eklipse. That feature allows you to clip any of your livestream content, whether it’s from Kick, Twitch, YouTube, or even Facebook Gaming.
If you’re a Call of Duty gamer, you can share some of the best loadouts to win the game. Or if you are a Fortnite gamer, you can always share your tips in finding a new Easter egg in the game.
Using the AI highlights, you can create How-to content in a minute without a fuss.
2. Connect with Your Audience through Video Replies
Forge a strong bond with your audience by responding to comments with videos rather than just text. This feature allows you to address questions, dive deep into topics, and keep your viewers coming back for more captivating content.
Imagine a TikTok user asking about your product. Seize the chance to reply with a video demonstrating various creative ways to use it. Showcase your expertise and provide value to your audience.
3. Use Compelling Calls-to-Action
Boost engagement by adding clear and compelling Calls-to-Action (CTAs) in your TikTok descriptions and comments.
Encourage viewers to follow your TikTok, visits you when you are livestreaming, or leave comments. Doing that will help you achieve your primary goals, which are growing your Twitch, Kick, or YouTube channel.
Maximize your description and comment sections to ask questions, prompt users to follow you, or direct them to your Twitch or Kick channel.
Enhance the accessibility of your TikTok videos by adding subtitles. While manual captions offer more customization, TikTok’s Captions tool allows you to generate subtitles with ease, making your content comprehensible to a wider audience.
You can also try the auto-caption tools from Eklipse. With those tools, you can easily convert any Twitch or Kick clips to TikTok and use the auto-caption feature, so you can enhance the accessibility of your content!
By incorporating subtitles, you not only reach a broader viewership but also cater to those who prefer watching videos without sounds.
5. Get Inspired by Top-Performing Videos
Looking for fresh ideas? The last TikTok tricks that you need to know is to explore the most successful videos in your niche for inspiration. Search relevant keywords, filter for “Most liked,” and analyze the top-performing viral videos.
By studying these videos, brainstorm innovative ways to add your unique touch to popular trends while staying true to your persona as a streamer. Emulate the success of others to remain relevant and connect better with your target audience.
Conclusion
In conclusion, these five TikTok tricks are your keys to going viral. Embrace creativity, engage your audience, and learn from the best to conquer TikTok and take your streaming journey to new heights. Happy TikToking, streamers!
Maximize your Black Ops 6 rewards—Create highlights from your best gameplay with with Eklipse
Eklipse help streamer improve their social media presence with AI highlights that clip your Twitch / Kick streams automatically & converts them to TikTok / Reels / Shorts
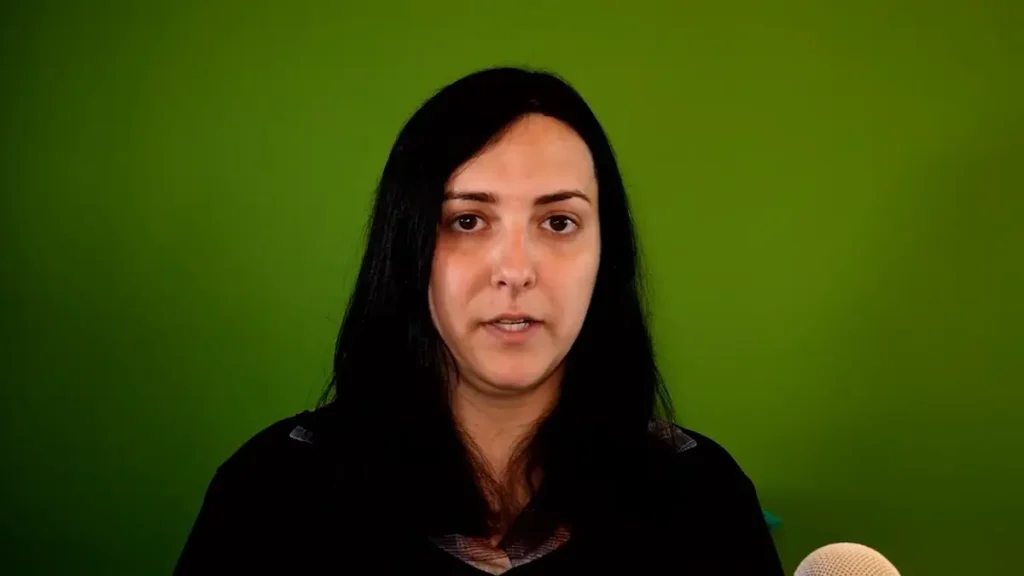
Meet Keffals, 29-year-old Canadian Twitch streamer and YouTuber. She’s known for creating content about LGBT-related issues and left-wing politics. Keffals is a transgender woman from a family of Italian immigrants, and she’s gained attention for her controversies. Let’s delve into her stories!
Keffals, whose real name is Clara Sorrenti, is a 29-year-old Canadian Twitch streamer and YouTuber. She creates content focused on LGBT-related issues and topics related to the left-wing of the political spectrum. Coming from a family of Italian immigrants, Keffals is the third generation of Italian-Canadians.
She is a transgender woman and has undergone bottom surgery. In May 2023, she shared a video where she talked about her struggles with drug addiction and its impact on her life. A fun fact about Keffals is that she is a big fan of Hideki Naganuma.
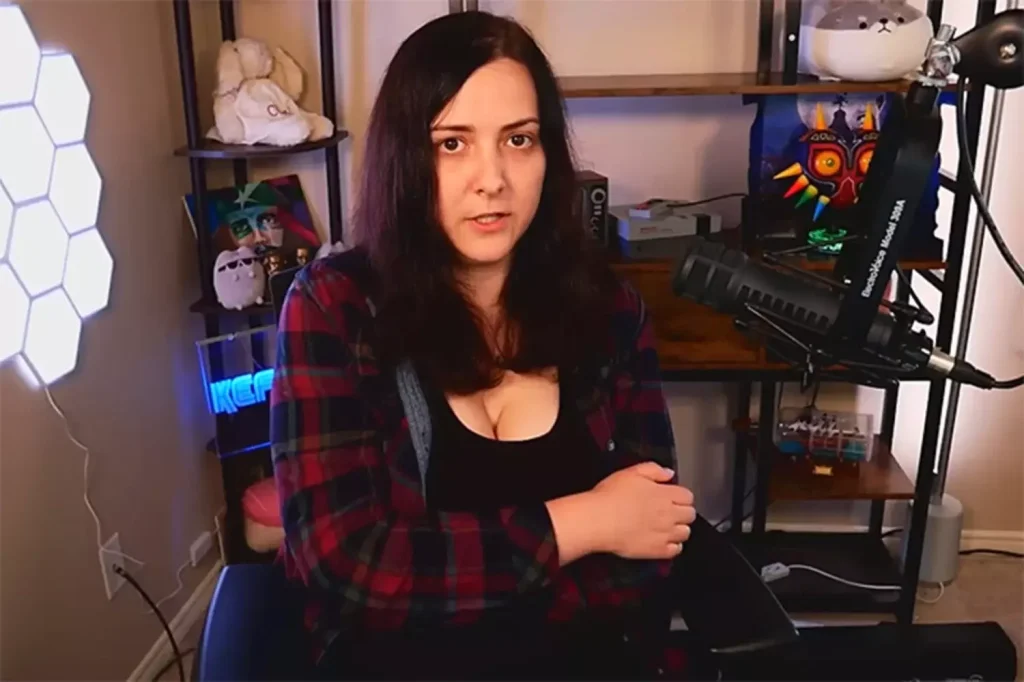
Keffals Twitch Career
Keffals started her YouTube journey with a video showcasing highlights from her Twitch stream, where she shared her thoughts on PragerU and made funny YTPs (YouTube Poops) mocking them. Being a transgender woman, Keffals creates videos discussing LGBT news and topics, including Disney’s Don’t Say Gay bill and the Lia Thomas controversy.
Clara has teamed up with other YouTubers like Shoe0nHead and H3h3Productions for some of her videos.
What is Keffals Famous For?
Source: Euro Game
Although she has a career on Twitch and YouTube, Kaffels is more famous in society because of her controversies. Some of the controversies surrounding Kaffels include:
Feud with Destiny
On March 22, 2022, Steven Bonnell streamed his reaction to the Lia Thomas controversy. He criticized the idea of transgender women in sports. Keffals accused him of bullying and reported him, leading to his indefinite ban from Twitch. Keffals also asked her fans to report Destiny’s tweets that violated Twitch’s hate speech rules, trying to get his Twitch account banned by informing staff about his use of an alternate account to evade the ban. Some YouTubers, like Nicholas DeOrio, Lauren Southern, and LonerBox, thought the ban was unfair and pointed out Destiny’s support for LGBT rights and that other streamers who did worse things were not banned.
Theft
After Keffals got Destiny banned, some users of Kiwifarms doxxed her and created a thread about her. She had to ask her mother to deactivate all her social media accounts because the doxxers were trying to find her mother’s address. They claimed Keffals was an opiate addict and stole from the Communist Party of Canada to support her addiction, but actual party members denied this and supported Keffals, saying she left the party for different reasons.
Catboy Ranch
The doxxing also claimed that Keffals ran a NSFW Discord server called “Catboy Ranch,” despite her having openly run the Discord and mentioning it in tweets in 2021 before shutting it down due to harassment from right-wing groups. The fans of Destiny who doxxed Keffals alleged there were minors in the Discord because of the use of “femboy” and cutesy language, claiming one particular account belonged to a 16-year-old.
In response, Keffals tweeted that the person in the screenshot claiming to be “under 18” was actually an adult running a porn account, and none of the screenshots in the alleged Discord showed her in the chat logs. She accused Destiny of boosting this lie without fact-checking because he wanted to see her fail.
Twitter ban
On June 30, 2022, Keffals’ Twitter account was permanently suspended but was later reinstated in early July. The reason for her account being banned remains unknown.
Harassment campaign
On August 9, 2022, Keffals uploaded a video on her YouTube channel explaining that she lost access to her main Twitter account and couldn’t stream because the police had raided her home and seized her computer, phone, and her fiancee’s laptop. This happened after someone impersonating her sent an email to Canadian city counselors, falsely claiming that she had killed her mother with an illegal firearm and was planning to harm cisgender people at city hall. The police later realized she was innocent, but her personal devices were still taken by the police.
In response to these events, Keffals started a GoFundMe fundraiser to help her move out and cover potential legal fees for her defense, but the funds were frozen after mass reporting. Despite this, Keffals was able to move into a hotel, but on August 17, 2022, the hotel’s location was doxxed, resulting in her receiving unwanted pizza deliveries under her deadname.
Due to continued harassment, including her Uber account being hacked for food orders, Keffals announced she would leave Canada and move to an undisclosed location in Europe. However, she was doxxed again in a swatting attempt after relocating to Belfast, Northern Ireland.
Conclusion
Despite her career on Twitch and YouTube, Keffals is most famous for the controversies surrounding her. From feuds with other streamers to doxxing incidents and Twitter account bans, her journey has been filled with ups and downs. Nevertheless, Keffals continues to create content and has a dedicated following on her social media platforms.
Maximize your Black Ops 6 rewards—Create highlights from your best gameplay with with Eklipse
Eklipse help streamer improve their social media presence with AI highlights that clip your Twitch / Kick streams automatically & converts them to TikTok / Reels / Shorts
Felix “xQc” Lengyel is undoubtedly one of the most influential live streamers in the online world.
Having risen to stardom on Twitch, xQc struck a lucrative deal with Kick back in June, securing an astounding $100 million to stream exclusively on the rival platform.
With a massive following of over 12 million on both Twitch and Kick, xQc’s influence is undeniable. However, as the demand for his IRL streams increases, some viewers have become increasingly insistent.
xQc Acknowledges the Challenge of Dealing with Demanding Kick Viewers as Requests for IRL Streams Persist
IRL (In Real Life) streams can deliver some of the most captivating content on the internet. Yet, xQc realizes that they can also bring out the worst in his viewers.
He shared his thoughts during a recent Kick stream, saying, “The thing is, with IRLs, it’s a lot of fun, but it fosters the very bad part of everything. Especially at this scale, it snowballs really bad. At the end of the day, when it’s time to chill out and talk to the community, and do stuff only between us, it’s really f*cking bad.”
xQc’s concerns are valid, as stream snipers can spoil a creator’s IRL broadcast, and demanding viewers can transform an otherwise enjoyable outing into a miserable experience.
To address this issue, xQc declared that he would “purge” his chat of these types of viewers if his fans desire to see more IRL streams.
xQc Statement On His Stream
He stated, “Alright, you know what? This is what I’m gonna do. We’ll try something. You see people like this?” while pointing out a chatter’s comment that read, ‘W gaslight.’ “I’ll just permaban all of them.”
“For those seeking quality content and enjoyable IRL streams, the chat is just going to be purged like crazy,” he continued. “Any individuals behaving in an unacceptable manner like, ‘Oh, do this or do that,’ or, ‘Don’t do this or don’t do that,’ you’re just gonna get permabanned.”
xQc’s frustration with overly-demanding viewers disrupting his IRL streams is evident. However, viewers aren’t the only ones capable of disrupting an otherwise entertaining IRL broadcast.
Indeed, numerous IRL streamers have faced daunting experiences during their streams, such as one creator who was [confronted by a knife-wielding man in Paris during TwitchCon.
xQc’s dedication to delivering exceptional content to his viewers while ensuring a positive streaming experience is commendable. Managing the demands of a growing audience, particularly during IRL streams, presents unique challenges that require a thoughtful approach.
By maintaining open communication with his fans, fostering a supportive community, and embracing the ever-changing landscape of IRL streaming, xQc can continue to captivate audiences while elevating the streaming experience for all.
Maximize your Black Ops 6 rewards—Create highlights from your best gameplay with with Eklipse
Eklipse help streamer improve their social media presence with AI highlights that clip your Twitch / Kick streams automatically & converts them to TikTok / Reels / Shorts
Twitch hosts two fantastic live-streaming conventions each year, bringing fans together from around the world.
TwitchCon 2022 was a blast in San Diego, California, and Amsterdam. But this time, get ready for more excitement as Twitch reveals two new thrilling locations.
Let’s dive into all you need to know about TwitchCon 2023, from the venues to securing your tickets for these incredible events.
In an exciting blog post on February 16, Twitch unveiled the two thrilling destinations for TwitchCon 2023.
TwitchCon Europe will be in the enchanting city of Paris, France, on July 8 & 9, 2023, at the magnificent Paris Expo Porte de Versailles.
Meanwhile, TwitchCon North America will debut in the vibrant city of Las Vegas, Nevada, between October 20 and 22, 2023, at the renowned Las Vegas Convention Center.
How to Purchase Tickets to TwitchCon 2023
For the Las Vegas, Nevada events, ticket sales went live on July 19, 2023. Secure your tickets here.
On the other hand, tickets for TwitchCon Paris were available on April 11, 2023. Don’t miss your chance, grab your tickets here.
Unfortunately, there won’t be a 50% discount for Twitch partners this year.
For attendees planning ahead, Twitch has thoughtfully provided discounted hotel booking options for those attending both the European and North American events.
Stay tuned for more updates as Twitch reveals exciting details about the upcoming events in the coming months.
As the event draws closer, fans are eager to know which musical artists will grace the stage this year. One performance that has everyone talking is Megan Thee Stallion twerking on Master Chief, promising to be an unforgettable spectacle!
So gear up for an exhilarating TwitchCon 2023 experience that combines gaming enthusiasm with memorable entertainment. Secure your tickets early and get ready to immerse yourself in the world of Twitch like never before!
Maximize your Black Ops 6 rewards—Create highlights from your best gameplay with with Eklipse
Eklipse help streamer improve their social media presence with AI highlights that clip your Twitch / Kick streams automatically & converts them to TikTok / Reels / Shorts
Building a strong community is crucial for streamers and content creators. It not only enhances your livestreaming experience but also helps establish your presence and connect with your audience.
Course Goals: 1. Develop a unique persona and charisma that will attract viewers.
2. Use social media to promote your live streams and engage with your audience.
3. Create VOD highlights to showcase the most exciting moments from your live streams.
4. Engage with your audience by responding to comments, asking for their opinions, and encouraging them to share their experiences
Persona and Charisma
One essential element for every streamer is charisma. Charisma represents the unique character and personality you display to your viewers. Once you have determined the persona you want to showcase, you are ready to embark on your livestreaming journey.
Utilizing Social Media
Though, if your viewers are still low, it could be because you haven’t fully used your social media platforms to promote your content and interact with your audience during live streams. Social media offers a great chance to share your live streaming content, updates, and relevant information with your followers.
To make the most of social media, start by identifying the platforms where your target audience is most active. Whether it’s Twitter, Facebook, Instagram, YouTube, Tiktok or Kicks, create accounts dedicated to your livestreaming activities. Consistently share exciting updates about your upcoming live streams, behind-the-scenes content, and interesting snippets. This will generate curiosity and encourage your followers to join your livestreams.
Engage with your audience by responding to comments, asking for their opinions, and encouraging them to share their experiences. Building a sense of community across different social media platforms will foster a loyal and supportive fan base. Consider hosting interactive sessions, giveaways, or exclusive content for your followers to keep them engaged and invested in your livestreaming journey.
Creating VOD Highlights
Another crucial aspect that can significantly boost your viewership and engagement is creating VOD (Video on Demand) highlights. VOD highlights are short, interactive clips extracted from your livestreams, showcasing the most exciting and memorable moments. These highlights act as bite-sized teasers that entice viewers to watch the full livestream or explore more of your content.
However, editing and downloading hours of footage can be time-consuming, especially for busy streamers. That’s where Eklipse comes in. Eklipse is a state-of-the-art AI tool designed to automatically generate highlights from your Twitch, YouTube, and Facebook streams/VODs. By using Eklipse, you can save time and effort while still delivering engaging content to your viewers.
Eklipse.gg is a powerful AI tool that will automatically convert your streams to highlights. With just a few easy steps, you can get the best highlight clips for all your social media. All you have to do is connect your account to Eklipse after logging in. You can log in to Eklipse using your email or Twitch or Facebook gaming account. After you are logged in, you can connect any account from YouTube, Facebook, Tiktok, Twitch and even your Discord to Eklipse.
Conclusion
By implementing these strategies :
1. Your live streaming community is bound to flourish.
2. Increased engagement and viewership are natural outcomes of actively building and nurturing a community.
Remember, it takes time and consistent effort to grow a dedicated fan base. Engage with your audience, create valuable content, and leverage the power of social media and VOD highlights to attract and retain viewers.
Once you have achieved these milestones, you can explore ways to monetize your channel, which will be discussed in the next module. Remember, a strong community forms the foundation of a successful live streaming career. Start building your community today and watch your live streaming journey thrive.
Can small streamers go live on YouTube? How to live stream on YouTube without 1000 subscribers? These questions have lingered in the minds of many until now.
While many YouTubers are eager to share content through YouTube live streaming, there is a common hurdle where YT requires 1000 subs before streamers can go live.
Fortunately, it is still feasible to conduct live streams on YouTube without fulfilling the prerequisite of 1000 subscribers!
Take a look at our comprehensive guide on engaging in YouTube live streaming without the need for 1000 subscribers.
How to Live Stream on YouTube Without 1000 Subscribers
Step 1: Enable Live Streaming On Your YouTube Account
The initial step to overcome the 1000 subscriber requirement is to enable live streaming on your YouTube account. Here’s what you need to do:
Log on to YouTube.
Click on “Create”.
Click “Go Live” from the top-right menu.
If it’s your first time live streaming, you’ll need to agree to YouTube’s terms and condition.
After agreeing, you’ll have to wait for 24 hours before live streaming becomes enabled for your account. Take this time to prepare and plan your upcoming live streams.
Step 2: Install StreamLabs App On Your Mobile Phone
Next, you’ll need to install the StreamLabs app on your mobile phone. StreamLabs is a powerful application that allows you to stream from your phone directly to YouTube Live.
Follow these simple steps:
Find StreamLabs on Google Play Store (Android) or Apple App Store (iOS).
Download and install the StreamLabs app onto your phone.
Once installed, you’re ready to connect it to your YouTube account.
Step 3: Connect StreamLabs App To Your YouTube Account
Now that you have the StreamLabs app, it’s time to connect it to your YouTube account. Here’s how you do it:
Open the StreamLabs app.
You’ll see a login screen.
Choose the YouTube icon.
Sign in with your Google account.
This grants the StreamLabs app access to your YouTube account, enabling direct streaming.
Make sure to grant permissions for camera and microphone access when prompted.
Step 4: Start Streaming To YouTube Live Without 1000 Subscribers
You’ve made it to the exciting part – starting your live stream on YouTube without having 1000 subscribers. Follow these steps:
Sign in to StreamLabs.
Grant permissions for the app.
You’ll be asked what you’ll be using the app for.
Select “Stream Yourself” using your mobile phone’s camera and microphone.
Choose YouTube as your streaming platform.
The app will present you with options for “streaming to an existing event”, “starting a scheduled event”, or “creating a new event”.
Select the “creating a new event” option.
Provide a title and description for your event.
If you prefer privacy, you can make it private.
Finally, hit the “Go Live” button.
When you’re finished streaming, you can hit the “Stop” button and end your broadcast.
You also have the option to finish the event or leave it active if you plan to switch to another streaming source.
Frequently Asked Questions
Q1: Are there any alternatives to StreamLabs for streaming to YouTube Live without 1000 subscribers?
While StreamLabs is a popular choice, there are other streaming apps available, such as OBS Studio and Streamlabs OBS, that offer similar functionality. Explore these options and choose the one that best suits your needs.
Q2: Can I switch from streaming with StreamLabs to another source during my live stream?
Yes, StreamLabs allows you to switch from mobile streaming to other sources, such as OBS Studio, seamlessly. This gives you more flexibility in managing your live streaming sessions.
Conclusion
Congratulations! You’ve successfully learned how to live stream on YouTube without 1000 subscribers. By following the steps outlined in this article, you can now share your content with the world through the power of live streaming.
In addition, remember to keep creating exciting and valuable content, and your subscriber count will naturally increase over time. Happy streaming!
Maximize your Black Ops 6 rewards—Create highlights from your best gameplay with with Eklipse
Eklipse help streamer improve their social media presence with AI highlights that clip your Twitch / Kick streams automatically & converts them to TikTok / Reels / Shorts
Have you heard about the recent Twitch Terms of Service (TOS) update? If not, make sure to read this article to avoid violating Twitch TOS and facing a ban!
Every community has its set of rules. Whether it’s at work, school, or even online, protocols and practices are in place to ensure a safe and respectful environment. Twitch, the popular streaming platform, is no exception.
Now, we will delve into the latest update of Twitch’s Terms of Service (TOS) and provide a comprehensive breakdown of the Community Guidelines. By understanding these rules, you can ensure a positive experience while using Twitch!
Twitch Terms of Service 2023: 16 Essential Points to Note
When creating a Twitch account, you will enter into a binding legal contract known as the Terms of Service. It is crucial to understand and abide by these terms, as violating them may result in penalties or other legal consequences.
Users must follow other documents, such as the Community Guidelines and Twitch Terms of Sale, along with the Terms of Service.
However, there’s no need to absorb everything all at once. It is already sufficient to grasp the essentials of the following Twitch TOS points:
Twitch TOS #1: Use of Twitch by Minors and Blocked Persons
Twitch imposes certain restrictions on the use of its platform by minors and blocked individuals. Users under the age of 13 are not permitted to use Twitch.
For users between the ages of 13 and the legal age in their country, a parent or guardian assumes responsibility for compliance with the Terms of Service.
Additionally, individuals who have been banned by Twitch staff are prohibited from accessing or using Twitch through any means.
Twitch TOS #2: Privacy Notice
Protecting online privacy is a significant concern for any reputable service, and Twitch is no exception. The Twitch Privacy Notice outlines how personal information is collected and used.
There are several ways Twitch may obtain your personal information, including:
Information provided by you during registration.
Automatically collected information through cookies, and
Data obtained from authorized third parties.
Twitch utilizes personal information for services, communication, promotion, legal compliance, etc. Note that Twitch may share personal information with service providers, affiliates, or when required by law.
As a user, you have the right to make privacy choices. However, refusing to provide certain information may limit the services available to you.
You can also close your account, but Twitch may retain certain information as permitted or required by law. Please note that third-party websites linked to Twitch have their own privacy practices, and their policies govern the sharing of information with them.
Your Twitch account should be for personal use only. Do not allow anyone else to access or use your account without proper authorization from Twitch.
Sharing or selling your account without Twitch’s explicit permission is strictly prohibited. Also, review the privacy policies of Twitch and the third-party service when registering through third-party services.
Twitch TOS #4: Use of Devices and Services
When accessing Twitch through various devices or internet providers, you are responsible for any associated fees and charges. Twitch does not assume responsibility for these costs.
Twitch TOS #5: Modification of the Terms
Source: Polygon
Twitch reserves the right to modify the Terms of Service periodically. By continuing to use Twitch’s services after the changes have been posted, you agree to the updated terms.
Twitch TOS #6: License
Twitch holds proprietary rights to all its services and materials. When you agree to the Terms of Service, you receive a limited license for personal or internal business purposes.
However, you are not permitted to sell, distribute, or modify any Twitch materials without obtaining a special license.
Twitch TOS #7: User Content
Twitch allows users to distribute their own content on the platform. This includes live streams, pre-recorded videos, chats, and posts on bulletin boards and forums.
When posting content, you grant Twitch licenses to modify, distribute, and create derivative works based on it. Deleting your content doesn’t always remove certain rights, such as Twitch’s ability to retain copies for a reasonable time or if it has been shared.
In addition, users must ensure their content complies with regulations. This entails:
Creating original content.
Obtaining necessary rights for third-party intellectual property.
Ensuring virus-free content.
Promotions are allowed on Twitch with specific conditions. Users must adhere to applicable rights and laws, take full responsibility for the promotion, and include a disclaimer that Twitch does not sponsor or endorse it.
Twitch adheres to the Digital Millennium Copyright Act (DMCA) and other relevant copyright laws. Users must respect intellectual property rights and obtain proper permission before sharing copyrighted materials.
Twitch TOS #10: Trademarks
Twitch holds its own trademarks, including logos, slogans, and graphics. You should not use these trademarks in connection with any other brand or product without authorization.
Twitch TOS #11: Third-Party Content
Source: Digital TV Europe
While users can promote third-party content on Twitch, it’s important to note that Twitch does not endorse or assume responsibility for such content. Users bear all risks associated with utilizing third-party information, products, or services.
Twitch TOS #12: Termination
Twitch possesses the authority to impose bans or terminate user accounts in instances. Some possible cause of termination are: failure to adhere to the Terms of Service, misuse of services, or necessitated by technical or legal obligations.
Twitch TOS #13: Idea Submission
If you share your ideas with Twitch staff, they may use those ideas without providing compensation.
Twitch TOS #14: Miscellaneous
Provisions not explicitly stated in the Terms of Service will be considered a waiver only if confirmed in writing. The remaining terms will not be invalidated if any term is deemed unlawful or void.
Twitch TOS #15: Disputes
By agreeing to the Terms of Service, users agree to defend Twitch in case of disputes. Twitch cannot guarantee the complete safety of information, accuracy of content, or the absence of viruses in its software.
Twitch is not liable for damages of any kind. In the event of a problem, users must notify Twitch within 30 days and attempt to resolve the issue informally.
If necessary, arbitration is the next step, and all actions must be in compliance with applicable laws.
Twitch TOS #16: Community Guidelines
The Community Guidelines complement the Terms of Service and outline conduct expectations on Twitch. Violations may lead to suspensions or penalties.
FAQ
Q1: Can I create multiple Twitch accounts?
Yes, you can create multiple Twitch accounts as long as you abide by the Terms of Service and Community Guidelines for each account.
Q2: What happens if I violate the Terms of Service?
Violating the Terms of Service can result in penalties such as warnings, temporary suspensions, or even indefinite suspensions, depending on the severity of the violation.
Q3: Can I share copyrighted music on Twitch?
No, sharing copyrighted music on Twitch without proper permission is a violation of the Terms of Service. Make sure to obtain the necessary licenses before using copyrighted materials.
Q4: How can I report a violation of the Terms of Service?
You can make a report to Twitch by following the reporting guidelines provided.
Q5: What should I do if I have questions about Twitch’s privacy practices?
If you have any questions or concerns about Twitch’s privacy practices, you can reach out to their privacy team by sending an email to privacy@twitch.tv.
Conclusion
Understanding the Twitch Terms of Service and Community Guidelines is essential for all users of the platform. By familiarizing yourself with these rules, you can ensure a safe and enjoyable experience on Twitch.
Maximize your Black Ops 6 rewards—Create highlights from your best gameplay with with Eklipse
Eklipse help streamer improve their social media presence with AI highlights that clip your Twitch / Kick streams automatically & converts them to TikTok / Reels / Shorts
Maximize your Black Ops 6 rewards—Create highlights from your best gameplay with with Eklipse
Eklipse help streamer improve their social media presence with AI highlights that clip your Twitch / Kick streams automatically & converts them to TikTok / Reels / Shorts
The year 2023 sparked a battle among streaming platforms. Twitch, Mixer, Facebook Gaming, and YouTube Gaming are striving to stay on top, but now Kick has emerged as a formidable rival.
Kick has gained attention by partnering with big-name streamers. From xQc to a surprising move by Amouranth, Kick is drawing in content creators with a more lucrative revenue share. Many streamers find Kick appealing.
Kick took an opportunity to target Twitch, its Amazon-backed rival, after a dissatisfied streamer criticized Twitch’s new Hype Chat feature. Hype Chat works similarly to YouTube’s Super Chat, where viewers pay to highlight their messages in the chat, with a portion going to the streamer.
However, some Twitch Partners are unhappy with the revenue split. An Australian Twitch streamer named Tahlia shared her frustration when she received an $85 Hype Chat message but only received $35. She announced her departure from Twitch and pledged to stream on Kick instead.
Kick’s official Twitter account @KickStreaming took a jab at Twitch, commenting, “Doesn’t sound very hype.” Kick also revealed that they are developing their own feature called ‘Mega Chat,’ set to arrive soon. The twist? Kick promised a groundbreaking 95/5 split, ensuring streamers receive the majority of the revenue.
The Promise of the 95/5 Revenue Split
Although ‘Mega Chat’ is not yet available on Kick, the platform has delivered on its promise so far. Streamers on Kick currently enjoy a generous 95/5 revenue split on all subscriptions. This surpasses the average Twitch Partner’s 50/50 split, making Kick an appealing platform for content creators seeking better financial incentives.
In conclusion, Kick is intensifying the streaming platform competition by offering innovative features and an enticing 95/5 revenue split. While the success of ‘Mega Chat’ remains to be seen, Kick has a solid track record of keeping its promises. The rivalry between Kick and Twitch is heating up, giving content creators more options and opportunities to thrive in the world of online streaming.
Maximize your Black Ops 6 rewards—Create highlights from your best gameplay with with Eklipse
Eklipse help streamer improve their social media presence with AI highlights that clip your Twitch / Kick streams automatically & converts them to TikTok / Reels / Shorts
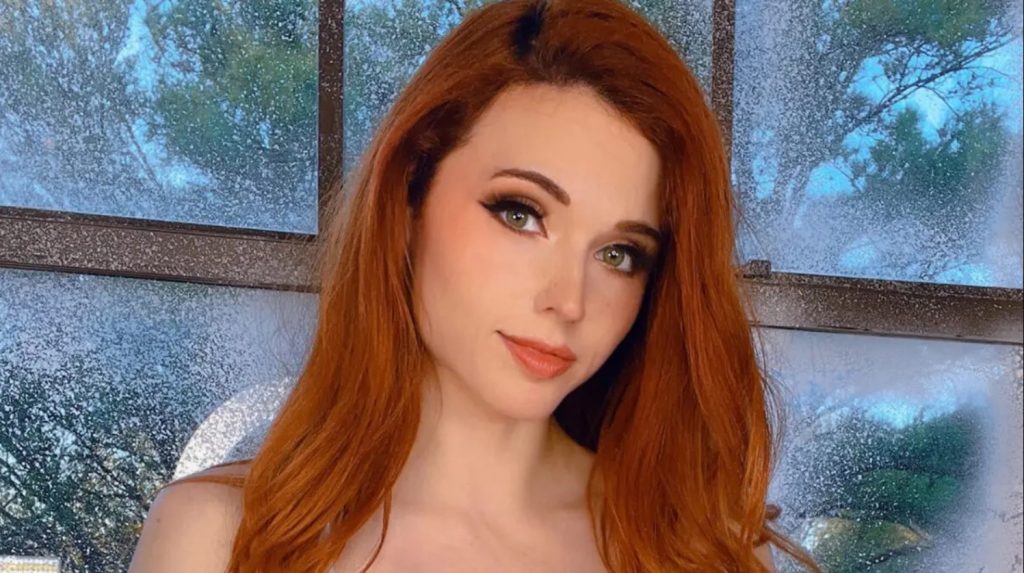
In a surprising twist of events, popular Twitch personality Amouranth, who recently secured a lucrative streaming agreement with Kick, has been banned from Twitch as of July 18, without a clear disclosed reason.
Currently, Amouranth has chosen not to comment on the cause for this unexpected suspension. However, those visiting her channel are greeted with a standard message Twitch uses when a user violates their Community Guidelines or Terms of Service.
The message reads, “This channel is temporarily unavailable due to a violation of Twitch’s Community Guidelines or Terms of Service.”
This isn’t the first time the internet sensation has faced a suspension; a similar incident occurred in May 2023, but the reason for that suspension was also never made public.
Amouranth’s Streaming Journey with Kick
Amouranth’s notable deal with Kick, which took place in June, was a significant move for the content creator. While the exact deal figures haven’t been disclosed, it’s believed to be worth millions of dollars.
This agreement allowed her to continue streaming not only on Twitch but also on OnlyFans and various social media platforms. Ever since the deal began, Amouranth has followed a routine of starting her day with hour-long Twitch streams before moving on to Kick for the rest of her streaming activities.
The Risk of Ban on Kick
Despite her newfound partnership with Kick, Amouranth found herself in a potentially precarious situation when she engaged in “twerking” during one of her streams, a violation of the platform’s Terms of Service. Such actions could lead to a ban on Kick as well, causing concern among her fans and followers.
Awaiting Clarity on Twitch Ban Reason
As the mystery surrounding Amouranth’s Twitch ban continues, many of her followers are eagerly waiting for her to address the situation. If she reveals the reason behind the suspension, we’ll ensure this article reflects the updated information. Until then, we recommend reading about Amouranth’s recent profit from her investment in Activision Blizzard for anyone interested in her financial ventures.
Stay tuned for further updates on Amouranth’s Twitch ban, and we’ll inform you as soon as more information becomes available.
Maximize your Black Ops 6 rewards—Create highlights from your best gameplay with with Eklipse
Eklipse help streamer improve their social media presence with AI highlights that clip your Twitch / Kick streams automatically & converts them to TikTok / Reels / Shorts
Are you ready to take your live streaming game to the next level on YouTube? Look no further than OBS Studio, the ultimate tool for seamless live streaming. Yet, many streamers are still unsure about how to stream on YouTube with OBS.
Now you don’t have to worry. Here, we will guide you through the process of connecting YouTube to OBS Studio, step by step. This will empower you to unleash your creativity and captivate your viewers like a professional. Let’s go!
Streaming on YouTube with OBS can be done through three simple methods:
1. Enable live streaming on your YouTube account.
Once verified, navigate to your YouTube Studio.
Click the “Go Live” button in the top right corner.
Select the “Start” option next to “Right Now” to enter the Studio.
2. Set up the YouTube stream in OBS Studio.
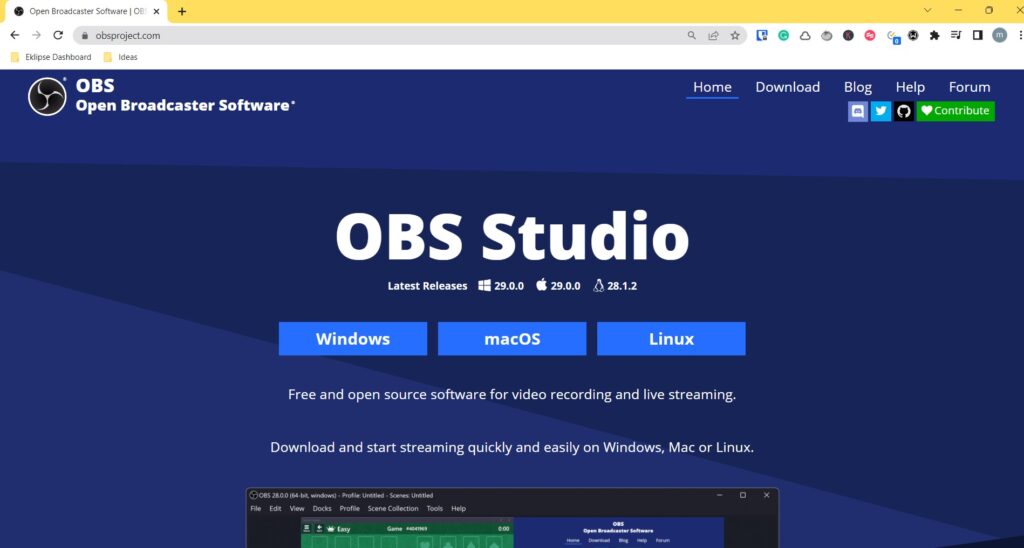
Download the latest version of OBS Studio from the official website.
Run the Auto-Configuration Wizard to optimize OBS settings for your hardware.
Launch OBS Studio.
Click on “Settings” at the bottom right corner.
In the “Stream” tab, choose “YouTube” or “YouTube Gaming” from the Service dropdown menu.
Copy the stream key from YouTube Studio.
Paste it into the Stream Key field in OBS.
Click “Apply“.
Clik “OK” to save your settings.
3. Go live on YouTube with OBS Studio.
Ensure your stream is ready in OBS Studio by configuring additional settings (like adding a camera and microphone sources).
Click “Start Streaming” in OBS Studio to go live on YouTube.
Engage your audience and deliver captivating content while OBS Studio handles the technical aspects.
Pro tip: Broaden your audience by utilizing third-party tools to enable multi-streaming with OBS. Discover additional insights and techniques in our comprehensive guide: How to Multi Stream with OBS: 3 Simple Steps.
Encountering stream issues when you are doing live stream on YouTube with OBS is not uncommon. The good news is, OBS Studio provides tools to troubleshoot and resolve them:
Open the OBS log files by clicking “Help” > “Log Files“.
Upload the log file to the OBS Log Analyzer for a detailed analysis of any performance problems.
Paste the log file URL into the Log Analyzer to receive suggestions and solutions to improve your stream quality.
Conclusion
Streaming on YouTube with OBS Studio opens up a world of possibilities for content creators. By following the simple steps outlined in this guide, you can seamlessly connect YouTube to OBS Studio and enjoy complete control over your live streams. Get ready to wow your viewers and embark on an exciting streaming journey!
Maximize your Black Ops 6 rewards—Create highlights from your best gameplay with with Eklipse
Eklipse help streamer improve their social media presence with AI highlights that clip your Twitch / Kick streams automatically & converts them to TikTok / Reels / Shorts