Streaming game on Kick is even more fun when you listen to Spotify gaming songs. The official music streaming app has gathered a collection of songs that are perfect to play while gaming.
These top Spotify songs are believed to pump up the adrenaline of gamers and streamers, making them more excited to play. Whether it’s a popular game or a horror game for content creation, these songs have got you covered.
Curious about these Spotify gaming songs? Well, let’s check them out below.
Listening to music can boost your mood and energy throughout the day. It has a powerful effect on our emotions.
No matter what you’re doing, adding music to the mix makes it more enjoyable. Many people find that music helps them stay focused and get things done quickly.
The same goes while you stream your game on Kick. The right songs can motivate players to play and win.
But it’s important to choose the right songs for gaming. They need to have upbeat instrumentals that match the game you’re playing. Slow or mellow songs might not fit the mood.
Luckily, Spotify has a great selection of gaming songs for you to listen to. You don’t have to worry about finding the perfect songs for gaming on your PC or phone. Here’s the list of songs:
WORTH NOTHING – TWISTED feat Oliver Tree
Push Up (Main Edit) – Creeds
STAR WALKIN’ (League of Legends Worlds Anthem) – Lil Nas X
Enemy (from the series Arcane League of Legends) – Imagine Dragons feat JID
Legends Never Die – Against The Current, League of Legends, and M.A.K.O.
Fight Back – NEFFEX
Everytime We Touch (TEKKNO Version) – Electric Callboy
GigaChad Theme – Phonk House Version
In addition to these songs, you can also explore dedicated playlists on Spotify that are specifically created to enhance your gaming experience. You can visit the best Spotify gaming songs playlist here to access thousands of songs provided by the Spotify app.
Creating Your Own Spotify Gaming Playlist
Source: TechCrunch
Besides the recommended songs on Spotify, you might want to create your own personalized Spotify playlist, right? Here’s a simple guide to help you create the Spotify playlist you want. Just follow these steps:
Open the Spotify app on your device.
Tap on the “Your Library” menu at the bottom.
Then, tap on the “+” icon at the top right corner.
Enter a name for your Spotify playlist. You can choose any name you like.
Once done, add your favorite Spotify gaming songs to the playlist.
Done! Enjoy your personalized playlist.
Conclusion
That’s all about the collection of Spotify gaming songs that you can enjoy while streaming your games on Kick. Listening to music can really boost your mood and energy. Even if not everyone can listen to music while being active, at least the songs in the Best Song Spotify gaming playlist can support your gaming activities.
Maximize your Black Ops 6 rewards—Create highlights from your best gameplay with with Eklipse
Eklipse help streamer improve their social media presence with AI highlights that clip your Twitch / Kick streams automatically & converts them to TikTok / Reels / Shorts
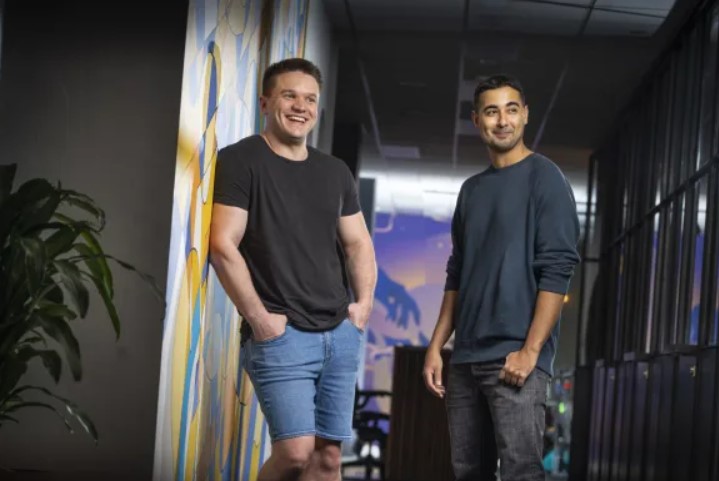
Edward Craven, commonly known as Ed Craven or Eddie, has emerged as a prominent Australian billionaire and entrepreneur.
At just 27 years old, he has garnered significant attention as the co-founder of Kick, a new streaming platform. Additionally, Craven owns Stake, an online crypto-gambling casino that has propelled him into the ranks of the country’s youngest billionaires.
Ed Craven comes from a family with a business background. His father, James Ashley Craven, was involved in the collapse of the Spedley Group, which resulted in his imprisonment.
However, these events occurred before Ed Craven’s birth. Throughout his life, Craven has engaged in various investment ventures and entrepreneurial pursuits. Notably, he founded a gaming company named EasyGo Gaming.
Stake.com: A Remarkable Achievement
Among his many accomplishments, Stake.com stands out as Ed Craven’s crowning achievement.
Together with investor Bijan Tehrani, he co-founded this online crypto-gambling website. Over time, Stake.com has grown into one of the world’s largest crypto casinos.
An investigation conducted by The Age revealed that the company technically operates under the ownership of a Dutch Curacao-based entity to bypass Australian anti-money laundering regulations.
From Gaming to Streaming: Ed Craven’s Journey
Ed Craven’s interest in video games, such as Runescape, and his fascination with in-game currencies sparked his curiosity in cryptocurrencies.
Through his social media channels and Medium blog posts, Craven has shared his passion for gaming and the connection it forged with the world of cryptocurrencies. This success in the crypto-gambling industry led Craven to venture into streaming with the creation of Kick.
Kick: A Rising Competitor in the Streaming World
Kick, launched in late 2022, aims to directly compete with Amazon’s Twitch. Spearheaded by established streamer Tyler ‘Trainwreckstv,’ the platform has managed to strike deals with renowned creators like Adin Ross, GMHikaru, and Destiny. What sets Kick apart are its highly favorable revenue splits, surpassing the payouts offered by Twitch and YouTube.
Alluring Features and Influencer Support
Kick’s appeal lies in its attractive features and the overwhelming support it has received from the streaming community.
The platform offers a 95-5 subscription split, eliminates deductibles on donations, and introduces a flat rate for hourly streams. These offerings have enticed notable creators, including Myth, Sodapppin, and Asmongold, who commend Kick for bringing healthy competition to the streaming landscape.
Criticisms and Stake Connection
While Kick has garnered praise, it has also faced criticism. Online investigator Coffeezilla pointed out various tweets and posts suggesting that Kick was primarily created to drive traffic towards the Crypto-Casino Stake.
Additionally, the association between gambling streamer Trainwreckstv and Kick further fueled speculation about the platform’s motivations. For a comprehensive breakdown of the Stake connection, refer to Coffeezilla’s findings.
A Promising Future
Despite the controversies surrounding Kick, Ed Craven remains confident in the platform’s stability and profitability. In a recent stream with Big E, he expressed optimism about the business model’s potential to turn a profit, even with its narrow profit margins.
Moreover, Kick has secured significant partnerships, such as becoming the official streaming partner of the Alfa Romeo F1 team, further solidifying its position in the industry.
Conclusion
Edward Craven’s entrepreneurial journey from the crypto-gambling industry to the streaming world has captivated many. As the co-founder of Stake and Kick, he has demonstrated his ability to innovate and create platforms that disrupt established markets.
With his determination and entrepreneurial spirit, Ed Craven is poised to continue making waves in the business world, leaving an indelible mark on both the streaming and crypto industries.
Maximize your Black Ops 6 rewards—Create highlights from your best gameplay with with Eklipse
Eklipse help streamer improve their social media presence with AI highlights that clip your Twitch / Kick streams automatically & converts them to TikTok / Reels / Shorts
Discord is the go-to communication tool for gamers worldwide.
It offers real-time text and voice chat, surpassing in-game options with better audio quality and no lag. Joining gaming servers on Discord provides opportunities to make friends, exchange game-related info, and more.
When it comes to gaming servers on Discord, you’ll find any variety of that. Some servers are relatively generic and cover multiple games. Meanwhile, you can also find the server with a specific game name. Additionally, this kind of server may be run by a relevant gaming company. But, others are just an unofficial group with related interests.
Apart from that, you can always gain something if you decide to join one of the best gaming Discord servers. There will always be updates from the official ones, or some gaming tips or hilarious memes from the ordinary group. You can always discuss every gaming-related thing there.
So, here are some popular gaming Discord servers that are worth joining.
1. Minecraft Official Gaming Server
Who doesn’t know bout Minecraft? The most popular online game all the time. Playing Minecraft will never get you bored since it always has something new to discover. Besides, its simple concept will always attract many players.
The Minecraft server allows you to discuss every Minecraft-related thing with other members, such as the latest updates, Bedrock Mechanics, Survival Discussion, and more. In addition to that, you can also share your blocky creations, or simply just connect with other players.
2. Call of Duty: One of The Best Gaming Discord Servers
Calling out to all big fans of Call of Duty! Now, you will get more friends that are really into this game just like you through this server. As the name of it, this server focused on various Call of Duty games.
You can get more updates regarding the game, discuss in-game weapons, and more! Just make yourself at home, and keep playing this fantastic game!
3. TK Call of Duty: Black Ops Cold War Server
Another Call of Duty-related server is TK Call of Duty: Black Ops Cold War. TK is actually an abbreviation of Team Kaliber, an American eSports and Gaming entertainment organization. Despite it having the same main title as the previous server, this server is more specific as it only focused on CoD Black Ops Cold War.
Through this article, you will not only get the latest information regarding the Cold War, but you can also find updates about tournaments and even play in tournaments. Other than that, this server also lets you share your loadouts, submit your incredible clips, or just simply make friends with other players.
Members can play in tournaments, find players, chat, share loadouts, submit clips, and make friends.
4. Genshin Impact Discord Server
Aside from Minecraft, Genshin Impact is also one of the most favourite games among all gamers. This action role-playing game comes with interesting gameplay and storyline. Above all, you can play it for free!
Additionally, there will be always redeem codes available every month for you to acquire special items. This is how this game always attracts its players.
As a famous online game, no wonder the official Discord server has over 800K members which is quite challenging to join it. However, if you are persistent enough in your attempts to enter this server, you might have a chance to be one of the members.
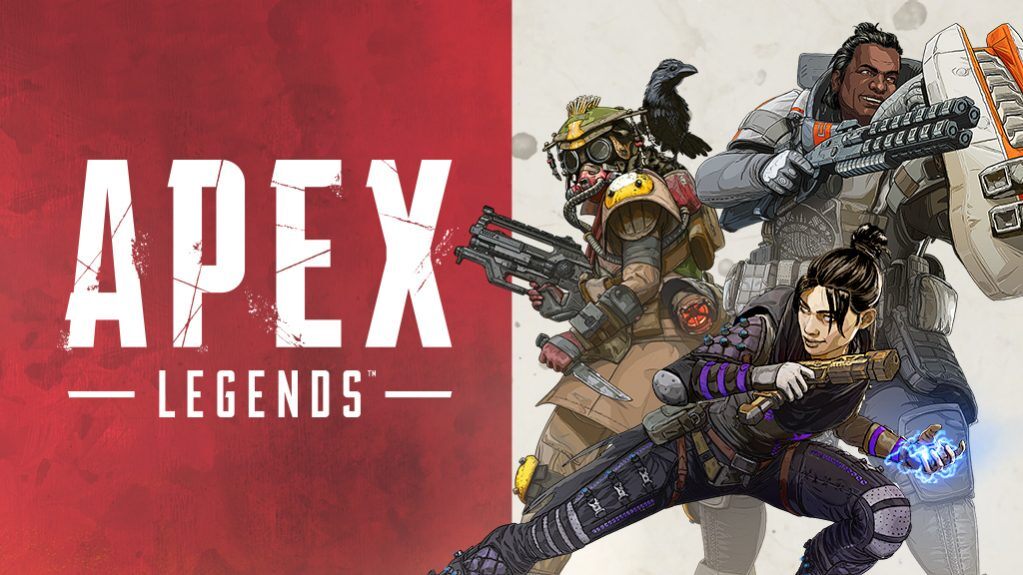
5. Official Apex Legends Gaming Discord Server
Official Apex Legends Discord server is the best place for those who are really into this game. This server provides everything you need to know regarding this game through the discussion and announcement channel.
Looking for the latest information about events, eSports, or strategy sharing? This server got you. In addition to that, you can also share your in-game screenshots or other Apex arts.
6. r/leagueoflegends
Did you play League of Legends? If so, you might get interested to join r/leagueoflegends as one of the best gaming Discord servers. Additionally, r/leagueoflegends is a community-run server for the subreddit group.
Although it isn’t the official one but doesn’t mean it can’t accommodate your needs about LoL-related topics. Come join and discuss everything about your favourite game!
7. Valorant Discord Server: One of The Most Popular Gaming Discord Servers
Another Discord gaming server with over 800K members is Valorant Discord Server. Run by its official developer, Riot Games, the Valorant Discord server is highly active and available for all global Valorant players. However, it might be quite challenging to join this server due to the massive number of members.
Additionally, this server allows you to find various channels covering many topics such as game news (including event, server, eSport), discussion (including gameplay discussion, agent, and strategy), and more!
8. Animal Crossing: New Horizons
Another popular role-playing game aside from Genshin Impact is Animal Crossing. If Genshin Impact comes with serious adventure gameplay and storyline, Animal Crossing gives you a cute and lovely concept for the game.
This is actually the official Discord server of Animal Crossing. Additionally, the server has various categories such as Island Life, Game guide and Help, Nook Inc, Museum, Marketplace, and other topics.
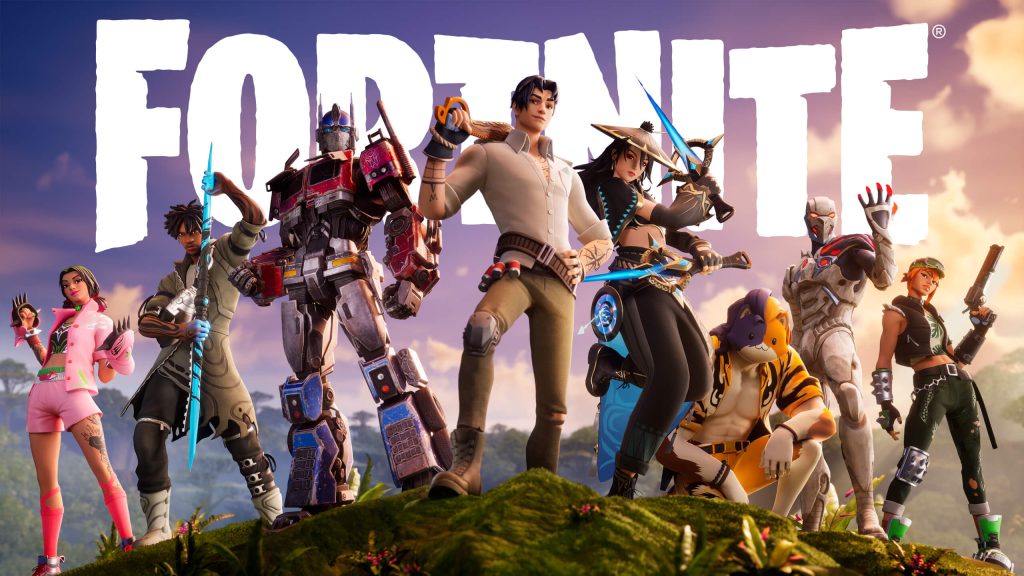
9. The Official Fortnite Gaming Discord Server
Fortnite is a game which everyone loves to play. This game provides you with various gaming modes and challenges to get special items. Additionally, Fortnite Battle Royale has become the most popular mode so far.
Like other Discord servers, The Official Fortnite Gaming Discord Server provides channels in various categories, including Fortnite News, General Community, Bug Reporting, and more. If you want to know more details about the channel categories, join them up!
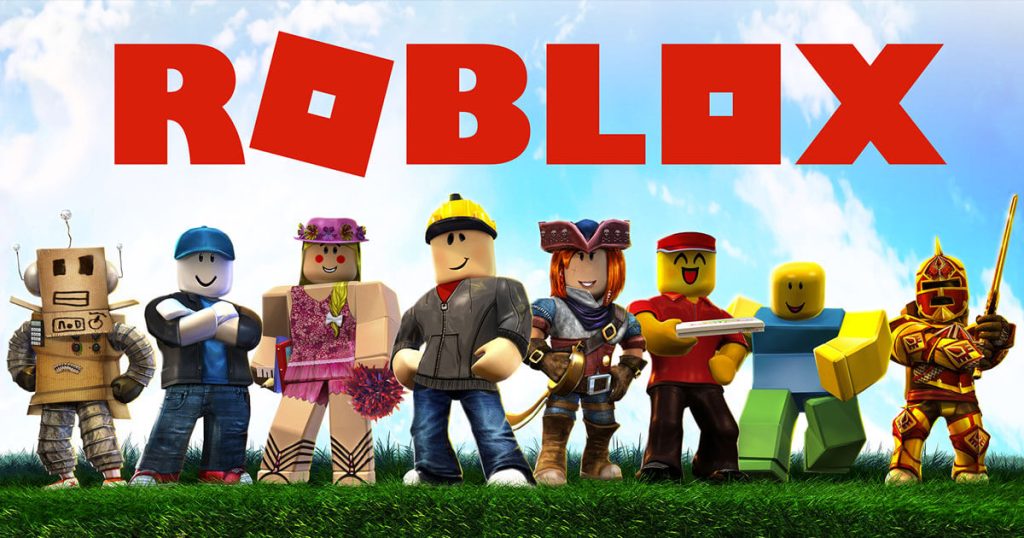
10. Roblox Unofficial Discord Server
The last server we wholeheartedly recommend to join is Roblox Unofficial Discord Server. Despite it being a community-run server, this server is quite popular as it has more than 700K members.
However, if you want to chat with other members on this server, it would be better to verify your Roblox account.
Conclusion
So, that’s the list of the best gaming Discord servers. Those Discord servers will be really helpful to accommodate your needs regarding your favourite games. Join now to get new gaming partners and more tips to improve your gaming experience. Enjoy!
If you want to record and share your gaming clips or VoD to a specific Discord server, you can use Eklipse as an A.I-driven clipping tool that will automatically create your incredible clips. Try Eklipse now!
In the gaming industry, social media plays a crucial role in the success of game streamers. It goes beyond streaming platforms like Facebook, YouTube, or Twitch, offering a broader reach and audience engagement. This article explores the art of optimizing social media for game streamer careers.
We’ll cover tips on platform selection, consistent content posting, diverse engagement strategies, content planning, and collaboration with fellow creators. Get ready to level up your game and discover the power of social media for
Out of the numerous social media platforms available today, is it necessary to be present and become an influencer on all of them? In practice, actively creating content on multiple platforms simultaneously, such as Instagram, Twitter, TikTok, Kick, YouTube, Twitch, or Facebook, can be time-consuming.
Therefore, it is recommended to choose just one platform to focus on building your personal branding. However, this doesn’t mean you can’t have accounts on the platforms mentioned above! It’s just advised to select the one that aligns with your game niche.
For example, on TikTok, you can become a TikToker who discusses game content and builds your audience community there. Once your TikTok account grows significantly, you can expand to other platforms.
2. Consistent Posting for Social Media
Consistently posting content is key to maintaining an active presence. This ensures that your followers know that you truly exist and that your account is genuine. One of the strategies is to frequently post content.
The type of content is not limited. Here are the recommended minimum posting suggestions to establish content consistency on your social media channels.
Facebook: Post between 3-7 times per week. Schedule one post per day.
Twitter: Tweet about 10 times per day, spread out throughout the day. Avoid posting in a sequential manner.
Instagram: Publish one post per day, but also try to post several IG Stories throughout the week.
3. Create Diverse and Engaging Content
Promoting your live streaming events in your social media bio is a great way to organically build a streaming audience. However, you’ll gain more benefits by creating different types of content. This helps your audience understand that your interests go beyond just playing games. For example, you can also post about your favorite movies or toys.
One type of content that often works well is providing tips and tricks. Some ideas include Tips for Winning Consistently in Mobile Legends. Additionally, you can also ask your audience about topics they would like you to discuss. This can be done through IG Stories.
4. Plan Your Social Media Content
To maintain consistency, you need to plan the content you will upload each day. Research popular keywords or trends to engage your followers and encourage interactions with your account. Therefore, create a content plan for 2-3 hours, which you can execute daily.
Setting aside 2-3 hours to create content will save you more time. This content can be prepared and scheduled to be published according to your plan. One free application that can help you schedule content is Hootsuite.
5. Collaborate with Other Creators
Collaborating with other creators is a crucial step that should not be underestimated. Even though collaborating with other creators, including competitors, may seem counterintuitive, it actually benefits you! Especially for new channels or accounts.
Start by engaging with other gaming influencers on any social media platform you use. Share their content and add some brief comments. This will not only help you gain more followers from those creators but also open the door for future collaborations and ultimately gain visibility from their followers
Conclusion
Social media is crucial for promoting streaming channels. By focusing on one platform, whether it’s Kick or Twitch, and consistently posting until collaborating with other creators, streamers can effectively boost their presence and engage with a wider audience. Harnessing the power of social media is key to success in the competitive world of game streaming.
Maximize your Black Ops 6 rewards—Create highlights from your best gameplay with with Eklipse
Eklipse help streamer improve their social media presence with AI highlights that clip your Twitch / Kick streams automatically & converts them to TikTok / Reels / Shorts
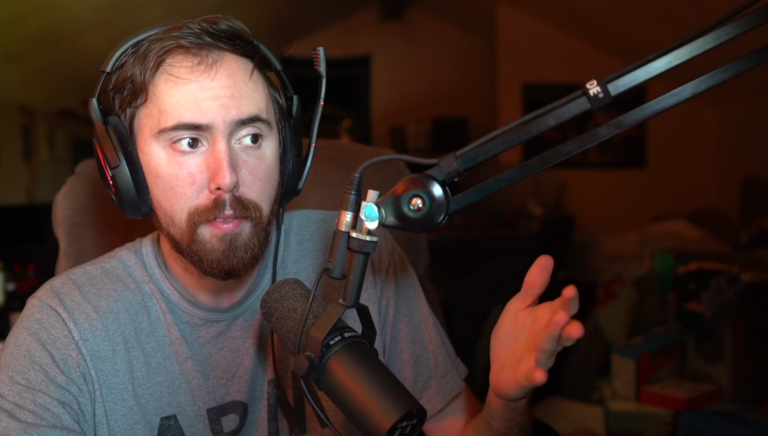
Asmongold, a popular Twitch streamer, continues to show unwavering support for Kick, a streaming platform challenging Twitch’s dominance.
Despite facing criticism, Asmongold remains unfazed, stating that he doesn’t care about the negative comments, even considering the potential consequences of Kick’s association with the gambling platform, Stake.
Kick has faced significant backlash due to its connection with the crypto gambling site, Stake. This criticism has intensified following Twitch’s ban on certain gambling content, including Stake, which Asmongold had previously criticized.
Asmongold’s Nonchalant Response to Kick Criticism
During a stream on January 26, Asmongold responded firmly to a comment about the ethics of Kick deals. He stated, “I hate to break it to you, but I don’t have to follow the rules you create. I do what I want and don’t make excuses for it. I’m not here to argue with you.”
Acknowledging the potential consequences, he added, “There are, of course, consequences, and I understand that. But I won’t backtrack on my words or sugarcoat them to avoid offending anyone. I genuinely don’t care. It doesn’t affect me.”
Asmongold reiterated his point when a viewer compared the situation to child labor in sweatshops. He said, “I don’t care—no matter how many times you say it, my answer won’t change.
I don’t need anyone’s approval to do what I want. If people don’t like it…well, too bad. Just remember, it’s not that I don’t care; it’s that I don’t care enough to let it change my path.”
When a viewer expressed concern about being critical of Kick affecting their chances of securing a contract, Asmongold honestly replied, “Yes, you’re right.”
Despite the controversy surrounding Kick and Asmongold’s previous stance on gambling content on Twitch, it’s clear that he has reevaluated the situation and adjusted his perspective. Whether he eventually joins Kick or not is still uncertain.
Conclusion
In conclusion, Asmongold remains resolute in his support for Kick despite criticism. He advocates for emerging platforms, disregards negative comments, and asserts his freedom of choice. The outcome of his association with Kick and its connection to Stake remains uncertain.
Maximize your Black Ops 6 rewards—Create highlights from your best gameplay with with Eklipse
Eklipse help streamer improve their social media presence with AI highlights that clip your Twitch / Kick streams automatically & converts them to TikTok / Reels / Shorts
Looking for unique YouTube gaming names? We’ve got you covered! Your channel name is crucial—it’s the first thing viewers notice.
A creative, memorable name attracts subscribers, while a generic one can push them away. Stand out with a name that reflects your personality and resonates with your audience.
As a Twitch streamer, it is essential to be aware of the list of banned words on Twitch to avoid potential suspensions and get permanently banned. The prohibited terms primarily include insults that are racist, homophobic, or sexist in nature. Twitch specifically bans three key terms, and using any of these can result in an immediate ban from the platform.
By staying informed and steering clear of these words, streamers can ensure a positive and inclusive streaming experience. This article will guide you through the list of banned words on Twitch and their implications.
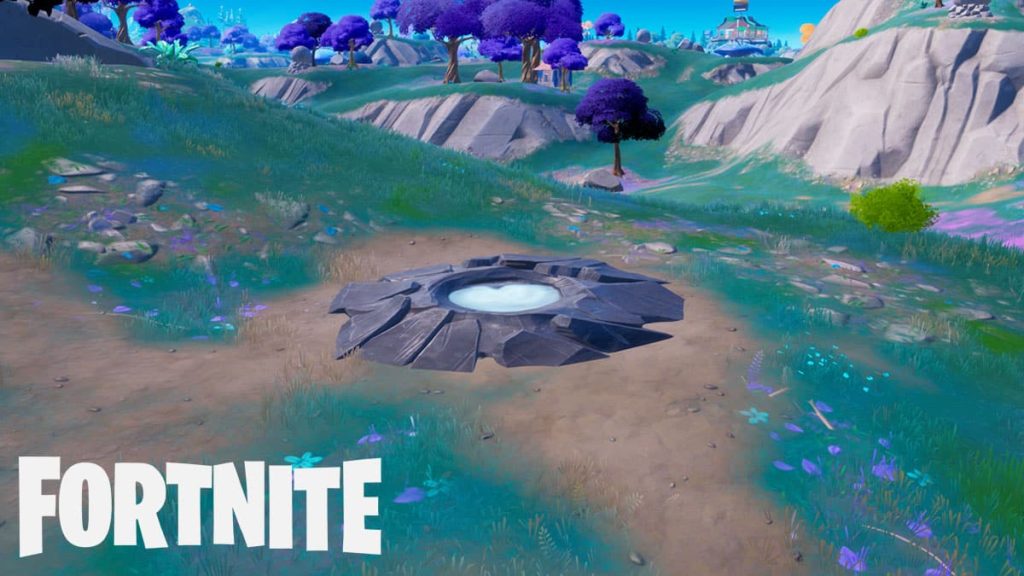
If you’re playing Fortnite’s Season 3 Week 6 quest, you might be wondering about Geysers in the game. Geysers are special spots that can launch your character into the sky. In the latest challenge, you need to use a baller, a zipline, and a geyser all in one match.
Finding Geysers can be tricky, so let’s explain where to find them and how to use them.
Basically, a Geyser in Fornite or real life is a hot spring that erupts with water periodically. Additionally, you can use this stuff to launch high up into the sky. Thus, you can traverse a great distance.
This is important to complete the task on Rave Cave in order to get special items. There are several geysers in Fortnite, and each has a different location. However, you’ll be able to find it easily through our guide in the next discussion.
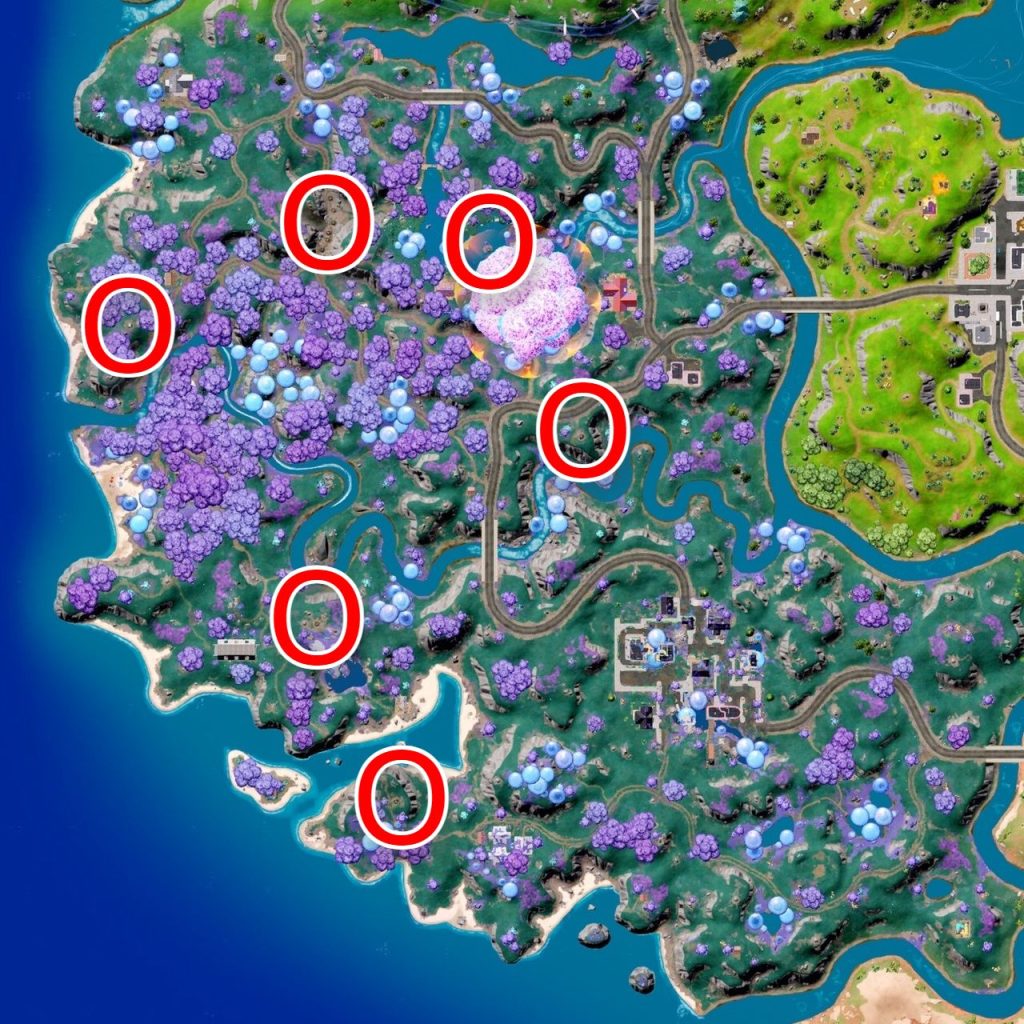
The Geyser Locations on Fortnite
Geysers in Fortnite can be found in the western section of the map. This section is full of giant and glowing mushrooms. Additionally, there will be 12 Geysers in this area, but seven of them will be clustered together in Peril Pass. Other than the Geysers, you can also find Reality Falls and Greasy Grove in this section. So, here’s where you can find the Geysers.
Displaced Depot: the Geyser is in the east-northeast of the landmark building. You can find it on top of the giant shark-head-looking rocks.
Peril Pass: As previously mentioned, there will be some geysers clustered together here. You can find seven geysers near this landmark area, or on the west of Reality Falls.
Reality Falls North: On a small rocky island, north of Reality Tree, there is a lake area fed by multiple waterfalls and a geyser.
Reality Falls South: the geyser is located on top of a cliff across the road.
Scratch Pad: On the southwest of the Scratch Pad landmark, find ta geyser on top of a hill. Geysers may be surrounded by trees.
Shelly Shoals: On the west-southwest of Greasy Grove, you’ll find a geyser around a large cliff formation on the west coast by a Shelly Shoals landmark.
How to Launch into the Air Using Geysers?
Now as you have found the geysers, you can learn how to use them properly to throw you upwards. All you need to do is to stand in its centre when it’s starting to blast water. You’ll get fired upward then. Additionally, you can use the geyser three times to complete the challenge and obtain the XP reward.
Conclusion
So, that’s all about geyser Fortnite, where you can find them and how to use this to make you sky-high. It is supposed to be easy to do since there’s already clear direction about the location. Are you ready to complete the challenge? Tighten your belt, and move your feet!
Do you want to record and make an awesome Fornite montage, you can try Eklipse as one of the best montage maker. Its powerful A.I will assist you to generate your gaming highlights just in a few clicks! Give it a try now!
Are many people curious about how do YouTube Shorts make money without making videos? Is it really possible? The answer is yes, it is absolutely possible. You can earn money as much as you can by using the YouTube Shorts feature. But uniquely, sometimes you don’t need to make the video.
YouTube allows you to create video and monetize it by publishing other’s videos. So you don’t need any extra effort to produce an interesting and creative video to brand your channel and attract viewers.
Curious about how it works? Just take a look at the article below.
Download the footage. To save the YouTube shorts or regular video is easy, but you need an additional application or online services to help you do that.
After that, you can head to Canva.com to create the story ad
Click Create Design and choose Story ad
Then, drag the downloaded video to the worksheet on Canva
Now is time to edit the video. You can trim, cut, or add some effects as you wish
Next, render and save the video
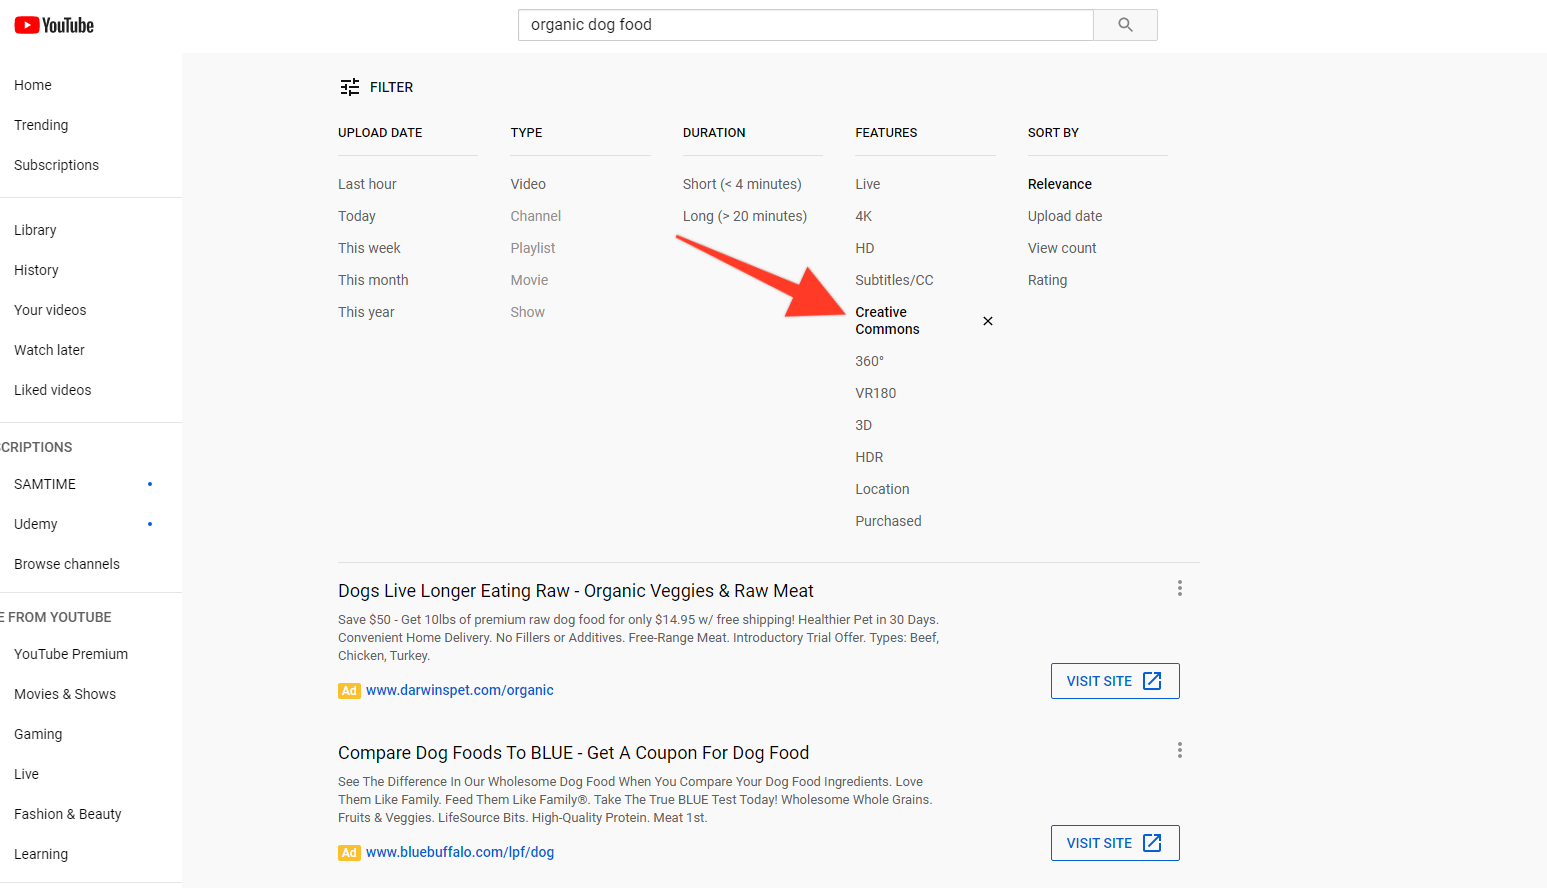
Creative common on YouTube is a feature that will grant you the right to reuse and edit a video on YouTube. So, don’t worry if you have activated this feature, you’ll not get banned for a copyright issue.
If you have been granted the license, you can also get the right to monetize the video royalty-free and use the video for commercial purposes.
Tips To Make Money With Short Videos
After you finished preparing the video, now you can upload it to your YouTube account. Though the video is not originally made by you but doesn’t mean you have to upload it plainly.
Try to make a catchy title, description, or even thumbnail to attract audiences. Make it as appealing as possible. Other than that, don’t forget to add some hashtags related to YouTube shorts, and write the original source of the video in the description box.
The thing that is important too to be included in your video post is doing affiliate marketing by attaching some merchandise links from any products in the description box. You can do it once you hit 2000 likes. This is necessary to monetize your video. Remember to write the call to action to make it more attractive.
Source: Quora
If you’re going to sell your merchandise, you can manage it through teespring.com. Once you’re done, just click publish your listing and copy the link to be added to the description box. This is how to make money on YouTube Shorts without Making Videos 2022. Simple yet tricky, right?
But apart from that, if you wish to monetize the video more properly, you can just follow the YouTube Shorts monetization rules 2022. Fulfil the requirements, and make sure they accept them.
Conclusion
From now on, you have to know how do YouTube Shorts make money without making videos. It’s quite easy to do as long as you have fulfilled the requirements from YouTube. Making money never feels this easy, right?
However, we suggest you to do your best in your YouTube channel to expand your revenue stream. Grow your own money tree and earn fast using the methods we suggest here: How to Get Monetized on YouTube Fast & Easy.
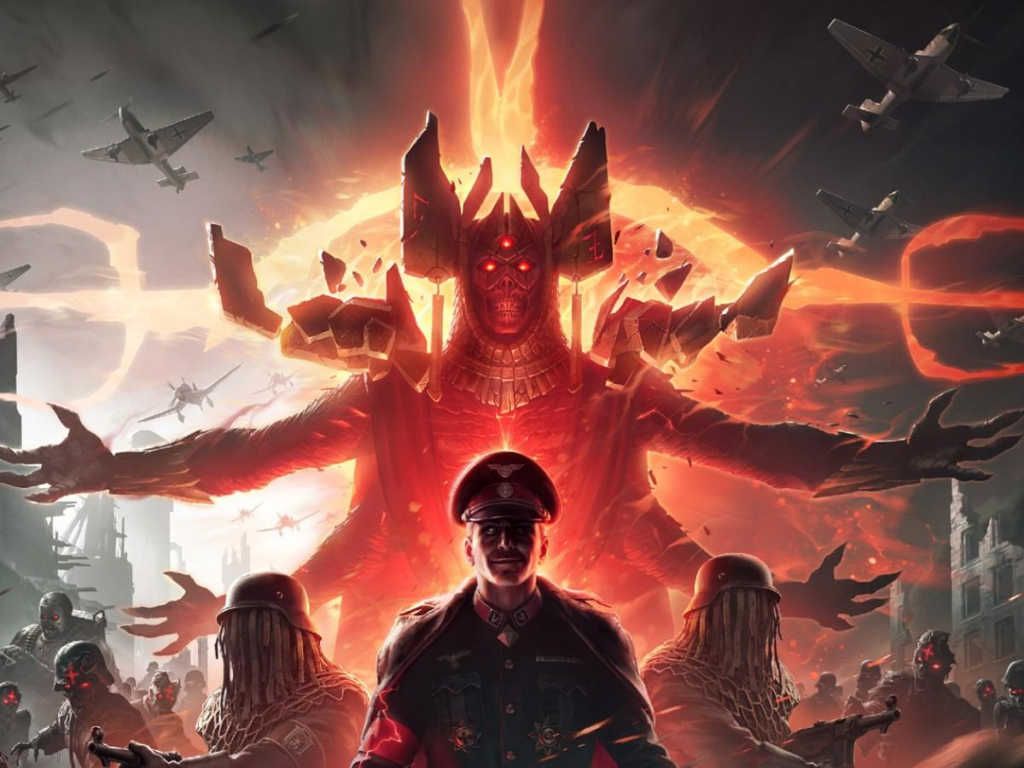
Since the map and the game type have been updated, the COD Vanguard Shi No Numa guide may be necessary to help you complete the main quest. In Swamp of Death, you need to team up with the other undead and avoid being eaten alive by the zombies.
Additionally, the Shi No Numa is actually not a new quest in Call of Duty: Vanguard. This is the classic quest but comes with new enhancements on it. So if you are going to know about the COD Vanguard Shi No Numa Easter egg and the guide to completing the task, here you are!
For those who are experienced in playing so-called Zombie games, the Shi No Numa Vanguard may be fairly simple. But if you aren’t experienced enough to face the Zombies, you can follow this Shi no Numa vanguard guide.
As a part of Mercenaries of Fortune, the goal of Shi No Numa is to build the wonder weapon, find the relic, and uncover the hidden horror of Kortifex’s past. Furthermore, here’s what you need to do.
1. Find the Dig Site and the Cypher Wheels
Source: Gaming Intel
The first thing you need to do is to find the Dig Site. Just so you know, this may be a new area for Shi No Numa veterans. To be able to go there, you can take the Storage route or the Comms Room. It will be sign-posted with an objective marker.
Once you’ve reached the Dig Site, now it’s time to find the three Cypher Wheels. Go to a dormitory, and see a bedside table next to a lantern. You’ll get the first Chyper Wheel. Then, the second one is on a table in front of the Pack-A-Punch machine. For the last chyper, head to Doctor’s Quarters, looking for a Max Ammo box, and you’ll find it in the corner next to it.
2. Activate the Monolith
The next thing you have to do is to find and activate the vine-covered monolith. For this step, you need to be at Round 5 or above. Go to Doctor’s Quarters Exterior and kill a Boom-Schreier in front of it to activate the monolith. The explosion will remove the mystic barrier from the monolith itself and later on, you can insert the three Cypher Wheels.
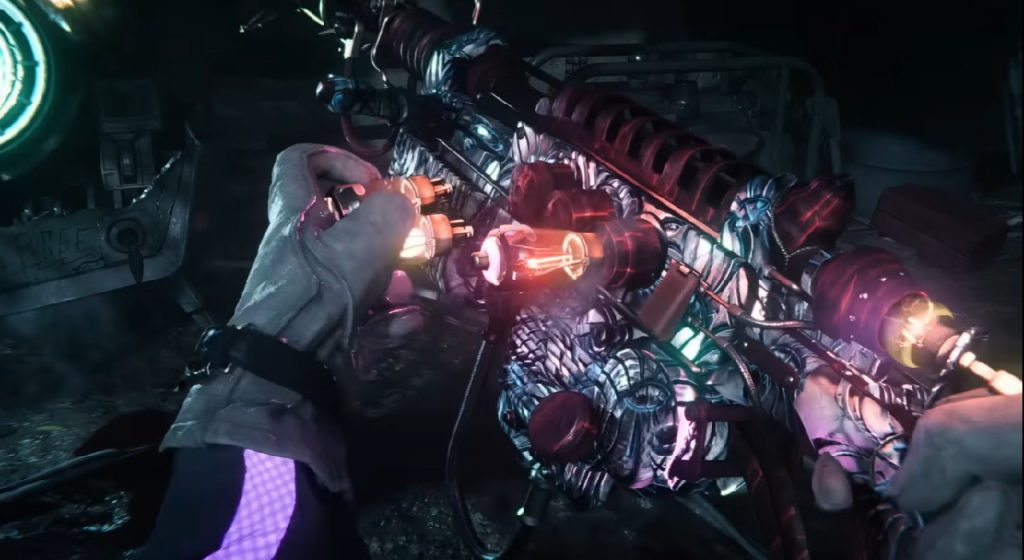
3. Build the COD Vanguard Shi No Numa Wunderwaffe DG2 Wonder Weapon
Source: Gameranx
To build this weapon, you need to collect the separate parts. You can find the first part in Fishing Hut on the right behind the door. Once you have got the piece, insert it into the base of the Radio Tower in the Comm Room Exterior.
Furthermore, in the Comm Room, you can find the next part of the weapon. Interact with a Radio in the room and end the round next to the Radio Tower. Next, you are required to defend the Radio Tower for a limited time. While defending the Radio Tower, you can pick up the barrel part. Then, go back to the radio in Comm Rom and charge the vacuum tube.
The next step, head to the other room in the Comm Room to get an Electrical Fuse. Once you’ve got it, go to the Storage Hut and activate the trap immediately. However, before you activate it, you need to repair the trap using the Electrical Fuse.
When the trap is ready, get a set number of kills using this. After that, you can go to the build station and power the barrel. Following this, you need to get the third part. And thus, you need to get to Round 15.
In this step, you have to face off against Zaballa the Deceiver. During the fight, make sure that she attacks you with her electrical attack three times, so that you can use it to charge a machine in Excavation Room, opposite the door to Storage. Then, you can pick up the charged cell and complete the Wunderwaffe DG2 in the Storage Hut.
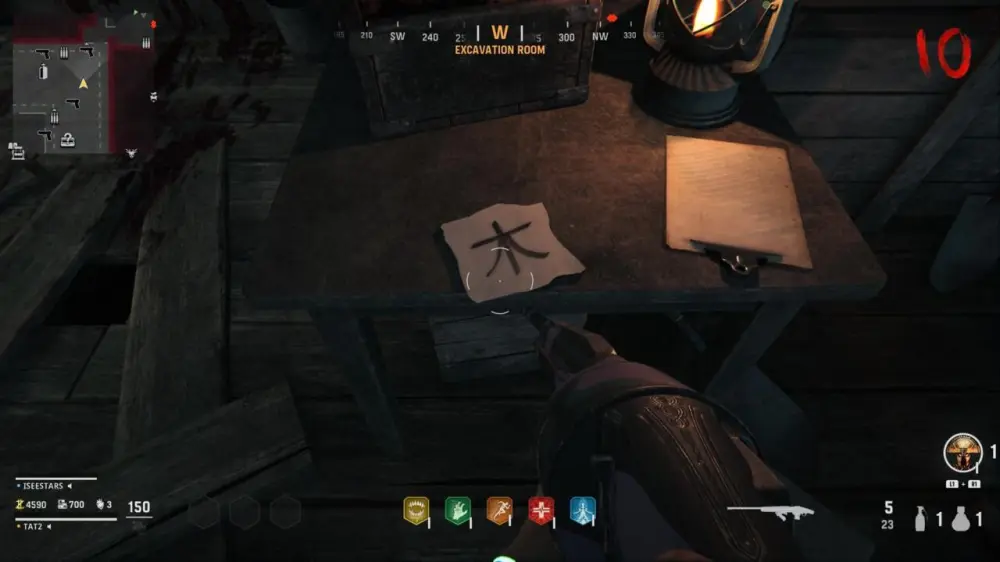
4. Find the Cypher Symbols
Source: Crumpe
After collecting the Cypher Wheels, now you need to find the Cypher symbols and solve the puzzle. Additionally, the symbols are on the paper attached to a clipboard. And to reveal the complete list of symbols, you need fire as it is written with invincible ink.
Watch out that the symbol will show differently in every game. The first symbol is on the back of the workbench in Dig Site. Following that, the second symbol is in the Comm Room, on the table opposite the Mystery Box spawn location. Meanwhile, you can find the third symbol on a table in Excavation Room. As for getting the last symbol, you need to shoot this to reveal the symbol under the papers.
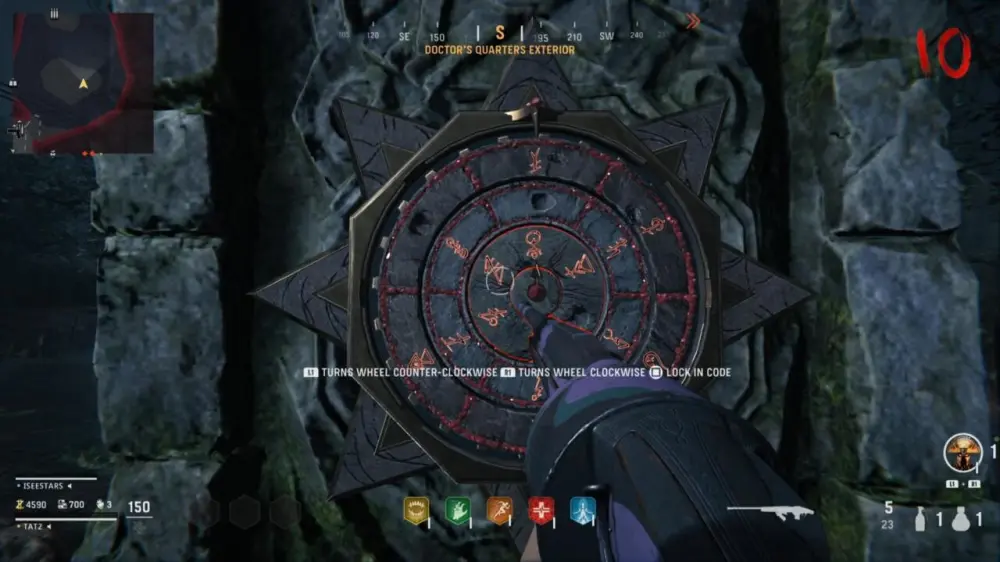
5. Solve the Cypher Puzzle of COD Vanguard Shi No Numa
Source: Crumpe
Now since you have got the symbol, it’s time to uncover the puzzle. Head to Doctor’s Quarters and find a half-finished cypher on the table. It’s on the next of the perk spawn. Throw something flammable to help you reveal the symbol.
Apart from them, the cypher is going to reveal a set of fifteen symbols. Don’t worry about it, the symbol won’t change in every game. You can take a screenshot of this for the future shi no Numa vanguard easter egg steps attempts.
Take each of the three Kanji symbols, and find it all on the list. Each symbol will link to another symbol on this cypher and have a second symbol to its right. Use the three new symbols from the right for the cypher.
Using the list of symbols you originally found at the Doctor’s Quarters, you’re going to get a new symbol to input into the monolith’s cypher. Take each of the three Kanji symbols you found, and find them on the list. Each one will have a second symbol to the right of it. You’ll use those three new symbols from the right for the cypher.
Put the symbol into each of the middle spots on the cypher disc. Rotate the disc to put the relevant symbols into a vertical row.
6. Survive Monolith Lockdown with Wonder Weapon
Once the symbols worked well on the Cypher disc, now you’ll see a small stone pillar that will glow red. You have to interact with it to trigger a lockdown. It’s worth noting that you have to be prepared to fight a wave of zombies. This is why you need your Wunderwaffe DG-2 wonder weapon.
Shoot the zombies with the blue haze since they are more aggressive and faster than others. Additionally, kill the zombies close to the monolith. This may be difficult to get done. However, you can repeat this step whenever you fail.
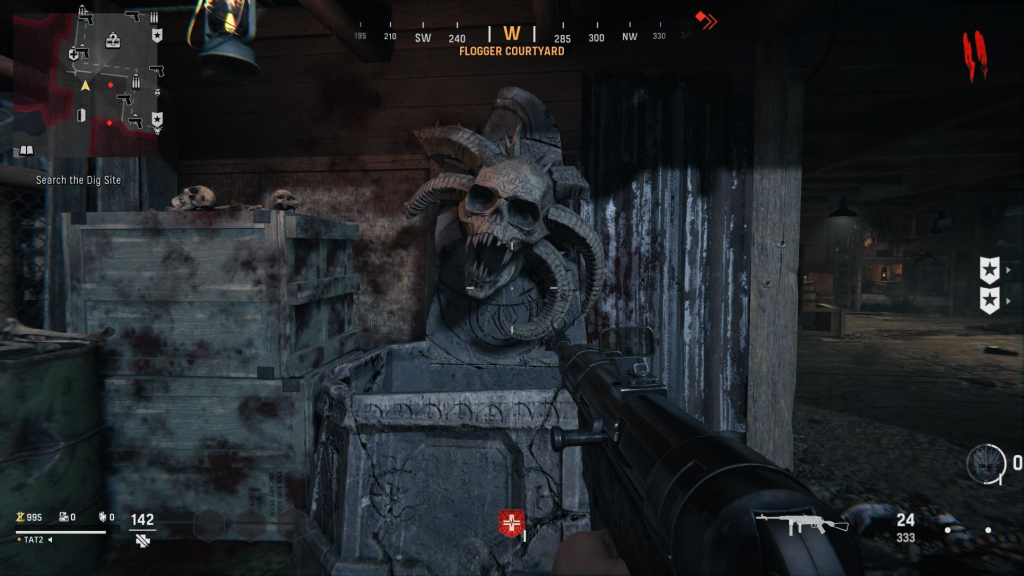
7. Drink Flogger Juice and Get Mirror Fragments
Source: Gamespot
Before getting the mirror fragments, you need to drink the zombie blood. You’ll fill the fountain with Flogger Juice. To do this, you are required to horde up some zombies and bait them to the flogger trap in the Flogger Courtyard. Then, you’ll be able to drink the juice and get a special vision.
This special vision helps you to find the mirror fragments. You’ll be able to see red orbs somewhere in the main building or an orb with an aqua-coloured glow around it. These orbs will lead you to where the mirror fragment is. However, if your vision disappears, you can repeat the same steps, which is drinking the zombie blood to get back the special vision.
8. Charging Podiums and Shooting Orbs
Have been succeeded in obtaining the mirror pieces? Now, you can take them to Dig Site and place them down on the pedestal. You will interact with the podium. And while you’re interacting with the podium, there will be an orb shoot up into the air and fly away to one of the huts.
To find back the orb and shoot it three times. Watch out that the orb will move after each shot. Once you have done it successfully, you’ll interact with the podium again and will trigger the final boss.
9. Fight the COD Vanguard Shi No Numa Boss
Source: Pinkvilla
You have reached the final step on Shi No Numa: the three-stage boss fight. As for the first stage, you need to kill Saraxis, the zombie, using a Wunderwaffe DG2 with the blue mist. You must conduct the fight around the central podium, where you placed the mirror pieces.
It will spawn a blue bubble where you can deal damage to the boss. You and the enemy need to be inside the bubble to do damage. Therefore, you may have to wait for Saraxis to move into the bubble.
For stage two, it’s Boom-Schreier’s that you need to kill using the same weapon. Do with the same steps as before. And now heading to the final stage, you will need to kill Sturmkriegers. Kill it with the same steps. But keep in mind that this enemy is more powerful and harder to beat up. Then, you have completed the quest!
Conclusion
So, that’s all about the COD Shi No Numa Vanguard easter egg guide. These little insights will help you a lot to complete this main quest. It’s now your turn to fight with your own power and knowledge. Uncover the puzzle and beat the bosses. Good luck!