Did you know that there’s a Fortnite XP glitch that lets you gain lots of XP easily? We’ll cover everything you need to know about it in this article.
The unfortunate thing about playing games like Fortnite is that you can’t always avoid the grind, even if you’re willing to pay for it on occasion. After all, if you could reach your highest level in an afternoon, there would be no reason to continue playing.
Of course, not everyone has the time to grind for levels or Battle Pass for weeks on end, so if you’re desperate for XP, there’s a little trick you can use. Here’s how to take advantage of the Fortnite XP glitch.
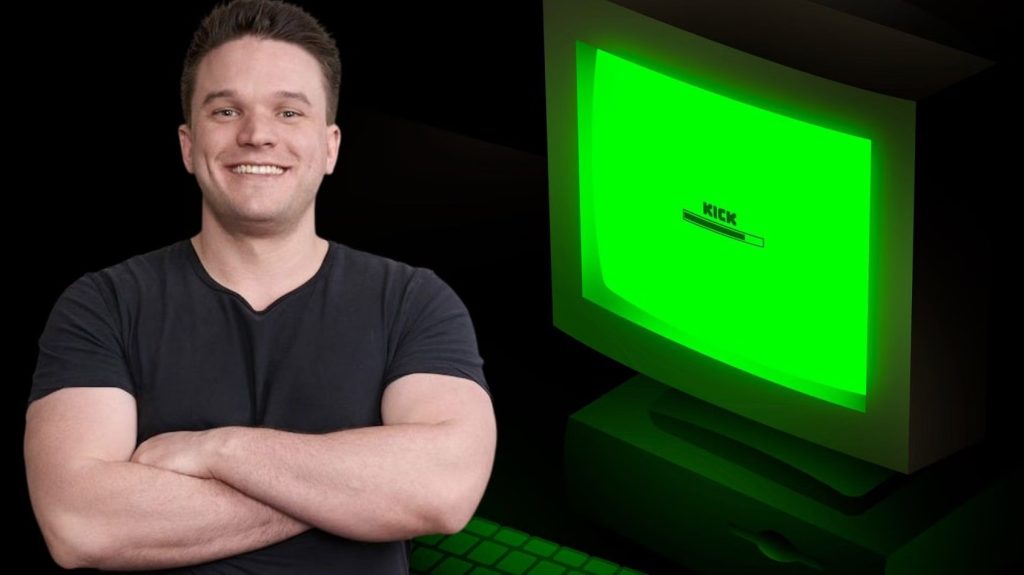
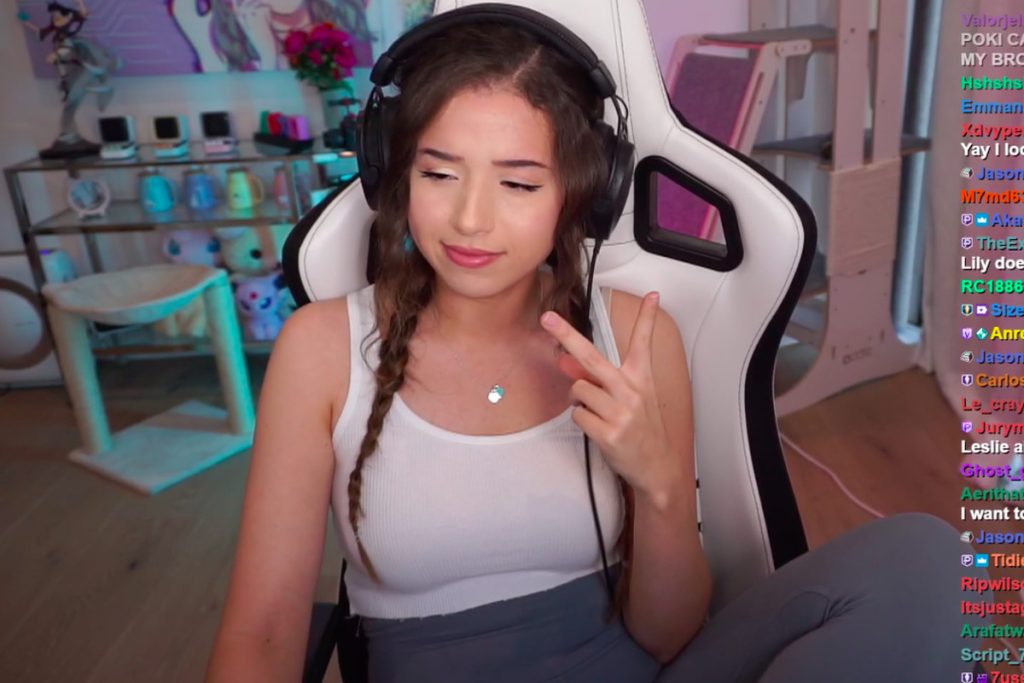
Kick, the rising streaming platform, continues to express its unwavering interest in signing Pokimane, despite recent criticism aimed at the platform. Ed Craven, the CEO of Kick, revealed that they “really wanted” to collaborate with Pokimane and are determined to secure her as a partner.
In the competitive world of streaming, Kick has been making waves by attracting some of the industry’s biggest names in a remarkably short span of time.
Notably, Kick has already successfully signed mega stars xQc and Amouranth to lucrative deals, and they show no signs of slowing down in their quest to surpass Twitch’s dominance.
However, Pokimane, a notable streamer, has made it clear that she has no interest in joining Kick.
The Moroccan-Canadian content creator has consistently voiced her stance, emphasizing that she will not compromise her morals and ethics, even for a staggering $100 million offer. Despite this, Kick remains hopeful that they can sway her decision and convince her to join their ranks.
Kick’s Desire to Collaborate with Pokimane
During an interview with Jake Lucky, the CEO of Kick shed light on the platform’s intentions and their pursuit of notable personalities who turned down their offers. Craven specifically mentioned Pokimane as a top choice, highlighting that Kick is genuinely supportive of her content.
“To be honest, we had a real desire to collaborate with Pokimane. We discussed her as a potential partner early on. However, it seems like she’s not interested in working with us at the moment. We’ll see,” revealed the CEO of Kick.
Pokimane’s Criticism and Kick’s Openness
While it remains uncertain whether Kick has extended a formal contract offer to Pokimane, her criticism of the platform has been escalating. This criticism even sparked a debated exchange between Pokimane and xQc, focusing on her perceived “morals.”
Despite the flack, Craven remains open to the possibility of signing Pokimane. He commented that Kick will continue to observe any changes and expressed the team’s strong support for Pokimane.
Potential Developments on Kick
Although the chances of Pokimane joining Kick seem unlikely at present, another prominent name might soon make an appearance on the platform. Reports suggest that banned Twitch star Dr Disrespect is currently in talks with Kick, seeking a deal worth half of xQc’s contract and an impressive $50 million. This potential signing has the potential to create significant buzz within the online community.
Conclusion
Kick’s persistent interest in signing Pokimane despite recent criticism highlights their determination to expand their roster of renowned streamers. While Pokimane’s decision not to join Kick may be firm for now, the streaming platform remains open to the possibility of future collaborations. Additionally, the potential addition of Dr Disrespect to Kick’s lineup adds to the anticipation and excitement surrounding the platform’s future endeavors.
Maximize your Black Ops 6 rewards—Create highlights from your best gameplay with with Eklipse
Eklipse help streamer improve their social media presence with AI highlights that clip your Twitch / Kick streams automatically & converts them to TikTok / Reels / Shorts
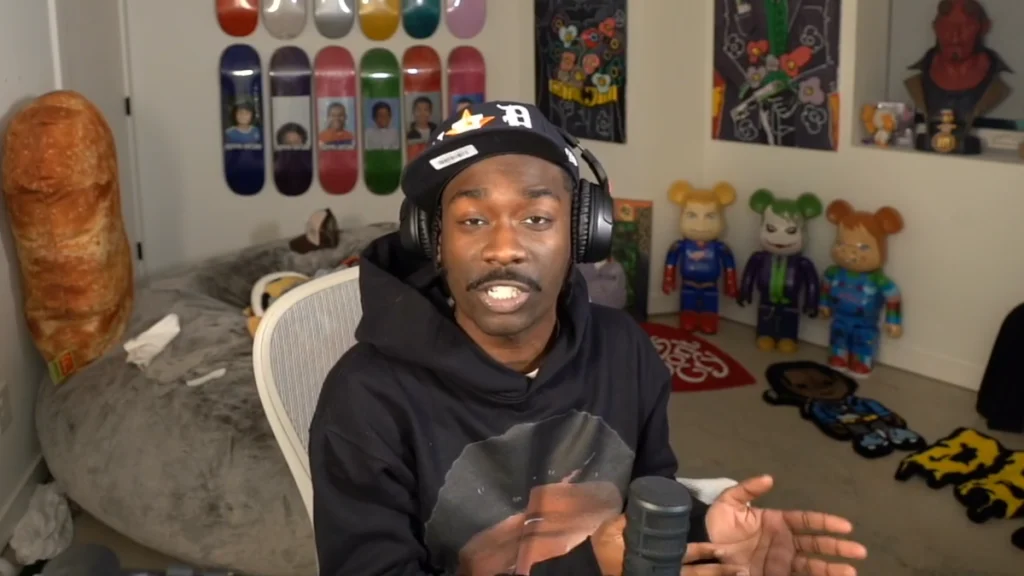
BruceDropEmOff, a popular streamer on Twitch, has a strong fan following of 1.3 million people. Of course, a lot of his fans are also curious about BruceDropEmOff Net Worth.
BruceDropEmOff is known for his entertaining and informative streams of a variety of games, including Grand Theft Auto V, Minecraft, and NBA 2K.
However, he faced several bans on Twitch due to breaking community guidelines. As a result, he decided to switch to the platform Kick and signed a lucrative multi-million dollar deal. Let’s delve into his life, career, and many more.
BruceDropEmOff earns money by streaming and creating reaction videos on YouTube and Kick. Through his gaming content featuring games like GTA 5, Minecraft, and Call of Duty, he has amassed an estimated wealth of $2 million so far. This number is expected to increase even further with his new partnership with Kick.
1. Twitch
With a large fan following and an average of 23,000 views per stream, BruceDropEmOff earned over $120,000 per year from subscribers, donations, and other contributions. Now, with his departure from Twitch and the new deal with Kick, he has the potential to earn millions of dollars in revenue. On YouTube, he has accumulated 1.2 million subscribers and 150 million views as of 2022.
2. YouTube
With an average of 250,000 views per video, BruceDropEmOff earns around $2,000 per day. This adds up to $720,000 per year, including revenue from ads and the total watch time of his videos. Additionally, earnings from YouTube Premium are slightly higher compared to videos with ads. The amount of money earned depends on the total number of views, as it is tied to specific deals.
Bruce Ray Jones was born in Riverdale, Georgia, on September 23, 2000. He grew up in Clayton County, a nearby area. As a child, Bruce developed a strong interest in fashion and gaming. He attended Kendrick Middle School before moving on to high school.
During his teenage years, Bruce faced difficulties in school which led to him battling with depression. He was frequently suspended during the early part of his high school years due to his misbehavior.
Bruce’s family life was also challenging. He primarily lived with his mother during his childhood, but at the age of 13, he moved in with his father. He didn’t see his mother again for almost five years. Finally, at the age of 18, Bruce successfully graduated from high school.
He met his girlfriend, Dana, in ninth grade, but they didn’t start dating until later. After graduating from high school, Bruce began dating Dana, whom he had known since high school. They often share pictures on social media.
Bruce discovered YouTube while in high school and used it as a way to cope with his troubles. Bruce had a passion for fashion and enjoyed shopping at places like H&M and PacSun. In his free time, he worked as a content creator, focusing on playing NBA 2K15.
In January 2015, Bruce created his YouTube channel, BruceDropEmOff, inspired by his favorite 2K creators. Initially, his content centered around NBA 2K but didn’t gain much attention. He then shifted his focus to streaming and learned from streamers like CashNasty.
Bruce gained popularity when he appeared in CashNasty’s streams and uploaded those moments to his own YouTube channel. He expanded this concept to other popular streamers like ANIMEILLUMINATI and FlightReacts. His subscriber count grew from 9k to almost 40k in a few weeks.
During his sophomore year of high school, Bruce’s YouTube channel gained significant traction, reaching 50k subscribers. He collaborated with Curse and later dedicated himself to becoming a Twitch streamer.
Bruce created his Twitch account in April 2015 but started streaming in January 2017. He built a community on Twitch and focused less on YouTube. He moved back in with his mom at 18 and streamed frequently, steadily growing his followers and subscribers.
In April 2017, Bruce became an affiliate on Twitch, monetizing his content. He earned a new gaming laptop and appeared as a guest on podcasts and streams. He achieved over a thousand concurrent viewers for the first time.
In 2018, Bruce’s YouTube channel saw renewed growth when he uploaded a stream of him playing “Among Us” with rapper Soulja Boy. He also fulfilled his dream of launching his fashion line called “Condone.” He joined OTK, a gaming organization in Austin, Texas.
Conclusion
BruceDropEmOff is a famous streamer who had some problems on Twitch but found success on Kick with a big money deal. He has about $2 million in wealth from streaming and making videos on YouTube.
Bruce’s personal life had difficulties, but he found comfort in creating content. He became popular by streaming games and collaborating with other streamers. BruceDropEmOff’s story shows that passion, resilience, and adaptability are important in the world of online content creation.
Eklipse is a powerful tool that can help you make highlights from your live streams so you can be a popular Kick streamer like BruceDropEmOff. With Eklipse, you can easily trim your clips, add music and effects, and create professional-looking highlights that will engage your viewers and help you grow your channel.
Maximize your Black Ops 6 rewards—Create highlights from your best gameplay with with Eklipse
Eklipse help streamer improve their social media presence with AI highlights that clip your Twitch / Kick streams automatically & converts them to TikTok / Reels / Shorts
A Gamertag, a nickname or game ID is usually contains a unique name and often becomes a topic of conversation within the gaming community. So, if you want to have a unique name, you can find out the tips through this article.
Choosing a gamertag can be confusing, especially when so many cool names have already been taken. With over 2.5 billion gamers worldwide, there is certainly competition to get the best names.
Here are some tips for creating a cool gamertag or game nickname. These tips are not only for gamers but also for streamers or YouTubers who are still unsure about choosing a cool ID name.
When creating a gamertag for a specific game, you need to consider the genre and other players’ IDs. Here are some rules for naming:
Character length: What is the minimum and maximum number of characters you can use for your name?
Special characters: You can also use spaces or special characters in your ID name.
Appearance: How will the gamertag look? Will it have prominent uppercase letters, or will everything be uppercase or lowercase?
Keep the name short. Try to make it less than 10-15 characters if possible. This will make your name easier to remember.
2. Use Personalized Names
If you haven’t found inspiration yet, you can start by making a list of words that have personal meaning to you. This can include the following:
Your name or nickname or initials.
Hobbies, passions, or interests.
Pets, cars, occupations.
Personal qualities or habits.
Countries.
Colors or tastes.
Animals and plants (both real and mythical).
Use an online dictionary or thesaurus. Try to find some synonyms. Think of adverbs or adjectives that can be paired with one of the personal words about yourself.
3. Use a Gamertag Generator
If the gamertag you chose is still not creative enough, you can use a generator. These gamertag generators can be an alternative to combine unique nicknames. There are three gamertag generators you can use, such as SpinXo and Fantasy Name Generators.
4. Choose a Cool and Unique Gamertag
Source: Wired
Using words or terms that spark conversations will make things interesting over time. When you find a funny or creative ID name, people will see you as someone different and might naturally be interested in you. Having a good name will help you make a good first impression when trying to build a team or find new friends.
5. Check Username Availability Across Platforms
If you want to know which names are available or not, you can visit various platforms and check your chosen gamertag. It may take some time, but if you manage to find a rare or unique ID name, your gamertag will feel special.
There is one free platform you can use to check gamertags across multiple platforms. Namechk is a free and easy-to-use online tool that allows you to check potential branding names simultaneously across various platforms and websites.
6. Use the Same Name in All Games
Once you choose a gamertag, try to use it every time you play online multiplayer games. Other players may recognize your ID name in the game and make new contacts.
If you start streaming after playing, that name can also become your streaming channel nickname. If your name is not available in a specific game, consider using a different variation, such as special characters.
7. Use Special Characters
Sometimes, using special characters or numbers can make your name unique. Eye-catching and cool ID names usually make people curious. For example, Entruv, Elle Bami, and so on.
However, if the name you choose is already taken by someone else, you can combine it by replacing letters with numbers or trying different spellings. Although this is not a good idea if you are a pro streamer or pro player, it’s not a problem if you’re just a casual gamer.
Conclusion
Those are the things to consider when creating a gamertag. The above tips are suitable for beginner streamers or content creators. We hope this article helps you to start your career as game streamer!
Maximize your Black Ops 6 rewards—Create highlights from your best gameplay with with Eklipse
Eklipse help streamer improve their social media presence with AI highlights that clip your Twitch / Kick streams automatically & converts them to TikTok / Reels / Shorts
Kick’s CEO, Ed Craven, recently unveiled that the platform has engaged in discussions with Dr Disrespect regarding a potential move. This revelation comes shortly after the renowned streamer laid out his contract demands.
The Buzz Around Dr Disrespect and New Streaming Platforms
With the emergence of new streaming platforms and their signings of popular streamers, fans are eagerly speculating whether Dr Disrespect will join the fray. Despite facing a mysterious Twitch ban, the Two-Time champion has achieved considerable success on YouTube. However, unlike Valkyrae or Ludwig, he has yet to secure an exclusive deal.
Hence, Kick’s entry into the streaming market and its offer of contracts to streamers has reignited the speculation surrounding Dr Disrespect. The Two-Time himself has actively contributed to the rumors, dropping hints about a significant and expensive renovation for his “arena.”
Dr Disrespect’s Contract Demands and Kick’s Genuine Interest
Furthermore, in light of xQc’s reported groundbreaking $100 million deal with a Stake-backed platform, Dr Disrespect has expressed his desire for half of that amount to make the move. Unsurprisingly, Kick has shown genuine interest in acquiring the services of the esteemed streamer.
Kick CEO Addresses Dr Disrespect’s Contract Demands
Timestamp of 31:58
During an interview conducted by Jake Lucky, Kick CEO Ed Craven openly addressed the topic of bringing Dr Disrespect to the platform. Craven shared his long-standing admiration for Dr Disrespect, emphasizing his appreciation for numerous other talented streamers. He expressed his enthusiasm for collaborating with exceptional individuals, including Dr Disrespect.
Craven revealed, “Dr Disrespect is someone we would love to collaborate with. We are currently in discussions with his team, as we strive to maintain open lines of communication with most individuals. Our goal is to collaborate with as many talented streamers as possible, making extraordinary things happen.”
Kick’s Commitment: Recognizing Streamers’ Worth
Additionally, Craven underscored Kick’s commitment to providing streamers with the recognition and compensation they deserve. However, he refrained from directly addressing Dr Disrespect’s staggering demand of $50 million.
Conclusion
With all the ongoing discussions and interests at play, it wouldn’t be surprising if we witness the Two-Time champion donning the green and black of Kick in the near future. Keep an eye out for further updates on this potential move.
Maximize your Black Ops 6 rewards—Create highlights from your best gameplay with with Eklipse
Eklipse help streamer improve their social media presence with AI highlights that clip your Twitch / Kick streams automatically & converts them to TikTok / Reels / Shorts
In a recent interview, Twitch CEO Dan Clancy addresses the potential financial impact of the rival streaming platform, Kick, on Twitch. This article aims to delve into Clancy’s clarifications and shed light on the ongoing debate.
Kick, a gaming and live streaming platform has been gaining significant traction lately, attracting a growing number of content creators who are switching from Twitch. Prominent personalities such as ‘xQc’ and ‘Amouranth’ have already joined Kick, with many others following suit.
The Generous Revenue Split on Kick
A major factor driving content creators to Kick is the platform’s incredibly generous revenue split. Unlike Twitch, which takes a 50% cut, Kick offers streamers a remarkable 95% share of their earnings. This significant difference raises questions about Kick’s impact on Twitch’s revenue, particularly considering its relationship with Amazon’s services.
Addressing the Claims
So, in short, Kick is subsidizing Twitch by paying to use the Twitch video system via AWS. I mean, yes, I too think IVS is the best video system for this use case, but paying ~8-10x cost is not a sustainable growth plan.
To provide clarity on the matter, Twitch CEO Dan Clancy participated in an interview with Jake Lucky. During a live stream on Clancy’s Twitch account, Lucky directly asked about that. He ask about the financial benefits of Kick for Twitch, considering Amazon’s acquisition of Twitch in 2014.
This discussion was sparked by a former Amazon engineer’s claim. On April 11th, former Amazon engineer in his Twitter @cyrusphall claims that Kick was “subsidizing” Twitch. What he means by subsidizing is that Kick paying for their streaming service through Amazon.
Contrary to the claims, CEO Dan Clancy refuted the notion that Kick financially benefits Twitch. When asked the question, Clancy confidently stated, “The simple answer is it doesn’t make Twitch money.”
He further clarified that AWS, the Amazon-owned web service, is not directly associated with Twitch but rather a service offered by Amazon. Clancy explained that Kick currently utilizes the Interactive Video Service (IVS), derived from Twitch, and this practice aligns with AWS’s approach across all business lines, promoting healthy competition.
Laying the Debate to Rest
With Clancy’s clarification, the debate surrounding Kick’s financial impact on Twitch can be put to rest, at least for now. Kick streamers can now have peace of mind, knowing that their revenue does not directly support any rival platforms.
Conclusion
Twitch CEO Dan Clancy’s interview provides valuable insights into the relationship between Kick, Twitch, and Amazon. His clarification dissipates the doubts surrounding Kick’s impact on Twitch’s revenue. As the streaming landscape continues to evolve, content creators have a wider array of platforms to choose from, each offering unique benefits and revenue models.
Maximize your Black Ops 6 rewards—Create highlights from your best gameplay with with Eklipse
Eklipse help streamer improve their social media presence with AI highlights that clip your Twitch / Kick streams automatically & converts them to TikTok / Reels / Shorts
How did Quackity become so popular and wealthy? What is Quackity net worth? How old is he? Is he married? Does he have any siblings?
Quackity, known as the funniest member of the Dream SMP team, is now a popular streamer on YouTube and Twitch. He shares various content on his YouTube channel, from gameplays to talent shows.
Quackity is one of the most popular gaming YouTubers in the world, with over 25 million subscribers. He is also a popular Twitch streamer, with over 10 million followers. Quackity’s popularity has made him a wealthy man, with a net worth estimated at over $10 million.
In this article, we’ll cover his personal life, career highlights, and how much money he makes from his channels and streams. We’ll also estimate Quackity’s net worth. Let’s get started!
Quackity has made a good amount of money throughout his career as a content creator, gaining popularity on YouTube and Twitch. Through ad revenue, donations, and sponsorships, Quackity’s estimated net worth is $1.5 million.
1. Twitch
Twitch streamers earn money from ads, bits, and subscriptions. Recently, Quackity hasn’t been very active on the platform, streaming only 6.9 hours in the last three months (according to Twitch Tracker). Due to Twitch updating its ad revenue program in February, it’s difficult to estimate how much he earns from ads.
While we can’t estimate his earnings from ads and bits, we can assume his earnings from member subscriptions. According to Twitch Tracker, Quackity has 1,845 active subscribers as of April 2022.
Based on this information, we can assume that his channel makes approximately $9.2k per month if all his subscribers are on Tier 1, which costs $4.99 each. However, since Twitch takes half of that amount, Quackity receives at least $4.6k for his videos. It could be higher though. Quackity is considered one of the top streamers on the platform, so the revenue split might be 70/30 instead of 50/50, and he could be earning $6.5k per month.
Additionally, there are higher subscription tiers available, and his subscriber count may increase again in the future. His highest number of active subscribers was 42,000.
It’s worth mentioning that according to a leak in 2021, Quackity ranked #73 among the highest-paid Twitch streamers between August 2018 and September of the previous year. He reportedly earned $1,065,157.18 during that time.
2. YouTube
According to Social Blade, Quackity earns between $725 and $11.6k per month, or $8.7k to $139.3k per year, from his main channel.
Meanwhile, his second most-subscribed channel, QuackiTwo, generates between $818 and $13.1k per month, or $9.8k to $157.1k per year.
3. Merchandise
Quackity also has a merchandise store cqualled By Quackity (also known as Planet Duck), where he sells various items. Currently, the store can only be accessed by entering a password.
Quackity Personal Life
where does quackity live
Quackity is known for his funny game commentary, server raids, and Discord Got Talent. He also organizes painting and photoshop competitions on his Discord server.
He’s part of the Dream SMP and played a significant role during the L’Manberg Presidential Elections as vice president.
Quackity has started trending hashtags and events on Twitter, like the Animal Jam raid in 2018 with over 52,000 players.
Although Quackity’s upload schedule isn’t consistent, his viewers eagerly await each new video, which often gets millions of views.
Not much is known about Quackity’s personal life. He’s from Mexico, currently living in Los Angeles, California. He visits Mexico occasionally while creating content. He speaks both Spanish and English fluently and has a Spanish-language YouTube channel.
Quackity keeps his family and relationships private, likely to protect their privacy. He mentioned being in law school, which limits his video uploads. He focuses on school or plans for lore and big projects on his channel when not uploading videos.
Quackity started making YouTube channels and uploading videos when he was very young. One of his oldest channels, DjYeroc123, is still available on YouTube. He began uploading videos about the game ToonTown in 2012, and in 2013, he created the channel that is now known as Quackity. He has uploaded various content since then, including videos about Roblox and Minecraft. He briefly returned to ToonTown in June 2021.
Quackity is famous for organizing raids on popular games. As a well-known Twitch streamer, he could gather thousands of players to crash the servers of these games. He organized raids on games like Roblox, Animal Jam, Habbo, and Club Penguin Island. He usually does this to send a message to the developers or protest something about the game. For example, he organized the Roblox Forum raid because the moderators had strict rules. The Animal Jam raid protested the game collecting money from children.
Quackity has faced bans on platforms like Twitter and Discord, but he eventually regained control of his Discord server.
In August 2020, Quackity joined the Dream SMP server, a Minecraft server created by the YouTuber Dream and his friends. He has become one of the most prominent members of the server and has played different characters. Quackity also won the MC Championship 15 with his team, Red Rabbits, alongside Dream, Sapnap, and Michaelmcchill.
Quackity plays various games, including Minecraft, Roblox, Among Us, Habbo, and Animal Crossing: New Horizons. He also enjoys playing The Sims 4, Outlast, Grand Theft Auto, Five Nights at Freddy’s, American Truck Simulator, Animal Jam, and Club Penguin.
Conclusion
Quackity has made a name for himself as a content creator on both Twitch and YouTube, earning a significant amount of money through ad revenue, sponsorships, and donations. He’s known for his server raids and game commentary, and he has become a prominent member of the Dream SMP. Although he keeps his personal life private, his viewers eagerly anticipate each new video he shares.
Want to be a streamer like Quackity?
Then you need Eklipse, the best tool for making highlights from streams!
Eklipse is a state-of-the-art AI tool that automatically generates highlights from your streams, so you can focus on gaming and let Eklipse take care of the rest.
With Eklipse, you can create amazing highlight reels of your best gameplay moments in minutes. Eklipse’s AI engine automatically detects the most exciting and funny moments in your streams, and it edits them together into a shareable video.
Maximize your Black Ops 6 rewards—Create highlights from your best gameplay with with Eklipse
Eklipse help streamer improve their social media presence with AI highlights that clip your Twitch / Kick streams automatically & converts them to TikTok / Reels / Shorts
Many people are interested in knowing how to view YouTube subscribers, especially YouTube creators. By knowing the information about the number of subscribers to your own or someone else’s YouTube account, you can understand the level of awareness people have towards the content being created.
In this article, we will discuss how to view YouTube subscribers and provide a clear guide on the process.
To view a complete list of subscribers to your channel, it is quite easy. You can do this through the YouTube Studio menu available on YouTube.
YouTube Studio is an analytics feature developed by YouTube LLC that displays the latest data and information about the progress of your YouTube account. You can access this feature directly through the website or by downloading the YouTube Studio app from the Google Play Store.
Here are the steps to view subscribers on YouTube channels:
Click on the profile icon in the top right corner.
Select “YouTube Studio” from the menu.
When you are on the YouTube Studio dashboard, scroll down and click on “See All” in the “Recent Subscribers” section.
Once you do that, you will be able to see how many new subscribers you have and who they are.
2. Viewing YouTube Subscribers on Mobile
Not only can you view the number of subscribers on YouTube by creating trending game content in 2023, but you can also check subscriber counts on YouTube accounts through your mobile device. Here’s how:
Open the browser on your mobile device and log in to YouTube.
Click on the profile icon in the top right corner and select “Desktop.”
Choose “YouTube Studio” from the menu.
Scroll down, and you will be able to see the “Recent Subscribers” section.
Now, what if you want to view subscribers directly from the YouTube app? It’s pretty easy.
Just follow step 2 mentioned above, and then select “YouTube Studio” from the menu. If you haven’t downloaded it yet, you will be prompted to download the app first.
Please note that the number of subscribers you can see is limited to the latest 100 subscribers. You can sort them based on the period they joined your YouTube channel, including the last seven days, 28 days, 90 days, and even the past 365 days.
How to Hide YouTube Subscribers?
Source: Vecteezy
Recently, you might have noticed YouTube accounts where the subscriber count is hidden. This means that below their channel name, the subscriber count does not appear.
Hiding YouTube subscribers can be done, as YouTube has updated its policy to allow creators to hide their subscriber counts. If you want to hide the number of subscribers, you can follow the steps mentioned below.
Visit the “YouTube Studio” menu on YouTube.
Click on “Dashboard” and then “Settings.” Scroll down.
Look for the “Channel” section in the “Settings.”
Finally, check the box next to “Display the number of people subscribed to my channel” under the “Subscriber count” menu.
Done.
Although the subscriber count is hidden, both creators and viewers can still see the number of subscribers to your channel. If you want to view hidden YouTube subscribers, you can use third-party tools. You can copy and paste the account name you want to check and visit the website NoxInfluencer.com. Enter the channel name in the “Search” menu, and the website will display information such as the number of subscribers, uploaded videos, and viewers.
Conclusion
So, it’s easy to find out how to view YouTube subscribers. You can check subscriber data via desktop and mobile devices. If you prefer not to display your subscriber count, you can hide it using the methods described above.
Maximize your Black Ops 6 rewards—Create highlights from your best gameplay with with Eklipse
Eklipse help streamer improve their social media presence with AI highlights that clip your Twitch / Kick streams automatically & converts them to TikTok / Reels / Shorts
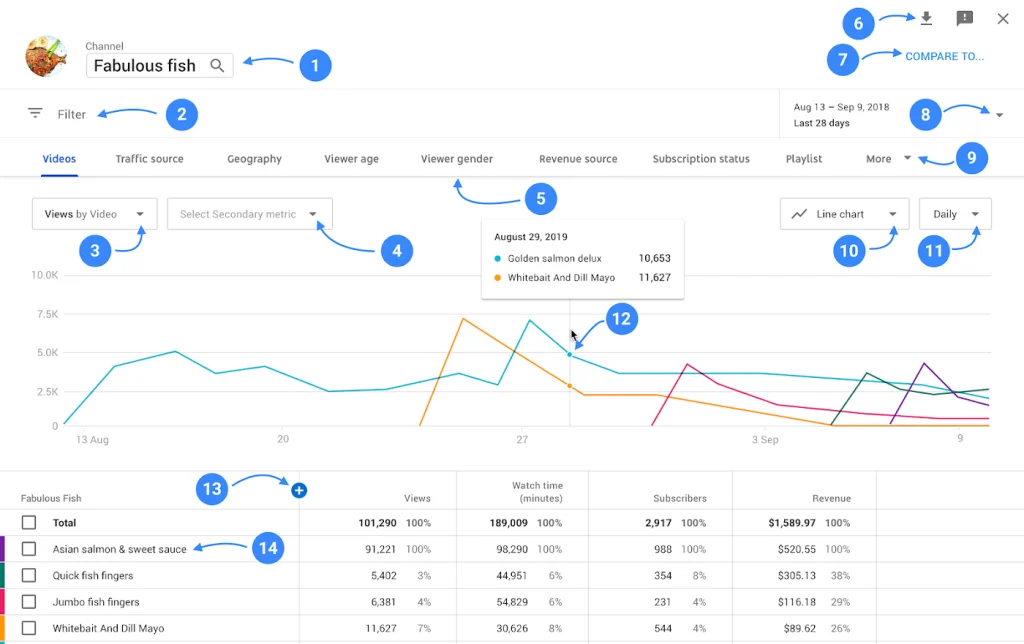
Understanding YouTube Analytics is crucial for content creators. It’s not just about reading the data, but also knowing how to generate new breakthroughs from the insights provided by the platform.
The data presented in YouTube Analytics can help you develop your channel. You can measure and even project strategies to accelerate the growth of your channel.
So, it’s not just about playing the most popular games on YouTube in 2023. In order to align the quality of your content with what the market desires, it’s essential to understand how to interpret data in YouTube Analytics.
If you’re confused or completely unfamiliar with this analytical service, let’s dive into the guide below.
YouTube Analytics is a tool you can use to understand and measure the performance of the video content you upload on YouTube. This measurement tool provides various data that can be used as benchmarks for success.
YouTube showcases insights regarding the progress of your content. Furthermore, you can also determine the effectiveness of the content you produce.
Consequently, you can identify which content receives more views, is engaging, and is liked by people. This way, if you want to create new content in a given period, you won’t repeat the same mistakes made in the previous period.
With the comprehensive data provided by YouTube, you can even determine how much of your created video content is being watched by viewers. Mastering YouTube Analytics Average duration can greatly assist you in tweaking your material and delivering it in a way that keeps viewers engaged with your channel.
YouTube Analytics Metrics
At this point, you’re probably wondering about the metrics or indicators YouTube uses to analyze creators’ videos, right? Similar to how Google Analytics provides data for websites, the important metrics used in YouTube Analytics are as follows:
1. Watch time
Watch time is a crucial metric that you must pay attention to. With this metric, you can gather information about the duration viewers spend watching your videos.
According to HubSpot, watch time is the amount of time viewers spend watching a creator’s videos.
If your watch time is high, YouTube will rank your channel at the top of the search results page. This metric can be found in the Overview menu along with other submetrics, such as Views and Subscribers.
2. Real-time
From its name, you probably already have an idea of how this metric works, right? Yes, the real-time metric allows you to see the number of people who are currently viewing or watching your content.
For example, if you open the Real-time metric and find 500,000 active viewers, it means that at that moment, 500,000 people are watching your content.
However, not all videos display the Real-time metric. Only videos published within the last 48 hours or two days will show Real-time data.
3. Reach
Another advantage of YouTube Analytics is that it helps you understand how many people have been exposed to and clicked on your video content. You can measure this through the Reach metric.
Through the Reach metric, you can discover Impressions, Click-through Rate (CTR), and Unique Viewers. By using the Reach submetric called Impression, you can see how many times your video appeared in front of viewers. However, it only reflects appearances and not whether the video was actually played or not.
On the other hand, CTR helps you calculate the percentage of impressions that turned into views. This means that if viewers see the thumbnail (YouTube poster), your CTR will increase.
Lastly, Unique Viewers allow you to see the number of people who watched the video within a specific timeframe, before the video’s data is available a few hours after it was uploaded.
4. Engagement
Engagement is a YouTube Analytics metric that reveals data on viewer participation and responses to your content. Through this metric, you can see the number of likes, comments, and shares.
Apart from these four metrics, you can also explore other metrics such as Audience, Revenue, Playlist Metrics, Device Type, and Interaction Metrics.
How to Analyze Metrics in YouTube Analytics?
Source: HubSpot
Now that you understand the importance of YouTube Analytics and its metrics, it’s time to analyze your video performance. The process is straightforward. While reading this article, you can also practice it simultaneously. Here’s how to analyze YouTube Analytics:
Log in to YouTube.
Click on the “Profile” menu located in the upper right corner, then select YouTube Studio.
Choose the “Analytics” menu. YouTube will then display all the data you need.
Select the desired metric.
If you want to learn about your audience’s background and its growth, you can check the Audience menu. If you’re simply interested in engagement, go to Overview >> Engagement.
Conclusion
Easy, right? Going forward, you’ll be able to read YouTube Analytics and create reports on the progress of your content. These reports will be helpful in increasing the viewership of your content.
Maximize your Black Ops 6 rewards—Create highlights from your best gameplay with with Eklipse
Eklipse help streamer improve their social media presence with AI highlights that clip your Twitch / Kick streams automatically & converts them to TikTok / Reels / Shorts
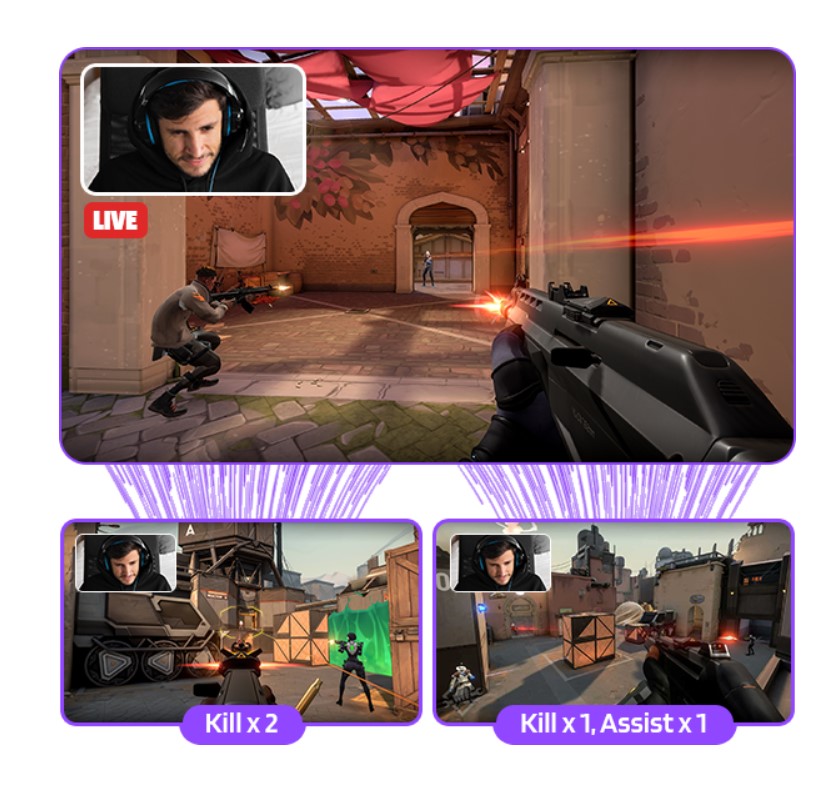
Kick streaming platform has become a popular medium for content creators to engage with their audience.
One effective way to maximize your reach and impact is by creating engaging stream highlights. These carefully curated moments can captivate viewers, attract new audiences, and leave a lasting impression.
In this article, we will provide you with five essential tips to help you create remarkable Kick stream highlights that will leave your viewers wanting more.
1. Choose the Right Moments – or Simply Use an AI Tool like Eklipse
The first tips on creating Kick stream highlights is knowing the right moment to share.
When selecting moments to highlight, consider what will resonate with your audience. Look for instances that are exciting, entertaining, or emotionally engaging. This could be an impressive play, a hilarious interaction, or a heartwarming moment with your chat.
While manually selecting the most compelling moments can have a powerful impact, it can be time-consuming and require significant effort.
If you’re looking for a faster process, there’s an AI tool that can assist you! Consider trying Eklipse, an AI highlight generator that automatically clips your stream.
2. Keep it Short and Sweet – Important Tips on Creating Kick Stream Highlights
In the fast-paced world of online content, attention spans are limited. It’s crucial to keep your highlights concise and to the point.
Aim for a duration of a few minutes, ensuring that each highlight maintains a sense of excitement throughout. By keeping them short and sweet, you’ll hold your viewers’ attention and increase the likelihood of them watching the highlights in their entirety.
3. Add Some Flair
To make your highlights visually appealing and engaging, consider adding some flair. Incorporate text overlays, music, or other effects that complement the moment you are highlighting.
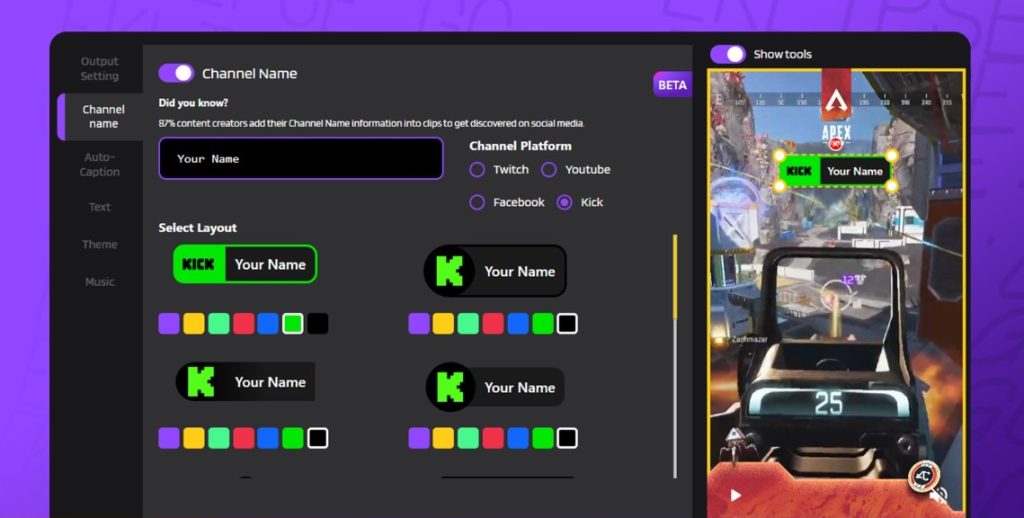
These creative additions will enhance the viewing experience, making your highlights more memorable and shareable among your audience. One of the good example of it is by adding channel name sticker.
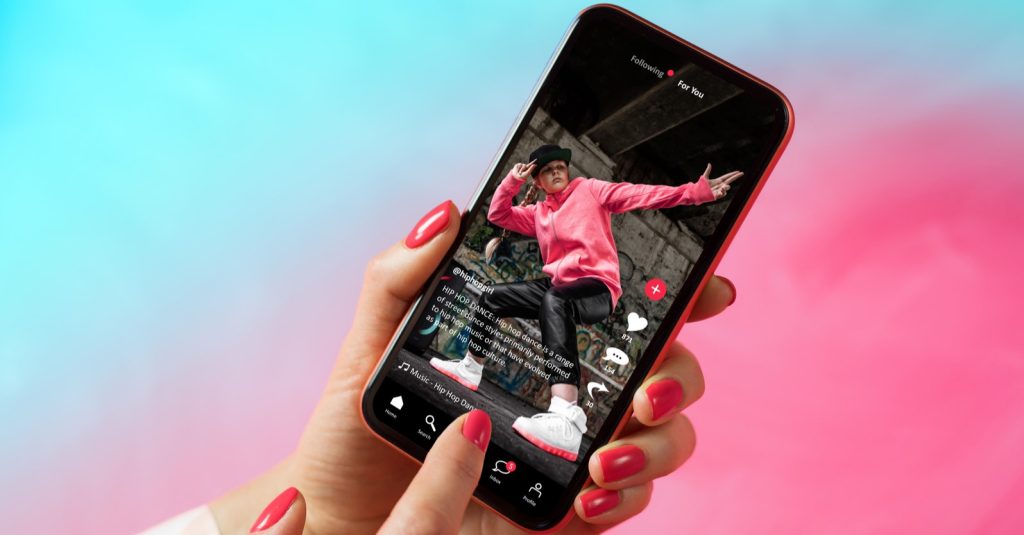
4. Promote Your Highlights – Convert Kick Stream to TikTok
Once you’ve crafted your stream highlights, it’s essential to promote them effectively. So the third tips on creating Kick stream highlights is by editing your highlights so you can share them on social media.
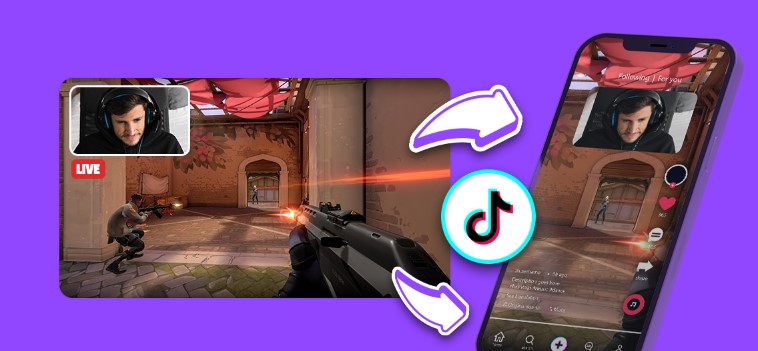
By doing so, you increase the chances of attracting new viewers and expanding the reach of your content. One effective method to consider is converting your Kick stream highlights into a TikTok. Given that vertical content is currently trending, it’s worth giving it a try.
Not sure how to proceed? Don’t worry! Check out our blog post on how to edit your Kick stream for TikTok. This article provides step-by-step instructions on converting your stream highlights into a format suitable for TikTok and similar platforms.
5. Don’t Be Afraid to Experiment
Highlight creation is an art form, and there is no one-size-fits-all approach. Embrace experimentation and explore different styles to discover what resonates best with your audience.
Try varying editing techniques, incorporate different effects, or experiment with unique storytelling approaches. By constantly evolving and adapting your highlight creation process, you’ll find a style that aligns with your content and captivates your viewers.
Conclusion
By implementing these five essential tips and incorporating the additional recommendations, you’ll be well-equipped to create captivating Kick stream highlights.
Remember, the key lies in choosing the right moments, keeping the highlights concise, adding creative elements, promoting effectively, and embracing experimentation. With each highlights you create, you’ll enhance your connection with viewers, expand your reach, and leave a lasting impact in the realm of Kick streaming.
Maximize your Black Ops 6 rewards—Create highlights from your best gameplay with with Eklipse
Eklipse help streamer improve their social media presence with AI highlights that clip your Twitch / Kick streams automatically & converts them to TikTok / Reels / Shorts