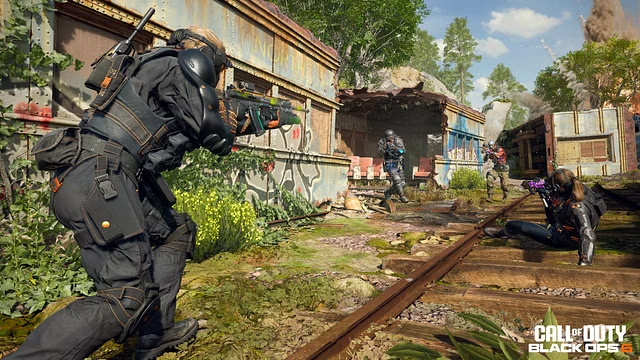
In Call of Duty: Black Ops 6, mastering movement mechanics is crucial to achieving an advantage in multiplayer. Knowing how to move effectively can significantly boost your survival, enabling you to outwit opponents and seize control of engagements.
This guide explores core movement skills, key setting tweaks, and strategic insights designed to elevate your performance and help you take charge on the battlefield.

Introduction to the Meteor Easter Egg
Understanding movement mechanics is fundamental to executing advanced strategies and completing complex objectives within the game. Whether you’re navigating tight corridors, engaging in close-quarters combat, or maneuvering through open maps, your movement proficiency can significantly influence your performance and overall success in matches.
The Basics of Movement
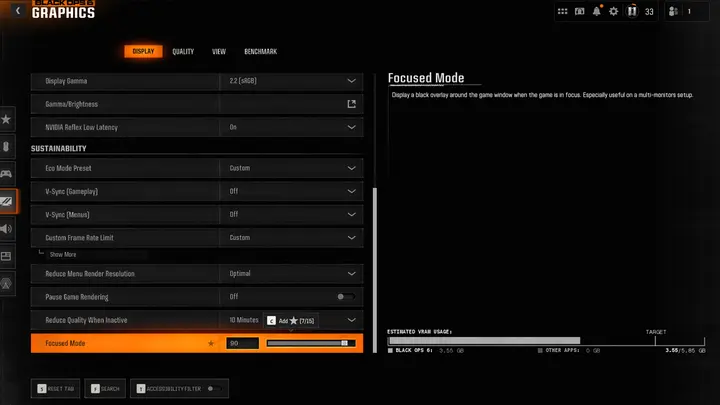
Sensitivity Settings
Adjusting your sensitivity settings is the first step towards customizing your movement for optimal performance. Sensitivity dictates how quickly your character responds to your inputs, affecting both aiming precision and movement fluidity.
How to Adjust Sensitivity:
- Navigate to Settings: Go to the main menu and select Settings.
- Select Controls: Under the Controls tab, locate the Sensitivity slider.
- Adjust Accordingly: Modify the slider to find a balance that suits your playstyle—higher sensitivity for quicker movements and lower sensitivity for more precise aiming.
Tip: Experiment with different sensitivity levels in training modes to determine what feels most comfortable and effective for you.
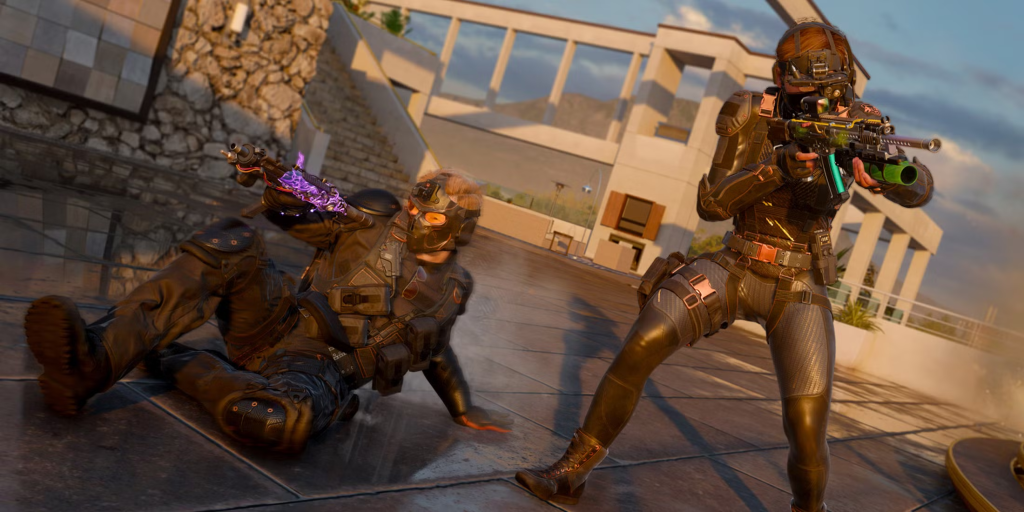
Sliding and Diving
Sliding and diving are essential techniques for maintaining momentum and evading enemy fire during fast-paced encounters.
Executing a Slide:
- Sprint Forward: Start by sprinting in the direction you intend to move.
- Initiate Slide: Press the crouch button while sprinting to perform a slide.
- Maintain Control: Use directional inputs to steer during the slide, allowing you to quickly change direction or drop into cover.
Executing a Dive:
- Sprint and Jump: While sprinting, press and hold the jump button to dive forward.
- Cover Position: Dive into cover or behind obstacles to avoid incoming fire and reposition yourself advantageously.
Tip: Combine sliding and diving with weapon switching to surprise enemies and gain the upper hand in engagements.
Swimming
Swimming mechanics add another layer of movement dynamics, especially in maps with water elements.
Tips for Effective Swimming:
- Stamina Management: Monitor your stamina to avoid running out while in water, which can leave you vulnerable.
- Use Vertical Movement: Swim vertically to gain higher ground or access hidden areas, providing tactical advantages over opponents.
Tip: Practice swimming in different map environments to become familiar with underwater navigation and potential ambush spots.
Omnimovement
Omnimovement introduces enhanced mobility options, allowing for seamless transitions between different movement states.
How to Utilize Omnimovement:
- Combine Movements: Integrate sliding into jumping or diving to maintain momentum and fluidity.
- Chain Movements: Practice chaining multiple movement actions to navigate the battlefield efficiently and unpredictably.
Tip: Use Omnimovement to surprise enemies by rapidly changing your movement patterns, making it harder for them to anticipate your actions.
Vertical Movement
Mastering vertical movement is crucial for accessing advantageous positions and outflanking opponents.
Techniques for Vertical Movement:
- Climbing: Approach climbable surfaces and press the jump button to ascend.
- Mantling: Use mantling to quickly scale obstacles and reach higher vantage points.
- Descending: Navigate vertical drops carefully to maintain control and avoid falling into traps.
Tip: Always be aware of your surroundings when performing vertical movements to prevent getting caught off guard by enemies.
Intelligent Movement
Intelligent mastering movement involves strategic and purposeful maneuvering to gain tactical advantages during combat.
Strategies for Intelligent Movement:
- Predict Enemy Positions: Anticipate where enemies might appear and position yourself accordingly.
- Use Cover Effectively: Continuously move from cover to cover, minimizing exposure to enemy fire.
- Adapt to Situations: Adjust your movement based on the flow of the battle, whether it requires aggressive pushes or cautious retreats.
Tip: Stay unpredictable by varying your movement patterns, making it difficult for enemies to track and counter your actions.
Corner Slice
Corner slicing is a technique used to peek around corners safely while minimizing exposure to enemy fire.
How to Perform a Corner Slice:
- Approach the Corner: Move towards a corner where you expect enemy presence.
- Initiate Slide: Perform a slide to quickly move around the corner.
- Aim and Fire: As you slice the corner, aim and engage enemies with precision.
Tip: Combine corner slicing with quick weapon swaps to maintain offensive pressure while staying protected.
Tips for Maximizing Movement Performance
- Practice Consistently: Regularly practice movement techniques in training modes to build muscle memory and enhance fluidity.
- Customize Controls: Tailor your control settings to match your preferred movement style, ensuring comfort and efficiency.
- Stay Aware: Always keep an eye on your surroundings to react swiftly to changing combat scenarios.
- Coordinate with Team: Communicate and coordinate movements with your team to execute strategies effectively and cover each other’s blind spots.
- Analyze Gameplay: Review your gameplay footage to identify areas for improvement in your movement and overall tactics.
Final Thoughts
To excel in Call of Duty: Black Ops 6’s multiplayer, mastering movement is key to gaining an upper hand. By leveraging diverse movement techniques—like sliding, diving, swimming, and advanced omnidirectional controls—you can boost your agility, survival chances, and tactical edge.
Regular practice, personalized settings, and situational strategy adjustments are essential to make the most of these mechanics and elevate your in-game performance.
Click here to join our Discord and win the prize!
Ready to showcase your improved gameplay? Eklipse offers advanced video editing tools to help you create professional-quality highlights and share your Black Ops 6 triumphs with the gaming community. Visit Eklipse today and take your content to the next level!