Dreaming of sharing your epic gameplay moments and building a community around your passion for gaming? Look no further than Twitch!
Twitch is a powerhouse live streaming platform that lets you broadcast your console adventures directly to the world, chat with viewers in real time, and potentially turn your hobby into a career.
In this comprehensive guide, we’ll break down everything you need to know about streaming console games on Twitch. We’ll walk you through the step-by-step setup process, provide valuable tips to enhance your stream quality and share best practices to captivate your audience and grow your viewership.
Adjust your settings to your liking, including chat, camera, and messages.
Create a title for your stream.
Finally, select “Start Broadcasting” to go live on Twitch.
How to Stream to Twitch From your Xbox One
Source: Dave Johnson via Business Insider
Download the Twitch app on your Xbox One.
Open the app and log in to your account.
Enter the 6-digit code provided to activate the app.
Make sure the “Share content made using Kinect” option is set to “Allow”.
In Settings under Preferences, check that “Allow broadcasts and Game DVR uploads” is enabled.
Adjust your settings as desired, including microphone, camera, and chat options.
Choose a name for your broadcast in the Broadcast Title window, and select the game you want to stream.
Finally, click on “Start Broadcast” to begin streaming live on Twitch.
How to Stream PS4 or Xbox One Using via Capture Card
Source: MakeUseOf
Turn on your console (PS4 or Xbox One) and go to “Settings” and then “System.”
For PS4 Only: Turn off “Enable HDCP.”
Download and install Elgato Game Capture HD before connecting the capture card.
Connect your console to the “HDMI In” port on the capture card.
Connect the “HDMI Out” port on the capture card to your TV or monitor.
Use a USB cable to connect the capture card to your PC.
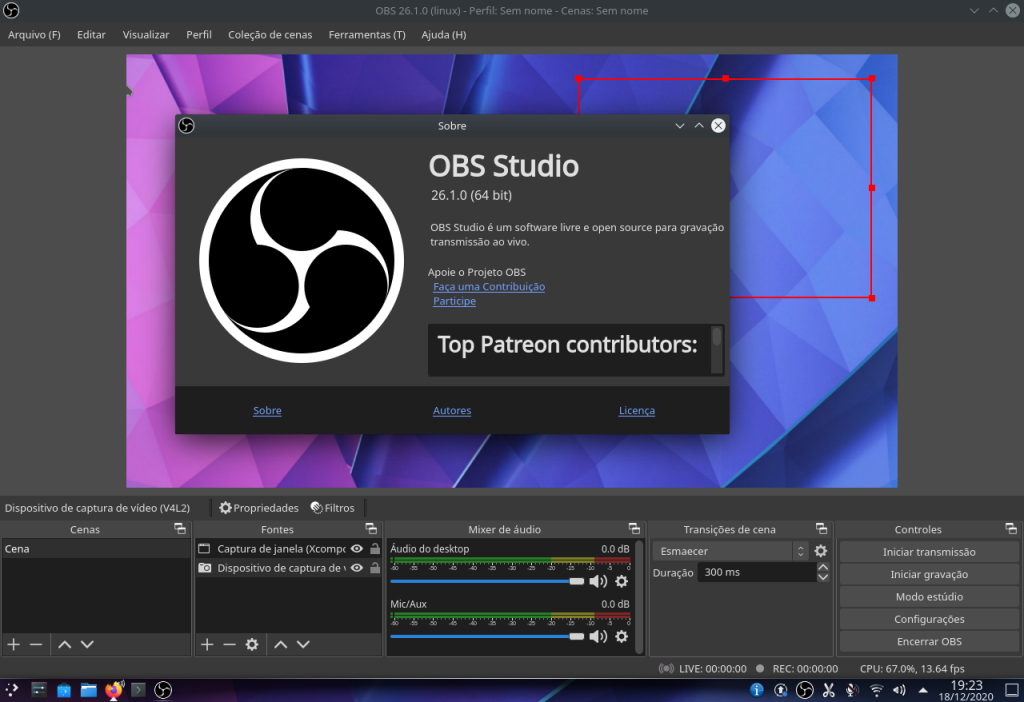
Launch OBS Studio on your PC.
Set the source for the PS4 or Xbox One gameplay in OBS.
Once it appears in OBS’s encoder, you can start streaming the games to Twitch or any other streaming platform you prefer.
Extra Tips After Stream Console Games so You Can Grow Your Twitch Channel
Source: https://motivizer.eu/
Stream console games are more than just hitting the “Start Broadcasting” button, especially if you want to build a successful channel.
Here are some extra tips to enhance your console game streaming experience on Twitch and help you build a community of loyal viewers.
Engaging with Your Audience: Interact with your viewers in the chat, add interactive elements like polls or Q&A sessions, and show appreciation for their support.
Consistency and Scheduling: Develop a schedule that works for you, and inform viewers of upcoming streams and updates on social media.
Collaborating with Other Streamers: Network with other streamers, participate in co-streams, and host/raid other channels to build relationships and reach new viewers.
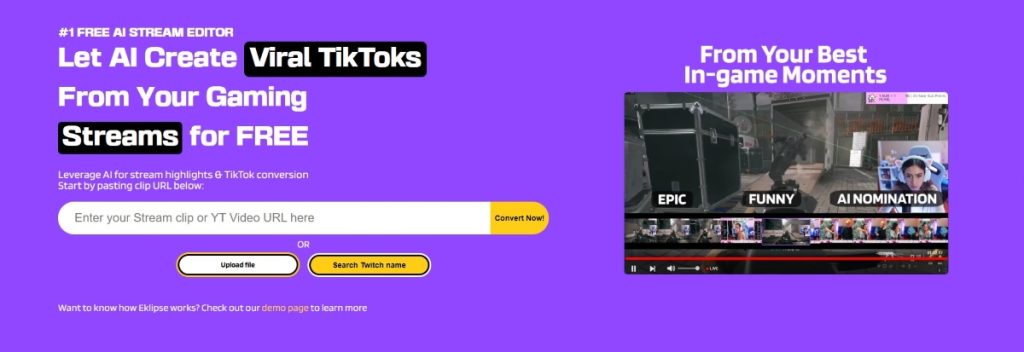
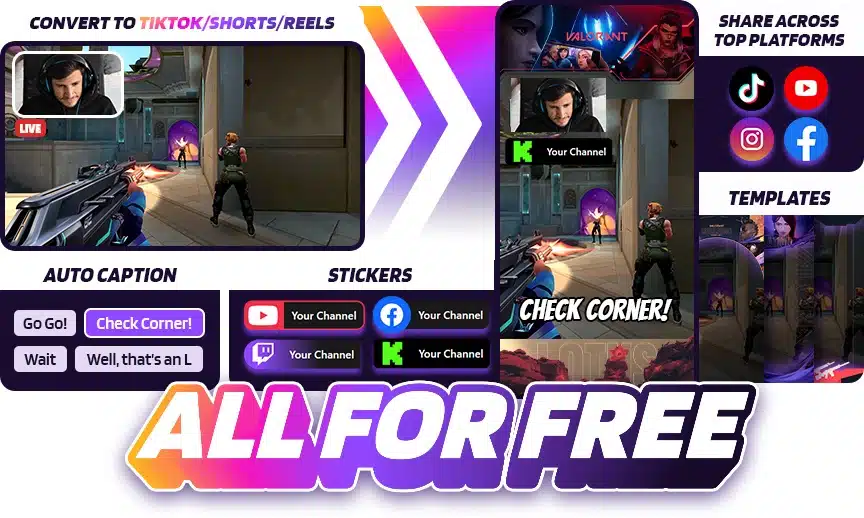
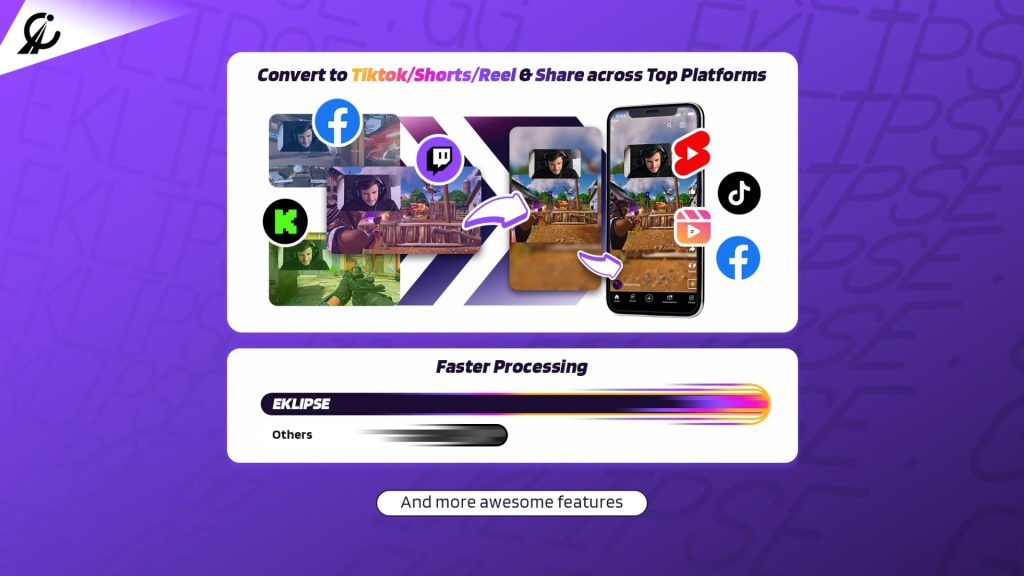
Promote your Content on Social Media: Use tools like Eklipse to generate clips with AI from your stream and convert Twitch clips to TikTok for free.
Improving Your On-Camera Presence: Add humor, storytelling, or personal anecdotes to your commentary, and consider adding overlays, music, or sound effects to make your stream visually appealing.
Final Thoughts
That’s the foundation you need to launch your Twitch console streaming journey! The good news? Forget the pressure of top-tier equipment. You can start with the basics and upgrade as you grow and refine your stream. This cost-effective approach allows you to experiment, discover your niche, and build your audience without a hefty upfront investment.
Want to grow your Twitch audience easily? Look no further than Eklipse!
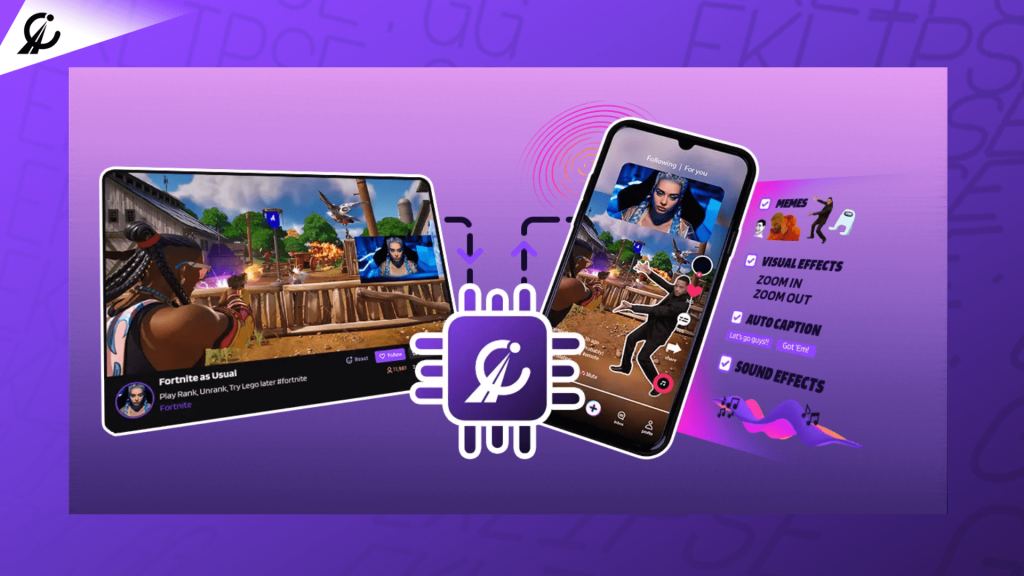
Experience the magic of our AI-powered tool, seamlessly transforming your Twitch LIVE moments into captivating TikTok/Short/Reels content with just a single click!Sign up for free at Eklipse.gg and dive into the world of effortlessly creating gaming video clips like never before.
Dreaming of building a thriving console streaming community? You’ve come to the right place! Console streaming offers a unique path to connect with fellow gamers, showcase your skills, and potentially even turn your passion into a career.
However, navigating the console streaming landscape can feel daunting. Fear not, aspiring streamer! This detailed guide equips you with all the essential tools and strategies to cultivate a loyal audience and elevate your console streams to new heights.
While you might not have the same level of customization as PC streamers, optimizing your console setup is crucial for a professional broadcast. Here’s what you’ll need:
High-Quality Capture Card: Ensure smooth and seamless gameplay footage by investing in a reliable capture card. This bridges the gap between your console and streaming platform.
Crystal Clear Microphone: Clear audio is vital for effective communication with your viewers. Look for a microphone that minimizes background noise and delivers crisp voice capture.
Engaging Webcam (Optional): A webcam personalizes your stream, allowing viewers to connect with you on a deeper level.
Finding Your Niche in the Gaming Galaxy
The console gaming world is vast! To stand out, carve out your niche. Here are some ideas:
Genre Mastery: Become an expert in a specific genre, like strategy games or immersive RPGs.
Speedrunning Prowess: Challenge yourself and viewers with lightning-fast playthroughs.
Competitive Domination: Showcase your skills in online multiplayer games.
Unique Commentary: Offer insightful or humorous commentary while playing.
Consistency is Key: Building a Loyal Viewership
Treat your stream like a professional appointment. Establish a consistent schedule and stick to it. This allows viewers to know when to expect your content and plan their viewing accordingly. Consider factors like your target audience’s time zones when setting your schedule.
Engaging Your Audience: Fostering a Community
Your viewers are the lifeblood of your stream. Here’s how to create a welcoming and interactive environment:
Respond to Comments: Acknowledge viewers’ messages and questions, fostering a sense of community.
Host Interactive Events: Organize viewer games, challenges, or Q&A sessions to keep things exciting.
Embrace the Chat: Encourage conversation and discussions among viewers in the chat window.
Promoting Your Streams: Spreading the Word
Don’t be shy – promote your streams across various platforms! Here are some effective strategies:
Social Media Powerhouse: Utilize platforms like Twitter, Instagram, and Discord to connect with potential viewers and announce upcoming streams.
Community Collaboration: Network with other streamers in your niche. Consider co-streams or guest appearances to expand your reach.
SEO Optimization: Include relevant keywords in your stream titles and descriptions to improve searchability on streaming platforms.
Crafting Unique Content: Standing Out From the Crowd
Source: StreamScheme
Deliver exceptional content that keeps viewers engaged and coming back for more. Here are some ideas:
Themed Streams: Dedicate streams to specific games, genres, or challenges.
Creative Collaborations: Partner with other streamers for unique content.
Post-Stream Highlights: Edit and share the best moments from your streams on social media.
Optimizing Stream Quality: A Visual Feast
A visually appealing stream enhances the viewer experience. Here’s what to consider:
High-Resolution Streaming: Aim for a resolution that balances clarity and bandwidth limitations.
Smooth Frame Rate: Ensure smooth gameplay footage by maintaining a consistent frame rate.
Eye-Catching Stream Layout: Utilize overlays, alerts, and graphics to create a visually engaging stream layout.
Continuous Improvement: Learning From Your Audience
Never stop learning and evolving! Actively monitor your stream analytics to identify areas for improvement. Pay attention to metrics like viewer retention and chat engagement. Additionally, solicit feedback from your viewers through polls or questions during streams.
Stream Your Way to Success!
That’s the ultimate console streamer tips to follow this year. Remember that streaming from a console may be more challenging than other broadcasting methods, but it can be incredibly rewarding.
You can tap into various specialized fan bases of console-exclusive games. It just requires a bit more creative thinking to succeed, but the results can be remarkable!
Final Thoughts
Elevate your console streaming game with Eklipse, the ultimate AI video editing tool designed for streamers and content creators. Save a whopping 90% of your editing time and transform your streams into viral clips with just one click.
Sign up now at Eklipse.gg or click the button below and enjoy Eklipse’s exclusive feature for free. Happy streaming!
Ever dream of sharing your epic gaming moments with the world? Console streaming makes it possible! Whether you’re a seasoned pro or a controller newbie, broadcasting your gameplay can be a fantastic way to connect with viewers, showcase your skills, and build a community.
This guide dives into the world of console streaming, exploring two main approaches: using your console’s built-in capabilities and leveraging capture cards for a more advanced setup.
Both PlayStation 4 and Xbox One offer built-in apps like Twitch that allow you to broadcast directly. This is a fantastic option for beginners as it requires minimal setup:
Download the streaming app of your choice (e.g., Twitch) on your console.
Link your console account to the streaming platform.
Configure your stream settings, such as title and resolution (if available).
Hit that “go live” button and start sharing your gameplay!
The PlayStation 4 and Xbox One allow direct streaming through their respective Twitch apps. If you prefer this method, make sure to check out these detailed guides:
Easy to set up – minimal technical knowledge required.
No extra hardware is needed – use your existing console and controller.
Cons:
Limited customization options – you might not be able to add overlays or tweak stream quality as much.
Lower video quality compared to capture cards.
Capture Cards: Unleash Your Streaming Potential
For those who want more control and a more polished broadcast, capture cards offer a powerful solution. They act as an intermediary device, capturing your gameplay footage and sending it to your computer. Here, you can use streaming software like OBS to add a personal touch:
Connect your capture card to your console and computer following the manufacturer’s instructions.
Download and install streaming software like OBS on your computer.
Configure OBS to capture the video and audio feed from your capture card.
Add overlays, alerts, and other customizations to enhance your stream’s look and feel.
Start streaming your gameplay on your chosen platform (e.g., Twitch).
Pros:
Higher video quality for a more polished stream.
Extensive customization options – personalize your stream with overlays, alerts, and more.
Cons:
Requires additional investment in a capture card and potentially a new computer if yours isn’t powerful enough.
More complex setup process compared to direct console streaming.
If you choose to go with a capture card setup for console streaming, here are some guides for setting up streams with specific capture cards:
These guides provide step-by-step instructions tailored to each specific capture card’s functionality.
Finding the Perfect Setup: Consider These Pointers
Microphone: Regardless of your chosen method, using a microphone is highly recommended. It allows you to interact with your viewers and create a more engaging stream.
Audio Delay: Capture cards might introduce a slight audio delay. The provided guides (refer to the original article for links) will explain how to address this for a smooth audio experience.
Ready to Stream Like a Pro?
Console streaming can be an enriching experience for both gamers and their audience alike. By exploring various setups such as capture cards and direct console streaming methods, gamers have ample opportunities to share their gameplay from their game console seamlessly while engaging with viewers in real time through platforms like Twitch.
Understanding these setups’ nuances and considering audio synchronization will contribute positively to refining one’s console streaming experience.
In conclusion, choosing suitable hardware/software components can significantly impact one’s ability as a streamer; therefore understanding how they work together becomes imperative.
Final Thoughts
As a streamer, you know the importance of captivating your audience and keeping them engaged. But with hours of footage to sift through, creating highlight reels can be a time-consuming task. Eklipse, the AI-powered highlight generator, is here to revolutionize your streaming experience by automatically selecting and editing the best moments from your streams.
Eklipse’s cutting-edge AI algorithms intelligently scan your streams, identifying key moments of gameplay, hilarious bloopers, and chat interactions that will resonate with your viewers. It’s like having an expert editor at your fingertips, working tirelessly to curate the most exciting and engaging content from your streams.
Are you an avid console gamer passionate about sharing your gameplay with the world? The key to capturing the hearts of your viewers lies in the quality of your streams. High-quality editing can make your gaming content truly stand out.
AI editing tools use artificial intelligence to automatically detect highlights in your streams, trim clips, and add transitions. Some tools even allow adding text, music, and effects to your clips.
We’ll explore the top AI editing tools tailored to console gamers, offering insights, pricing details, features, and pros and cons. Are you ready to unlock the full potential of your gaming content?
Packed with AI-powered features, it’s a go-to choice for console gamers. Eklipse is an AI Tool that automatically generates highlights from your streams. It then can automatically convert your streams into highlight clips suitable for social media platforms like TikTok, Instagram Reels, and YouTube Shorts. You can promote your console streams easily and gain more viewers!
Not entirely relying on AI, you can also edit your streams more to your liking. Eklipse offers intuitive editing tools that allow you to effortlessly enhance your streams like trimming, transitions, and customizable overlays.
Whether you’re just starting your streaming adventure or you’re a seasoned pro looking to enhance your streams, Eklipse is the tool that can take you to the next level.
Key Features:
Automated clip creation
Highlight detection
Editing tools available; trimming, transitions, and overlays
Directly share to social media
Pros:
Easy-to-use interface for all skill levels.
AI-driven features improve stream quality.
Affordable premium plans.
Intuitive editing tools
Cons:
Some advanced features might require a learning curve.
Pricing: Eklipse offers a free basic version with premium plans starting at just $9.99 per month or $149.99 per year.
2.Streamlabs – Best All-in-One Streaming Suite
Source: Streamlabs
While primarily known for its streaming capabilities, it also offers built-in AI features for console gamers. Streamlabs allows you to easily customize and enhance your streams, making it perfect for streamers who want an all-in-one solution.
Key Features:
Customizable overlays
Widgets
Seamless integration with popular platforms, such as Kick and Twitch
Pros:
Free with optional purchases
Feature-rich, customizable overlays
Extensive support and community
Cons:
Advanced features may require additional setup
Pricing: Free with optional in-app purchases
3.Lightstream Studio – Best for Cloud-Based Streaming
Source: Lightstream Studio
Lightstream Studio is a cloud-based AI editing tool that provides console gamers with a user-friendly platform for enhancing their streams. With built-in overlays, graphics, and scene transitions, it’s perfect for making their content visually stunning.
Key Features:
Built-in overlays
Graphics and scene transitions
Remote control from mobile devices
Pros:
Easy to use and set up
Cloud-based, reducing strain on your system
Professionally designed overlays
Affordable pricing
Cons:
Limited free features
Pricing: Plans start at $8.25/month
4.Medal.tv – Best for Easy Highlights Capturing
Source: MSI
Medal.tv is a platform designed for gamers to capture and share their gaming highlights. It allows users to record gameplay with a simple hotkey and instantly share the clips online. The platform supports a wide range of games and is particularly popular for its ease of use and integration with social media.
Key Features:
Record, edit, and share their gaming clips directly
Basic editing features like trimming, sound addition, and text overlays
5. Overwolf – Best for In-Game Integration and Performance
Source: esportsbureau
Overwolf is a gaming companion that enhances your gameplay experience and streams. It offers a range of overlays, apps, and in-game tools, making it a good choice for gamers who want to create unique and engaging content.
Key Features:
In-game apps
Performance monitoring
Pros:
Free with optional in-app purchases
A rich collection of overlays and apps
In-game tools for stream enhancements
Community support
Cons:
Maybe resource-intensive on your system
Pricing: Free with optional in-app purchases
6. NVIDIA Broadcast – Best for High-Quality Live Streams
Source: nvidia.com
NVIDIA Broadcast is an application that enhances live streams and video calls with AI-powered audio and video effects. It’s designed for content creators who want to improve the production quality of their broadcasts.
Key Features:
Noise removal
Virtual background effects
Auto-framing
Eye contact correction
Pros:
Professional-level stream enhancements
Easy to set up
Integrates well with popular streaming software
Cons:
Requires an NVIDIA RTX GPU
Pricing: Free
7. Rewind.ai – Best for Content Creation
Source: rewind.ai
Rewind.ai is an app that captures your screen and audio to help you remember past activities. It’s designed to act as a personal search engine for your digital life, making it easier to recall information and actions.
But, this AI can also be a powerful tool for console streamers. You can create content without having to manually record your commentary. The app compresses, transcribes, encrypts, and stores data locally, which means streamers can easily recall specific moments from their streams. For instance, if you want to highlight a particular gameplay moment or a viewer interaction, Rewind.ai can help you find the exact time it happened.
Key Features:
Continuous capture
Local processing
AI-assisted note-taking
Advanced search
Pros:
Memory aid
Productivity boost
Data privacy
Cons:
Learning curve
Subscription for full feature
Storage use
Pricing: $19 for the Rewind Pro plan.
8. Nightbot – Best for Audience Engagement
Source: Nightbot.tv
This is a chatbot that can be used to moderate your chat and interact with your viewers. Nightbot can be used to set up custom commands, answer frequently asked questions, and even time out or ban viewers.
It helps console streamers and even streamers in general to manage their chat rooms more efficiently, allowing them to focus on content creation.
Key Features:
Spam filters
Custom commands
Chat logs
Song requests
Giveaways
Timers
Cloud-hosted
Pros:
Highly customizable
Can handle many chat moderation tasks automatically
Integrates with various streaming platforms
Completely free
Cons:
Setting can be complex for new users
May require some time to familiarize yourself
Pricing: Free
Final Thoughts
In the world of console game streaming, where quality and engagement matter the most, one tool has truly stood out as the best of the best—Eklipse. With its intuitive interface, real-time editing, and affordable pricing, it’s the ultimate choice for console gamers who aim to create top-tier content effortlessly.
Why settle for good when you can have the best? Eklipse is your ticket to streaming success. It’s time to embark on this journey of excellence.Ready to transform your streams and captivate your audience like never before? Don’t miss out on the opportunity to elevate your streaming game to new heights. Get Started with Eklipse Now!
If you regularly dip your toe in the editing field, you must be aware that using an advanced editing app will take up a large space of your computer eventually. However since there is a cloud-based video editor, you can resolve this problem.
Cloud-based services offer you the opportunity to work and save your project to the cloud. Other than that, you can even access it online. No need to download them to make them work.
In this article, we have covered the best cloud-based video editing software you can pick from. Let’s take a look at them before deciding on the right tool for you.
1. Eklipse – Best Cloud-based Video Editor for Gamers and Streamers
Eklipse.gg
Eklipse is the ultimate answer if you are looking for a great tool capable of turning your video into a short form easily. Its powerful AI will help you to automatically capture the best moment of your video and convert it into TikTok/Reel/Shorts format.
What makes this software special, it’s 100% web-based software. You don’t even need to download any app on your device to make it work. In addition, your projects will also be safely stored in its cloud-based storage as long as you store them in the Playlist feature. So, it will last forever. Try Eklipse now!
Key Features:
Focuses on esports and gaming highlights
Automatic editing tools using AI
Direct social media posting
Custom playlists and showcases
Templates and editing tools
Pros:
Easy-to-use for gamers
Automates editing tasks
Supports auto-processing streams
No download required
Cons:
Limited features on the free plan
Pricing: $19.99 per month or $149.00 per year for the Premium plan.
2. YouTube Studio Editor – Best for Quick Edits
Source: YouTube Mike Downes
Did you know that YouTube doesn’t only let you broadcast or enjoy someone else’s videos? Yep, in 2010, YouTube launched its built-in video editor.
As a web-based platform, YouTube Studio Editor saves your projects in its cloud. However, you can’t expect to create stunning videos with this feature. It only provides basic editing such as a trimming tool, rotating videos, stabilizing clips, adding transitions, combining videos, and more.
Key Features:
Basic editing tools directly within YouTube’s platform
Integrates seamlessly with your YouTube channel
Pros:
Free
Convenient for YouTubers
Allows for quick edits without leaving the platform
Cons:
Limited editing functionality
Lacks advanced features like color correction or motion graphics
Pricing: Free
3. Openshot – Best Professional Cloud-based Video Editor
Source: OpenShot
Openshot is the best cloud-based video editor that is quite popular among editors. It allows you to create 3D animation for clip titles, speed, and direction; it even provides unlimited track layers.
However, due to its capability, this software isn’t friendly for beginners. Instead, it’s good enough for intermediate to professional editors. Other than that, you might find this tool a little bit laggy during the editing process.
Key Features:
Supports a variety of file formats
Unlimited track layers
Offers a variety of transitions
Pros:
Free
Supports multi-platforms
Good for professional editing
Cons:
Not beginner-friendly
Sometimes laggy
Pricing: Free
4. Clipchamp – Best for Microsoft Integration
Source: Clipchamp
Just like the other aforementioned tools, Clipchamp allows users to compress, convert, collect, save, and share the video. Moreover, what makes this tool better than others is that you can record your screen using this software too! This is the best place for all your video needs.
Do you think about making a beautiful montage from your existing footage? Clipchamp has your back. You can even make it more valuable by adding a soundtrack from its music library.
Key Features:
Template selection
Stock Library
AI-powered tools
Text and soundtrack options
Pros:
Intuitive user interface
Ease of use
Content Library
Microsoft Integration
Multi-platform support
Fast rendering
Cons:
Subscription for full features
Limited control over effects
Export limitations
Slow export rendering
Pricing: $6.00 per month for the Creator plan, $13.00 per month for the Business plan, and $27.00 per month for the Business Platinum plan.
5. Wave.video – Best Multifunction Editor
Source: Wave.video
Wave.video is another cloud-based video editor that offers a superb friendly interface. The interesting thing about this software is that it does not only work as an online video editor but also as a screen recorder, even allowing you to host any video or do live streaming.
Not stopping there, Wave.video is also able to convert texts to TTS or video and add subtitles or captions to more than 20 languages. If you want to give it a shot, just try the free version before going to the premium ones.
Key Features:
Live streaming studio
Video recording app
Thumbnail maker
Video hosting
Pros:
Huge library of assets
A free plan is available
Easy to use
Cons:
Lacks more pro tools
The business plan is pricey
Pricing: $16 per month for the Streamer plan, $24 per month for the Creator plan, and $48 for the Business plan.
6. Flexclip – Best for Brand Videos and Marketing Content
Source: Flexclip via PCMags
FlexClip is a straightforward yet versatile free cloud video editing. It caters to both beginners and professionals, offering essential editing features without the need for additional software installation.
FlexClip provides a comprehensive toolkit with drag-and-drop functionality, including a slideshow maker, sequence video editing, movie editor, background remover, and GIF creator.
Key Features:
Versatile
Drag-and-drop functionality
Comprehensive toolkit
Pros:
Simple but capable
Good for beginners or professionals
Cons:
Uploading media delays editing
The free option has low export quality
Pricing: $19.99 per month for the Plus plan, and $29.99 per month for the Business plan.
7. Blackbird Video – Best for Remote Editing
Source: Blackbird Video
Blackbird Video is a professional cloud video editing platform known for its speed and efficiency. It allows for remote editing and provides rapid access to video content, enabling the creation of clips, highlights, and longer-form content for multiple devices and platforms.
Key Features:
Frame-accurate editing in a browser
Instant precision access to video
Publishing to multiple platforms in seconds
Rich user and media management portal
Easy integration with existing infrastructure
Supports up to 12 videos and 32 audio tracks, voice-over, color correction, pan and zoom, multi-cam, transitions, closed captions, and more
Pros:
Professional-grade editing tools
Efficient for remote editing
Supports a wide range of video and audio tracks
Cons:
Some users may find the quality of the controller and camera to be less than expected
The platform might have a learning curve for new users and could be considered complex for simple tasks.
Pricing: $15.99 per month with a month-to-month charge, or $159.99 for 1 year.
8. Kapwing – Best for Collaborations
Source: Kapwing
Kapwing is an intuitive online video editor that offers a suite of tools for fast and collaborative video creation. It’s designed for both beginners and professionals, with a focus on ease of use and AI-powered features.
Key Features:
Drag-and-drop timeline editing
AI-powered tools like Smart Cut and Magic Subtitles
Real-time collaboration and shared workspaces
Content repurposing tools for different platforms
Text-based video editing by editing auto-generated transcripts
Pros:
User-friendly interface with drag-and-drop editing and AI-powered tools.
Offers real-time collaboration and a variety of video editing tools.
Supports a wide range of video file formats and allows for text-based video editing
Cons:
Some users report glitches and video processing issues, which can be time-consuming to resolve.
Free users face limitations such as a maximum of three active projects, video length restrictions, and watermarks on videos.
Pricing: $16 per month for the Pro plan, and $50 for the Business plan
9. Adobe Express – Best for High-Quality Video Edits
Source: Adobe Express
Adobe Express (formerly Adobe Spark) is a free online video editor that simplifies the video editing process with a user-friendly interface. It’s suitable for creating social media content, marketing videos, and more.
Key Features:
A vast collection of customizable video templates
Easy-to-use tools for cropping, trimming, and splitting videos
Animated effects for graphics, icons, text, and images
Integration with Adobe Stock for images and soundtracks
Quick actions for tasks like background removal and video resizing
Pros:
Provides a vast collection of templates, stock images, and fonts.
Includes powerful image and video editing features with file conversion capabilities.
Offers 100GB of cloud storage in the paid version and has an always-free plan.
Cons:
May be less intuitive for users accustomed to other Adobe Creative Cloud desktop apps.
Some users find the interface laggy and lacking in precision for certain design tasks.
Pricing: $9.99 per month for the Premium plan.
Final Thoughts
Lucky for you since cloud-based video editors are scattered all around the internet. You can find them easily and pick what suits you best. Among the tools above, which one is your favorite?
Unleash your creativity, save precious disk space, and let Eklipse transform your gaming highlights into legendary tales. Start your journey with Eklipse today—where every play becomes a potential masterpiece.
Selecting the perfect Twitch video editor is crucial for elevating your stream’s aesthetics and enhancing the overall viewing experience for your audience. The right tool empowers you to craft compelling content, paving the way for significant Twitch growth.
A Twitch video editor is your gateway to unleashing creativity – from adding effects, stickers, and images, to incorporating buttons – enabling the creation of standout highlights and clips. Moreover, seamless instant sharing to your socials becomes a breeze. Dive into our curated list of video editing software embraced by Twitch streamers. Elevate your channel by exploring and adopting these tools that promise not just video editing but a ticket to channel expansion. Let’s explore the options and boost your Twitch presence!
The best choice for Twitch video editors online is Eklipse. Generated by AI, Eklipse can analyze your Twitch streaming videos and find the best moments automatically. Additionally, Eklipse also allows you to make some changes manually, such as trimming and clipping, and even convert your video to TikTok. You can do anything for an instant!
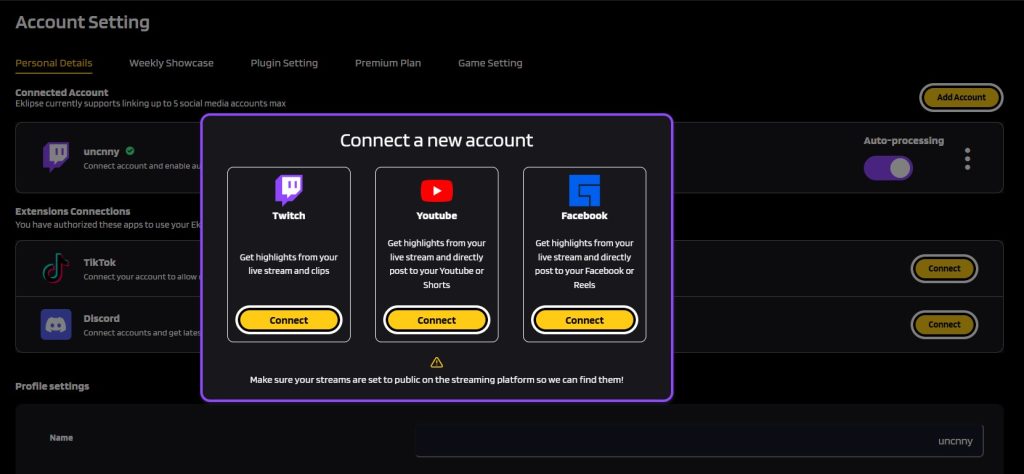
All you need to do is register here, connect your account to Facebook, YouTube, or Twitch, then you can start capturing the best moments.
Above all, Eklipse is a free and best video editing software for streamers. So, you don’t need to spend money at all to enjoy its incredible features.
Key Features:
AI detection
Funny moments captures
Voice command
Support more than 200 games
Convert to TikTok
Eklipse studio
Free templates
Auto caption
Channel stickers
Social media scheduling
Pros
Free tool
Friendly interface
Generated with A.I (will automatically help you create some cool highlight clips)
Easy to use
Complete features
Produce high-quality output
Cons
Its fantastic features will make you addicted
Several templates for TikTok clips are still unavailable
2. StreamLabs – Best for Daily Gaming
Source: GitHub
Another alternative for Twitch video editors free is StreamLabs. This is a Twitch video editor and streaming tool that was once used only by gamers for daily gaming.
However, due to its sleek appearance and user-friendly interface which streamlines everything from recording your gameplay videos in high definition (HD) down to tweaking them so they go smoothly without any lag or stuttery playback even while watching others play on Twitch.
VEED.io is a cloud-based video editor that caters to a wide range of content creators, including streamers on a budget. It offers a user-friendly interface and a surprising amount of functionality for a free plan.
This free online platform offers a surprising amount of functionality to help you create polished highlights and engaging content for your Twitch channel. You can easily trim, cut, and split your footage with ease. Even add text overlays, captions, and royalty-free music to make your Twitch video look more engaging!
Key Features
Social media optimization
Stock media library
Screen recording
AI-powered features
Pros
Free to use
It comes with easy user guides
Social media ready
Cloud-based
Cons
Limited features in the free version
No advanced editing features
Pricing: $10 for the Basic plan and $18 for the Pro plan
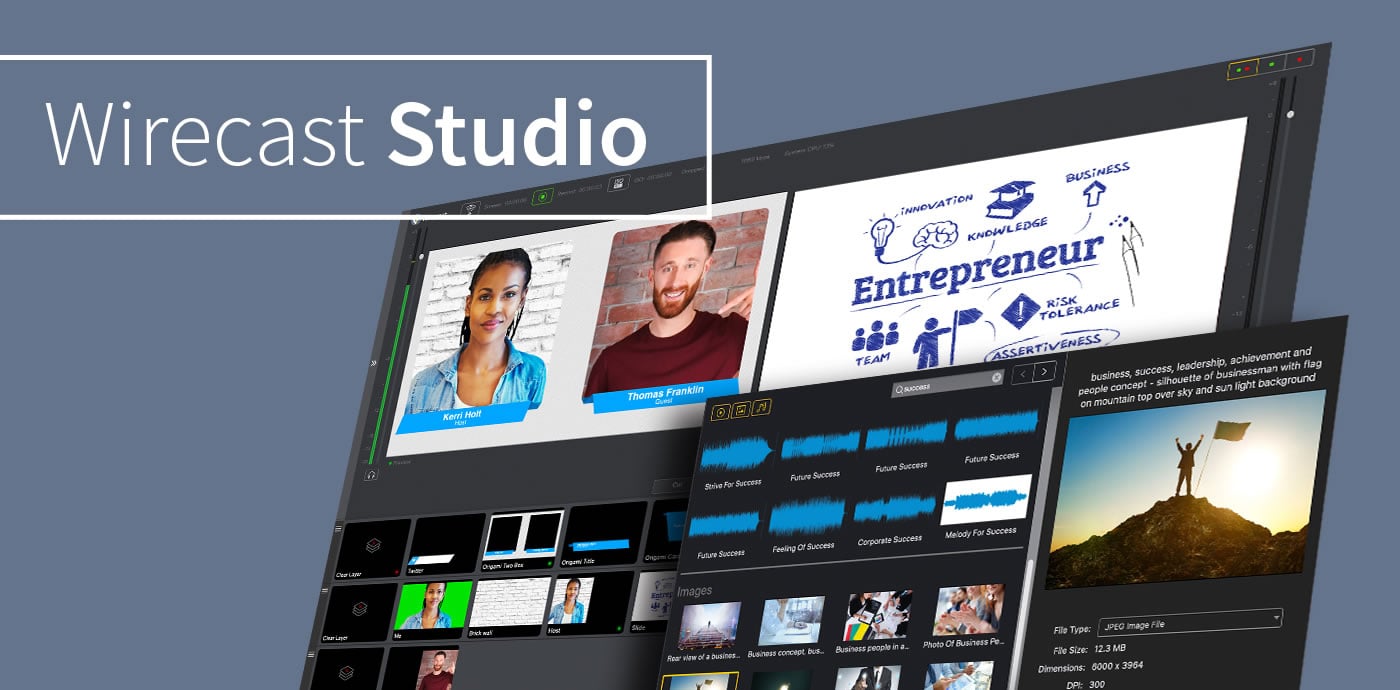
How to make Twitch videos fast and easy? Wirecast is another great video editing software for professionals that you should check out.
This clip editor Twitch comes in 2 packages: Wirecast Studio and Pro, with loads of features that you can’t find anywhere else like multistreaming unlimited capture (and more), animated 3D tiles; high-definition ISO recording on-demand & instant replays.
A unique pro version of the Twitch video editor goes up another notch when high-definition ISO recordings are made alongside animations created within 3D tiles, all on top of being easy enough for beginners.
Key Features:
High-definition ISO recording on-demand
Instant replays
Multistreaming
Pros
Works on both Windows and Mac
Offers professional support
time-to-time updates
All-in-one platform
Cons
Expensive as compared to others
Pricing: $35 per month for the Wirecast Studio plan and $46 per month for the Wirecast Pro plan
5. Nvidia Shadowplay – Best for PC Gamers
Source: NVIDIA Shadowplay
Nvidia’s Shadowplay is a versatile tool for gamers looking to stream their gameplay. It has been tightly integrated into Nvidia drivers, so it works seamlessly out of the box with no additional software needed on top of your gaming platform or streaming service provider.
Many gamers use the OBS Twitch video editor to stream their gameplay. The program is great for those who just want an easy way of doing so, but if you’re looking for more sophisticated features like the ability to edit videos or record them off your screen then Nvidia Shadowplay should be used instead – especially since this software also supports NVENC encoding by default.
Key Features:
Manual Recording
Hardware acceleration
High-quality recording
Share directly to social media
Background recording
Pros
Free and easy to use
Minimal performance impact
Multiple capture options
Cons
Limited to NVIDIA GPUs
Limited editing features
Storage requirements
Pricing: Free
6. LightStream – Best for Professional-looking Videos
Source: Golightstream
The next best free video editing software for streamers is Lightstream.
One of the greatest features of the Lightstream Twitch video editor is its simplicity. However, it does not require any installation on your computer, which means you can access it anywhere with an internet connection.
Customize your stream’s look and feel with professional-looking overlays, alerts, and follower notifications. Engage your audience with interactive elements like chat functionality and polls.
Key Features
Cloud-based broadcasting
Multi-stream
Seamless scene switching
Remote control
Branded overlays and widgets
Guest integration
Pros
Professional production value
Multi-platform streaming
Remote control
Great for new streamers or established creators
Cons
Limited free features
The learning curve for advanced features
Pricing: Starts from $8 per month for the Gamer plan, and $25 per month for the Creator plan.
7. Flixier – Best for Collaboration
Source: Flixier.com
For streamers who value a streamlined editing workflow, Flixier offers a user-friendly and accessible online video editor. You can also work with your team or fellow streamers on editing projects in real-time.
Its browser-based approach, Twitch integration, and social media focus make it a convenient tool for creating engaging highlight clips.
Key Features:
Seamless Twitch integration
Intuitive interface
Rich media library
Social media integration
Collaboration tools
Recorder available
Pros
Browser-based
User-friendly interface
Affordable
Cons
Some features are limited to paid plans
Pricing: $8 per month for the Creator Plan and $20 per month for the Business Plan.
8. CapCut – Best for Short Videos for Social Media
Source: CapCut
How to edit Twitch VODs for YouTube Shorts or TikTok? The easiest way to do so is by utilizing CapCut. CapCut is an all-in-one video editor that caters to both beginners and seasoned creators.
It is perfect for streamers who prioritize quick and easy editing on the go. Its user-friendly interface and intuitive features make it perfect for editing on your phone or tablet, with no computer required.
No, you cannot directly edit videos on Twitch itself. Twitch offers some basic VOD (Video On Demand) management features, but not true editing capabilities. You can do VOD trimming and highlight creation.
What should I consider when choosing a Twitch video editor?
Choosing a Twitch video editor depends on your editing goals and skill level. You can consider factors like basic highlights, advanced editing, speed, ease of use, or even budgets.
Final Thoughts
For the best Twitch live stream software, it depends on what you need. Depending on your requirements and preferences there are many different options available for streaming such as the aforementioned ones.
Ready to revolutionize your highlight creation process? Try Eklipse.gg today and see how AI can help you showcase your best Twitch moments and grow your audience like never before!
Clipping software has become an essential tool for gamers because it allows them to capture and share memorable moments from their gameplay. These digital tools enable users to “clip” specific segments of video. In 2025, various best clipping software for gaming options are available, including free choices catering to different needs.
This article presents a curated list of clipping software for gaming to try this year. From casual players looking to share fun moments to serious content creators aiming for professional-quality clips, there is an option here that will meet your requirements.
Eklipse.gg isn’t your typical game clipping software. Instead of fiddling with hotkeys and manually capturing moments, Eklipse.gg uses artificial intelligence (AI) to do the heavy lifting for you.
Eklipse is an AI highlight-making tool that allows you to create the best highlights. It can automatically format your clips for platforms like TikTok, Reels, and Shorts, with the perfect length and size for those fast-paced feeds. Plus, you can add music and customize the clips to match your style.
For those who want a streamlined and AI-powered way to capture and share their gameplay highlights, Eklipse.gg is worth checking out. Sign up for a free Eklipse free account today!
Key Features:
Automatically generates highlights using AI
Converts highlight for TikTok, Reels, and Shorts formats
Integrates with Twitch, YouTube, and Facebook Gaming
Mobile app to manage and share clips
Offers templates, customization options, and auto-captions
Pros:
Saves time editing streams into highlight videos
Easy to use, even for beginners
Makes sharing clips on social media easier
Offers some customization options for highlights
Cons:
AI sorting can be random and may not pick the best moments
May not be ideal for streamers who want more control over their highlight editing
Limited features in the free version
Pricing: Free plan available. $19.99 per month for the Premium plan.
2. VideoProc – Best for High-Quality Recordings
Source: screenapp.io
VideoProc by Digiarty is a game recording program for both Windows and Mac.
This lightweight yet advanced video processing tool lets you record your computer screen, webcam, and audiowhile gaming in a window or full-screen mode.
Lags make game recording difficult, but not here. VideoProc lets you establish recording zones, add text annotations, and draw highlights when recording games.
This robust game recording tool can record gameplay smoothly and without latency on a less competent PC.
Key Features:
Versatile recording
Easy editing
Direct sharing
High-quality clips
Pros:
High-quality recording.
The intuitive interface and easy-to-use editing tools make it perfect for beginners.
Flexible recording options cater to different recording needs.
Cons:
Advanced features are only available in the paid version.
Resource-intensive, so it can impact game performance on low-end PCs.
Pricing: $25.95 for thePremium 365 plan (1 year subscription/3 PCs), $45.95 for a Lifetime License (1 PC), and $57.95 for a Lifetime Family License (3-5 PCs).
3. Rav.ai – Best for Detailed Gameplay Recordings
Source: Rav AI
Rav.ai is a video editor. It’s an AI-based video editing tool that helps customers edit videos rapidly.
However, you can modify your videos yourself. Rav.ai converts raw footage with instructions into a quality film for your viewers. This best clipping software for gaming also automates video editing and social media publishing.
Key Features:
AI-Powered Clipping
High-Definition Clips
Multi-Platform Support
Direct Sharing
Pros:
Captures audio and webcam video.
Supports automated recordings.
High-definition clip quality.
Easy sharing options for social media.
Cons:
The AI can miss certain moments depending on the game’s action intensity.
No free version is available.
The paid version is very expensive.
Pricing: Start from $50 per month.
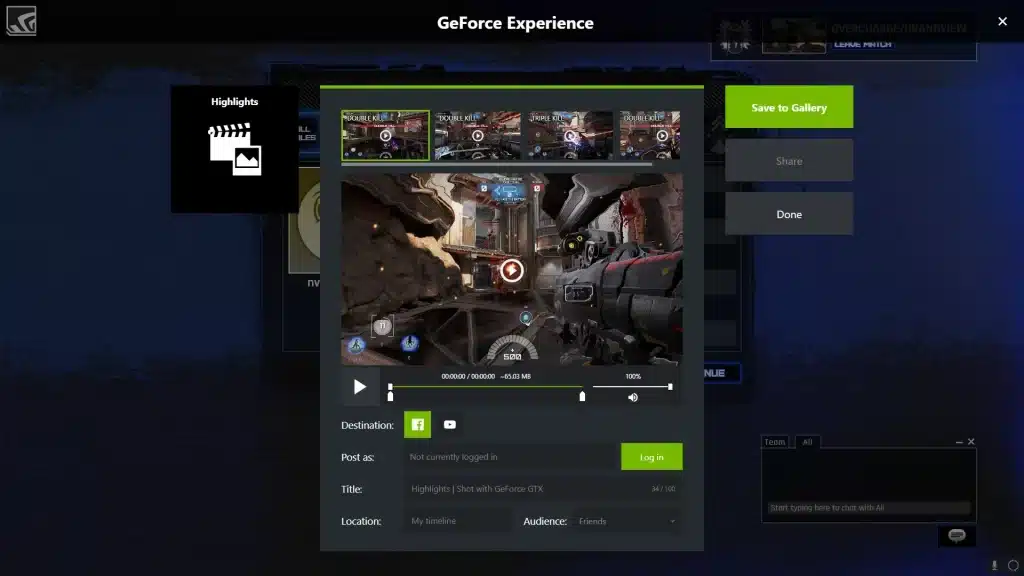
4. NVIDIA ShadowPlay – Best for UHD Recordings
Source: nvidia.com
Recording and sharing high-quality game videos, photos, and live broadcasts have never been easier with ShadowPlay! It is manufactured by NVIDIA, which produces some of the best graphics processing units available.
You can record your screen in 4K or 8K resolutions at 30 or 60 frames per second. Because this software is hardware-accelerated, you can operate it in the background without experiencing lags or freezes.
Key Features:
Instant replay
Manual recording
Livestreaming to YouTube, Facebook, and Twitch.
Capture in high-resolution
Pros:
1:1 quality retention when recording.
Automatically captures the most recent moments in games.
GPU-accelerated encoding by NVIDIA for fast and efficient processing.
Efficient compression of recorded footage with H.264 encoder.
Record videos in UHD 8K and 4K.
Record videos with picture-in-picture effects.
Grab up to 8K game screenshots.
Cons:
Only runs on Windows operating systems.
No macOS version.
Requires NVIDIA Graphic Card to work.
Pricing: Free
5. HitPaw Screen Recorder – Best for Flexible Recording
Source: hitpaw.id
HitPaw Screen Recorder is an easy-to-use but highly powerful tool for recording gameplay footage. You can learn to use HitPaw Screen Recorder to record games when you download it.
When recording games, it is possible to simultaneously record the keyboard, your face, and the game. More importantly, if your PC doesn’t have a camera, you can record games on your computer using your iPhone or iPad as a camera.
If you wish to point out something in the recording, you’ll need to record the mouse and the drawing. HitPaw Screen Recorder also has an editor that lets you cut, crop, rotate, modify, and change the speed of the video.
Key Features:
Flexible recording; can record full screen, selected window, or custom region
Audio recording
High-quality output
Pros:
Simple and easy to use
Offers flexibility
Cons:
Advanced editing features are not included
Need to upgrade to access all features
Pricing: $9.99 per month, $29.99 per year, and $49.99 for the Perpetual (one-time) plan.
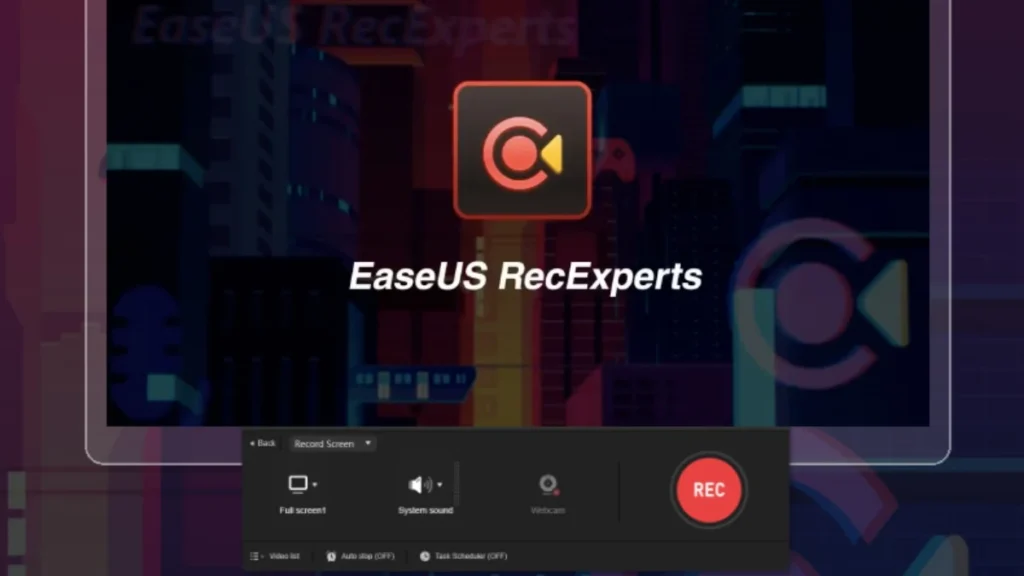
6. EaseUS RecExperts – Best for Smooth Gameplay Recordings
Source: EaseUS
Using EaseUS RecExperts, you can capture a specific part of your screen,your webcam, or the entire screen.
It enables you torecord system sounds and your external voice using your microphone, giving you the go-ahead to record games.
After you’ve recorded your screen, you may go to the editing panel to addtext, effects, arrows, and other cool stuff to spice up your video. 2D/3D games can also be recorded in 4K UHD resolution
Key Features:
Includes a dedicated Game Mode
Flexible recording
Basic editing features
Pros:
Game Mode ensures smooth gameplay recording
Basic editing tools, best for beginners
Cons:
The interface can be a little bit complicated
Watermark in the free version
Pricing: $19.95 per month (one license for one computer).
7. Medal.tv – Best for Sharing Clips Online
Source: CBS Insight
Medal.tv is a game clipping software that combines gaming capture functionality with social media features. With Medal.tv, you can clip gameplay moments easily. Whether it’s a spectacular kill, a funny glitch, or an impressive play, you can capture it with just a few clicks.
The software allows you to share your clips online with others. It acts as a bridge between gaming capture and social media platforms, making it easy to showcase your best moments.
8. OBS Studio – Best Free Gaming Clipping Software
Source: OBS Project.com
OBS Studio (Open Broadcast Software) is widely regarded as one of the best game capture software options. It is incredibly flexible, allowing you to capture not only your gameplay but also add elements like your webcam, watermarks, and even more complex overlays.
Despite its extensive capabilities, the performance impact of OBS Studio remains surprisingly small.
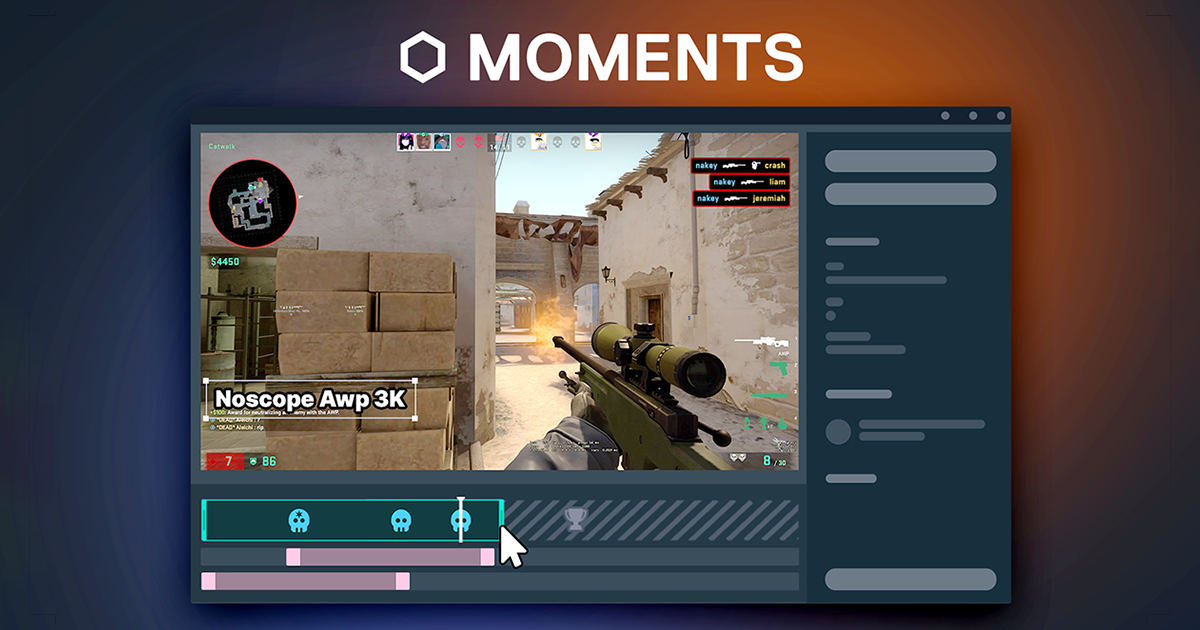
Action! stands out by allowing control via an Android app. Even if you’re away from your computer, you can still make quick recordings or adjust audio settings using the app.
The desktop version works seamlessly without the Android app, ensuring flexibility for users.
Key Features:
High-FPS Recording, up to 120 FPS
Direct YouTube Export
Multiple Audio Inputs
Pros:
Efficient Video and Audio Compression
User-Friendly Interface
Livestreaming Capabilities
Cons:
Costly Full Version
Watermarked Free Version
Pricing: $19.77 for Home use, and $32.95 for Commercial use. Both are lifetime subscriptions.
10. Xbox Game Bar – Best for Windows Users
Source: thewincentral
Xbox Game Bar is specifically designed for Windows operating systems. It seamlessly integrates with the official Xbox app for PC. Whether you’re playing Valorant, Fortnite, or other games, the Xbox Game Bar makes it quick and easy to grab clips while playing with friends.
Xbox Game Bar allows you to capture screenshots during gameplay without interrupting your gaming experience. If you’re a streamer, Xbox Game Bar lets you live stream your gameplay to platforms like Twitch and YouTube directly from the software.
Key Features:
Instant capture
Performance widget
Audio control
Pros:
Allows simultaneous screen and webcam recording.
Offers tracking of keyboard and mouse actions.
Convenient to use, because it’s already built in for Windows users
Minimal performance impact
Cons:
Very limited features compared to dedicated recording software
Only available for Windows
Pricing: Free, but must have the Xbox app for Windows installed and signed in.
How do you choose the best clipping software for gaming?
To choose the best gaming clipping software, you should consider the following essential factors:
Compatibility: Make sure the software works with your operating system (Windows or Mac) and the games you play.
Ease of use: Look for a program with a user-friendly interface and hotkey recording for convenience.
Price: Free options exist with limitations, while paid versions offer more features.
Audio options: Choose software that supports capturing audio from games, a microphone, or multiple sources.
Video quality: For high-end games, consider software that records at high FPS (frames per second) and resolution (HD or higher).
Streaming options: If you want to stream directly, look for software with built-in streaming functionality.
Editing options: Some software allows basic editing like trimming clips, which can be helpful.
In short, prioritize compatibility and ease of use. Consider additional features based on your needs and budget.
Choosing the best clipping software for gaming depends on your specific needs and preferences. With numerous options available in 2025, including innovative AI-driven tools like Eklipse.gg, gamers can easily capture and share their gameplay highlights. Eklipse stands out for its ability to automatically generate clips formatted for social media platforms, making it a great choice for those looking to streamline their content creation process.
To enhance your gaming experience and effortlessly showcase your best moments, consider signing up for a free account at Eklipse.gg today. With its user-friendly interface and powerful features, Eklipse is a top contender among the best clipping software for gaming that can help you elevate your content and engage with your audience effectively.
Animoto is a widely used video creation platform that has captured the attention of individuals and businesses alike with its user-friendly interface and extensive features. As the demand for video content continues to rise, many users are seeking out Animoto alternatives that offer even more features, better pricing, or a more streamlined experience.
In this article, we will take a closer look at the other powerful video editors with more affordable options and a different pace. Without further ado, let’s just get started.
Animoto is an online video maker that allows users to create a variety of videos, including promo videos, slideshows, social media videos, tutorials, birthday videos, graduation videos, and more. It’s a cloud-based platform, which means you can access it from any device with an internet connection. Whether you’re a teacher, student, or business owner, Animoto simplifies the video creation process by providing templates, drag-and-drop interactivity, and a wealth of available media.
However, Animoto isn’t perfect. Therefore, if you require more video customization options, including special effects, overlays, and branding control, you might explore alternatives. That’s why some users seek alternatives with advanced features beyond Animoto’s capabilities.
Here are some options for Animoto alternatives you might want to consider:
1. Eklipse – Animoto Alternative For Clipping Streams
Source: Eklipse.gg
Eklipse is a video editing tool designed to simplify the process of creating stream highlights. Unlike traditional manual editing, Eklipse leverages powerful AI algorithms to automatically identify and capture the best moments from your stream.
Eklipse can help analyze your stream and select the most engaging moments without any manual intervention. This saves time and ensures that you don’t miss out on exciting content.
Getting started with Eklipse is also straightforward. A few clicks are all it takes to set up the tool and begin capturing highlights from your streams. While Eklipse automates the selection process, it also allows for customization. You can add a channel name sticker, background music, and auto-captions to enhance your clips.
Eklipse also recognizes the popularity of platforms like TikTok, Reels, and YouTube Shorts. It enables you to convert your clips into bite-sized, vertical videos optimized for these platforms. That way, you can focus on content rather than technical details. Feel free to explore Eklipse and see how it fits into your workflow!
Pros:
Easy to use and offers a friendly interface
Provides a wide scoop of templates
Automatic clipping
Free and no watermark
Time-saving
Cloud-based
Enable to convert the clip to TikTok/Reel/Short
Cons:
The use case may be too specific for streamers
The editing tools are not quite complete
Pricing: $19.99 per month
2. Clideo– Most Versatile Video Editor
Source: Clideo
Clideo is an amazing video editing platform that takes care of all your needs by providing you with a convenient interface and diverse editing tools. With Clideo, you can work on your video project in your browser. You don’t need to download the software to make it work. This video editing app allows you to edit, compress, compile, and crop your videos.
It has a very convenient drag-and-drop feature that you can use to edit your videos, photos, and gifs conveniently. Clideo is available on your Windows, Mac, Linux, Android, and any other device with a browser. It supports many formats and always gives you high-quality videos. You can save your downloads to Google Drive or Dropbox.
Pros:
Free open-source video shaper
Exact cutting by outline
Switch between Keyframe and Normal cut modes
Load videos for cutting by URL
Basic cuts with handles or time arrows
Supports single and multiple jump cuts
4K video cutting is possible on older PCs
Cons:
Sometimes can’t capture frames accurately.
No option to cut the video by setting the time manually.
Supports MP4, AVI, and MOV cutting, but only outputs in MP4.
Sticking the URL for video cutting doesn’t work, no error message.
WeVideo is an online video editing software that is convenient for beginner video editors. The best part about using WeVideo is its simple interface and ease of access. You will find everything you need in WeVideo. It’s free and available for everyone to use. Furthermore, several people can work on a single video and save it to Google Drive.
You can instantly publish your edited videos to your YouTube, Instagram, Facebook, TikTok, and other social media platforms. WeVideo allows you to optimize your video for any social media platform by providing you with square, vertical, and horizontal video aspects. You can always use WeVideo’s stock content in your videos and make them look professional.
Pros:
User-friendly interface with a moderate learning curve.
Vast template library and over 1 million stock media.
Supports webcam screen recording.
Multi-track editing for audio and visual effects.
Android and iOS apps are available.
Cons:
A cluttered UI may be challenging for beginners.
Limited free plan, 480p max video res, 5-min monthly limit, no simultaneous recording.
Pricing:
For Educators: $89 per year for Teachers and $299 per year for Classrooms.
For independent creators/businesses: $4.99 for the Power subscription, $7.99 per month for the Unlimited subscription, $19.99 per month for the Professional subscription, and $36.99 per month for the Business subscription.
4. Wideo – Best for Easy Corporate Videos
Source: Wideo
Wideo caters to both standard editing and animation creation. Its intuitive drag-and-drop interface makes edits a breeze, while a vast library of pre-made elements lets you craft professional-looking animations quickly. The best part? You can reuse these elements endlessly, saving you time and effort.
You can also create professional-looking presentations using Wideo’s built-in themes and tools. You don’t even need to be an expert at editing or animation to make these videos. Wideo’s interface is intuitive, and anyone can learn to make eye-catching animated content using Wideo.
When it comes to animated content, Wideo is one of the best software out there.
Pros:
Easy to use
Free plan available
No limits on animations.
Perfect for demos, presentations, announcements, and more.
Share within your team or promote on your website.
Cons:
Templates are not as high quality as other video makers.
Pricing: $19 per month for Basic Plan, $39 per month for Pro Plan, and $79 per month for Pro+.
5. Kapwing – Best for Team Collaboration
Source: YouTube
Kapwing is a famous online video editing software. The best part about using Kapwing is automation. It has auto subtitles and the editor takes care of the background for you. This automation makes the editing process much faster and easier for editors. Whether you’re a casual video editor or a professional, Kapwing will serve you well.
Furthermore, Kapwing allows you to convert your videos into a different format. You can convert your mp4 or other format videos into GIFs, slideshows, and mp3 music files. Just upload a video and select your preferred file format to convert a video into that format.
Pros:
Offers intuitive interface
Provides complete editing features
Enables users to import files or drop the URL link
Cons:
Doesn’t offer an instant sharing feature
Focus on the manual editing process
The paid version is sort of pricey
Pricing: $16 per month for the Pro plan, and $50 per month for the Business plan
Filmora is a bad-ass video editing software that can go toe-to-toe with pricey options like Adobe Premiere Pro. You can record a video with voiceover right through your webcam, and then edit it to your heart’s desires. But if you already have footage, Filmora’s got you covered too!
You can use its templates, fancy text, video customization options, sweet overlays, animations, transitions, and visual and audio effects to level up your videos and make them look like a pro-created them.
Pricing: $79.99 for the Perpetual Plan, $69.99 per year for the Cross-Platform Plan, and $49.99 per year for the Subscription Plan.
7. Lumen5 – Best for Converting Blog Posts to Video
Source: Lumen5
Lumen5 is an easy-to-use cloud-based video editor that caters to teams and individuals with a small marketing budget. It excels in creating slideshow-style videos using an intuitive AI-powered system, pre-designed templates, transitions, and a vast music library.
Pros:
Great for beginners.
Efficient for repurposing content.
Cons:
Less control over editing.
Some features are available only to paid users.
Limited free plan options.
Pricing: $19 per month for the Basic plan, $59 per month for the Starter plan, and $149 for the Professional plan.
8. InVideo – Best for Social Media Marketing
Source: VideoCreek
InVideo is a highly intuitive online video editor that enables you to create professional videos in minutes, even if you’ve never edited a video before.
Unlike Animoto, InVideo allows complete customization of videos. InVideo works equally well for both professional and personal use. Whether you’re a social media marketer, business owner, or YouTube creator, InVideo’s templates and stock assets cater to diverse needs.
Pros:
Mix and match templates for unique videos.
Intuitive interface.
Suitable for professionals and personal use.
Cons:
Very few ready-to-use templates compared to some other platforms.
No stock videos are available.
Pricing: $20 per month for the Plus plan, and $48 per month for the Max plan.
Biteable is a cloud-based video editing platform that allows users to create engaging videos quickly. It is popular for its unique collection of features and assets, making it a preferred choice for motion graphic videos.
Biteable offers hundreds of ready-made animations suitable for various purposes. With 1000+ customizable templates, users can create videos for different industries and use cases.
Pros:
Access to 1.8 million stock images and videos (live-action, animated, and claymation).
Suitable for beginners
Biteable is intuitive and has a short learning curve.
Offers various animation styles.
Cons:
Biteable can be relatively expensive.
Less control over editing compared to some alternatives.
Limited music options.
Pricing: $588 per year for the Pro plan, and $1.188 per year for the Premium.
10. Camtasia – Best for Tutorial Videos
Source: Camtasia
Camtasia is well-known for its powerful screen recording capabilities. It allows you to capture your screen activity, making it ideal for creating software tutorials, educational videos, and demonstrations.
You can work with multiple tracks (video, audio, and effects) simultaneously. It also includes a library of stock media assets (music, images, and video clips).
Pros:
Professional Quality
Screen Recording
User-Friendly Interface
Cons:
The price can be expensive for some users
Requires a powerful computer for smooth performance.
Fewer templates compared to some other platforms.
Pricing: $199.67 per year for Individual subscription, $329.87 per user for Camtasia + Audiate, and $479.86 per year for Camtasia + Assets + Audiate.
Final Thoughts
Whether it’s for personal or professional use, each of these platforms has unique features that cater to specific needs. We explored 10 fantastic options, each with its strengths, from super-easy drag-and-drop interfaces to animation powerhouses.
While all these Animoto alternatives are great, Eklipse truly stands out as the most user-friendly and powerful option. With the right choice, you’ll be able to produce high-quality videos that capture your audience’s attention.
Don’t just take our word for it, jump over to Eklipse, register for free, and start creating stunning videos yourself – you won’t be disappointed!
Is StreamLadder free to use in 2024? This question has been frequently asked by many rising streamers, but don’t worry, we have the complete review of StreamLadder for you right here.
If you are a streamer or a gamer who wants to create and share amazing videos for social media platforms, you might have heard of StreamLadder. StreamLadder is a web-based service that helps you transform your Twitch clips into engaging and optimized videos for TikTok, Instagram, YouTube, and more. But is StreamLadder free?
In this article, we will answer these questions and help you decide whether StreamLadder is the right tool for you. Keep reading to find out more!
StreamLadder is a web-based service that helps streamers create engaging and optimized videos for TikTok, Instagram, and YouTube. StreamLadder allows users to upload their Twitch clips and transform them into vertical, square, or horizontal formats with various editing options.
Source: Streamladder
Users can also add captions, stickers, emojis, music, and voice-overs to their videos. StreamLadder aims to make video editing easy and fast for streamers and gamers who want to grow their audience and reach more potential fans.
Is Streamladder Free?
Is StreamLadder free? The answer is yes. StreamLadder offers a free basic plan that allows users to create unlimited videos without a watermark.
However, you are limited to using various stickers and music in your clip. The rendering process might be slower compared to the premium plan. In addition, the free StreamLadder account can only export videos with a quality of 720p / 60 fps.
Source: StreamLadder
So, if users want to unlock more features and benefits, they need to upgrade to the premium plan. The premium plan costs around $6 – $15 per month, including these features:
Export in 1080p / 60fps
Add stickers & text
AI-powered captions
Fast rendering (5x faster)
Schedule clips directly to social media channels
Render in the background
Note: Users can cancel their subscription at any time and switch back to the free plan.
Streamladder may be free to use, but it doesn’t give you full accessibility and control to create great content. In this case, you should consider using Eklipse instead.
Source: Eklipse Blog
You might have heard of StreamLadder and Eklipse before. Both are web-based services that help you convert your Twitch clips into TikTok, Reels, or Shorts videos with various editing options. While StreamLadder offers a free basic plan with limited features, Eklipse also has both free and premium plans, packed with more amazing tools for you.
Eklipse is a more advanced and innovative service that uses AI to generate multiple highlight clips for you from your Twitch, YouTube, or Facebook streams. You can use voice command AI to clip your best moments in real-time; surely only Eklipse has this unique feature just for you.
Not only that, Eklipse offers a free basic plan that lets you create unlimited videos with a watermark and access to premium templates and background music. If you want to unlock the full power of Eklipse and get 1080p resolution, watermark-free videos, faster processing speed, and more, you need to upgrade to the premium plan, which costs $19.99 per month or $149.99 per year.
Well, now you know the answer to the popular question: “Is StreamLadder free?” The answer is yes but with limited features available. If you want to use a great premium clipping tool, we highly recommend Eklipse because you can get better features with higher capability by adding just a few more dollars compared to the StreamLadder premium plan. Hope this information helps!
Are you looking for a video editor that can help you create engaging and professional videos for your streaming or gaming channel? If so, you might want to check out this VEED.io review 2024. VEED.io is one of the best online video editors that claims to be fast, easy, and free.
In this article, we will review VEED.io and see what it can offer to you as streamers and gamers to boost your productivity and popularity. By the end of this article, you will have a better idea of whether VEED.io is the right video editor for you. Let’s get started!
VEED.io is an online video editing platform that allows you to create and edit videos for various purposes, such as social media, podcasts, YouTube, advertising, and more.
Source: VEED.io
VEED.io is browser-based, which means you don’t need to download or install any software to use it. You can access VEED.io on any browser and device, as long as you have an internet connection.
How Does It Work?
To use VEED.io, you need to create an account and log in. Then, you can either upload your video files or use the screen recorder or webcam to capture your footage.
Source: VEED
Here’s the complete workflow of VEED.io:
Easily sign up to create a Free Plan account. Start your video editing journey with a simple registration process.
Enter project details and basic information to begin editing. Upload content smoothly, with various template options available.
Use essential tools such as the progress bar maker, waveform creator, and resizing features. Enhance your creativity with subtitles, emojis, filters, and other innovative elements.
Collaborate efficiently on video projects with team-sharing capabilities. Enhance collaboration by adding extra elements like emojis, stickers, and filters.
Access tutorials and support channels to master the VEED workflow effectively. Utilize educational resources for a polished and engaging video editing experience.
Getting Started with VEED
Getting started with VEED is a straightforward process. First, open your web browser and go to the veed.io website.
You can start using VEED by signing up for a free account or logging in if you already have one. The free account offers basic features sufficient for simple projects and small files.
Source: Screenshots by Eklipse.gg
Once logged in, you will be directed to the dashboard. This is where you can access your existing projects, start new ones, or explore templates.
For newbies, beginning with a template can be a game-changer. Veed offers a library of pre-made video templates to jumpstart your editing process.
Source: Screenshots by Eklipse.gg
Templates come pre-equipped with structured designs, so you only need to customize a few elements to make the video your own. This could be as simple as changing the text, swapping out images, or tweaking colors.
It’s a fantastic way to learn how different features work and to produce a polished-looking video quickly. Plus, it builds your confidence as you see immediate, professional results from your efforts!
Navigating VEED
Navigating VEED is a breeze, even if you’re not exactly tech-savvy. Let’s walk through how you can find your way around and start making awesome videos with ease.
VEED keeps things simple. On the left side, a menu bar is your gateway to all the cool features. If you’re looking for a head start, hit up the Templates section.
Source: Screenshots by Eklipse.gg
Creating something from scratch? Just hit the ‘Create Project’ button. Drag and drop your video clips right into the browser window, or use the upload button.
Got a sudden burst of inspiration? You can record directly from your webcam or screen right within VEED—no need for extra software. But we don’t recommend doing this, because uploading your media can slow down the process.
The uploaded media are not stored in a dedicated storage but immediately added to the project. It is confusing if you’re editing multiple clips at the same time.
Source: Screenshots by Eklipse.gg
If you need help, you can also use their AI help by clicking the “Start with AI button.”
Source: Screenshots by Eklipse.gg
Once your clips are in, the fun starts. Drag your clips around in the timeline at the bottom of the screen. It’s where you’ll spend most of your time, trimming clips, adjusting timing, and layering your masterpiece.
Source: Screenshots by Eklipse.gg
On the left, you’ll find all the editing tools you need. From adding text and filters to fine-tuning colors and adding subtitles, everything is a click away.
For more advanced users, VEED offers features like automatic subtitles (which can be edited for accuracy), translations, and even screen recording functionalities.
Before finalizing your video, you can preview it to ensure everything looks and sounds as expected. Once you are satisfied with your video, you can export it in various resolutions and formats depending on your subscription plan.
VEED also offers options to directly share your videos on social media platforms or through other online channels.
Any videos you’ve started on will show up under Recent Videos.’
Source: Screenshots by Eklipse.gg
Tips for new users, better spend some time exploring all the features that VEED offers. Experimenting with different tools and effects can help you understand the full capability of the platform.
VEED User Interface
The VEED user interface is all about keeping things sleek and simple, so even if you’re new to video editing, you won’t feel out of your depth.
When you log into VEED, you’re greeted by a clean, minimalist dashboard. There’s no clutter or overwhelming arrays of buttons and settings, which is a breath of fresh air if you’ve ever been intimidated by more complex video editing software.
The dashboard is super navigable, making it easy to find old projects or start new ones without any fuss.
On to the editing workspace—this is where the magic happens. Everything you need to transform your footage into a polished video is laid out in panels that are easy to navigate.
VEED makes sure you see exactly what your video will look like before you decide to download or share it. The preview button is always in sight, and when you’re done, exporting your video is just as straightforward. Choose your desired quality, format, and even where you want to share your video directly.
Source: Screenshots by Eklipse.gg
VEED understands that not everyone wants to be a professional editor, but everyone wants to feel like one. So, whether you’re a beginner or you have some editing chops, you’ll appreciate the simplicity and functionality of the layout.
VEED.io Key Features
Source: Screenshots by Eklipse.gg
VEED.io offers a variety of features to help you create impressive videos easily. Key features include:
Automatic subtitles: Transcribe audio to text in seconds and customize subtitles.
Screen recorder and webcam: Record and edit demos, tutorials, or live streams.
Filters and effects: Apply filters, adjust brightness, contrast, and more.
Stickers and images: Add stickers, upload images, and customize them.
Music and sound effects: Add music, trim audio, and adjust volume.
Object detection and tracking: Use AI to detect and track objects in your video.
Create avatars: Users can generate digital avatars that look like themselves, and then use them in the videos.
Video GPT by VEED: It leverages ChatGPT to generate video content from text prompts. This technology can be thought of as a kind of “video chatbot” that interprets user inputs and creates corresponding video segments that match the content described.
VEED.io Pricing
VEED.io offers four plans for its users: Free, Basic, Pro, and Business, starting from $18 until $59 per month. Each plan offers different prices and features:
Plan
Description
Price (per month, billed annually)
Features
Free Plan
Ideal for quick projects under 10 minutes. Unlimited 720p exports with Veed watermark. 30 minutes of subtitles per month.
Free
Individuals and professionals rely on video for growth. 1440 minutes of subtitles, subtitle translation, and advanced export capabilities. Access to Veed’s library of stock audio, stock video, and templates.
Basic Plan
Designed for easy online video editing. Removes Veed watermark. 1080p video quality exports for up to 25 minutes. 720 minutes of subtitles.
$18
– Easy online video editing– No Veed watermark– 1080p video quality exports for up to 25 minutes– 720 minutes of subtitles
Pro Plan
Individuals and professionals rely on video for growth. 1440 minutes of subtitles, subtitle translation, and advanced export capabilities. Access to Veed’s library of stock audio, stock video, and templates.
$30
– 1440 minutes of subtitles– Subtitle translation– Advanced export capabilities– Access to stock audio, stock video, and templates– AI editing tools
Business Plan
For organizations integrating video into their growth and communication strategies. 8000 minutes of subtitles, custom templates, clickable links in videos, advanced video analytics, and 4k video exports.
$59
– 8000 minutes of subtitles– Custom templates– Clickable links in videos– Advanced video analytics– 4k video exports
Is VEED Worth It or Not?
Source: VEED.io
So, we have seen the VEED.io review 2024. Now, deciding if VEED is worth it boils down to how much it helps with making videos. People really like VEED because it’s easy to use and saves time and money. It has lots of useful features, like tools that make your audio sound better and change text into speech. This makes it simple for users to make interesting videos.
However, certain advanced features are exclusive to more expensive plans, restricting access for users on free plans. This can be a significant issue, especially for new content creators with a limited budget.
But don’t worry, because there are lots of AI clipping tools with more reasonable prices and better features.
If you are looking for a video editing tool to help you create and share your best gaming moments with your fans and followers, you might be interested in Eklipse, a free AI-powered tool tailor-made for streamers and gamers.
Eklipse differs from VEED.io and other video editing tools because it can automatically capture your most glorious moments and generate epic clips ready for sharing on social media. Eklipse does the hard work for you, using its smart algorithms to identify highlights and create stunning videos in seconds.
Another great feature of Eklipse (which is not found in VEED.io) is voice-command editing. You can shout commands like “clip it” and have it instantly marked in your footage. You can also use AI-powered captions that magically appear, making your content accessible to everyone.
The most interesting part of Eklipse is that everything is available for free. However, if you crave more power, Eklipse offers a premium plan at a lower price compared to VEED.io (only $19.99 per month!). You can enjoy high-resolution exports, extended processing times, and a treasure trove of storage space without breaking the bank.
Yes, VEED.IO is designed to be user-friendly and accessible for users of all skill levels.
Is VEED a good editor?
Yes, VEED is a good editor, especially for users looking for an intuitive and feature-rich online platform for video editing. It offers a variety of user-friendly tools for tasks like subtitling, cutting, and effects, making it ideal for both beginners and experienced users who need to quickly produce high-quality video content.
Is Veed IO safe to use?
Yes, VEED.io is safe to use. VEED.io uses SSL encryption to protect your data and privacy. VEED.io also does not store your videos on its servers, unless you choose to do so. VEED.io also complies with the GDPR and other data protection laws.
Is Veed IO completely free?
No, VEED.io is not completely free. VEED.io offers a free plan that allows you to edit up to 10 minutes of video per month, with a watermark and limited features. If you want to remove the watermark and access more features, you need to upgrade to a paid plan, which starts from $18 per month.
Is VEED good for subtitles?
Yes, VEED.io is good for subtitles. VEED.io can automatically generate subtitles for your video in seconds, using its AI software. You can also edit the subtitles manually or upload your transcript file.
Does VEED IO have a mobile app?
No, VEED.io does not have a mobile app. VEED.io is a web-based platform that you can access on any browser and device, including mobile phones and tablets. You don’t need to download or install any app to use VEED.io.
How much does the VEED app cost?
$12 for the Basic plan, $24 for the Pro plan, and $59 for the Business plan.
Is VEED free for commercial use?
For commercial use, a subscription to the Basic, Pro, or Business plan is recommended. The watermark on the free version can be disturbing. Commercial rights for videos are granted with the purchase of a subscription.
Final Thoughts
That’s the complete VEED.io review for 2024. Even though VEED.io is a fast and easy video editor with various interesting features, this app also has some limitations and drawbacks that you should consider before using it.
If you are looking for a video editor that can meet your needs and preferences, you might want to check out Eklipse or some of the alternatives to VEED.io. Remember to pick the right AI tools that suit your needs. Thanks for reading this VEED.io review 2024, happy streaming!