Funny profile pictures (PFPs) for TikTok are gaining popularity nowadays and have even become an enduring trend on the platform. Many TikTok users are inclined to change their PFPs to hilarious pictures because, let’s face it, who can resist funny memes?
Consequently, people continue to create funny pictures and share them on social media. This allows other users to utilize them on their TikTok accounts or other platforms such as Twitter or Discord.
Fortunately, you’ve come to the right place if you’re searching for funny TikTok PFPs. We have compiled a list of the best and funniest PFPs from various sources for you to browse and use. Let’s dive into the list, but be warned, you might not be able to contain your laughter!
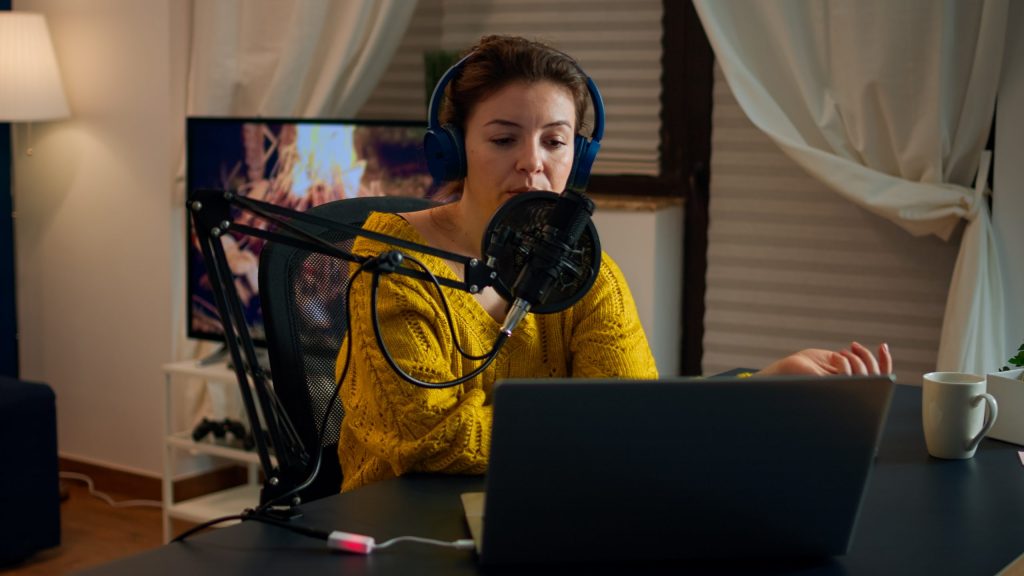
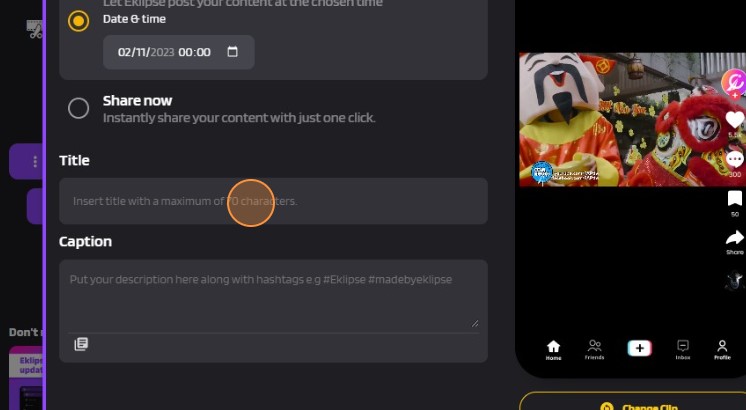
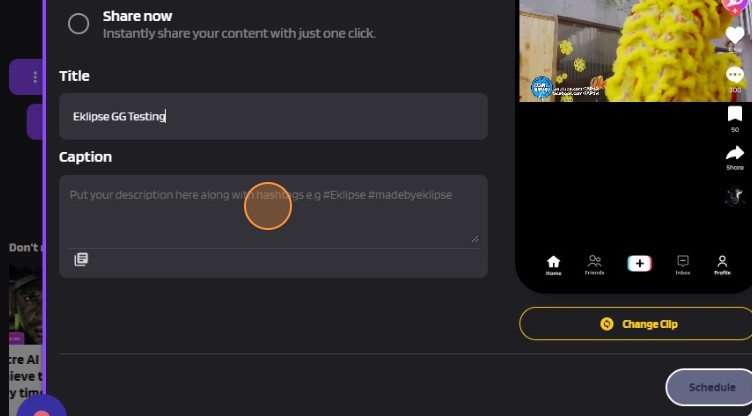
Level Up Your TikTok Game: Auto-Clips, Music, and More with Eklipse AI.
Funny PFP For TikTok: Fun Your Favorite One!
The use of funny PFP on social media can make your day. It sometimes tells you a hidden story or a kind of sarcasm. But it is indeed not to insult others. If you want to understand the funny part of a PFP, you need to understand the context. But the thing is for sure, we are all just joking. So don’t take it seriously and just enjoy the PFPs here.
More on Eklipse Blog >> Top 6 TikTok Video Editor Apps – Pick Your Favorite Ones!
The Best Fortnite PFP


Funny PFP for TikTok Boy


Disney Animation Funny Profile Picture


More on Eklipse Blog >> How to Upload TikTok Video to YouTube: A Beginner’s Guide
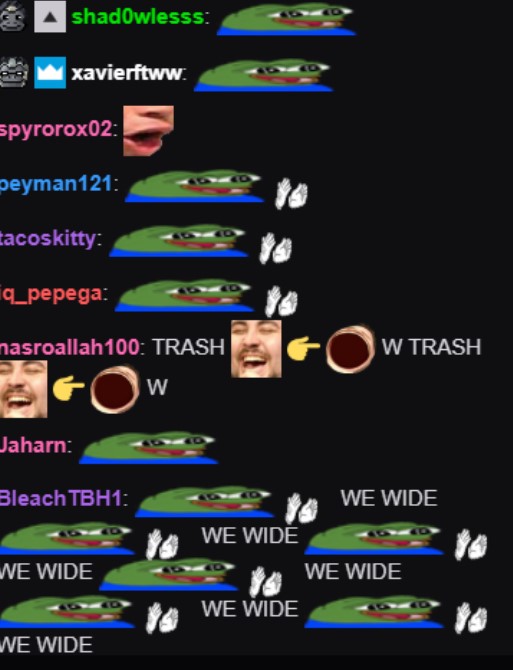
Funny Animal Related PFP
![This contains an image of: outer banks groupchat - Chapter Eighteen | :]](https://i.pinimg.com/236x/8d/00/89/8d0089e3157f2aa6422c1db328243693.jpg)


Cool and Funny PFP


TikTok Fame in Minutes? Eklipse Turns Your Long Videos into Viral Gold.
Hilarious Cartoon PFP


Funny PFP for TikTok Cat


More on Eklipse Blog >> 5 TikTok Online Video Editors: Create Stunning Content Instantl
Funny PFP for School


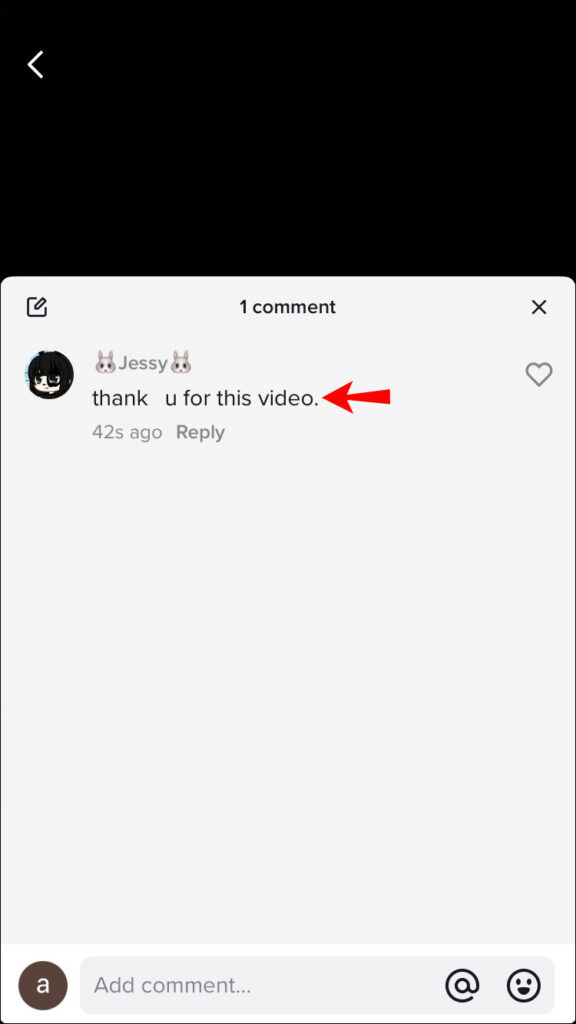
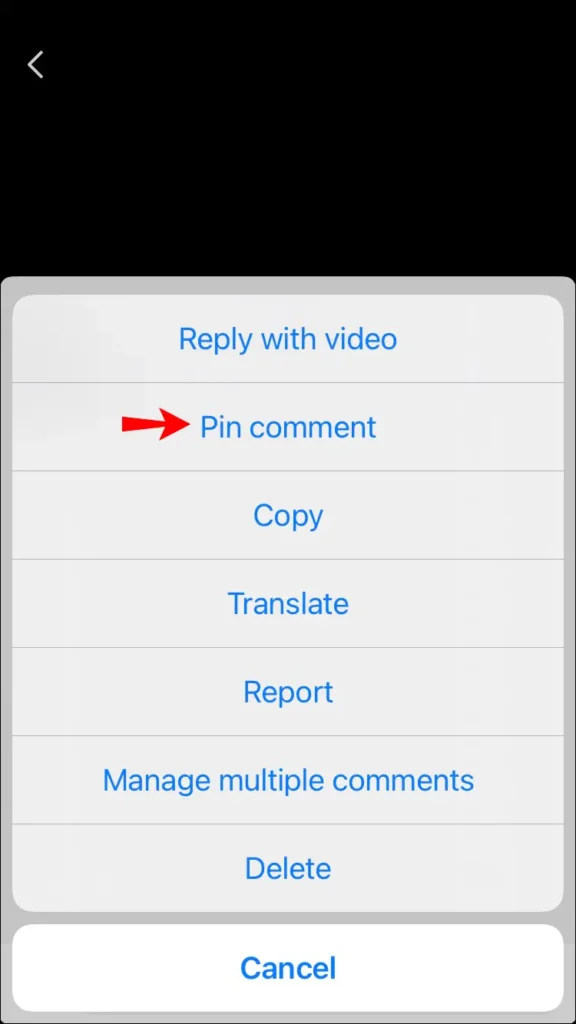
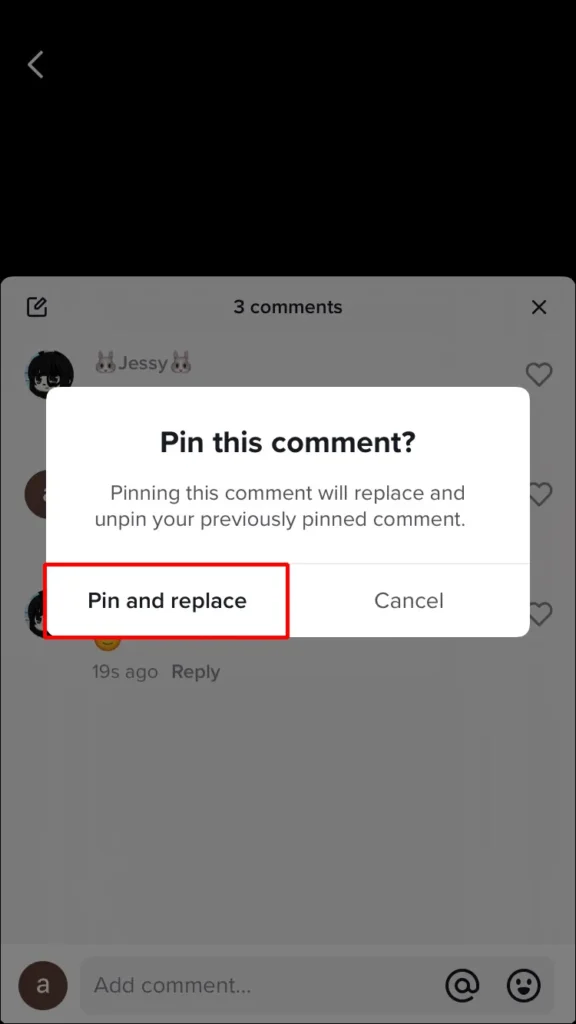
How To Download Funny PFP for TikTok?
To have some funny TikTok PFP, you just need to do the following steps. Only three super-simple steps to download your favorite PFP. Here’s how:
- Read this whole article and find the best and funniest PFP
- Right-click to the image you want to download
- Then click Save Image As…
- Rename it or leave it with the same name
- Hit the Save button
Now, you can download the images as many as you want and use them wherever and whenever you decided to. Anyway, PFPs are mostly free to download. So, you don’t need to pay for a single pic or GIF at all. Enjoy the jokes!
More on Eklipse Blog >> Tiktok profile views feature incites privacy debate
How Big is a Profile Picture for TikTok?
The PFP must be 20 x 20 pixels. It is the ideal size if you want to upload. Additionally, PFPs aren’t just for fun, you can also make them part of your identity on TikTok. You should make them fun, but also impactful.
Just keep it to your mind that your PFP won’t be visible once the profile video is set.
Conclusion
Funny PFP for TikTok is a sort of how TikTok users cheer each other up. So, you don’t need to take everything seriously about PFPs. Other than entertaining its users, PFPs can also be a representation of your emotions. So, which one is your favorite PFP?
Lastly, don’t forget to boost your TikTok’s followers with Eklipse!
Our AI-powered tool for effortlessly turning your Twitch/Kick/YouTube LIVE moments into TikTok/Short/Reels content with just one click! This free application not only detects, but also automatically creates and shares your short videos.
Click here to try Eklipse for free now and start becoming a viral FYP sensation on TikTok.
Maximize your Black Ops 6 rewards—Create highlights from your best gameplay with with Eklipse
Eklipse help streamer improve their social media presence with AI highlights that clip your Twitch / Kick streams automatically & converts them to TikTok / Reels / Shorts