You missed the live stream. You rush to the channel to catch the replay, only to be hit with a purple screen: “Subscribe to watch this video.”
It is one of the most frustrating experiences on Twitch. Whether you are a broke student, a casual viewer, or a content creator studying gameplay, being locked out of a VOD (Video on Demand) feels like hitting a brick wall.
While Twitch allows streamers to lock their archives behind a paywall to encourage subscriptions, there are ways to access this content for personal viewing. In this guide, we will show you how to download and watch Sub-Only VODs without installing shady software on your PC.
Twitch partners and affiliates can toggle a setting that makes their past broadcasts accessible only to active subscribers. While this supports the creator, it is a nightmare for:
Clip Channels: Who need footage to create compilations.
Coaches/Analysts: Who need to review gameplay.
Casual Fans: Who simply missed the notification.
You might have tried searching for “Twitch VOD Bypass” scripts on GitHub, but those often require coding knowledge or stop working after a Twitch API update. There is a safer, cloud-based way.
Method 1: The Eklipse VOD Downloader (Safe & Easy)
The fastest way to watch a restricted VOD is to download it. Once the file is on your device, the subscription lock no longer applies.
Eklipse offers a powerful VOD processing tool that fetches stream data directly from Twitch servers. Unlike sketchy browser extensions that might steal your cookies, Eklipse is a verified cloud tool used by over 1 million creators.
Why use Eklipse?
No Installation: It runs in your browser (Chrome/Edge/Mobile).
Safe: No need to mess with “Inspector Element” or scripts.
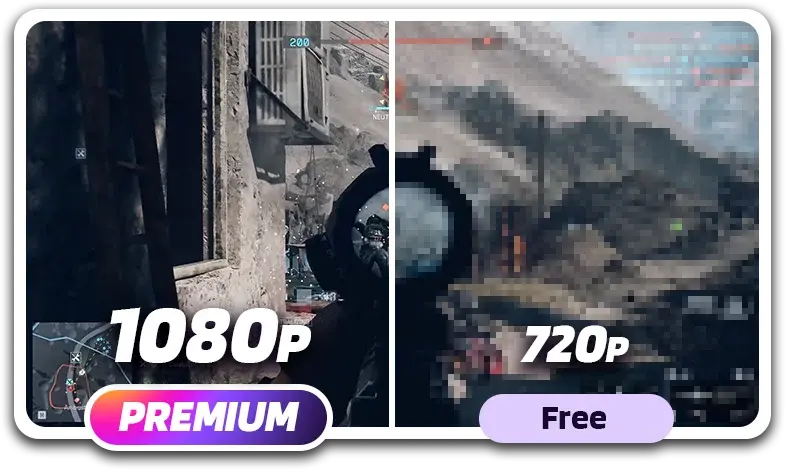
High Quality: Downloads the source quality (1080p60fps).
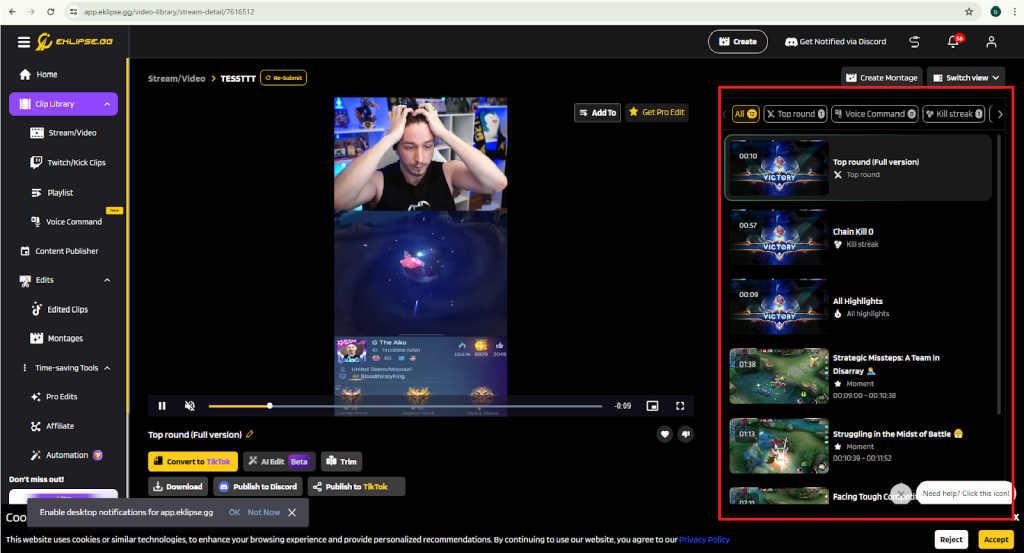
Step-by-Step Guide:
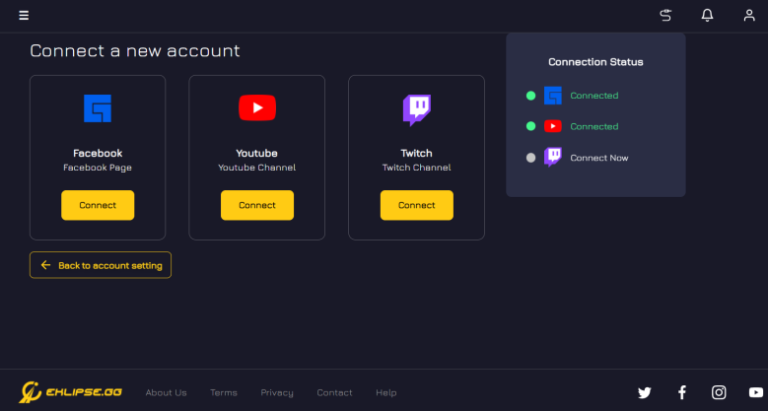
Copy the Link: Go to the Twitch channel and copy the link of the locked VOD.
Paste & Process: Paste the Twitch URL into the “Get Clips” or “Downloader” section.
Download: Eklipse will fetch the video data. You can then download the full video or let our AI automatically cut it into TikTok-ready highlights.
(Note: While Eklipse is powerful, always respect the creator’s copyright. Download VODs for personal viewing or fair-use content creation only.)
Method 2: The Technical Route (TwitchRecover/GitHub)
If you are comfortable with command lines and installing third-party executable files, the open-source community has developed tools like TwitchRecover.
How it works: It attempts to find the unmuted .m3u8 playlist file of the VOD from Twitch’s backend servers.
The Downside: Twitch frequently patches these exploits. A tool that works today might be broken tomorrow. Furthermore, downloading .exe files from unknown GitHub repositories always carries a security risk.
Verdict: Unless you are a developer, stick to cloud-based solutions like Eklipse to avoid malware and headaches.
Don’t Let a Paywall Stop You
Content is meant to be watched. Whether you are catching up on lore or analyzing a pro player’s rotation, you shouldn’t be blocked by a sub-wall for a stream that happened 12 hours ago.
Ready to grab that VOD? Stop searching for complex scripts and use the tool built for gamers.
Struggling with FPS drops, black screens, or crashes while recording Arc Raiders? Here is the ultimate guide to optimizing your Arc Raiders recording settings and switching to a lightweight clipping solution.
Arc Raiders is a visually stunning extraction shooter, but it’s also demanding on your hardware. If you are trying to record your gameplay using local software like OBS, Medal, or Nvidia Shadowplay, you might be experiencing significant performance issues. Finding the right Arc Raiders recording settings is crucial to maintaining high frame rates while capturing crisp footage of your extractions.
Common Arc Raiders Recording Issues reported by players:
FPS Stuttering: The game freezes or drops frames during intense firefights.
Black Screen: OBS captures audio but shows a black screen for the game feed.
Game Crashing: Running recording software alongside the game causes Arc Raiders to crash to the desktop.
The root cause? Local recording software eats up valuable CPU and GPU resources that Arc Raiders desperately needs to run smoothly. The solution isn’t just lowering your game settings—it’s changing how you record.
The Fix: Switch to Cloud-Based Clipping (Zero FPS Drop)
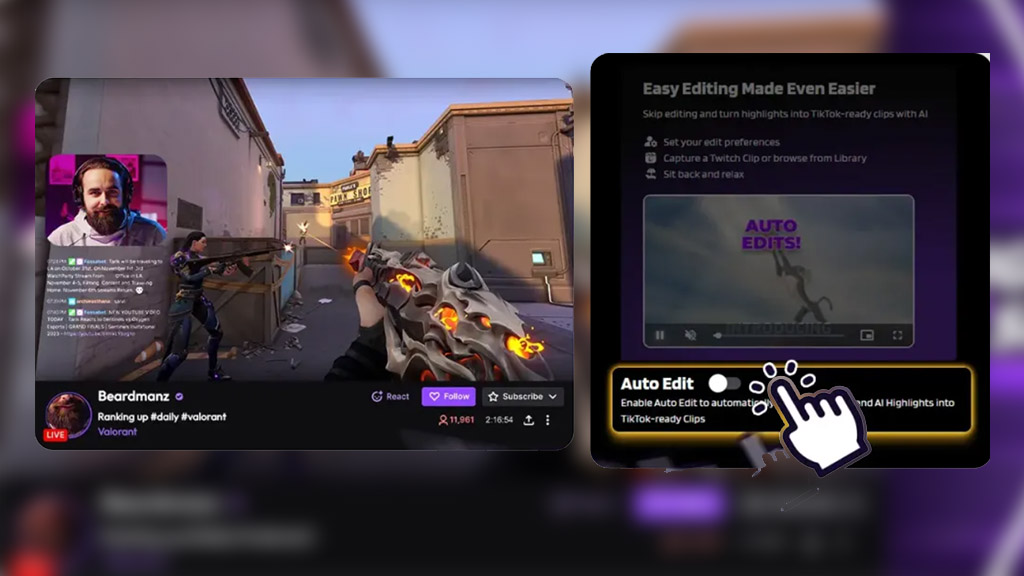
Instead of forcing your PC to render the game AND record the video simultaneously, use a cloud-based clipper like Eklipse. By connecting your Twitch or YouTube stream to Eklipse, the recording happens on our servers, not your rig.
Why this fixes Arc Raiders lag:
0% GPU Usage: Your graphics card focuses 100% on rendering Arc Raiders.
No Black Screens: Eklipse captures the stream feed directly, bypassing local hook issues.
Auto-Highlights: You don’t even need to hit a hotkey. Our AI detects intense moments and clips them for you.
Recommended Arc Raiders Graphic Settings for Visibility
Even with cloud clipping, optimizing your in-game settings ensures your recordings look crisp and enemies are easy to spot. Here are the best settings for a balance of performance and visibility:
Setting
Recommendation
Reason
Window Mode
Fullscreen
Prioritizes game resources and prevents OBS capture bugs.
DLSS / FSR
Quality / Balanced
Boosts FPS significantly without making the image blurry.
Shadow Quality
Medium/Low
High shadows kill FPS and make enemies harder to see in dark corners.
Motion Blur
OFF
Essential for clarity. Blur makes clips look messy and hides targets.
V-Sync
OFF
Reduces input lag for snappier aiming.
How to Clip “Bugs & Glitches” for Dev Reports
Since Arc Raiders is still in active development, you will encounter bugs. Developers need video proof to fix them. Instead of constantly recording huge files, use Voice Command to clip bugs instantly.
Connect Eklipse: Link your stream account.
Enable Voice Command: In the Eklipse dashboard settings.
Trigger the Clip: When you see a glitch (or hit a crazy shot), just say “Clip That!” or “What the heck!”.
Instant Proof: Eklipse saves the last 60 seconds and sends it to your library, ready to be shared on Discord or Reddit.
Ready to record Arc Raiders without the lag?
Don’t let recording software ruin your extraction. Switch to Eklipse today and capture every loot run in 1080p without touching your PC’s performance. Start clipping for free!
TL;DR Q: What is the best clipping software for gaming? A: For pure performance, Eklipse.gg ranks #1 with 0% hardware impact (cloud-based). For local recording, NVIDIA ShadowPlay is the most efficient (<5% FPS drop). Medal.tv offers great social features but consumes more RAM.
When you are pushing for 240Hz in competitive shooters like Valorant or Call of Duty, every single frame matters. Choosing the best clipping software for gaming is a mathematical decision. A poorly optimized recorder can eat up 15-20% of your CPU, causing micro-stutters that ruin your aim.
In 2026, efficiency is the only metric that counts. We have analyzed and ranked the top 10 clipping tools on the market, prioritizing FPS impact, CPU usage, and processing speed. Whether you need a tool that generates viral clips in 60 seconds or a recorder that runs invisibly in the background, this list provides the hard data you need to optimize your setup.
We ranked these tools from Lowest Impact (Best Performance) to Highest Impact.
Rank
Software
FPS Impact (Est.)
CPU/RAM Usage
Best For
Price
#1
Eklipse.gg
0% (None)
0% (Cloud)
Streamers (Auto-Clip)
Free / Premium
#2
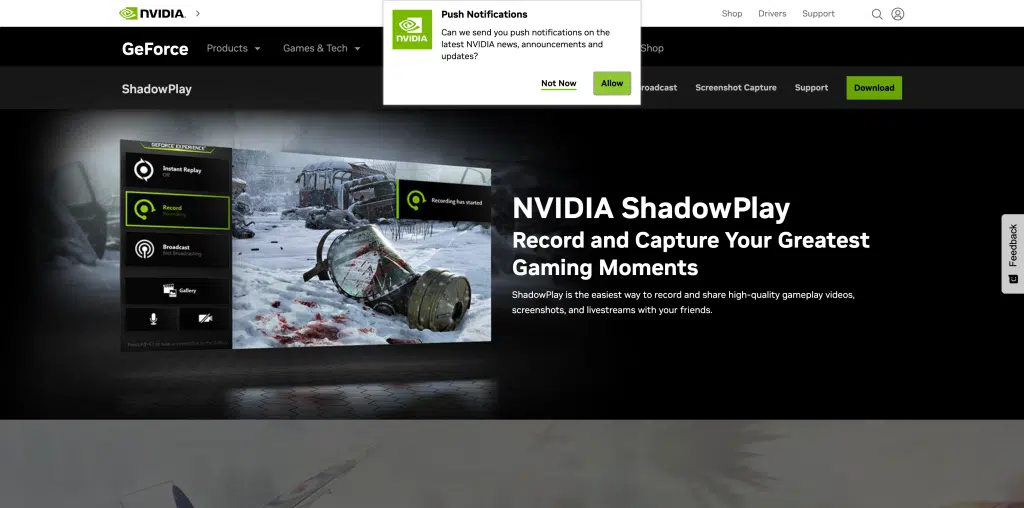
NVIDIA ShadowPlay
~3-5%
Low (GPU Encoded)
NVIDIA Users
Free
#3
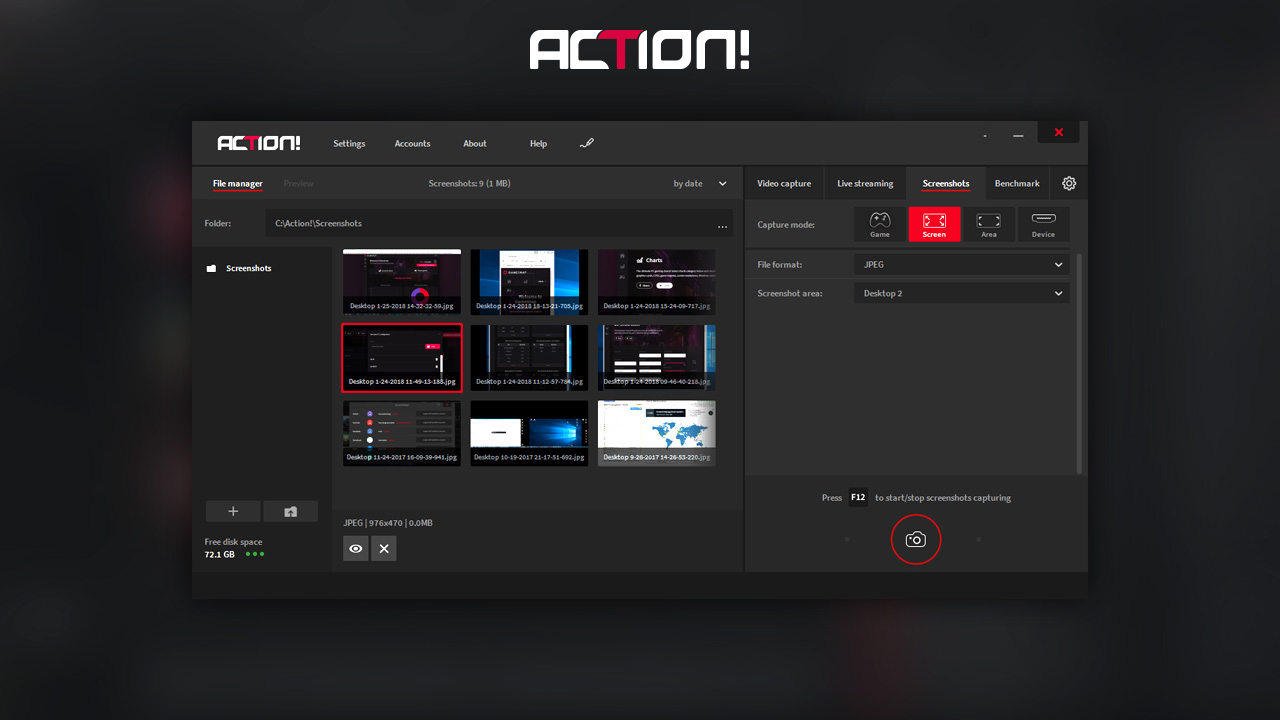
Action!
~4-6%
Low (Proprietary Codec)
High FPS Recording
$19.77 (Lifetime)
#4
OBS Studio
~5-10%
Medium (Highly Variable)
Full Control
Free ($0)
#5
Xbox Game Bar
~5-8%
Low-Medium
Windows Native
Free
#6
VideoProc
~8-12%
Medium (HW Accel)
Low-End PCs
$25.95/yr
#7
EaseUS RecExperts
~10-15%
Medium
Scheduled Recording
$19.95/mo
#8
HitPaw
~10-15%
Medium
Multiple Inputs
$9.99/mo
#9
Medal.tv
~10-20%
High (High RAM)
Social Sharing
Free / Premium
#10
Rav.ai
N/A
N/A (Post-Process)
Enterprise Editing
$2,000/yr
1. Eklipse.gg – The 0% Impact Champion
Eklipse: The Ultimate AI Video Editor
The Numbers: 0% CPU Usage | 1080p Quality | 10 Clips in 60 Seconds
Eklipse.gg takes the #1 spot for a logical reason: it bypasses your hardware entirely. Unlike local recorders that encode video while you play (stressing your PC), Eklipse connects to your Twitch, YouTube, or Kick stream. It processes the VOD on cloud servers after or during your stream.
Why it wins on specs:
0 FPS Drop: Your PC dedicates 100% of its resources to the game.
Automation Speed: AI detects kills and funny moments, generating vertical clips automatically.
Storage Saved: No massive video files clogging your SSD; everything is stored in the cloud.
The Numbers: ~3% Performance Hit | Up to 8K Resolution
If you are an offline gamer (not streaming), ShadowPlay is the mathematical leader. It utilizes the dedicated NVENC encoder chip found on GTX and RTX cards. This chip is separate from the part of the GPU that renders your game, resulting in negligible performance loss.
Pros: “Instant Replay” buffers the last 5-20 minutes efficiently.
Cons: Zero editing automation. You must manually cut and format every file.
3. Action! – Best for High Refresh Rates
The Numbers: 120 FPS Recording | FICV Codec
Mirillis Action! is optimized for speed. It uses a proprietary video codec (FICV) designed to be lighter than standard H.264. It is one of the few recorders that can capture at 120 FPS or even 240 FPS, making it ideal for creating silky-smooth slow-motion montages.
Pros: Extremely low CPU overhead due to optimized code.
Cons: Paid software; the interface is dated.
4. OBS Studio – Best for Customization
The Numbers: $0 Cost | Unlimited Scenes
OBS is the industry standard, but it requires manual tuning. If configured correctly (using NVENC or AMF encoders), the impact is low (~5%). However, adding complex overlays or using the wrong settings (like x264 software encoding) can spike CPU usage to 20%+, causing massive lag.
Pros: Total control over bitrate and audio tracks.
Cons: High risk of user error affecting performance.
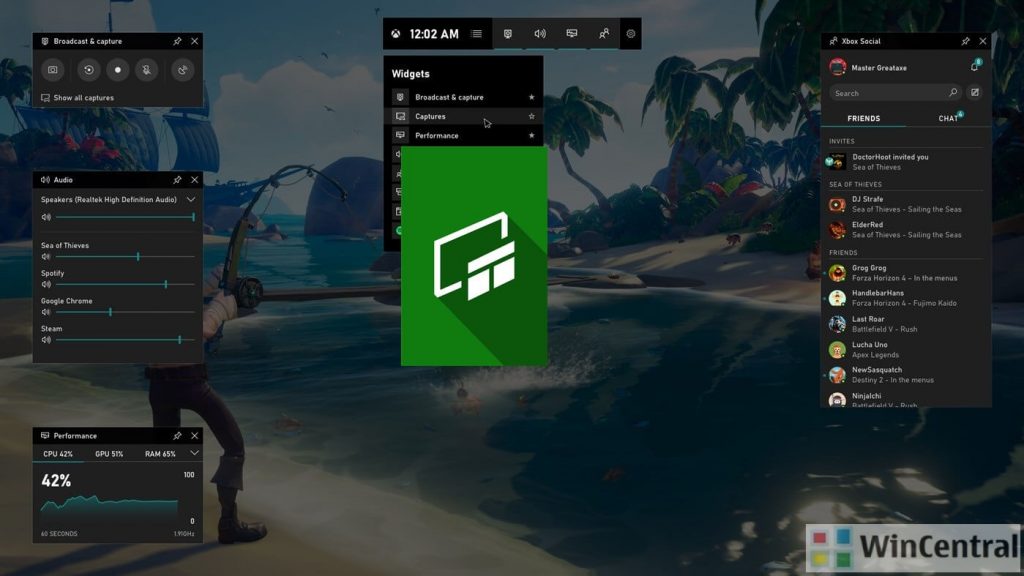
5. Xbox Game Bar – Best for Native Integration
Source: thewincentral
The Numbers: Pre-installed on 100% of Windows PCs
The Xbox Game Bar is “always on” in Windows 10/11. Its “Record Last 30 Seconds” feature is convenient and reasonably efficient because it’s integrated into the OS kernel. However, it does run background services that consume a small amount of RAM constantly, even when you aren’t gaming.
Pros: No installation required.
Cons: Limited to 30-second or 5-minute buffers; basic quality options.
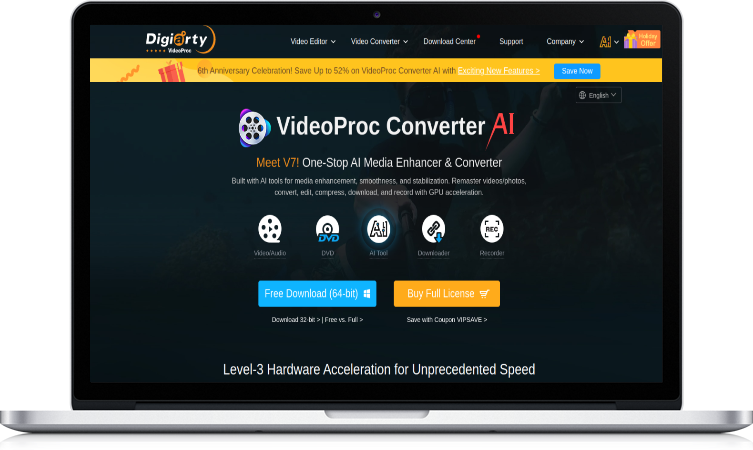
6. VideoProc – Best for Low-End Hardware
Source: https://www.videoproc.com/
The Numbers: Level-3 Hardware Acceleration
VideoProc focuses on “Level-3 Hardware Acceleration,” utilizing Intel QSV, AMD, and NVIDIA tech to offload tasks. It is a solid choice for older laptops where CPU cycles are scarce. However, as an external app, it still has more overhead than ShadowPlay.
Pros: Good for non-gaming PCs.
Cons: Paid license required for full features.
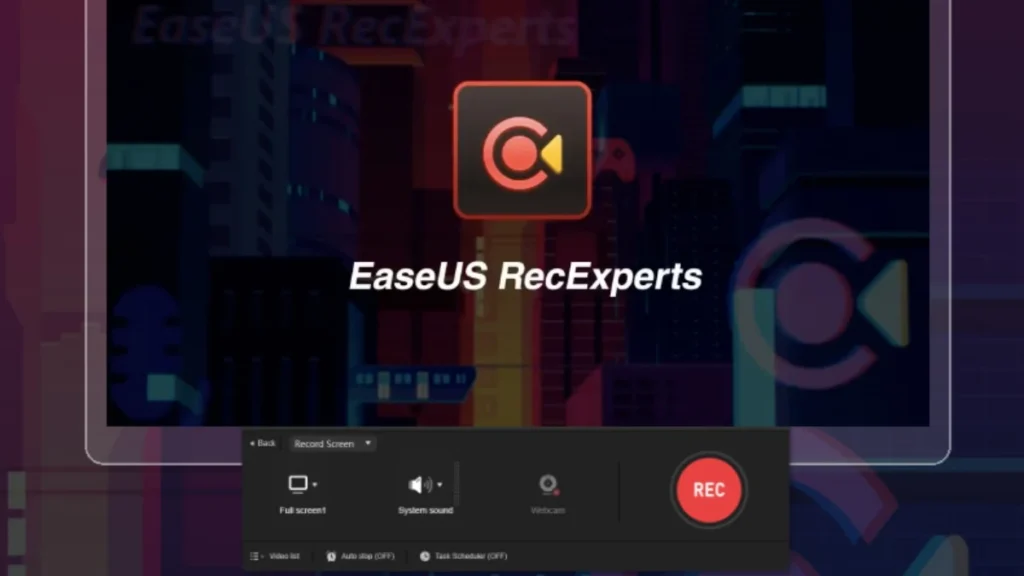
7. EaseUS RecExperts – Best for Scheduled Capture
The Numbers: 4K UHD Support | Monthly Subscription
EaseUS is a general-purpose screen recorder with a “Game Mode.” While it produces high-quality 4K video, benchmarks show it consumes more system resources than dedicated gaming tools. It is better suited for recording tutorials than high-octane competitive gameplay.
8. HitPaw – Best for Multi-Device Inputs
The Numbers: 3 Simultaneous Inputs
HitPaw allows you to record your screen, webcam, and even an iOS device simultaneously. While impressive, processing three video streams in real-time takes a toll on your CPU. Expect a 10-15% FPS drop on mid-range machines.
9. Medal.tv – Best for Social (High Resource Usage)
The Numbers: 500MB+ RAM Usage | Electron Framework
Medal is incredibly popular for its social feed, but from a performance standpoint, it is heavy. It runs on the Electron framework (like a web browser), which is known for high RAM usage. On lower-end PCs with 8GB or 16GB of RAM, running Medal alongside a heavy game like Cyberpunk 2077 can cause stuttering.
Pros: One-click sharing and cloud syncing.
Cons: Heaviest background resource usage on this list.
10. Rav.ai – Best for Post-Production (Not Real-Time)
The Numbers: $2,000/year Entry Price
Rav.ai is not a real-time clipper but an automated editing service. It has N/A impact on your FPS because you upload files after you play. However, the “cost” here is time and money. It is designed for enterprise-level creators who need full video edits, not quick clips.
How to Choose Based on Specs (The Logic)
When looking at the numbers, apply this logic to your decision:
For Maximum FPS (Competitive): Use Eklipse (if you stream) or ShadowPlay (if you don’t). These offer the lowest mathematical impact on your system.
For Content Volume:Eklipse wins. It automates the extraction of clips, saving you ~10 hours of editing time per week.
For Social Features:Medal is great, but only if you have a high-end PC (32GB RAM recommended) to handle the overhead.
Frequently Asked Questions (Data & Specs)
Which software has the absolute lowest FPS drop?
Eklipse.gg technically has the lowest impact (0 FPS drop) because it processes the VOD from the streaming platform’s server, not your PC. Among local recorders, NVIDIA ShadowPlay is the most efficient (~3% impact).
Why does Medal.tv make my game lag?
Medal.tv uses the Electron framework, which can be RAM-intensive. If your system runs out of RAM, it starts using the disk page file, causing significant in-game stutters.
Is 60FPS recording enough for TikTok?
Yes. While you may game at 144Hz or 240Hz, TikTok and Instagram Reels cap videos at 60FPS. Recording higher than 60FPS is only useful if you plan to use slow-motion effects.
Final Verdict: The Numbers Don’t Lie
If you want to protect your frame rate in 2026, the data points to a clear winner:
The Efficiency King:Eklipse.gg. By offloading the processing to the cloud, it guarantees 0% hardware usage while you play.
The Local Standard:NVIDIA ShadowPlay. The best option for offline recording with minimal impact.
Stop sacrificing frames for content. Switch to the most efficient workflow today.
TL;DR: Q: How to create a highlight reel? A: The most efficient way is to use an AI-powered tool like Eklipse.gg. It automatically scans your VODs, detects the best moments, and compiles them into shareable clips, saving you hours of manual scrubbing and editing.
Learning how to create a highlight reel is essential for channel growth, but the traditional process is a massive time sink. Usually, it involves downloading massive VOD files, scrubbing through hours of footage to find killstreaks or funny moments, and manually editing them together. For most streamers, this manual workflow is the biggest bottleneck to consistency.
But what if you could reclaim that time? Imagine saving 10+ hours of editing work every single week. That is time you could spend streaming, engaging with your Discord community, or simply getting some well-deserved rest. In 2026, you don’t need to be a video editing wizard to go viral; you just need the right assistant. Let’s explore how to automate your highlights and turn hours of work into minutes of review.
There is a common misconception in the streaming community that you have to do everything yourself to “earn” your success. While hard work is necessary, busy work is not. If you stream for 4 hours, spending another 4 hours editing a highlight reel is a recipe for burnout.
Your value as a creator lies in your personality and your gameplay, not in how fast you can use the razor tool in Premiere Pro. By automating the creation of your highlight reels, you shift your focus from production to performance. This is the “Outcome” mindset: the goal isn’t just to have a video; the goal is to have a growing channel without sacrificing your mental health.
The Smart Way: Using Eklipse as Your Personal Assistant
Think of Eklipse not just as a software tool, but as a dedicated production assistant that watches your stream 24/7. While you sleep, Eklipse processes your latest VODs from Twitch, YouTube, or Kick, identifies the high-energy moments, and prepares them for you.
Here is how Eklipse changes the workflow:
Auto-Detection: No need to re-watch your 6-hour stream. Eklipse uses AI to find kills, wins, and funny moments automatically.
Instant Formatting: It automatically converts landscape footage into vertical (9:16) formats perfect for TikTok, Shorts, and Reels.
AI Captions: It generates accurate captions to keep viewers engaged, even with the sound off.
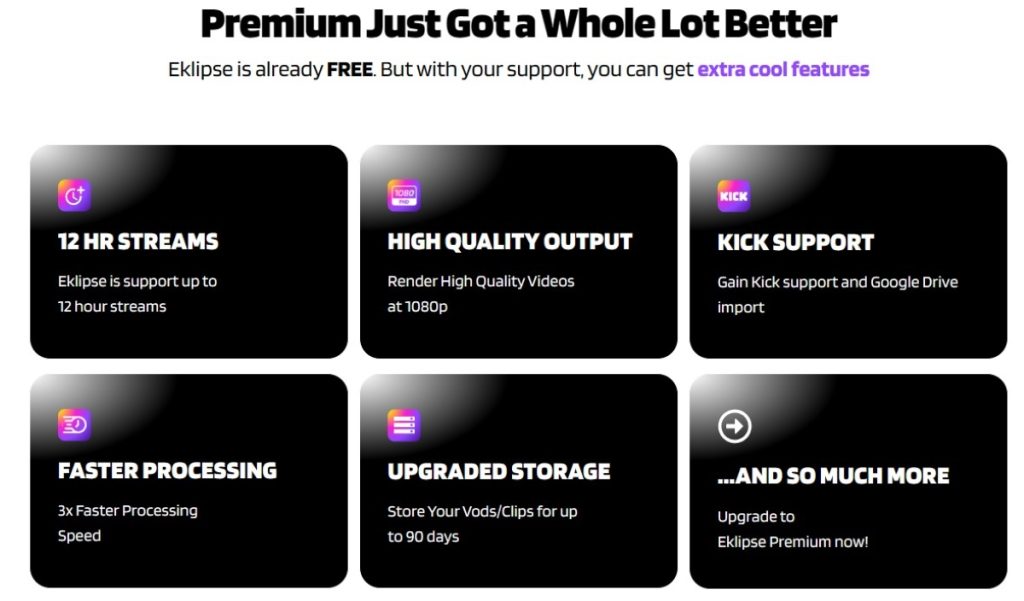
For those serious about quality, Eklipse Premium offers 1080p export quality, faster processing speeds, and the ability to process longer streams. It’s a small investment to reclaim hours of your life.
How to Create a Highlight Reel with Eklipse (Step-by-Step)
How to Get Mobile Legends Highlight Automatically with Eklipse
Ready to save those 10 hours? Here is the exact workflow to generate a highlight reel in minutes.
Step 1: Connect Your Stream
Log in to Eklipse.gg and link your Twitch, YouTube, or Kick account. You only need to do this once. Eklipse will automatically see your past VODs.
Step 2: Select Your Stream
Choose the stream you want to turn into a highlight reel. Click “Get Clips.” Eklipse’s AI will begin analyzing the footage. You can close the tab and walk away—go grab a coffee or start your next stream. The AI is doing the heavy lifting.
Step 3: Review and Refine
Once processed, you will see a list of generated clips ranked by potential virality.
Review: Watch the clips Eklipse selected.
Edit: Use the built-in editor to trim the start/end times, add stickers, or adjust the AI face-cam layout.
Compile: You can download individual clips or stitch them together into a longer montage.
Step 4: Export and Share
Export your clips directly to TikTok, YouTube Shorts, or Instagram Reels. If you are a Premium user, you can utilize the Social Media Scheduler to plan your posts for the week, ensuring you stay consistent without logging in every day.
The Old Way: Manual Editing (For Comparison)
To truly appreciate the time you are saving, let’s look at what the manual process entails. If you choose not to use AI, here is how to create a highlight reel manually:
Download the VOD: Wait for a 5GB+ file to download to your PC.
Watch the Footage: Re-watch your entire stream (real-time or 2x speed) and write down timestamps of good moments.
Import to Editor: Drag the file into DaVinci Resolve or Premiere.
Cut and Trim: Manually cut out the boring parts.
Resize for Vertical: Manually adjust the aspect ratio and keyframe your face cam to keep it in frame.
Add Captions: Type out subtitles manually, word for word.
Render: Wait for the video to export.
Total Time Estimated: 4 to 6 hours per video. Total Time with Eklipse: 15 to 30 minutes.
3 Tips for Better Highlight Reels in 2026
Even with an AI assistant, your creative input matters. Here is how to ensure your highlights perform well:
Keep it Short: Attention spans are shorter than ever. Aim for clips under 60 seconds for Shorts/Reels.
Hook in 3 Seconds: Ensure the very first second of your highlight has action or a loud reaction. If it starts slow, people scroll.
Use Eklipse Premium Features: High-definition quality matters. Viewers on 2026 devices expect crisp 1080p visuals. Upgrade to Premium to remove watermarks and ensure your content looks professional.
Frequently Asked Questions
How long does it take to create a highlight reel with AI?
With Eklipse, the active work time is usually 15-20 minutes. The AI processing happens in the background, so you don’t need to sit at your computer while it finds the clips.
Can I use Eklipse for Kick streams?
Yes! Eklipse supports Kick, Twitch, YouTube, and Facebook Gaming. You can also upload video files directly from your computer or Google Drive (a Premium feature).
Is the free version enough?
The free version is a great starting point, offering 720p exports and standard processing. However, if you want to save maximum time and get the highest quality (1080p) without watermarks, Eklipse Premium is the recommended choice for growing streamers.
Conclusion: Work Smarter, Stream More
Learning how to create a highlight reel doesn’t mean you have to suffer through hours of editing. By leveraging AI, you are buying back your time. That is 10+ hours a week you can reinvest into your community, your gameplay, or your personal life.
Don’t let editing fatigue stop you from growing. Let Eklipse handle the grind so you can focus on the game.
Ready to automate your content creation? Try Eklipse Premium today and see how much time you can save.
TL;DR: What is the best clipping software for gaming? In 2025, the best clipping software for gaming includes AI-powered tools like Eklipse.gg for automation, OBS Studio for free manual control, and NVIDIA ShadowPlay for low-impact recording. The ideal choice depends on whether you prefer automated or manual clipping.
You just pulled off an incredible play, but the moment is lost forever because you weren’t recording. Or worse, you have hours of VOD footage, but the thought of manually scrubbing through it to find that one highlight is exhausting and kills your motivation to create content. Finding the best clipping software for gaming is crucial, but the real challenge is finding a workflow that doesn’t lead to burnout.
In 2025, the market offers a diverse range of solutions, each catering to different needs. From user-friendly free tools to powerful, AI-driven platforms that do the work for you, this guide ranks the 15 best options to help you choose the perfect tool to capture, edit, and share your gaming highlights effortlessly.
Drag-and-drop interface, AI tools, effects library, direct export options
User-friendly, affordable, AI features
Limited in free version, watermarks
Beginners, Intermediate users
iMovie
Free (Apple)
Mac, iOS
Simple editing tools, transitions, effects, seamless Apple integration
Free for Apple users, clean interface
Limited to Apple platforms, less advanced
Apple users, Basic editing
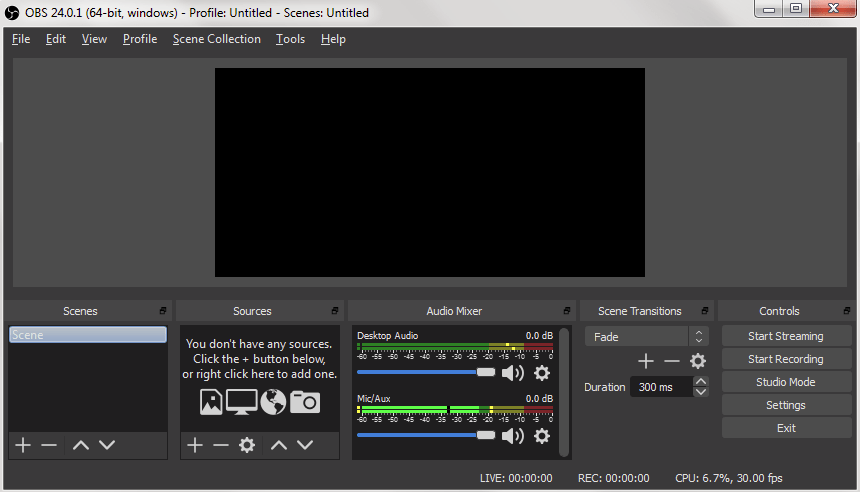
1. OBS Studio
OBS Studio remains a staple in the gaming community as a free, open-source solution for both recording and live streaming. Its versatility and extensive customization options make it a favorite among gamers of all levels.
Key Features:
Multi-Platform Support: Available on Windows, macOS, and Linux.
Scene Composition: Create multiple scenes with different sources, including game captures, webcams, and overlays.
Audio Mixing: Advanced audio controls with filters and noise suppression.
Plugins and Extensions: Enhance functionality with a vast library of community-driven plugins.
Pros:
Completely free with no hidden costs.
Highly customizable with a supportive community.
No restrictions on recording duration or quality.
Cons:
Steeper learning curve for beginners.
Requires manual setup for optimal performance.
2. Nvidia ShadowPlay
Designed exclusively for Nvidia graphics card users, ShadowPlay offers seamless, high-quality recording without significantly impacting game performance. It’s perfect for gamers seeking a hassle-free recording solution.
Key Features:
High-Resolution Recording: Supports up to 4K at 60FPS.
Instant Replay Mode: Automatically records the last few minutes of gameplay.
GIF Creation: Easily convert clips into GIFs for quick sharing.
Low Performance Overhead: Minimal impact on game performance due to hardware acceleration.
Pros:
Free with Nvidia graphics cards.
Easy to use with minimal setup.
High-quality recordings suitable for professional use.
Cons:
Limited to Nvidia GPU users.
Fewer advanced editing features compared to standalone software.
Eklipse is AI powered, so you do not have to clip your gameplay manually ever again.
Eklipse leverages artificial intelligence to automate the clipping process, making it an ideal choice for streamers and gamers who want to focus on gameplay without the hassle of manual editing.
Key Features:
AI-Driven Highlight Detection: Automatically identifies and clips top moments from your gameplay.
Ultra Highlights: Creates cinematic, AI-edited montages of your best plays. (Learn More)
Seamless Integration: Connects with platforms like Twitch, YouTube, Facebook Gaming, and Kick.
Online Editing Tools: Trim, combine, and enhance clips directly within the platform.
Free and Premium Options: Basic features available for free, with advanced tools in premium tiers.
Pros:
Saves time by automating highlight creation.
User-friendly interface suitable for all skill levels.
Facilitates easy sharing across multiple platforms.
Cons:
Dependent on AI accuracy for highlight detection.
Limited manual editing capabilities for advanced customization.
4. Gecata by Movavi
Gecata by Movavi is celebrated for its user-friendly interface and reliable performance. It offers HD recording capabilities, making it a great choice for gamers who need straightforward clipping without extensive features.
Key Features:
High-FPS Recording: Supports up to 120 FPS for smooth gameplay captures.
Multiple Audio Sources: Capture game audio and microphone input simultaneously.
Webcam Overlay: Easily add a personal touch with webcam overlays.
Scheduled Recording: Automate recording sessions based on your gaming schedule.
Pros:
Intuitive interface ideal for beginners.
Reliable performance with minimal setup.
Affordable pricing with a free trial available.
Cons:
Limited advanced features compared to other software.
Free version may include watermarks or limited functionality.
5. Xbox Game Bar
Source: thewincentral
Integrated into Windows 10 and 11, Xbox Game Bar provides a quick and easy way to record gameplay without needing additional software. It’s perfect for gamers who want basic clipping capabilities without the complexity.
Key Features:
Built-In Tool: No need to download or install additional software.
Simple Recording: Easily capture screen, audio, and webcam footage.
Performance Monitoring: Track system performance in real-time while recording.
Quick Access: Easily accessible through a keyboard shortcut (Win + G).
Pros:
Free and pre-installed on Windows systems.
Minimal setup required for quick recordings.
Lightweight with no significant impact on performance.
Cons:
Limited editing and customization options.
Not ideal for long-form or high-quality recordings.
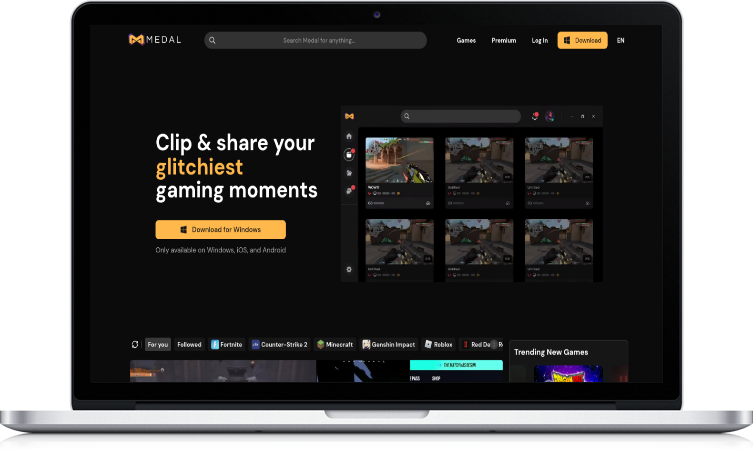
6. Medal.tv
source: medal.tv
Medal.tv specializes in short-form highlights, making it an excellent choice for gamers who want to share quick clips with friends or the broader gaming community. Its social features enhance the sharing experience.
Key Features:
Instant Clipping: Quickly capture and share highlights during or after gameplay.
Social Integration: Discover and share clips within the Medal.tv community.
Cloud Storage: Save your highlights securely in the cloud.
Customizable Clips: Add annotations, captions, and effects to your clips.
Pros:
Focused on quick and easy highlight sharing.
Active community for discovering new clips.
Free with optional premium features.
Cons:
May impact game performance on lower-end PCs.
Limited in-depth editing capabilities.
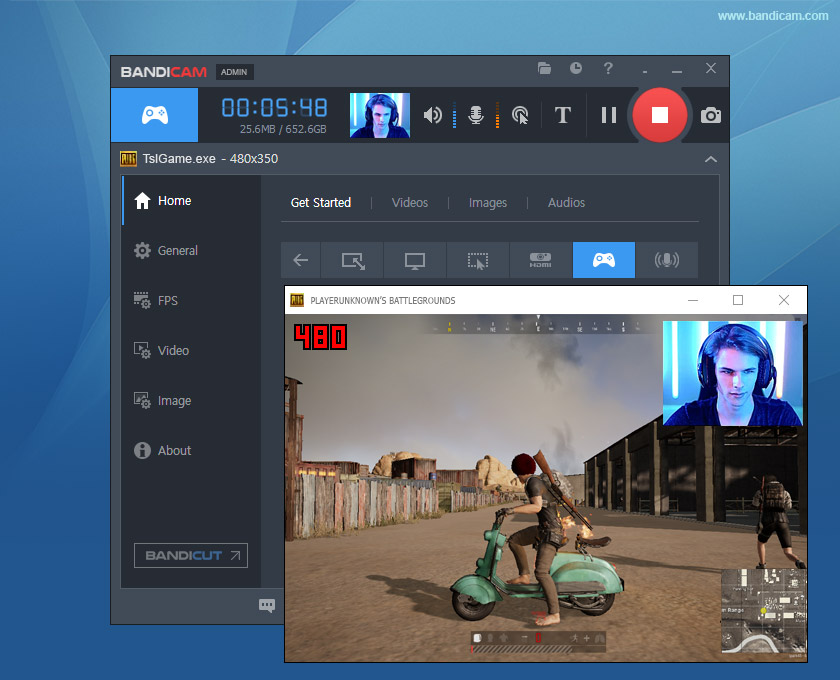
7. Bandicam
Bandicam is renowned for its ability to capture high-FPS gameplay, supporting up to 480 FPS. It offers a range of features tailored for both casual gamers and professionals seeking detailed recordings.
Key Features:
High-FPS Capture: Record gameplay at up to 480 FPS for ultra-smooth footage.
Webcam Overlay: Add a personal touch by overlaying webcam footage.
Scheduled Recording: Set specific times to start and stop recordings automatically.
Compression Technology: Maintain high quality with reduced file sizes.
Pros:
Exceptional high-FPS recording capabilities.
Reliable performance with minimal lag.
Versatile recording options for different needs.
Cons:
Free version includes watermarks and limited features.
No built-in streaming functionality.
8. Action!
Source: Actions!
Action! by Mirillis is designed for advanced gamers who require high-quality recordings and live streaming capabilities. It offers a range of customization options to suit various recording needs.
Key Features:
High-Quality Recording: Capture up to 4K resolution at 240 FPS.
Live Streaming: Stream directly to platforms like Twitch, YouTube, and Facebook.
Time-Shift Mode: Instantly save the last few minutes of gameplay.
Real-Time Editing: Apply filters, transitions, and overlays during recording.
Pros:
Powerful recording and streaming features.
High customization for professional-grade recordings.
Supports multiple output formats.
Cons:
Paid license required for full functionality.
Can be resource-intensive on lower-end systems.
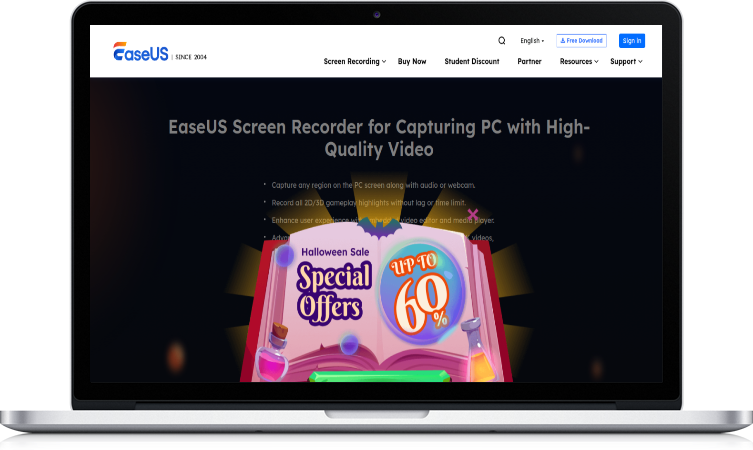
9. EaseUS RecExperts
EaseUS Screen Recorder – Source: EaseUS
EaseUS RecExperts offers a versatile screen recording experience with support for UHD footage and multiple audio sources. It’s suitable for gamers who need flexible recording options without sacrificing quality.
Key Features:
UHD Recording: Capture 4K/60FPS gameplay for stunning visuals.
Flexible Recording Options: Region-based recording, full-screen capture, and window-specific recording.
Multiple Audio Sources: Record system audio, microphone input, and game sounds simultaneously.
Scheduled Recording: Plan recordings in advance to capture key gaming sessions.
Pros:
Comprehensive feature set catering to various recording needs.
User-friendly interface with easy navigation.
Affordable pricing with a free trial available.
Cons:
Can be overwhelming for users seeking simple clipping solutions.
Some advanced features require the premium version.
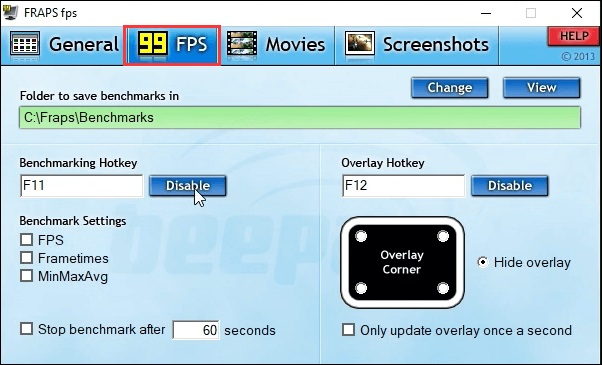
10. Fraps
Fraps is a lightweight game capture tool known for its simplicity and effectiveness, particularly suited for older or lower-end PCs. It’s ideal for gamers who need basic recording without extensive features.
Key Features:
Real-Time FPS Display: Monitor game performance while recording.
Basic Screen Capture: Easily record gameplay with minimal setup.
Benchmarking Tools: Test and measure your system’s performance.
Simple Interface: Start and stop recordings with ease.
Pros:
Extremely lightweight with minimal system impact.
Easy to use with straightforward functionality.
Ideal for basic recording needs.
Cons:
Limited features compared to modern recording software.
No built-in editing tools or social sharing options.
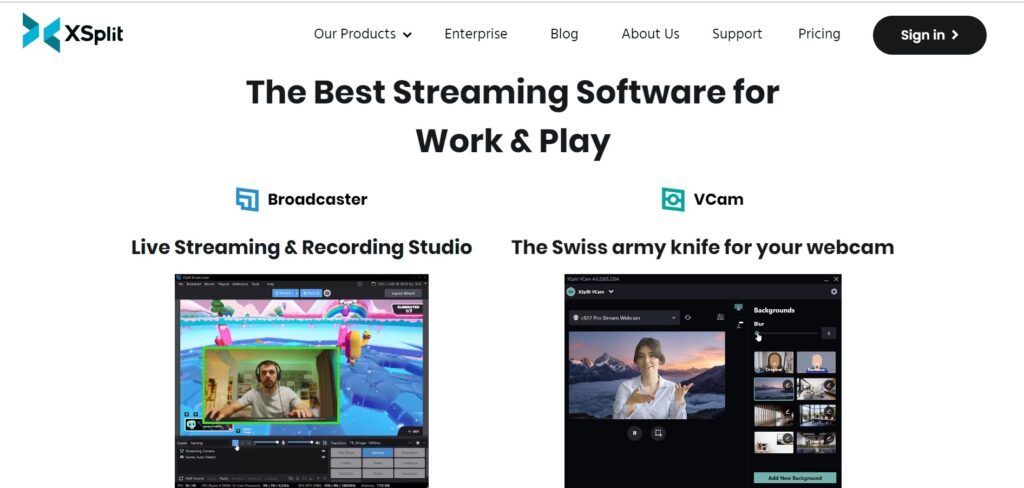
11. XSplit Broadcaster
XSplit Broadcaster is a versatile tool for both live streaming and recording gameplay. It offers advanced features like scene switching and multi-source capture, making it a favorite among streamers.
Key Features:
Multi-Scene Setup: Create and switch between multiple scenes during streaming.
Plugin Support: Enhance functionality with a wide range of plugins.
Built-In Chat Integration: Manage stream interactions directly within the software.
Live Streaming: Stream to multiple platforms simultaneously.
Pros:
Comprehensive features for both streaming and recording.
User-friendly interface with robust support.
Integrates seamlessly with various streaming platforms.
Cons:
Some advanced features require a paid subscription.
Heavier on system resources compared to simpler alternatives.
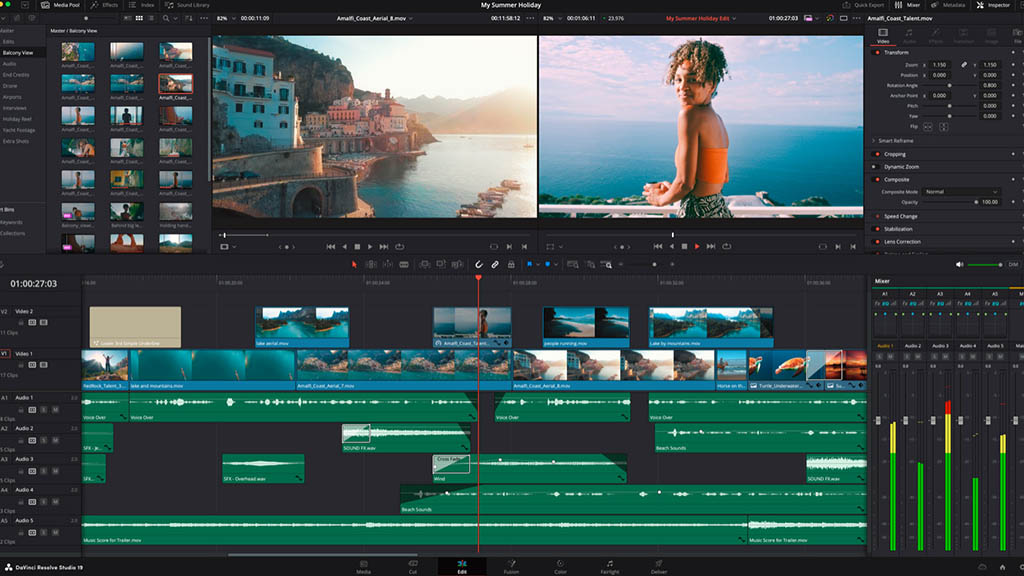
12. DaVinci Resolve
DaVinci Resolve
While primarily a professional video editing suite, DaVinci Resolve offers powerful tools for capturing and editing game replays. It’s perfect for gamers looking to create polished, high-quality content.
Key Features:
Advanced Editing Tools: Includes color grading, visual effects, and motion tracking.
Fusion VFX: Create stunning visual effects with the integrated Fusion module.
Fairlight Audio: Professional-grade audio editing and mixing.
Collaboration Features: Work with teams in real-time for collaborative editing projects.
Pros:
Industry-standard editing capabilities.
Free version offers most core features.
Extensive support for high-resolution footage.
Cons:
Steep learning curve for beginners.
Overkill for simple game clipping needs.
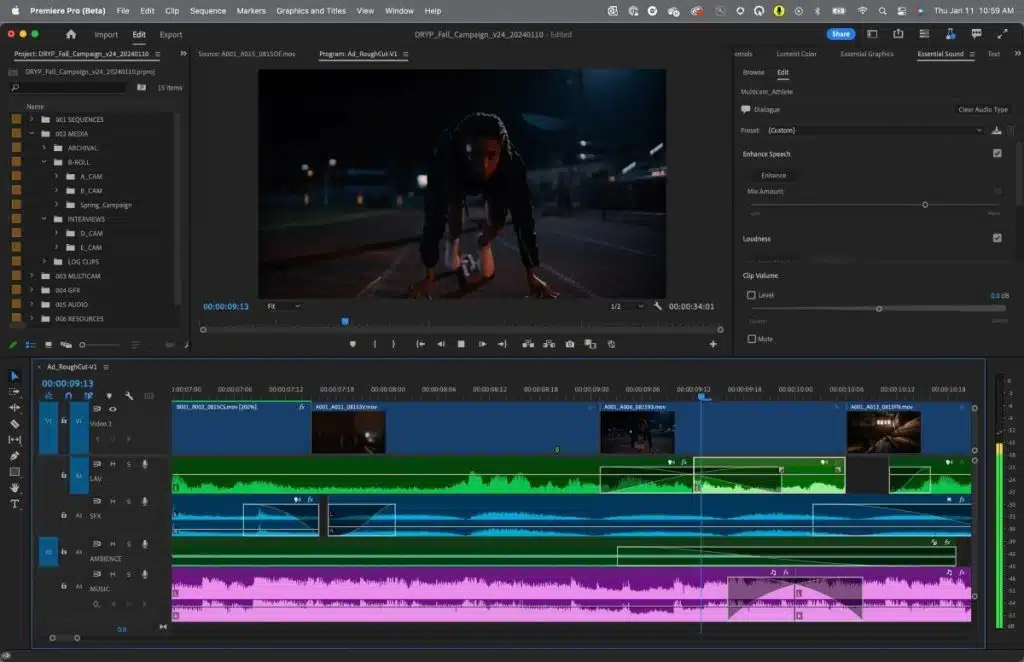
13. Adobe Premiere Pro
Adobe Premiere Pro
Adobe Premiere Pro is the gold standard for professional video editing, offering an unparalleled suite of tools for creating high-quality gaming videos. While not a dedicated clipping tool, its advanced features make it ideal for serious content creators.
Key Features:
Comprehensive Editing Tools: Multi-track editing, advanced transitions, and effects.
Seamless Integration: Works seamlessly with other Adobe Creative Cloud apps like After Effects and Photoshop.
Motion Graphics Templates: Easily add professional-grade animations and titles.
Lumetri Color: Advanced color correction and grading tools.
Pros:
Unmatched editing capabilities for professional content.
Regular updates and extensive community support.
Integration with a wide range of Adobe tools.
Cons:
Expensive subscription model.
Requires significant time to learn and master.
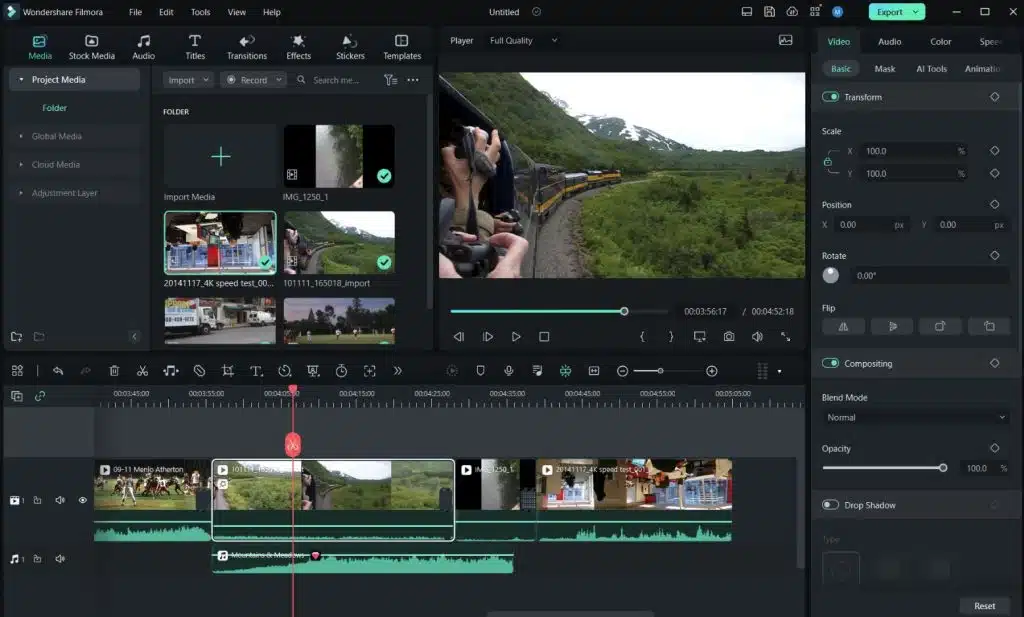
14. Wondershare Filmora
Source: Wondershare
Wondershare Filmora strikes a balance between ease of use and advanced features, making it suitable for both beginners and intermediate users. Its intuitive interface and AI-driven tools simplify the editing process.
Key Features:
Drag-and-Drop Interface: Easy to use with a minimal learning curve.
AI-Powered Tools: Includes features like auto scene detection and smart background removal.
Extensive Effects Library: Access a wide range of transitions, filters, and overlays.
Direct Export Options: Easily upload videos to platforms like YouTube and Twitch.
Pros:
User-friendly interface with powerful editing tools.
Affordable pricing with flexible licensing options.
AI features save time and enhance video quality.
Cons:
Some advanced features are locked behind the paid version.
Watermarks may appear in the free version.
15. iMovie (Apple Devices)
iMovie is Apple’s default video editing application, offering a straightforward solution for Mac and iOS users. It’s perfect for gamers who need basic editing tools without the complexity of professional software.
Key Features:
Simple Editing Tools: Intuitive timeline-based editing with drag-and-drop functionality.
Built-In Effects and Transitions: Easily add visual enhancements to your clips.
Seamless Integration: Syncs across Apple devices through iCloud.
Direct Sharing: Export videos directly to YouTube, Apple devices, or social media.
Pros:
Free for Apple device owners.
Clean, user-friendly interface ideal for beginners.
Reliable performance on Apple hardware.
Cons:
Limited to macOS and iOS platforms.
Not as feature-rich as professional editing software.
Considerations for Different User Needs
Beginners:
For those new to game clipping and video editing, simplicity and ease of use are paramount. Medal.tv, Xbox Game Bar, Gecata by Movavi, Wondershare Filmora, and iMovie offer intuitive interfaces and straightforward functionalities that make capturing and sharing gameplay highlights effortless.
Streamers:
Streamers require robust tools that support live streaming alongside recording. OBS Studio, XSplit Broadcaster, Streamlabs, and Action! provide comprehensive features like multi-scene setups, real-time overlays, and seamless integration with streaming platforms, making them ideal for professional streaming setups.
Advanced Users and Professionals:
For those seeking advanced editing capabilities and professional-grade features, DaVinci Resolve, Adobe Premiere Pro, and Wondershare Filmora offer extensive tools for detailed video editing, color grading, and motion graphics. These tools are perfect for content creators who aim to produce high-quality, polished videos for platforms like YouTube and Twitch.
AI-Powered Highlights:
If automation is your priority, Eklipse stands out with its AI-driven highlight generation. It automatically detects and clips your best moments, saving you time and effort, and is particularly beneficial for streamers who prefer focusing on gameplay rather than manual editing.
Frequently Asked Questions (FAQ)
What clipping software uses AI to find highlights automatically? Eklipse is a leading software that uses AI to automatically analyze your stream VODs and generate highlight clips. This saves you from having to manually search through hours of footage.
What is the best free clipping software for gamers? For free manual clipping, OBS Studio and Nvidia ShadowPlay are top choices. OBS is highly customizable for advanced users, while ShadowPlay is very easy for Nvidia GPU owners. For free automated clipping, Eklipse offers a robust free plan.
Does clipping software affect gaming performance? Yes, some software can impact performance. Tools like Nvidia ShadowPlay are hardware-accelerated to minimize FPS drops. AI-powered tools like Eklipse have zero impact on your game’s performance because they process your stream after you’ve finished playing.
What is a good clipping tool for a beginner? For beginners, the built-in Xbox Game Bar on Windows is the easiest place to start. Other
Conclusion
Selecting the best clipping software for gaming ultimately depends on your specific needs, budget, and technical expertise. For a detailed look at tools for specific platforms, check our guide on the best tools for TikTok or our list of the best free highlight tools. If you want to explore more recorder options, see our review of the best highlight recorders.
From the highly customizable OBS Studio to the AI-driven convenience of Eklipse, each tool offers unique features to enhance your content. Explore a few options, find the perfect fit for your setup, and start capturing your epic moments today.
Stop letting your best plays get lost. Let Eklipse’s AI find and clip them for you, automatically. Try It for Free!
TL;DR Q: What are the best AI tools for creating game highlights? A: For an all-in-one solution, Eklipse is the best AI game highlights tool, offering automated clipping, a full video editor, and multi-platform support (including Kick). Other top alternatives for specific needs include Sizzle.gg, Streamladder, and Athenascope.
As a streamer or gamer, you know the struggle. The live stream was a success—full of incredible wins and unforgettable moments—but now you face the soul-crushing task of VOD-diving. Manually finding those highlights is tedious, time-consuming, and the single biggest reason creators fail to grow on social media. Thankfully, the solution has arrived: the best AI game highlights tools are here to change everything.
These revolutionary platforms leverage artificial intelligence to automatically analyze your gameplay footage, pinpoint the most exciting moments, and generate clips for you. This technology is the ultimate advantage for creators of all levels, from established pros to casual players who just want to share an amazing play with their friends. In this guide, we’ll break down the top 7 AI tools for 2025, so you can finally ditch the editing grind and get back to gaming.
1. Eklipse: The Best All-in-One AI Highlights Platform
Source: eklipse.gg
Eklipse isn’t just another tool; it’s a complete, all-in-one ecosystem for content creators. It stands out by combining a powerful AI highlight generator with a full suite of editing tools, making it the most comprehensive solution on the market.
Trusted by over 1 million creators, you simply connect your Twitch, Kick, YouTube, or Facebook account, and Eklipse’s AI analyzes your past broadcasts. It identifies your best moments from over 1000+ supported games and delivers them as ready-to-edit clips for any social platform.
Key Features:
AI Stream Clipper: The AI intelligently scans your VODs for key moments like multi-kills, victories, and funny reactions, saving you countless hours.
Ultra Highlights: Creates cinematic, AI-edited montages of your best plays. (Learn More)
Dedicated Social Editors: Convert clips into vertical videos for TikTok, Shorts, and Reels with one click using professional templates, text, stickers, and royalty-free music.
Kick Platform Support: One of the few AI platforms offering full support for the fast-growing Kick streaming platform.
Direct Social Sharing: Post or schedule your finished clips directly to your social media channels without leaving the platform.
Pros:
A complete, integrated workflow from discovery to posting.
Powerful AI saves an enormous amount of time.
Supports all major streaming platforms, including Kick.
Excellent free plan to get you started.
Cons:
The best features (1080p, no watermark) are part of the Premium subscription.
AI can occasionally miss moments with unique context.
Pricing: Free plan available. Premium plans unlock higher quality, faster processing, and advanced features.
Available on: Web, Android, and iOS.
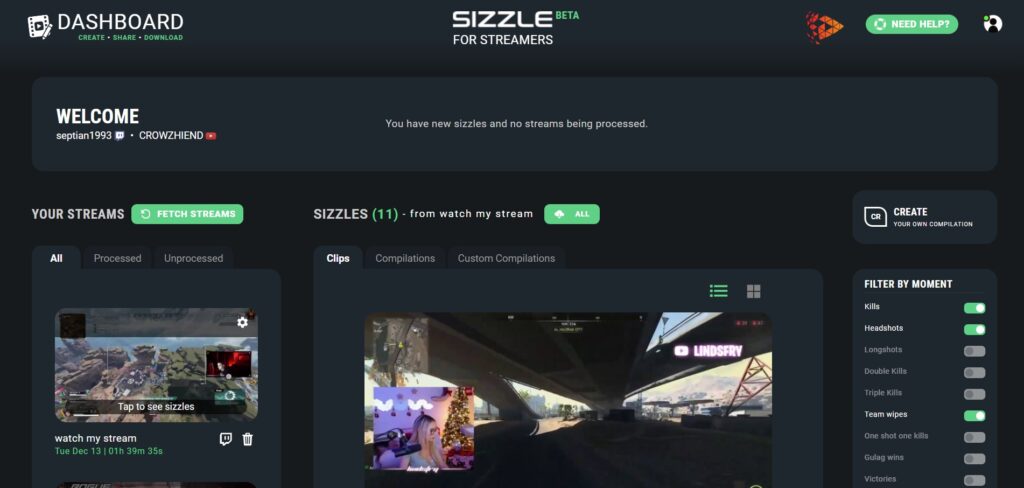
2. Sizzle.gg: The Best for Pure Automation
Source: Sizzle.gg
Sizzle.gg is a strong competitor focused purely on AI highlight detection. Like Eklipse, it connects to your Twitch or YouTube and automatically clips moments based on in-game events. Its hands-off approach makes it a great choice for creators who just want a quick reel of their best kills and plays without needing to do much editing within the platform itself.
Key Features:
Automatic Highlight Creation: AI analyzes gameplay and creates clips based on your preferences.
Personalized Filtering: You can filter for specific moments like headshots, knockdowns, or wins.
Direct Sharing: Easy sharing to platforms like Twitter and TikTok.
Pros:
Highly automated and very easy to use.
Good AI detection, especially for popular FPS games.
A completely hands-off process for generating clips.
Cons:
Very limited built-in editing and customization tools.
The free version includes a Sizzle.gg watermark.
Less creative control compared to all-in-one platforms.
Pricing: Free tier available; a paid “Starter” plan removes the watermark and adds features.
Available on: Web.
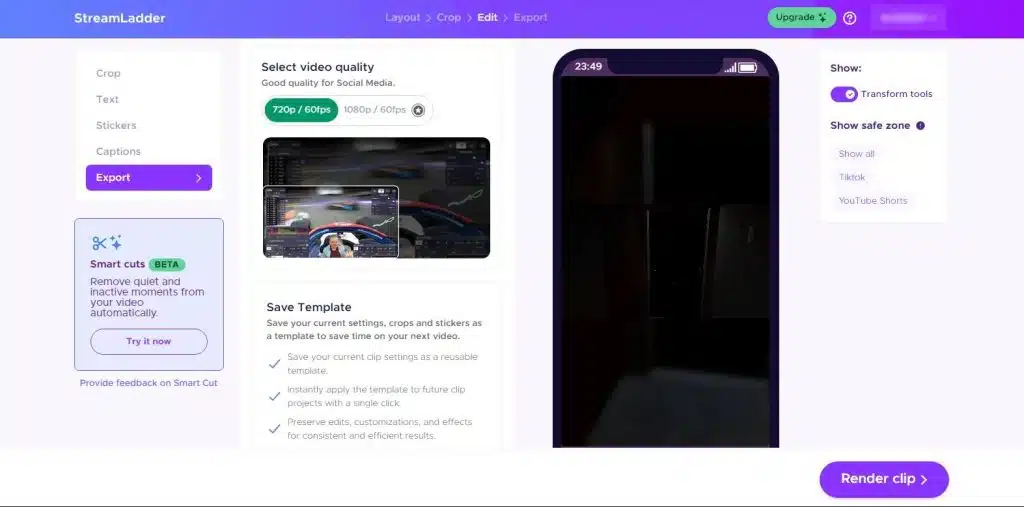
3. Streamladder: The Best for Converting Existing Clips
Source: streamladder.com
Streamladder operates differently from AI discovery tools. It’s a clip *converter*. You provide it with an existing Twitch clip link, and it gives you a simple interface with various templates to turn that horizontal clip into a vertical video for social media. It’s a fantastic single-purpose tool if you already know which moment you want to share and just need to format it quickly.
Key Features:
Clip-to-Vertical Conversion: Its core function is to reformat horizontal video for mobile viewing.
Template Library: Offers a wide variety of free and premium templates to frame your gameplay and facecam.
Simple Editor: Allows you to add text and stickers to your clips.
Pros:
Extremely simple and fast for converting single, pre-selected clips.
No software download is required.
Good selection of free templates to get started.
Cons:
Does not use AI to find moments from full streams; the workflow is entirely manual.
The free version includes a prominent watermark.
Fewer advanced features compared to Eklipse.
Pricing: Free (with watermark); a Pro plan is available to remove watermarks and unlock more features.
Available on: Web.
4. Streamlabs Cross Clip: Best for Desktop Integration
Source: streamlabs.com
For streamers already using Streamlabs Desktop, Cross Clip is the integrated solution for creating vertical content. It allows you to import existing Twitch clips directly within the Streamlabs ecosystem and use a straightforward editor to convert them into formats suitable for Shorts, Reels, and TikTok. Its main strength is its convenience for existing Streamlabs users.
Key Features:
Direct Twitch Clip Import: Easily pull in clips from your connected Twitch account.
Multi-platform Layouts: Edit your clip once and export it for multiple platforms.
Simple Editing Tools: Trim clips, arrange layers, and add text.
Pros:
Seamless integration if you already use Streamlabs Desktop.
A convenient and familiar workflow for existing users.
Cons:
It is not a standalone web tool; it’s part of the Streamlabs ecosystem.
Lacks AI to discover new highlights from full VODs; you must bring your own clips.
Pricing: Included with the free version of Streamlabs; a Streamlabs Ultra subscription unlocks premium features like 1080p60 export and watermark removal.
Available on: Desktop (via Streamlabs).
5. Powder.gg: The Discontinued Predecessor
Note: This platform was officially shut down in late 2024. Powder.gg was a popular AI clipping tool from the same generation as Eklipse. It was well-known for its early AI technology and its ability to connect to consoles, though that feature was sometimes unreliable. While it is no longer available, it played an important role in popularizing AI highlights for gamers. Many of its former users have since migrated to more powerful and actively developed platforms like Eklipse to continue their content creation journey.
6. Professional Editing Service: Best for a Pro Polish
Source: Marketplaces like Fiverr, Upwork
For creators with a budget who want the absolute highest quality, hiring a human editor is a powerful option. This isn’t an AI tool, but rather a service that provides a professional touch that AI can’t yet replicate. A skilled editor can understand narrative, add creative effects, and tailor a video perfectly to your brand and vision. This is the ultimate solution for a hands-off, premium result.
Key Features:
Human Creativity and Storytelling: An editor can build a narrative, understand comedic timing, and add a personal touch.
Advanced Visual Effects: Access to professional software for motion graphics, transitions, and color grading.
Fully Customized Content: The final product is tailored exactly to your specifications.
Pros:
Unmatched quality and creativity.
Completely customized to your vision.
Saves you all editing time.
Cons:
By far the most expensive option.
Requires clear communication, direction, and management.
Turnaround times can be slower than automated tools.
Pricing: Varies widely, from ~$20 for a single clip to hundreds or thousands for complex montages.
Available on: Various online freelance platforms.
Frequently Asked Questions About AI Game Highlights
Can AI edit gaming clips?
Yes, absolutely! AI is exceptionally good at editing gaming clips. It works by analyzing video and audio cues from your stream VOD to identify high-action moments like kills, objectives, loud reactions, and rapid chat activity. It then automatically “clips” these sections for you to review, saving you from manual searching.
What is the best AI clipping software?
The best AI clipping software for most creators is Eklipse. It offers the most complete package, combining powerful AI highlight detection from full streams with a built-in suite of video editors for TikTok, Shorts, and Reels. This all-in-one approach makes it the most efficient tool on the market.
What is the best app to make a highlight reel?
For making a highlight reel on the go, the Eklipse mobile app (available on Android and iOS) is the best choice. It allows you to manage your AI-generated clips, edit them, and post them to social media directly from your phone. For desktop users, the Eklipse web platform provides the same powerful features in your browser.
How do I create a highlight reel from my streams?
Creating a highlight reel has never been easier. Here’s how you can do it in minutes with a tool like Eklipse:
Connect Your Account: Sign up for Eklipse for free and connect your Twitch, Kick, YouTube, or Facebook account.
Process a Stream: Choose a past stream (VOD) and let the AI analyze it.
Review Your Clips: Eklipse will deliver a collection of your best moments.
Edit and Customize: Click “Edit” on any clip to convert it to a vertical format, add templates, text, and music.
Share Everywhere: Download your finished highlight or post it directly to TikTok, YouTube Shorts, and more.
Final Thoughts
The rise of the best AI game highlights tools is completely changing the content creation landscape for gamers and streamers. Whether you’re a seasoned pro aiming to streamline your workflow or a new creator wanting to share an epic moment, there is a perfect AI-powered solution for you. For those seeking a powerful, automated, and truly all-in-one platform, Eklipse offers the most robust and user-friendly experience available.
By leveraging artificial intelligence, you can finally reclaim your time and concentrate on what truly matters: creating amazing live content and building your community. So explore these options, find the right fit, and let AI help you create viral clips that captivate your audience.
TL;DR: What is the best clipping software for gaming? In 2025, the best clipping software for gaming includes AI-powered tools like Eklipse.gg for automation, OBS Studio for free manual control, and NVIDIA ShadowPlay for low-impact recording. The ideal choice depends on whether you prefer automated or manual clipping.
You just pulled off an insane play, but the moment is gone forever because you forgot to hit record. Or worse, you have hours of VOD footage, but the thought of manually scrubbing through it to find highlights is completely demoralizing. Finding the best clipping software for gaming is essential, but the real challenge is finding a workflow that doesn’t lead to burnout.
Imagine how much time you’d save if you didn’t have to sift through hours of video. With modern game clipping software—especially tools that use AI to automatically turn a long stream into vertical highlights—you can focus on playing, not on tedious editing. With so many options available, we’ve put together this definitive list of the 10 best tools to try in 2025.
1. Eklipse – Best AI Highlight Generator for Viral Clips
Eklipse: The Ultimate AI Video Editor
Eklipse.gg isn’t your typical clipping software. Instead of you having to fiddle with hotkeys and manually capture moments, Eklipse.gg uses artificial intelligence (AI) to do the heavy lifting for you.
Eklipse is an AI highlight-making tool that can automatically format your clips for platforms like TikTok, Reels, and Shorts, with the perfect length and size for those fast-paced feeds. Plus, you can add music and customize the clips to match your style.
For those who want a streamlined and AI-powered way to capture and share their gameplay highlights, Eklipse.gg is worth checking out. You can sign up for a free Eklipse account today!
Key Features:
Automatically generates highlights from streams using AI.
Ultra Highlights: Creates cinematic, AI-edited montages of your best plays. (Learn More)
Converts highlights for TikTok, Reels, and Shorts formats.
Integrates with Twitch, YouTube, Kick, and Facebook Gaming.
Mobile app to manage and share clips.
Offers templates, customization options, and auto-captions.
Pros:
Saves massive amounts of time on editing.
Extremely easy to use, even for absolute beginners.
Makes sharing high-quality clips on social media effortless.
Offers powerful customization options for unique highlights.
Cons:
AI can sometimes miss moments that rely on specific, non-action context.
Limited features in the free version.
Pricing: Free plan available. Premium plans with advanced features are available.
2. VideoProc – Best for High-Quality Recordings
Source: https://www.videoproc.com/
VideoProc by Digiarty is a versatile game recording program available for both Windows and Mac. It’s a lightweight yet advanced video processing tool that lets you record your computer screen, webcam, and audio simultaneously, whether you are in full-screen or windowed mode.
VideoProc is designed to minimize lag, allowing you to record gameplay smoothly even on less powerful PCs. During recording, you can also establish specific recording zones, add text annotations, and draw highlights to emphasize key moments.
Key Features:
Record screen, webcam, and audio simultaneously.
Green screen/chroma key feature for webcam overlays.
Set custom recording areas on your screen.
Built-in basic editing tools for trimming and annotations.
Direct sharing capabilities.
Pros:
Supports high-quality 4K recording.
Intuitive interface is suitable for beginners.
Flexible recording options cater to different needs.
Cons:
Advanced features are locked behind the paid version.
Can be resource-intensive on very low-end PCs.
Pricing: Premium 365 plan at $25.95 (1 year/3 PCs), Lifetime License at $45.95 (1 PC), and a Family License at $57.95 (3-5 PCs).
3. Rav.ai – Best for Detailed Gameplay Recordings
Source: Rav AI
Rav.ai is a newer, AI-based video editing tool designed to help users create polished videos quickly by automating much of the editing process. Instead of manual editing, you provide instructions, and the AI transforms your raw footage into a finished product.
This software is aimed at creators who want to automate not just the editing, but also the process of publishing to social media, making it a hands-off solution for those with a high volume of content.
Key Features:
AI-powered video editing based on user instructions.
Automated clipping and highlight generation.
Direct sharing and publishing to social media platforms.
Supports high-definition video output.
Pros:
Drastically reduces manual editing time.
Can capture both webcam video and audio.
Produces high-definition clips.
Cons:
The AI can miss certain moments depending on the game’s action intensity.
No free version is available to test the features.
The price point is significantly higher than other tools, targeting enterprise users.
Pricing: The Basic plan starts at $2,000 per year.
4. NVIDIA ShadowPlay – Best for UHD Recordings
Included with NVIDIA’s GeForce Experience software, ShadowPlay is a favorite for gamers who want high-quality capture with minimal performance impact. Because it’s hardware-accelerated, it can run in the background without causing lag or freezes.
Its standout feature is “Instant Replay,” which constantly records the last several minutes of your gameplay. When an amazing moment happens, you just press a hotkey to save the clip. You can record your screen in stunning 4K or even 8K resolution.
Key Features:
Instant Replay mode to save recent gameplay with a hotkey.
Manual recording for longer, planned sessions.
Direct livestreaming capabilities to YouTube, Facebook, and Twitch.
Capture screenshots and videos in up to 8K resolution.
Pros:
Excellent recording quality with virtually no FPS drop.
Completely free for users with NVIDIA graphics cards.
Extremely easy to use with a simple overlay and hotkeys.
Instant Replay is perfect for capturing unexpected moments.
Cons:
Only works on PCs with a compatible NVIDIA GPU.
Not available for macOS or Linux users.
Lacks any built-in video editing features.
Pricing: Free, but requires an NVIDIA GeForce graphics card.
5. HitPaw Screen Recorder – Best for Flexible Recording
HitPaw Screen Recorder is a user-friendly and powerful tool for capturing gameplay. It offers a lot of flexibility, allowing you to record your game, face, and keyboard simultaneously. A unique feature is the ability to use your iPhone or iPad as a wireless camera if your PC doesn’t have one.
During recording, you can capture your mouse and draw on the screen to highlight specific points. After recording, HitPaw also provides a basic editor to trim, crop, rotate, and adjust the speed of your video.
Key Features:
Flexible recording of full screen, a specific window, or a custom region.
Simultaneous recording of game, webcam, and keyboard.
Can use an iOS device as a camera source.
Includes a basic built-in video editor.
Pros:
Very simple and easy-to-use interface.
Offers a high degree of recording flexibility.
High-quality video output.
Cons:
Advanced editing features are not included.
Many features require upgrading to the paid version.
Pricing: Starts at $9.99 per month, with yearly ($29.99) and perpetual ($49.99) plans available.
6. EaseUS RecExperts – Best for Smooth Gameplay Recordings
EaseUS Screen Recorder – Source: EaseUS
EaseUS RecExperts is a comprehensive screen recorder that includes a dedicated “Game Mode” designed to capture gameplay smoothly. You can capture a specific part of your screen, your webcam, or the entire screen, and it allows you to record system sounds and your voice via a microphone simultaneously.
After recording, you can use the editing panel to add text, effects, arrows, and other annotations to enhance your video. It supports recording 2D/3D games in up to 4K UHD resolution.
Key Features:
Dedicated Game Mode for optimized recording.
Flexible recording of screen, webcam, and audio.
Basic editing features like adding text and effects.
Scheduled recording functionality.
Pros:
Game Mode ensures smooth gameplay capture.
Basic editing tools are great for beginners.
Supports high-resolution 4K recording.
Cons:
The interface can be a bit complicated for new users.
The free version places a watermark on your videos.
Pricing: Starts at $19.95 per month for a single license.
7. Medal.tv – Best for Sharing Clips Online
source: medal.tv
Medal.tv is more than just a clipping tool; it’s a social platform for gamers. It combines easy gameplay capture with features designed for sharing and community interaction. You can capture spectacular kills, funny glitches, or impressive plays with just a few clicks or let it record automatically in the background.
The platform acts as a bridge between your game and social media, making it incredibly easy to showcase your best moments to friends and followers. It also includes a free video editor to help you polish your clips before sharing.
Key Features:
Automatic and manual clip recording.
Built-in social platform for sharing and discovery.
Free video editor with basic tools.
Available for Windows, macOS, and mobile devices.
Pros:
Excellent for community interaction and sharing clips.
Supports high-definition recording up to 4K UHD.
Completely free to use.
Cons:
Editing features are more limited than dedicated software.
The editing mode can sometimes feel laggy or slow.
No option to schedule automatic recordings.
Pricing: Free.
8. OBS Studio – Best Free Gaming Clipping Software
OBS Studio (Open Broadcast Software) is the gold standard for free recording and streaming software. It’s an incredibly powerful and flexible tool that allows you to capture not only your gameplay but also add complex overlays, your webcam, watermarks, and multiple audio sources.
While it’s known for streaming, its recording capabilities are top-notch. It includes an “Instant Replay Buffer” feature similar to NVIDIA ShadowPlay, allowing you to save the last few moments of gameplay with a hotkey. Despite its extensive features, OBS has a surprisingly small performance impact.
Key Features:
High-performance real-time video/audio capturing and mixing.
Instant Replay Buffer for capturing recent moments.
Extensive customization with scenes, sources, and plugins.
Direct livestreaming to Twitch, YouTube, and more.
Pros:
Completely free and open-source with no limitations.
Extremely powerful and highly customizable.
Low impact on game performance.
Supports high-quality 4K recording.
Cons:
Has a steep learning curve for beginners.
The interface can look cluttered and intimidating.
Lacks built-in video editing features.
Pricing: Free.
9. Action! – Best for Video and Audio Compression
Source: Actions!
Action! is a screen recorder that stands out with some unique features, including the ability to control it via an Android app. This allows you to start/stop recordings or adjust settings remotely. The software is also known for its efficient video and audio compression, which results in smaller file sizes without sacrificing quality.
It supports high-FPS recording up to 120 FPS and allows for direct export to YouTube, making the sharing process more convenient. You can also mix multiple audio inputs, perfect for recording commentary over your gameplay.
Key Features:
High-FPS recording (up to 120 FPS).
Efficient video and audio compression for smaller files.
Control recordings remotely with an Android app.
Direct export to platforms like YouTube.
Pros:
User-friendly and intuitive interface.
Excellent performance and file compression.
Includes livestreaming capabilities.
Cons:
The full version can be costly compared to free alternatives.
The free trial version includes a watermark.
Pricing: A lifetime license is $19.77 for Home use and $32.95 for Commercial use.
10. Xbox Game Bar – Best for Windows Users
Source: thewincentral
The Xbox Game Bar is a convenient clipping tool that comes built-in with Windows 10 and 11. It’s designed for quick and easy captures without interrupting your game. You can use it to record the last 30 seconds of gameplay, take screenshots, and even start a longer recording, all via a simple overlay (Win+G) or hotkeys.
While it’s not as feature-rich as dedicated software, its seamless integration into the Windows OS makes it incredibly accessible for casual clipping. It’s perfect for quickly grabbing a clip to share with friends without needing to install anything extra.
Key Features:
“Record what happened” feature to save the last 30 seconds.
Manual background recording.
Built-in performance widgets to monitor FPS, CPU, and GPU usage.
Basic audio controls within the overlay.
Pros:
Completely free and already installed on Windows.
Very convenient and easy to use.
Minimal impact on game performance.
Cons:
Very limited features compared to dedicated software.
Only available on Windows 10 and 11.
Lacks any editing capabilities.
Pricing: Free (built into Windows).
How do you choose the best clipping software for gaming?
Gaming clipping software lets you capture and save short video clips of your gameplay. These can be epic wins, hilarious fails, or just moments you want to share. There are two main ways clipping software works: manual recording and instant replay.
To choose the best gaming clipping software, you should consider the following essential factors:
Compatibility: Make sure the software works with your operating system (Windows or Mac) and the games you play.
Ease of use: Look for a program with a user-friendly interface and hotkey recording for convenience.
Additional features to consider:
Price: Free options exist with limitations, while paid versions offer more features.
Audio options: Choose software that supports capturing audio from games, a microphone, or multiple sources.
Video quality: For high-end games, consider software that records at high FPS (frames per second) and resolution (HD or higher).
Streaming options: If you want to stream directly, look for software with built-in streaming functionality.
Editing options: Some software allows basic editing like trimming clips, which can be helpful.
In short, prioritize compatibility and ease of use. Consider additional features based on your needs and budget.
Frequently Asked Questions (FAQ)
What software do most gamers use to clip? Many gamers use NVIDIA ShadowPlay or OBS Studio for manual clipping because they are free and powerful. However, for automating the process, a growing number of streamers are using AI tools like Eklipse.gg to save time and create social media content more efficiently.
Is Eklipse.gg a clipping software? Yes, Eklipse.gg is a type of clipping software, but it works differently from traditional recorders. Instead of you manually clipping moments, its AI analyzes your past streams (VODs) from Twitch, Kick, or YouTube and automatically generates highlight clips for you.
What is the best free clipping software for PC? For manual recording, OBS Studio and NVIDIA ShadowPlay are considered the best free options. For automated clipping from your streams, Eklipse.gg offers a robust free plan that can create highlight clips for you without any manual work.
Does clipping software affect gaming performance (FPS)? Yes, all clipping software can have some impact on performance. However, tools like NVIDIA ShadowPlay are hardware-accelerated to minimize FPS drops. AI tools like Eklipse.gg have no impact on your in-game performance because they process your stream VOD after you’ve finished playing.
Final Thoughts
With so many fantastic options, choosing the best clipping software for gaming comes down to your personal needs. For a detailed look at tools for specific platforms, check out our guide on the best TikTok gaming content tools or our list of the best free tools for creating highlights.
If you value control and a hands-on approach, a manual tool is perfect. But if you want a seamless, time-saving way to capture and share your best moments, look no further than Eklipse.gg. It uses advanced AI to automatically generate stunning clips from your streams, freeing you up to focus on creating epic content. Try Eklipse today and see how AI can revolutionize your workflow!
Stop missing your best moments. Let Eklipse’s AI find and clip them for you, automatically. Try It for Free!
You’re a streamer trying to grow or a gamer who wants to show off your skills, but you’re stuck. You know you need to learn how to make a gaming montage video to get more engagement, but the thought of spending hours in a complicated editor is overwhelming. Your best plays are trapped in long VODs, and you don’t have the time or experience to turn them into the epic content they deserve to be.
This is the exact problem Eklipse was designed to solve. Powered by advanced AI, Eklipse helps you create incredible gaming montages seamlessly and in minutes, not hours. Forget the steep learning curve and say goodbye to the time-consuming editing process. You can get professional-looking clips and montages effortlessly, and this guide will show you exactly how.
Eklipse is designed to do the heavy lifting while you focus on gaming. With just a few clicks, your highlight clips and montages are ready to go. Follow these simple steps to get started.
Step 1. Go to the Eklipse website or hit the following button and sign in/ sign up with your email, Twitch, or Facebook account.
Step 2. Link Eklipse to your preferred social media, either YouTube, Facebook, and/or Twitch by hitting the cable icon. Then, let the AI load your gaming streams.
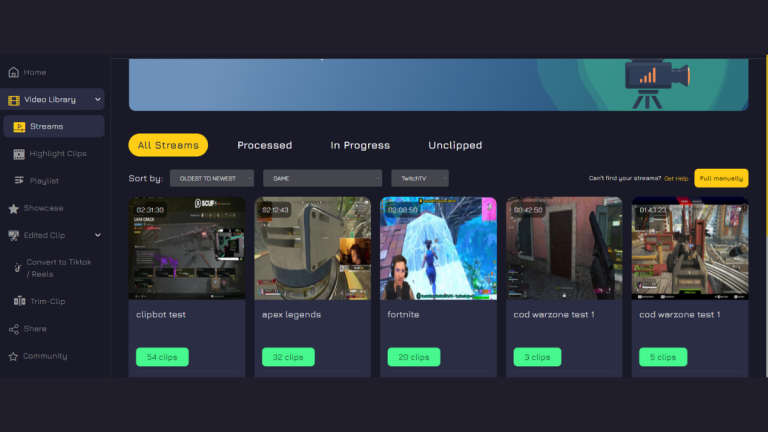
Step 3. Navigate to the Streams tab and hit All Streams to find all your stream videos. Pick whichever you like and click Get Clip.
Step 4. After choosing the gaming stream, the AI will automatically extract the essence of your streams to be single clips.
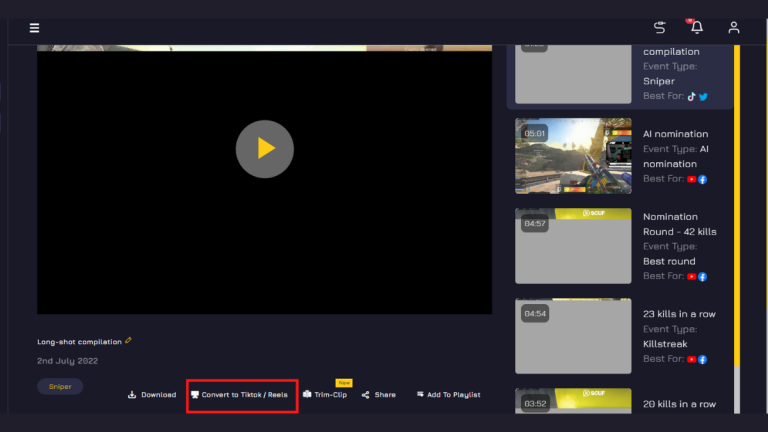
Step 5. Choose the best clips and hit Convert to TikTok/Reel button under the video preview.
Step 6. Next up, pick the template for TikTok, and adjust the feed area as well as the clip length. Hit Next.
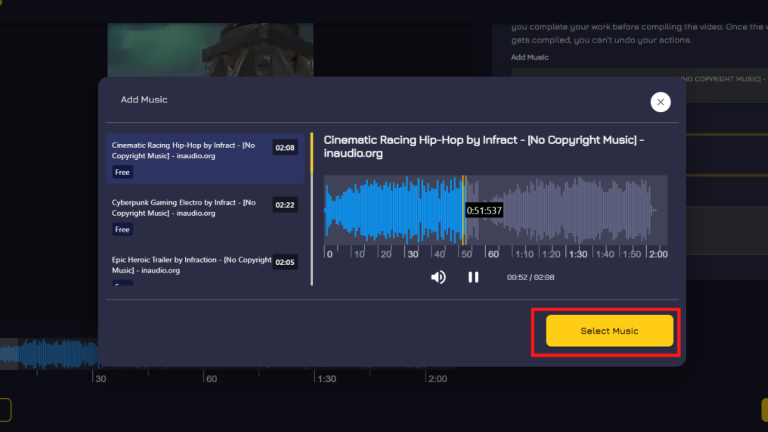
Step 7. Navigate to Add Music to add soundtrack. You’ll see some copyright-free music from the Eklipse library. Once you’re sure of your choice, click Select Music.
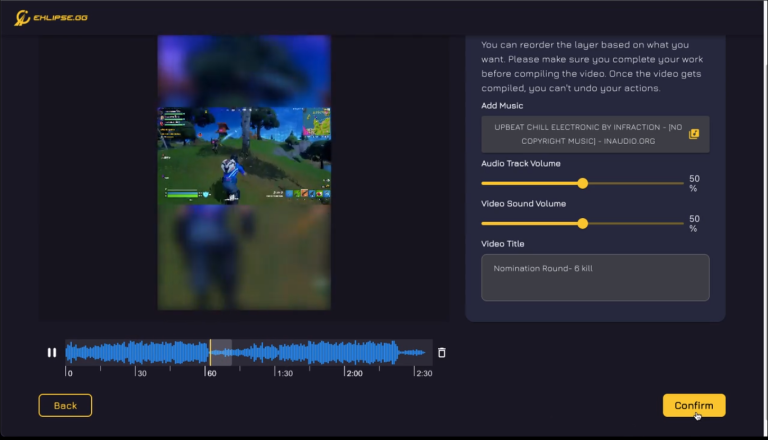
Step 8. In this section, you are allowed to pick the music part, and the length, and adjust the audio and music volume. If you’re done, hit Confirm.
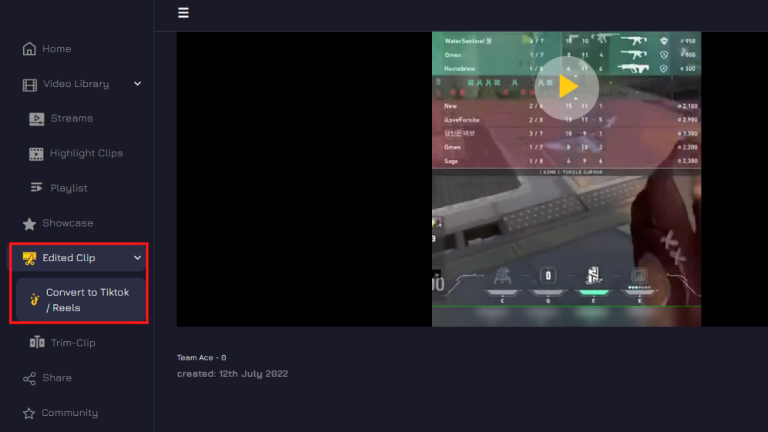
Step 9. After a while, your clip will be ready and you can find it on the Edited Clips tab and select the Convert to TikTok/Reels option.
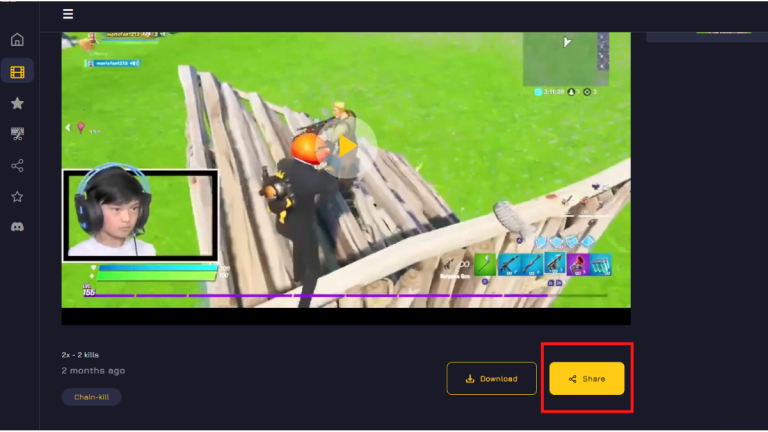
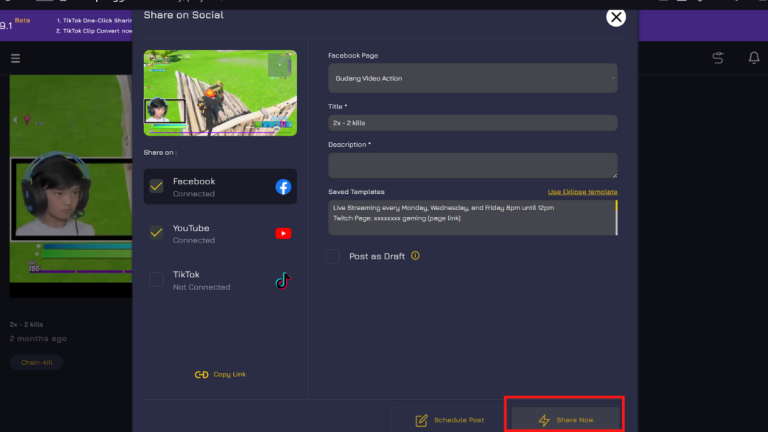
Step 10. Hit the Share icon under your video to directly post it to TikTok, Facebook, or YouTube or download it.
Step 11. Finally, write a title, description, and set the publishing time, and hit the Share Now button.
Pro Tip: Use the AI Montage Maker (Ultra Highlights) for Instant Reels
Don’t want to edit individual clips? Eklipse has you covered. For your most action-packed streams, the Ultra Highlights feature is your secret weapon. This powerful AI tool automatically identifies your best plays from a single stream and stitches them together into a cinematic, ready-to-post montage. It’s the fastest way to turn a great stream into an epic highlight reel.
Frequently Asked Questions (FAQ)
Do I need editing experience to make a montage with Eklipse? No, not at all! Eklipse is designed for everyone, especially beginners. The AI does all the hard work of finding your best moments, and the editor is simple and intuitive. You don’t need any prior video editing experience to create a great-looking montage.
Is Eklipse completely free to use? Yes, Eklipse has a free plan that allows you to process your streams, get AI-generated clips, and use the basic editor. While there is a Premium plan with advanced features like 1080p quality and no watermarks, you can absolutely create and share amazing montages using only the free version.
Can I make a montage from my old streams? Yes. Once you connect your Twitch, Kick, or YouTube account, Eklipse can access your past broadcasts (VODs). You can select any of your previous streams to generate highlights from, not just your most recent ones.
What’s the difference between a clip and a montage? A clip is usually a short, single moment of gameplay (e.g., one impressive kill). A montage is a collection of these clips edited together, often set to music, to create a longer highlight reel that showcases your best skills over time.
Conclusion
That’s all it takes to learn how to make a gaming montage video using Eklipse. Now, anyone can save time and energy while creating high-quality content that grows their channel. You no longer have to worry that your videos won’t measure up to the pros, because Eklipse gives you the tools to succeed.
Best of all, you can get started for free! For a more detailed look at creating longer videos, check out our step-by-step guide on Creating Highlight Reels from Live Streams with Eklipse. What are you waiting for? Stop letting your best moments go to waste and start creating today!
Ready to create your own epic montage? Let Eklipse’s AI do all the hard work for you. Try It for Free!
TL;DR: What is the easiest way of creating highlight reels from a live stream? The easiest way is using an AI tool like Eklipse. Simply connect your stream account, and Eklipse’s AI will automatically find your best moments, allowing you to quickly edit and compile them into a shareable highlight reel.
The stream is over, the hype was real, but now the grind begins. The daunting task of creating highlight reels from hours of VOD footage is a major pain point for every creator. Your best moments are trapped in a long timeline, and the thought of manual editing is enough to cause serious burnout. What if you could get all the credit without any of the grind?
This is where Eklipse steps in, transforming the entire process with its powerful AI features. This guide will walk you through the exact step-by-step process of using Eklipse to automatically generate clips and edit a professional-looking highlight reel, whether you’re a beginner or a seasoned streamer.
How to Get Mobile Legends Highlight Automatically with Eklipse
1. Create and Connect Your Account
First, you’ll need to create an Eklipse account. Once registered, link your account to your streaming platform—whether it’s Twitch, YouTube, or Facebook Gaming. Eklipse integrates seamlessly with these platforms to automatically pull your live stream data.
2. Stream Your Gameplay
As you stream, Eklipse works in the background, recording your live session. There’s no need to worry about manually starting or stopping recordings, as Eklipse automatically captures your entire broadcast.
3. AI Highlight Generation
Eklipse’s powerful AI begins analyzing your live stream in real-time, detecting key moments such as headshots, kills, victories, or other exciting plays. These moments are automatically clipped into short highlight videos, which you can review and edit further.
4. Manage and Review Your Highlights
After your stream ends, log into your Eklipse account. Here, you can access and review the clips that were automatically generated by the AI. If any key moments were missed, don’t worry—you can manually create clips from the full stream as well.
5. Manual Clip Creation (Optional)
If the AI missed a crucial moment or you want to highlight a specific part of your stream, you can manually select the section and create a clip. This step allows for precise control over which parts of your stream become part of your highlight reel.
6. Edit Your Highlights
Use Eklipse’s built-in video editing tools to refine your clips. You can trim clips, add text overlays, insert transitions, music, and other effects to make your highlight reel stand out. The intuitive editor helps make the editing process smooth and efficient.
7. Compile Your Highlight Reel
Once your clips are ready, it’s time to create your highlight reel. Select your best moments, arrange them in a sequence, and compile them into one cohesive video. Eklipse’s editing tools allow you to tweak the order and timing to make the final reel flow smoothly.
8. Optimize for Social Media
Eklipse also allows you to automatically convert your highlight reel into a vertical format, perfect for sharing on social media platforms like TikTok and Instagram Reels. This ensures your content looks great, whether it’s viewed on a mobile phone or desktop.
9. Download or Share
After finalizing your highlight reel, you have the option to download the video to your device or share it directly to your social media accounts. Eklipse’s integration with popular platforms makes sharing your content quick and easy.
Eklipse’s AI automatically scans your stream and identifies the most exciting moments. It detects key actions, such as game-winning moves, headshots, or critical gameplay sequences, and creates clips based on those highlights.
For your most epic plays, the Ultra Highlights feature takes this a step further, automatically creating a cinematic, multi-kill montage to give your best moments the spotlight they deserve.
2. Manual Clip Creation
If the AI misses a significant moment or if you want to focus on a specific part of your stream, you can manually create clips. Simply navigate to the relevant timestamp in your stream, and Eklipse will help you extract and save that section.
3. Video Editing Tools
Eklipse provides a variety of basic video editing tools, including trimming, cutting, and merging clips. You can also add text overlays, music, transitions, and other effects to enhance your highlight reel.
4. Social Media Conversion
The platform can automatically convert your videos to formats optimized for platforms like TikTok and Instagram. This feature makes it easy to create short-form videos that are ready to go viral on social media.
Supported Platforms and Games
Streaming Platforms:
Twitch
YouTube
Facebook Gaming
Kick Streaming
Rumble
Supported Games:
Eklipse supports a wide range of popular games across various genres, including first-person shooters, battle royales, and MOBAs. Whether you’re streaming Call of Duty, Marvel Rivals, Fortnite, Apex Legends, League of Legends, or any other game, Eklipse is capable of creating highlight reels for virtually any game.
Free vs. Premium Features
Free Features:
Eklipse offers a solid free version with the core functionalities you need to create highlight reels. This includes automatic highlight generation, basic editing tools, and social media sharing.
Premium Features:
For those who want more advanced capabilities, Eklipse also offers premium features. These include higher-quality exports, longer video processing times, and access to more advanced editing tools. Premium users also benefit from additional customization options and faster processing speeds.
Conclusion
Eklipse offers the most streamlined solution for creating highlight reels that capture the energy of your live streams without the soul-crushing editing process. With its powerful AI, user-friendly editor, and seamless platform integration, you can finally stop spending hours VOD-diving and start sharing your best moments instantly. If you’re ready to elevate your content and focus more on creating than editing, try Eklipse today and see the difference for yourself.
Stop the editing grind. Let Eklipse create your highlight reels automatically. Try It for Free!
TL;DR In 2025, the best TikTok gaming content tools include AI-powered highlight platforms like Eklipse.gg, alongside editing apps (CapCut, DaVinci Resolve, Adobe Premiere Pro), streaming software (OBS, Streamlabs), and design/audio tools. Eklipse.gg stands out by automatically turning long gameplay sessions into viral-ready vertical clips for TikTok.
You’re streaming for hours, hitting insane plays in games like Battlefield 6 or the new Call of Duty, but your TikTok is a ghost town. The agonizing process of manually finding those moments and editing them into a single viral-worthy clip feels like a second full-time job. This is the exact pain point where having the right TikTok gaming content tools becomes a necessity, not a luxury.
The real challenge lies in condensing hours of gameplay into short, eye-catching clips that can capture attention in a sea of content. Fortunately, in 2025, a wave of AI-powered tools is making that process far easier. Among them, Eklipse.gg stands out for automatically detecting highlights and converting them into vertical, TikTok-ready videos with minimal effort.
What are the leading tools for creating gaming content for TikTok in 2025?
The leading tools for creating gaming content for TikTok in 2025 primarily include AI-powered platforms like Eklipse.gg for automated highlight generation, alongside a suite of versatile video editing software, streaming applications, graphic design tools, and audio solutions.
Eklipse.gg is particularly effective for transforming long-form gameplay into short, viral-ready vertical videos, making it a highly valuable asset for content creators. Other essential tools complement this by providing capabilities for detailed editing, live broadcasting, visual branding, and sound optimization.
Eklipse.gg: A Leading Solution for Gaming Content Automation
Eklipse.gg is recognized as a premier AI-powered platform for gaming content creation, designed to assist streamers and gamers in transforming their long-form content into short-form videos suitable for platforms such as TikTok, Reels, and YouTube Shorts. It aims to alleviate the challenges associated with manual video editing and the consistent production of engaging short-form content.
What are the key features of Eklipse.gg for TikTok gaming content?
AI-Powered Highlight Generation: Eklipse.gg employs advanced AI to automatically identify and clip significant moments from streams on Twitch, YouTube, or Kick. This feature can considerably reduce the time spent on manual review and editing.
Ultra Highlights: For your most epic plays, this feature uses AI to automatically create a cinematic, multi-kill montage, turning your best moments into a shareable masterpiece. (Learn More)
Optimized for TikTok Conversion: The platform offers functionalities specifically tailored for TikTok, enabling users to convert gaming clips into vertical video formats. Options include various vertical templates and adjustments for elements like webcam placement.
Direct Social Media Integration: Eklipse.gg supports direct posting to TikTok, YouTube Shorts, and Reels, which can simplify the content distribution process.
Customizable Editing Tools: In addition to AI automation, Eklipse.gg provides online editing tools for further refinement of clips, including text overlays and other adjustments.
Multi-Platform Compatibility: The platform integrates with Twitch, YouTube, and Kick, offering versatility for creators across different streaming services.
Free Tier Availability: A free tier is available, allowing users to process a limited number of streams and generate clips at 720p quality, providing an opportunity to explore its features.
How does Eklipse.gg address common creator challenges?
Content creators often face the challenge of time-consuming content repurposing. Eklipse.gg seeks to address this by:
Enhancing Efficiency: By automating highlight identification and clipping, it allows creators to allocate more time to streaming and audience engagement.
Supporting Content Quality: The platform assists in maintaining a consistent level of quality, even for creators with limited video editing experience.
Facilitating Audience Growth: By simplifying the creation of short-form content, Eklipse.gg can help creators expand their presence on TikTok and other platforms.
What other essential tools are available for TikTok gaming content creation?
While Eklipse.gg offers specialized features for automated highlight generation and TikTok conversion, a comprehensive content creation workflow often benefits from a range of other tools. These tools can support various aspects of content production, from live streaming and video editing to graphic design and audience analytics.
Video Editing Software:
CapCut: A widely used mobile video editing application known for its user-friendly interface and features tailored for short-form video platforms. It provides a selection of effects, filters, music, and text options, suitable for mobile-first editing.
DaVinci Resolve: A professional video editing suite that includes a free version with robust capabilities. It offers advanced controls for color grading, visual effects, and audio post-production, catering to creators seeking more in-depth editing functionalities.
Adobe Premiere Pro: An industry-standard video editor offering a comprehensive set of tools for professional video production. It operates on a subscription model and integrates with other Adobe Creative Cloud applications.
Streaming Software:
OBS Studio (Open Broadcaster Software): A free and open-source software commonly used for live streaming and video recording. OBS Studio is highly customizable and provides flexibility in managing scenes, sources, and audio.
Streamlabs Desktop: Based on OBS, Streamlabs Desktop offers a more streamlined interface with integrated features such as alerts, widgets, and themes, which can simplify the setup process for new streamers.
Graphic Design Tools:
Canva: An online graphic design platform that enables users to create visual assets like thumbnails and overlays. It features a library of templates, fonts, and graphics.
Adobe Photoshop/Illustrator: Professional graphic design software that provides advanced tools for creating custom visual elements, including logos and detailed graphics.
Audio Tools:
Audacity: A free, open-source audio editor and recorder. It can be used for audio cleanup, noise reduction, and level adjustments to enhance audio quality in videos.
Epidemic Sound/Artlist: Subscription services that offer royalty-free music and sound effects. Utilizing licensed audio is important for compliance with platform guidelines and monetization.
Engagement and Analytics Tools:
TikTok Analytics: The platform’s built-in analytics provide insights into audience demographics, video performance, and content trends, which can inform content strategy.
Social Blade: A web-based tool that offers user statistics for various social media platforms, including TikTok, useful for tracking growth and comparing performance.
How can Eklipse Premium enhance content creation capabilities?
While the free tier of Eklipse.gg provides foundational features for content creation, an upgrade to Eklipse Premium offers an expanded set of functionalities designed to further support content development and efficiency. For creators aiming to optimize their output and reach, Premium provides several notable advantages:
1080p Clip Quality: Enables the production of gaming highlights in full HD, contributing to a higher visual quality for the audience.
Watermark-Free Content: Allows for the creation of clips without watermarks, which can contribute to a more polished presentation.
Accelerated Processing: Offers faster processing times for video clips, potentially aiding in quicker content turnaround.
Social Media Caption and Hashtag Generation: Provides AI-generated captions and relevant hashtags, which can assist in content optimization and discoverability.
Discord Auto-Share Bot: Facilitates automatic sharing of new clips with Discord communities, potentially increasing engagement.
Extended Stream Duration Support: Supports the processing of highlights from longer streaming sessions.
Increased Storage: Offers additional storage capacity for clips and projects within the Eklipse platform.
Kick Platform Integration: Provides compatibility with Kick streams, broadening the range of supported platforms.
Google Drive Import: Allows for the import of footage directly from Google Drive, enhancing workflow flexibility.
Advanced Editing Tools: Access to a more comprehensive suite of editing features for fine-tuning video content.
Dedicated Support: Provides priority access to customer support for assistance with the platform.
Early Access to New Games: Offers early access to AI highlight features for newly released games, which can be beneficial for timely content creation.
Eklipse Premium represents an option for creators seeking to enhance their content creation process and expand their presence on platforms like TikTok.
What is the overall conclusion regarding tools for TikTok gaming content?
Ultimately, a winning strategy for TikTok in 2025 comes down to using the right TikTok gaming content tools to work smarter, not harder. While a variety of software can handle different parts of the process, a platform like Eklipse.gg offers a powerful, automated solution to the biggest bottleneck: finding and editing your best moments. It frees you from the time-consuming grind, allowing you to focus more on gaming and engaging with your community.
By integrating an AI-powered tool like Eklipse into your workflow alongside other essential editing and design software, you can build a robust content pipeline. This approach is key to consistently producing high-quality videos, unlocking your creativity, and driving real audience growth on TikTok.
Frequently Asked Questions (FAQ)
What is Eklipse.gg? Eklipse.gg is an AI-powered platform designed to automatically generate highlights from live streams and convert them into short-form video content for platforms such as TikTok, Reels, and YouTube Shorts.
Does Eklipse.gg offer a free version? Yes, Eklipse.gg provides a free tier that allows users to process a limited number of streams and generate clips at 720p resolution. This tier supports connections to Twitch, YouTube, and Facebook.
What additional features are available with Eklipse Premium? Eklipse Premium includes features such as 1080p clip quality, the removal of watermarks, faster processing times, AI-driven social media caption and hashtag generation, a Discord Auto-Share Bot, support for extended stream durations, increased storage, integration with Kick, Google Drive import capabilities, advanced editing tools, dedicated customer support, and early access to features for new games.
What other types of tools are useful for creating TikTok gaming content? Beyond Eklipse.gg, other valuable tools for TikTok gaming content include video editing software (e.g., CapCut, DaVinci Resolve, Adobe Premiere Pro), streaming software (e.g., OBS Studio, Streamlabs Desktop), graphic design tools (e.g., Canva, Adobe Photoshop/Illustrator), audio editing tools (e.g., Audacity, Epidemic Sound/Artlist), and analytics platforms (e.g., TikTok Analytics, Social Blade).
How can creators enhance their gaming content for TikTok? To enhance gaming content for TikTok, creators can focus on producing high-quality, engaging short-form videos. Utilizing tools like Eklipse.gg for efficient highlight generation, incorporating trending audio and hashtags, actively engaging with the audience, and analyzing performance data through TikTok Analytics can contribute to content improvement and audience growth.
Stop the editing grind. Let Eklipse create your TikToks for you, automatically. Try It for Free!