One effective way to achieve this is by adding captions to your Twitch stream. Captions not only make your content accessible to a wider audience but also enhance the overall viewing experience.
In this guide, we will walk you through the step-by-step process of adding captions to your Twitch stream. Let’s dive in and make your streams more inclusive!
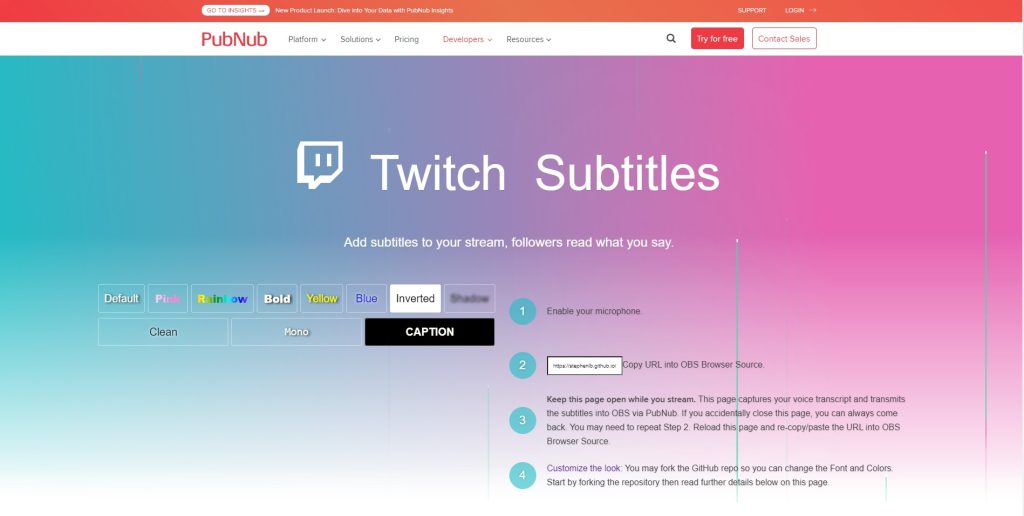
Before we proceed, please ensure that you have a dependable captioning solution ready. Several tools are available to assist you in generating real-time captions or uploading pre-recorded caption files.
For your convenience, there is a community tool available that allows you to simply copy the URL and add it to your “Browser Source” in OBS.
Now, let’s move on to the next step.
Step 2: Integrating Captions into Your Twitch Stream
Once you have set up your captioning tool, it’s time to integrate the captions into your Twitch stream. Follow these steps to ensure a seamless integration:
Now that you have completed this step, keep the web page open as we move on to the next step. Next step, it’s time to add this captions tools to your Twitch stream via broadcasting software like OBS or Streamlabs OBS.
Step 3: Adding The Caption Tools to Your OBS
Now that you have copied the URL, it’s time to integrate the Twitch captions tool into your overlay. The step-by-step process is as follows:
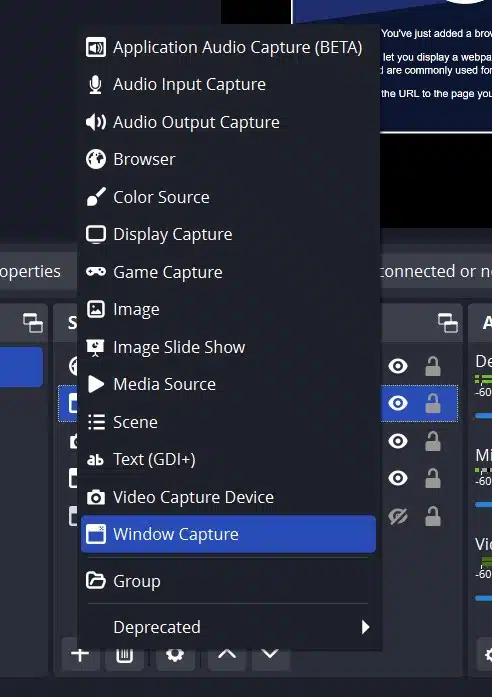
Open OBS (or Streamlabs OBS).
Click the “+” button in the “Sources” section and select “Browser Source”.
Paste the previously copied URL into the “URL” box.
Click “OK”.
Congratulations! You now have captions on your Twitch stream.
The final task is to position your captions so that they can be easily read without obstructing your webcam. Once you have finished arranging the layout, you can start broadcasting to Twitch and showcase captions for every word spoken during the stream.
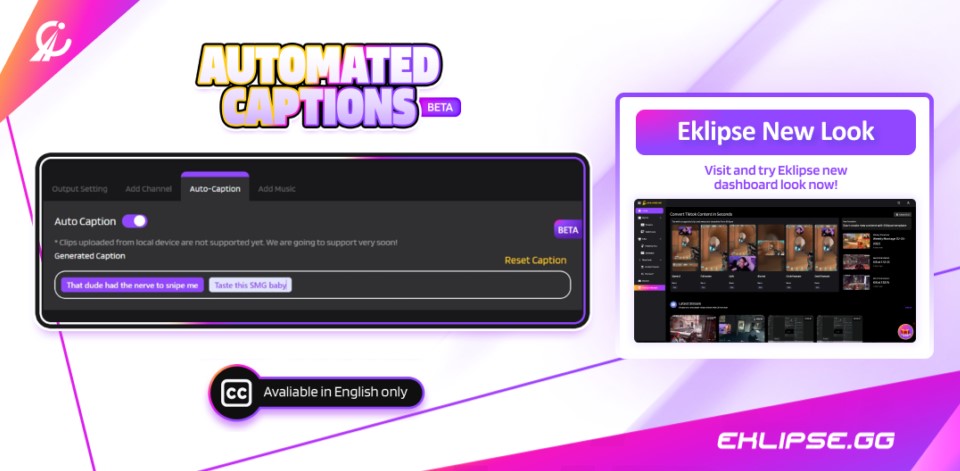
Another alternative to adding captions to a Twitch stream is using tools like Eklipse.
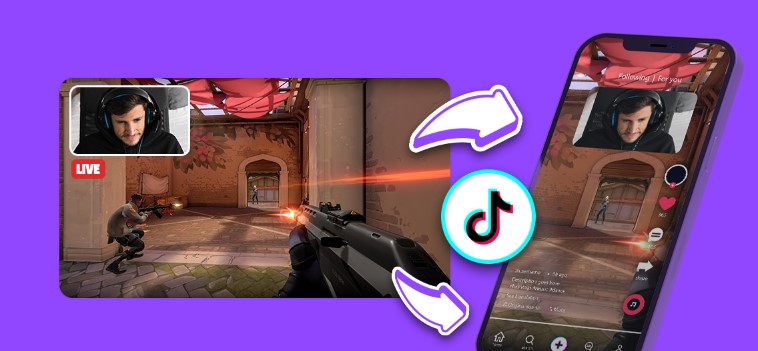
Eklipse can automatically clip your stream and convert it to TikTok’s vertical format using online video editing tools. The advantage of using Eklipse is that captions are added automatically by detecting and transcribing anything on the stream clip.
However, it’s important to note that Eklipse cannot directly add captions to your Twitch live stream. Instead, it can assist you in creating social media content from your stream.
Visit Eklipse.ggto learn more and sign upnow to start growing your channel.
Maximize your Black Ops 6 rewards—Create highlights from your best gameplay with with Eklipse
Eklipse help streamer improve their social media presence with AI highlights that clip your Twitch / Kick streams automatically & converts them to TikTok / Reels / Shorts
Maximize your Black Ops 6 rewards—Create highlights from your best gameplay with with Eklipse
Eklipse help streamer improve their social media presence with AI highlights that clip your Twitch / Kick streams automatically & converts them to TikTok / Reels / Shorts
By following this guide, you can seamlessly add captions to your Twitch stream, creating a more inclusive and engaging experience for all viewers. Remember to choose a reliable captioning tool, integrate it into your streaming software, and refine the captions for optimal.
What is the Twitch Elevate message and how can you send one? Twitch has recently announced that it is testing a new monetization feature, similar to YouTube Live, that enables viewers to prioritize their messages by paying for them.
Twitch provides various ways for streamers to monetize their content, including channel subscriptions and bit donations. In addition, Twitch has revealed that it is currently experimenting with a new monetization feature that may remind YouTube Live viewers of Super Chats.
Introducing Elevated Chat, Twitch now allows viewers to pay for their chat messages to appear at the top of a streamer’s chat for a specific duration of time.
This article will provide you with all the information you need about Twitch’s latest feature.
Source: Eklipse Blog - motivational videos for success
According to Techjury statistics, live streaming experienced a growth of 99 percent from April 2019 to April 2020, and 63% of people worldwide aged 18 to 34 are accustomed to watching live streaming, be it movies or games. Moreover, experts estimate that the live streaming market will be worth nearly 250 billion dollars by 2027.
Given these data, it’s no wonder that gaming video creators and streamers are emerging on various platforms such as Twitch, Facebook Gaming, and YouTube. If you’re one of the beginner streamers, there are several things to consider before starting live streaming.
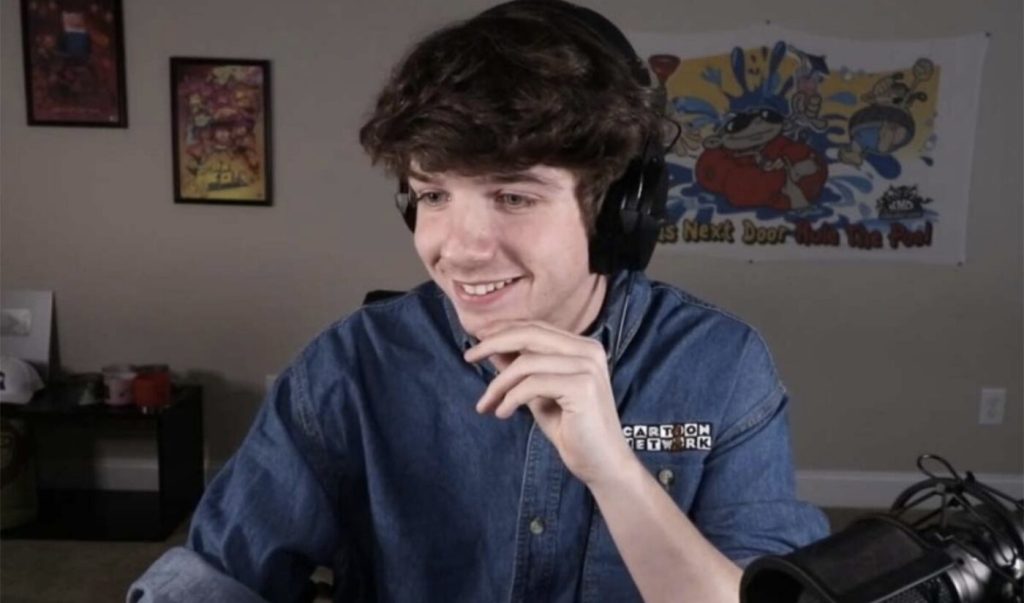
The following tips are based on the experience of StoneMountain64, a content creator with over 3 million followers. Let’s dive into them below!
The first live streaming basics to emphasize is that professional streamers also go through challenging steps. However, they still follow their passion and roadmap gradually. Almost every successful streamer has created their own content style and attracted their audience.
One of the challenges is experimenting with content and constantly innovating with new ideas. Having few or even zero viewers can be demotivating, but everyone, including famous streamers, has been in that position.
2. Maximize the Available Equipment, and Have the Right Tools (Like Eklipse)
The second live streaming basics are about using any resource you had at the time.
When starting live streaming, you don’t need to have advanced equipment like a streaming PC to become the best streamer. In fact, most creators start with whatever devices they have and gradually upgrade while learning.
It can automatically clip your streams, saving you the hassle of scrolling through your VOD to find the perfect clip for your social media. Additionally, it can transform your landscape videos into vertical format, allowing you to expand your presence on platforms like TikTok. And the best part? All of these features are available for free!
In addition to having reliable hardware and software, beginner streamers also need to understand encoding settings, platform selection, game selection, and copyright issues.
3. Consistency in Content, Schedule, and Quality
Once you have the necessary equipment, the next step in live streaming basics is about content. If you choose game-related content that provides up-to-date information, you need to offer a unique angle and keep it current. However, if you opt for evergreen content, it requires time for production and gaining attention.
The key is to be consistent in creating content and maintaining its quality. This is what gives your audience a reason to follow your channel. Besides content consistency, consistency in terms of scheduling is also crucial. While some creators aim for viral content, StoneMountain64 suggests creating content with long-term value. Viral content may gain popularity quickly but fades away after a short time.
4. Find Your Niche
The fourth thing in live streaming basics is about finding your own niche.
Choosing and finding a niche cannot be done in a day. It requires research and experimentation. A niche refers not only to the subject matter but also how you deliver and present the content on the screen.
There are thousands of niches, ranging from various games to specific categories within those games. You can choose to become a professional gamer, an entertainer, an explainer of gameplay strategies, or provide advice and tips, among other options.
Keep in mind that if you choose a mainstream game, competition will be tougher because famous streamers will already dominate it. It is recommended to select a niche game with fewer competitors, especially among renowned creators who discuss it.
For instance, Stodeh, a Twitch streamer, excels in shooting games like Battlefield 2042. He consistently plays that FPS game, attracting the attention of over 200K viewers on Twitch and gaining 250K+ subscribers on YouTube.
5. Focus on a Single Platform
Admittedly, focusing on a single platform is essential. However, diversifying across multiple platforms can also expand your audience reach. For example, if you feel comfortable on Twitch but have many friends on Facebook, you can try live streaming on Facebook occasionally or share offline content.
It is recommended to primarily focus on one platform for production efficiency. However, there’s nothing wrong with cross-platform engagement to attract a wider audience. If you choose this approach, be prepared for the additional time required for production and distribution.
6. Competitors are to be Learned from, Not Avoided
Competition among streamers is inevitable. Often, as a beginner streamer, you want to stand out and attract an audience. However, it’s important to understand that there is ample room for growth by supporting other streamers and building relationships with them.
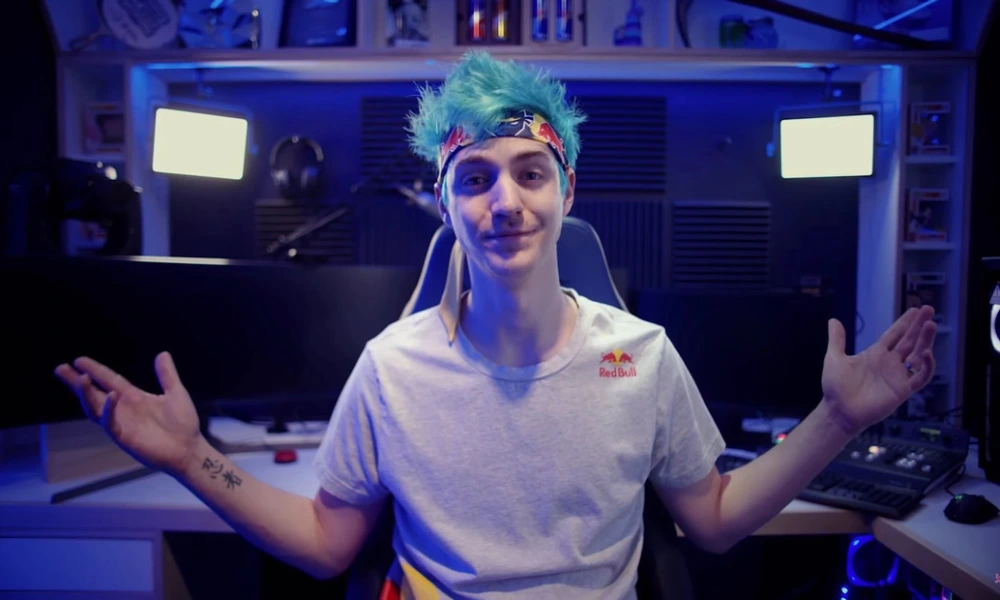
Take Ninja as an example. Over the past five years, he has contributed to the development of the gaming and live streaming industry by bringing in many viewers to play Fortnite. His content has attracted new viewers, which in turn has benefited hundreds of other creators who have grown alongside him.
7. Build Community and Industry Connections
As a creator, creating content is crucial. However, don’t forget about your audience. Although they may seem like viewers, as content creators, we also need to build relationships with them. For example, write captions with questions or respond to all comments. Ultimately, treat them as friends who will support you in the future.
Building a community is not only important for the sustainability of your live streaming channel but also influences the industry as a whole. If you successfully build a community, the gaming and streaming industry will continue to thrive.
8. Maintain Professionalism and Reputation
It’s important to maintain strong and organic relationships with other content creators and potential viewers. When joining a new community and having knowledge to share, do so as a friend rather than someone who knows everything or a mentor.
In addition to sharing knowledge, you can collaborate with other creators. Despite being considered competitors, collaboration can lead to gaining new viewers and showcase your professionalism by mutually safeguarding each other’s reputation.
The same principle applies to sponsorships. If offered advertorials, you must position the value of your content. Building a good reputation with brands will impact your future career.
9. Create a Plan to Increase Viewership
Although streaming and live broadcasts are important activities for a streamer, they are pointless without viewers. Similarly, even if your content is excellent, you need viewers to reap the rewards of your hard work in producing quality content. So, how do you attract viewers?
Apart from having quality content, there are three basic ways to attract an audience: social media word-of-mouth promotion, SEO optimization, and advertising. Nowadays, these three can be implemented simultaneously in the digital age.
10. Balance Time Investments
When deciding to become a game streamer, whether as a career path or just a hobby, it’s crucial to find a balance. If it’s a hobby, it shouldn’t interfere with your primary job. However, if you intend to make it your main profession, remember that it requires time and resources investment. Regardless of your choice, there needs to be a balance between content production and content analysis.
Conclusion
That’s all the live streaming basics every beginners should know. In summary, live streaming has become really popular and a great opportunity for new streamers. To succeed as a beginner in the live streaming world, just remember the 10 important things we talked about earlier.
Maximize your Black Ops 6 rewards—Create highlights from your best gameplay with with Eklipse
Eklipse help streamer improve their social media presence with AI highlights that clip your Twitch / Kick streams automatically & converts them to TikTok / Reels / Shorts
Since 2019, Sykkuno has rapidly gained popularity on YouTube and Twitch through his efforts. Now, there is curiosity among people about his earnings. In this regard, we are here to provide you with the details.
Sykkuno’s estimated net worth exceeds $1,200,000, and he currently earns an estimated $139,465.20 per month. Here is the breakdown.
Twitch
Sykkuno earns around $118,504.5 directly from Twitch each month. This can be broken down as follows:
1. Subscriptions
Sykkuno currently has 15,101 active subscribers as of November 2021, according to Twitchtracker. This means he earns approximately $52,853.5 per month from Twitch subscriptions, assuming a 70/30 split with Twitch.
2. Advertisements
Last month, Sykkuno streamed for approximately 150 hours with an average viewership of 20,217 viewers. If he runs two ads per hour at a $10 CPM (cost per thousand views), he would make $60,651 per month from ads.
3. Donations & Bits
It is difficult to calculate the exact amount Sykkuno receives from donations and bits since there are no specific figures available. However, given his level of viewership, it is estimated that he earns an additional $3,000 – $5,000 or more per month from donations.
YouTube
Sykkuno primarily generates income on YouTube through Adsense revenue. Last month, he accumulated a total of 5,525,346 views, resulting in an approximate monthly earning of $26,110.56 from YouTube.
Brand Deals
Sykkuno has several brand deals and partnerships with companies such as NordVPN, GFuel, Elgato, Mavix Gaming Chairs, and CyberPower PC. Although there is no precise data available, it is estimated that he earns anywhere from $5,000 to $10,000 per month from these brand deals.
Overall, Sykkuno earns approximately $10,000 per month from brand deals.
Sykkuno Personal Life
Source: Business of Esports
Thomas is an American individual aged 29, born on June 4, 1992. He is a well-known Twitch streamer with Chinese and Vietnamese heritage.
Limited information is available about his personal life, except for the fact that he has a sister and a dog named Bimbu. Details about his educational background and relationship status remain undisclosed, much to the disappointment of his female fans.
Sykkuno Career
He began his career in 2012 by uploading commentary videos on League of Legends. In 2019, he ventured into Twitch streaming at the suggestion of LilyPichu, a fellow streamer from Offline TV.
Since then, Sykkuno has become one of the prominent figures on the platform, often collaborating with other popular streamers like Corpse Husband.
Conclusion
Sykkuno has been actively creating content for a considerable period of time. However, it was when OfflineTV encouraged him to stream regularly that his popularity skyrocketed. We are eagerly looking forward to seeing the future direction of his content!
Maximize your Black Ops 6 rewards—Create highlights from your best gameplay with with Eklipse
Eklipse help streamer improve their social media presence with AI highlights that clip your Twitch / Kick streams automatically & converts them to TikTok / Reels / Shorts
In response, Twitch CEO Dan Clancy issued a personal apology, acknowledging the company’s mistake and taking responsibility for the proposed restrictions that had caused an uproar.
On June 6, 2023, Twitch introduced new branded content guidelines aimed at regulating how streamers advertise sponsorships. However, these guidelines were met with immediate criticism as they were perceived to have negative implications for charity, esports, and individual streamers alike.
Renowned streamer Asmongold called for a boycott, while the OTK Network, an organization associated with him, threatened to abandon the platform entirely. Twitch promptly issued an apology shortly after the backlash and ultimately decided to remove the guidelines from their website.
Content Creators React
The controversy surrounding the branded content guidelines garnered attention from other prominent content creators as well. Ludwig, among others, voiced their opinions on the matter. The collective backlash from streamers and the community prompted Twitch to swiftly reverse its decision and discard the proposed changes within a day.
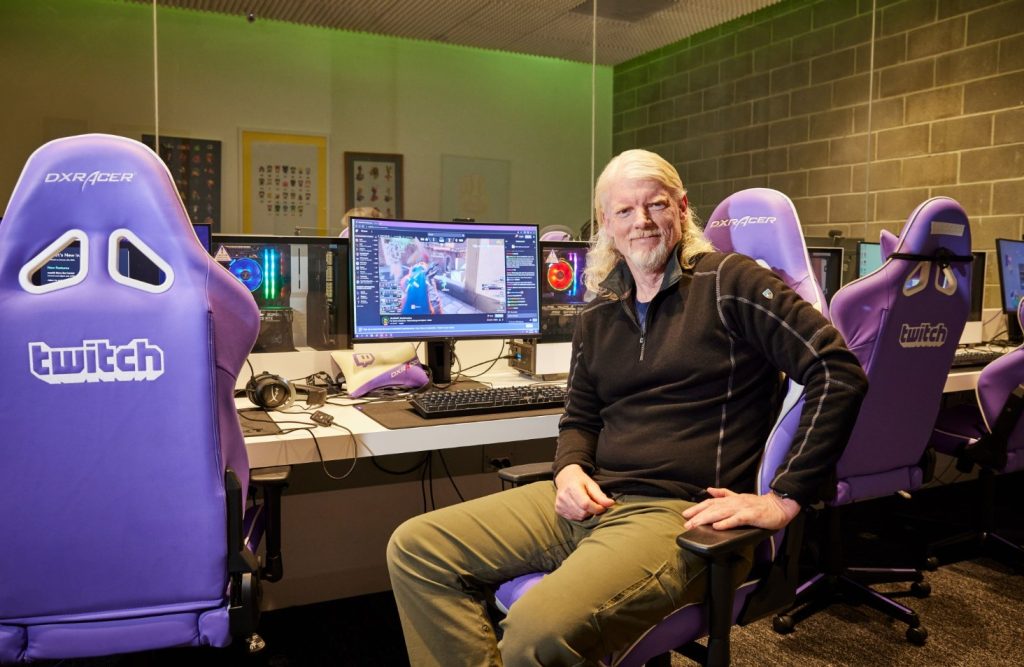
CEO Apology on Livestream
During his recent livestream on Twitch, CEO Dan Clancy took the opportunity to personally apologize for the situation. He wasted no time in addressing the issue head-on.
Apology for Recent Branded Content Guidelines
“Let me get straight to the point. As you may know, we recently introduced the branded content policy. I won’t delve into all the specifics.”
Clancy then proceeded to express his regret for the mishap in the guidelines, assuming full responsibility and admitting that Twitch had made an error.
“We received substantial negative feedback, and the truth is, we messed up. The fault lies with us, and I sincerely apologize for that.”
Despite the company’s quick action in rectifying the situation, Twitch users and the wider community still harbor concerns about the platform’s overall stance on supporting content creators.
Conclusion
The recent controversy surrounding Twitch’s branded content guidelines has caused significant turmoil within the streaming community. However, CEO Dan Clancy’s personal apology during his livestream demonstrates a willingness to take responsibility for the misstep and make amends.
As Twitch moves forward, it must prioritize transparency and effective communication to rebuild trust among its content creators and users alike.
Maximize your Black Ops 6 rewards—Create highlights from your best gameplay with with Eklipse
Eklipse help streamer improve their social media presence with AI highlights that clip your Twitch / Kick streams automatically & converts them to TikTok / Reels / Shorts
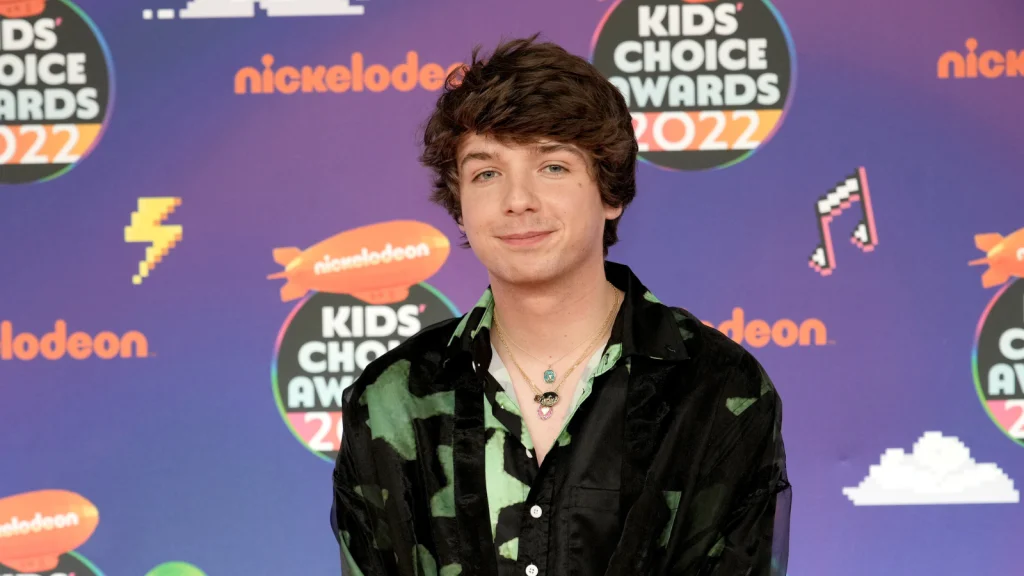
Karl Jacobs, aka Karljacobs, is a popular American social media star with millions of followers on platforms like Twitch, YouTube, Instagram, Twitter, and TikTok. Originally part of MrBeast’s crew, he’s now a standout star in his own right. No wonder a lot of his fans are curious about Karl Jacobs net worth. Are you one of them?
His engaging personality, creative content, and involvement in the popular Dream SMP server have propelled him to stardom. But beyond his online persona, Karl Jacobs is an intriguing individual with a unique story to tell.
Discover more about Karl as we reveal intriguing facts about him.
Source: Tubefilter – how much does karl jacobs make a year
Karl Jacobs’s primary earnings come from thead revenue on his YouTube channel and his streaming activities on Twitch. Additionally, Karl frequently collaborates with MrBeast and appears in his videos. Furthermore, he has his own merchandise line and also sells MrBeast’s merchandise.
Considering these revenue streams, Karl Jacobs’ estimated net worth falls between $800,000 and $1 million.
Twitch
Through his Twitch streaming alone, Karl Jacobs earns an estimated $65,000. His monthly subscribers contribute approximately $60,000 to his earnings (assuming a rate of $3.5 per subscriber). On average, he gains around 17,000 new subscribers each month. The remaining $5,000 (from the $60,000) comes from advertising revenue on Twitch during his streams, resulting in a total of $65,000.
YouTube
Social Blade data suggests that Karl Jacobs receives an average of 7.6 million monthly views on his YouTube channel. Assuming a CPM (cost per thousand views) of $3, he earns an estimated $22,000 from YouTube through ad revenue alone.
Other Sources of Income
Karl Jacobs continues to be a member of the Dream Team and works alongside MrBeast, earning income from those endeavors as well. Additionally, he receives commissions from the sale of MrBeast’s merchandise, given his involvement as a crew member. Moreover, Karl earns from his other social media accounts.
In total, Karl Jacobs’ net worth is estimated to be around $800,000 to $1 million.
Karl Jacobs Age, Relationship, Family
Source: Variety
Karl Jacobs was born on July 19, 1998 (23 years old). Karl stands at a height of 5’11” (180.3 cm) and weighs approximately 120 lb (55 kg).
While Karl’s family maintains a low profile, he has a sister named Corry and a brother named Sean. Limited information is available about them, although Karl posted a photo with his brother Sean on Instagram. Prior to attending Portland Community College, Karl resided with his parents and siblings in North Carolina.
Karl completed his high school education at Fort Dorchester High School, a prestigious institution in South Carolina. While attending Portland Community College, he also worked as a salesman at Starlite Gaming.
Currently, Karl is not in a romantic relationship. He has expressed his intention to prioritize his career at this time.
Karl Jacobs Career
Karl Jacobs embarked on his career journey by making a decision just five weeks before his college graduation. Instead of completing his studies, he chose to drop out and join MrBeast (whose real name is Jimmy Donaldson), becoming a member of the Dream Team SMP. This opportunity arose when a previous member left the team.
For Karl, being able to appear in a MrBeast video as a fan was a dream come true. He made his debut in MrBro’s “Last to Leave Halloween Candy Wins $10,000” challenge. Following his inclusion in the team, Karl became a regular participant in Dream’s Minecraft Manhunt videos. Before all of this, he took part in a Minecraft Championship event, although he unfortunately did not emerge as the victor. However, this experience led him to cross paths with MrBeast, opening doors for his future career.
In 2020, Karl Jacobs launched his own YouTube channel, aptly named “Karl,” which has amassed 3.6 million subscribers as of March 2022. Despite having his own channel, Karl continues to make appearances on MrBeast’s YouTube channel.
Karl has been an active Twitch streamer since 2017, initially using the username GamerBoyKarl. However, he now officially streams under the account name “karljacobs” and has become one of the most popular streamers on Twitch.
He boasts an impressive following on various social media platforms. His Instagram account, @karljacobs, has garnered 3.9 million followers. He is also a TikTok star, with 10.1 million followers and 101.3 million likes on his official TikTok account, @karljacobs. Furthermore, his Twitch account boasts 3.4 million followers. Notably, as a member of the MrBeast crew, Karl has taken on the role of cameraman.
Conclusion
Karl Jacobs is working hard to achieve his dreams in his thriving online career. With each step he takes, he gets closer to his goals, and there’s no doubt that even greater achievements await him in the future.
Want to gain quick social media popularity like Karl Jacobs? Eklipse can help!
Eklipse’s AI-powered clipping tool will turn your best Twitch live moments into captivating highlights best for TikTok/Shorts/Reels. Share your clips immediately from Eklipse and become an internet sensation overnight!
Maximize your Black Ops 6 rewards—Create highlights from your best gameplay with with Eklipse
Eklipse help streamer improve their social media presence with AI highlights that clip your Twitch / Kick streams automatically & converts them to TikTok / Reels / Shorts
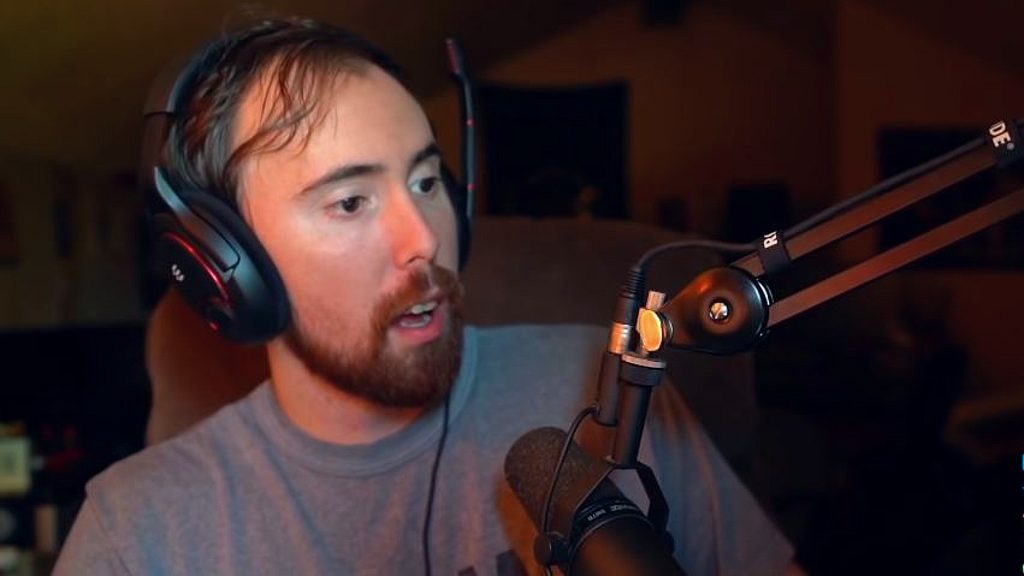
Asmongold is a famous streamer who became unexpectedly popular by playing the game World of Warcraft. As the leader of a guild, he has the most-watched channel on Twitch where he streams World of Warcraft. Let’s delve into this legend’s personal life, net worth, and more in 2023.
Like many other streamers, Asmongold generates income through online streaming, advertisements during live streams, paid subscriptions, tournament winnings, donations, and sponsorships.
Twitch
On Twitch, Asmongold earns money through subscriptions, advertisements, and donations. He has approximately 2.9 million followers, with an average of 10 million monthly views and over 18,000 active paid subscribers per stream. As a top-tier partner of Twitch, earning 70% of subscription income, Asmongold likely makes around $88,000 per month, totaling approximately $1.05 million annually.
YouTube
Most of Asmongold’s YouTube income comes from advertisements and exclusive partnerships. With over a million subscribers and a total of 571 million views, he likely earns around $75,000 per month and $900,000 per year from YouTube alone.
Aside from his main channel, Asmongold has additional YouTube channels, including Asmongold Clips, Asmongold, and ZackRawrr.
Considering both his Twitch and YouTube earnings, Asmongold’s total revenue is estimated to be around $163,000 per month and $1.95 million per year. This estimate does not include earnings from the Twitch Cheering Feature, which also generates substantial income for streamers like Asmongold.
Sponsorships
Asmongold’s major sponsors include Mountain Dew GameFuel and Chipotle. He is also a part of the OTK Network, which partners with Mountain Dew GFuel and Gatorade.
How Old is Asmongold?
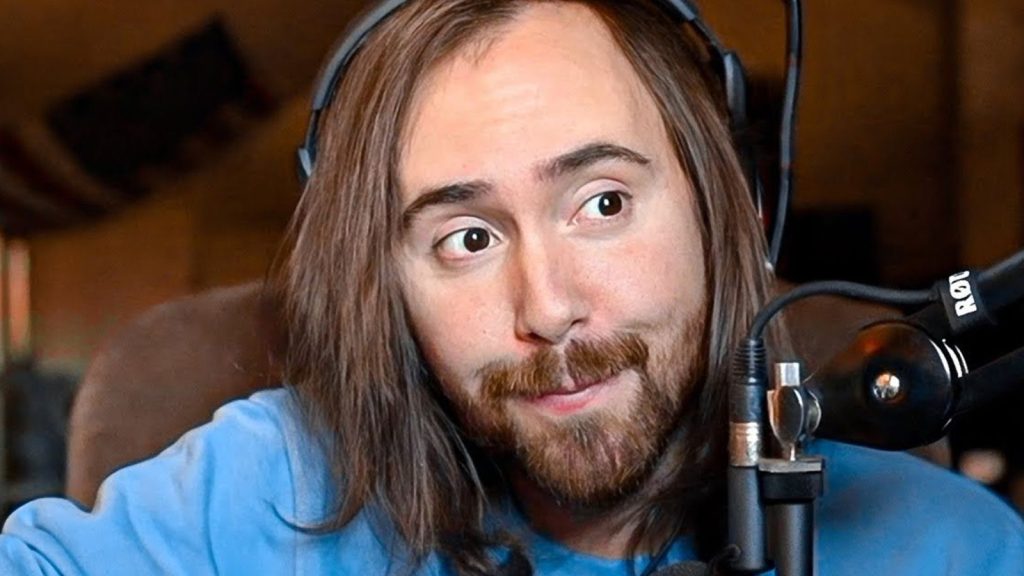
Zack, known as Asmongold, was born on April 20, 1990, making him 33 years old. He values his privacy and prefers not to disclose his real name to the public. Despite his love for gaming, his success did not come easily. Through hard work and consistency, supported by his parents and siblings, he earned his millions.
Who is Asmongold girlfriend? Currently, Zack is single. He was in a relationship with Izzy G, also known as Pink Sparkles, in 2018. However, they announced their breakup in 2019 after being together for over a year and a half. Fans continue to wonder if they will reconcile, but it seems unlikely at this point.
Asmongold Career Journey
Source: DotEsports
Asmongold began his streaming journey in 2013, during Twitch’s second year after its launch in 2011. With his extensive experience as a World of Warcraft player, he gradually became a prominent WoW streamer on Twitch, earning a prestigious reputation among Warcraft players and the gaming industry as a whole.
Following his rapid rise to fame and success as an internet personality, Asmongold co-founded One True King (OTK) in October 2020, alongside renowned Twitch streamers Mizkif, Esfand, Tips Out, and Rich Campbell.
While Asmongold is primarily known for playing World of Warcraft, he also explores various other online MMORPG and battle royale games. Here are some examples:
World of Warcraft
Lost Ark
Elden Ring
Dark Souls
Final Fantasy XIV Online
Dungeons & Dragons
Zack achieved a significant milestone in his gaming career by winning the Best MMORPG Streamer Award at the 2022 Streamy Awards. This recognition for his dedication and passion for the game brought him immense joy. It marked his first-ever award in the gaming industry.
Conclusion
Asmongold didn’t become famous overnight. He started streaming on Twitch with only a few viewers, but he kept going and streamed regularly. He just did what he loved, playing games and streaming, and eventually more people started to join his stream. His sincerity and passion influenced how his followers saw him. Being a streamer is tough work. It requires a lot of effort and long hours for every stream.
Maximize your Black Ops 6 rewards—Create highlights from your best gameplay with with Eklipse
Eklipse help streamer improve their social media presence with AI highlights that clip your Twitch / Kick streams automatically & converts them to TikTok / Reels / Shorts
Hardware Accelerated GPU Scheduling: What It Is and How to Turned it On
GPU hardware scheduling is a crucial component that enhances the performance of your computer’s graphics processing unit (GPU) while reducing input delay.
This feature optimizes the way tasks are managed and executed by the GPU, resulting in smoother and more responsive graphics performance. By understanding how GPU hardware scheduling works, you can unlock the full potential of your GPU and make your PC feels faster.
Let’s take a closer look at how this feature functions and how it can benefit your system.
What is Hardware Accelerated GPU Scheduling and How Does it Work?
In the Windows operating system, the GPU scheduler, known as the Windows Display Driver Model (WDDM) GPU scheduler, manages multiple processes that send tasks to the GPU.
While the GPU handles rendering, it’s the CPU’s job to plan and send these tasks to the GPU. To enhance efficiency, the CPU groups commands together instead of sending them one by one.
This technique, called frame buffering, improves frame rates and overall performance. However, it also introduces some input delay.
When you interact with your computer, like pressing a button, there can be a slight delay before the action takes place. This delay occurs because the CPU needs to finish the current batch of commands and submit a new one to the GPU.
Although the delay is minimal, it can be noticeable in certain situations.
Introducing Hardware Accelerated GPU Scheduling
To reduce the workload on the CPU and minimize input delay, Microsoft introduced the hardware-accelerated GPU scheduling feature.
This feature involves transferring some high-priority tasks, typically handled by the CPU, to a dedicated GPU-based scheduling processor.
By offloading these tasks to the GPU, the CPU can focus on other important processes, potentially leading to a more responsive system. Enabling GPU hardware scheduling should particularly benefit graphics-intensive activities like gaming, video editing, or live streaming using software like OBS (especially if you are using NVENC encoder).
Should You Turn Hardware Accelerated GPU Scheduling On or Off?
The decision to enable GPU hardware scheduling depends on various factors, such as your computer’s specifications and your usage patterns. If you have a lower or mid-tier CPU and experience high CPU usage during resource-demanding games, it’s worth considering enabling this feature.
However, keep in mind that not all systems support GPU hardware scheduling.
If this option isn’t available to you, there are alternative methods to improve your computer’s performance without upgrading hardware.
For example, you can disable frame buffering through in-game settings or your GPU driver control panel. This can enhance performance on an older PC, allowing you to continue enjoying visually appealing games.
It’s important to note that the impact of enabling GPU hardware scheduling can vary from system to system. According to Microsoft, there shouldn’t be significant differences in-game. However, you might notice positive changes when monitoring your CPU’s temperature and usage.
How to Enable GPU Hardware Scheduling via Windows Settings
To enable GPU hardware scheduling on your Windows 10 or Windows 11 system, follow these simple steps:
Enabling GPU Hardware Scheduling in Windows 10
Click the Start button and go to Settings > System.
Select Display from the left-hand menu.
Scroll down to the Multiple Displays section and click Graphics settings.
Turn on the Hardware-accelerated GPU scheduling toggle switch.
Restart your computer to apply the changes.
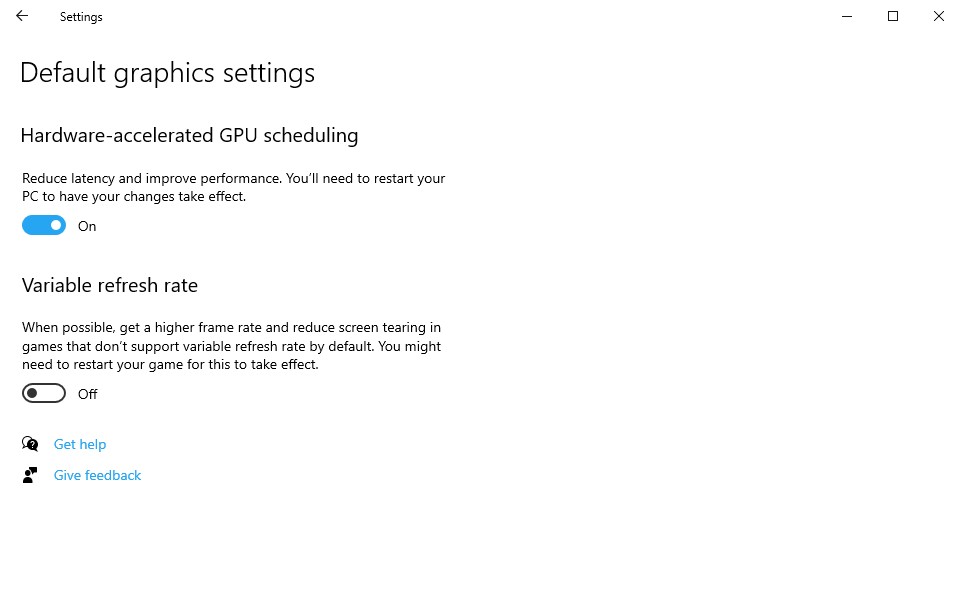
Enabling GPU Hardware Scheduling in Windows 11
Open Windows Settings and navigate to System > Display.
In the Related settings section, click Graphics.
Choose Change Default Graphics Settings.
Enable the toggle switch next to Hardware-Accelerated GPU Scheduling.
Restart your computer for the changes to take effect.
By following these steps, you can enable GPU hardware scheduling on your Windows system and potentially enhance your graphics performance.
Conclusion
In conclusion, GPU hardware scheduling is a valuable feature that optimizes GPU performance and reduces input delay.
Understanding how it works and considering your computer’s specifications will help you make an informed decision about enabling this feature for an improved computing experience, either it for gaming or streaming.
Maximize your Black Ops 6 rewards—Create highlights from your best gameplay with with Eklipse
Eklipse help streamer improve their social media presence with AI highlights that clip your Twitch / Kick streams automatically & converts them to TikTok / Reels / Shorts
In a surprising turn of events, Twitch recently announced its plans to implement new branded content guidelines, leading to significant discontent within the streaming community.
This article will provide an overview of the proposed changes, the resulting backlash, and Twitch’s subsequent reversal of these guidelines. Let’s dive in and explore the details.
Branded content, as defined by Twitch, refers to any content produced by streamers that involves the promotion of products or services in exchange for compensation.
This includes activities such as playing newly released video games, endorsing energy drinks, or advertising clothing lines. However, it is important to note that Twitch maintains exclusive rights to sell, serve, and display advertisements on its platform, as outlined in its Terms of Service.
To maintain control over branded content, Twitch intends to impose stricter regulations on how it is presented.
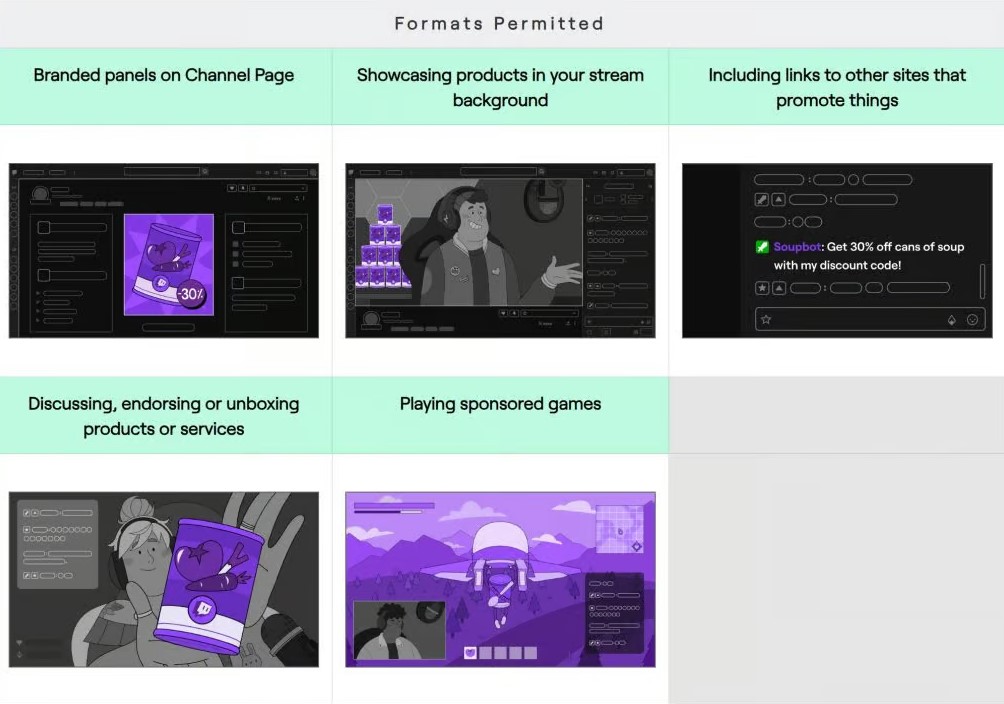
While certain products and services deemed unharmful will still be allowed for sponsored streams, the methods of integration will undergo changes. The following are examples of what will continue to be permitted on Twitch:
Branded panels on your Channel Page
Showcasing products in your stream background
Including links (in your chat) to other sites that promote things
Discussing, endorsing, or unboxing products or services
Playing sponsored games
What’s Not Allowed under the New Guidelines
Moving forward, streamers will face limitations on the freedoms they once had with regard to branded content.
Twitch branded content guidelines restrict the size of sponsored logos on streams, banner ads, or pre-recorded video ads, and the exclusion of audio ads.
Additionally, the new guidelines also impose restrictions on promoting illegal, hateful, malicious, political, adult-oriented, and financial products or services.
If streamers are unsure about the compatibility of a brand deal with these new restrictions, Twitch encourages them to consult the Branded Content Discloser Tool in the Stream Manager for guidance.
Yesterday, we released new Branded Content Guidelines that impacted your ability to work with sponsors to increase your income from streaming. These guidelines are bad for you and bad for Twitch, and we are removing them immediately.
Though Twitch might have already removed the guideline, we are still uncertain about what the future holds in terms of putting sponsorship content in your streams.
What Twitch New Branded Policy Means For New Streamer?
Twitch’s recent updates, including new branded content guidelines and a monetized streamer agreement policy, have raised concerns among streamers.
These changes will restrict streamer revenue streams by limiting the display of sponsor logos during streams.
So what it means? It means you need to actively engage with other video platforms. You can try short-form vertical videos like TikTok, YouTube Shorts, Facebook, or Instagram Reels.
By doing so, you can reach a wider audience and avoid the restrictions imposed by these changes. These changes limit the display of sponsor logos during streams, which in turn restricts streamer revenue streams.
Diversifying presence can help you, fellow streamers, to expand your reach. Also, who knows? You might find additional revenue opportunities in your journey.
Adaptability and utilizing multiple platforms are key to success in the evolving streaming landscape.
But How Can You Reach a Broader Audience as a Twitch Streamer?
As a new streamer, capturing and sharing the most exciting moments from your streams can be a challenge, especially if you’re short on time or lack video editing skills. That’s why you should try a tools like Eklipse.
This opens up new opportunities to reach a wider audience and expand your content’s reach. Remember, the key to successful content creation lies in consistently delivering high-quality and engaging streams.
Whether you choose to utilize tools like Eklipse or explore other options, finding a solution that simplifies the creation of stream highlights will undoubtedly contribute to enhancing your overall streaming experience.
Conclusion
Twitch’s new guidelines and monetization policy have raised concerns among streamers. These changes limit revenue streams by restricting sponsor logo displays.
To thrive in the evolving streaming landscape, delivering engaging content and adapting to Twitch’s changes is a must for any streamer.
Exploring alternative platforms and leveraging tools enhances the streaming experience and expands their reach.
In the new Monetized Streamer Agreement, section 4.1, Twitch can take some money from a streamer’s earnings. This helps Twitch cover the costs of managing inactive accounts and keeps things fair for everyone.
The amount taken is determined by two things: how much the streamer earned from their Twitch Channel and a fixed fee of $25. But the streamer only has to pay the lower amount of the two.
So, if they earned less than $25, they’ll have to pay all of their earnings. But if they earned more than $25, Twitch will only take $25 from their earnings.
Does Twitch Charge Streamers $25 When Leaving Affiliate Programs?
One question that arises among streamers is whether Twitch will charge a $25 fee when they decide to leave the Affiliate Program. It’s important to clarify this aspect to dispel any confusion.
Under the Monetized Streamer Agreement, the $25 maintenance fee is not directly linked to leaving the Affiliate Program.
The fee applies to streamers whose Twitch Channels have been inactive for at least 12 consecutive months and who have not earned the minimum Payment Threshold during that period.
If a streamer actively participates in the Affiliate Program and meets the Payment Threshold, there won’t be a $25 fee upon leaving the program.
However, it’s crucial to remain aware of the program’s terms and conditions to ensure a smooth transition and avoid any potential misunderstandings.
Though, with all that explanation, we still don’t know what “Inactive for 12 consecutive months” exactly means.
Does it include when you leave the Twitch Affiliate Program and start streaming on another platform? Or is it simply just a literal “when you stop streaming for 12 months?”
Let’s wait for a bit so that Twitch can provide a proper explanation regarding this issue.
Conclusion
In conclusion, Twitch’s new Monetized Streamer Agreement introduces important changes for streamers regarding revenue earning and payment terms. The inclusion of a maintenance fee, calculated based on earnings and a fixed amount of $25, aims to cover administrative costs associated with inactive accounts.
As the Monetized Streamer Agreement continues to shape the streaming landscape on Twitch, it is crucial for streamers to stay informed about the latest updates and guidelines to navigate their streaming journey successfully.
Maximize your Black Ops 6 rewards—Create highlights from your best gameplay with with Eklipse
Eklipse help streamer improve their social media presence with AI highlights that clip your Twitch / Kick streams automatically & converts them to TikTok / Reels / Shorts