How do I go live on Facebook using streaming software?
Facebook Gaming has become a hotbed for streamers to showcase their skills and connect with fellow gamers. To truly shine on this platform, you’ll need the right weapon in your arsenal: streaming software for Facebook Gaming. This software empowers you to capture your gameplay, add captivating effects, and broadcast your stream directly to Facebook Gaming.
With a plethora of options available, choosing the perfect fit can feel overwhelming. But fear not, adventurer! This guide will delve into the top contenders for best streaming software for Facebook Gaming on PC and mobile. We’ll also equip you with valuable tips to pick the software that aligns perfectly with your streaming goals.
Here are some of the best streaming software options that are available for free:
1. OBS Studio
Source: OBS Project.com
OBS Studio is a free, open-source live streaming and video recording application. It’s perfect for streaming on lower-end PCs. Plus, the constant updates with new features and bug fixes make it secure and stable software. That makes OBS studio a perfect option for live streaming because who wants their broadcasting software to crash in the middle of a live stream?
Key Features:
Audio mixer with per-source anti-noise and noise reduction filters
Modular ‘Dock’ UI allows you to rearrange the layout exactly as you like
Easy to use, powerful configuration options
Capture and mix high-definition video/audio in real-time
Pros:
Simultaneous recording
Plugins galore
Great video and audio quality
Supports multiple platforms
Highly customizable
Cons:
Learning curve
Resource intensive
Potential for technical issues
2.Streamlabs
Source: Github.com
Streamlabs is a well-renowned streaming software that offers an intuitive interface and plenty of features to provide you with one of the best streaming experiences you can have from the comfort of your home. Plus, it’s built on top of the open-source OBS framework but with many personalization features.
Gamecaster, formerly part of XSplit, has seen immense success in the past few years. It is an excellent streaming software specifically designed for gamers and is packed with rich features that would allow any streamer to broadcast professional-looking streams.
Key Features:
Advanced audio mixer for meticulous control of each scene
An all-in-one solution for tracking events and engaging with your audience
100s of overlay packs
Add widgets for subscriber goals or overlay chat on the stream
Pros:
User-friendly interface
Feature-rich (for a free option)
Direct Facebook streaming
Free and regularly updated
Decent performance
Cons:
Limited customization
Resource intensive
Lacks advanced features
Best Paid Facebook Live Streaming Software
If you’re a Facebook Gaming Partner or creator and are willing to pay for professional streaming software, we recommend you test the paid ones listed below:
1. BeLive
Source: Be.live
BeLive is a live streaming platform that allows users to broadcast live video on various social media platforms, including Facebook, YouTube, and Twitch. It’s a great tool for creators, businesses, and organizations looking to connect with their audiences in real-time. BeLive makes it easy to go live, and it has a bunch of features that can help you make your live streams look more professional.
Key Features:
Multi-camera support
Overlays and graphics, like logos and branding are available
Has a paywall feature that lets you charge viewers to access your live streams
Lets you share your screen
Pros:
Native Facebook integration
Mobile streaming option
Built-in engagement tools
Free and no account needed
Easy to use
Cons:
Lower production quality
No cloud recording
Mobile streaming limitations
2. Wirecast
Source: Telestream.net
For professional streamers who can afford to spend on advanced live-streaming software, we recommend checking out Wirecast. It’s a powerful streaming software with industry-leading features. While it’s not free, it does offer a free trial, so you can try it out before you commit to buying it.
Key Features:
Unlimited input support
Layer-based compositing
IP and PTZ Cameras with control surface integrations
Automation Tools for Professional Production
Built-in chroma key with animated graphics, 3D virtual sets, and overlays
Industry-standard, secure streaming protocols
Pros:
Cross-platform
Pre-made scenes and integrations
Reliable and stable
User-friendly interface
Feature-rich
Cons:
Resource-intensive
Potentially outdated features
Limited compatibility with non-Apple encoders
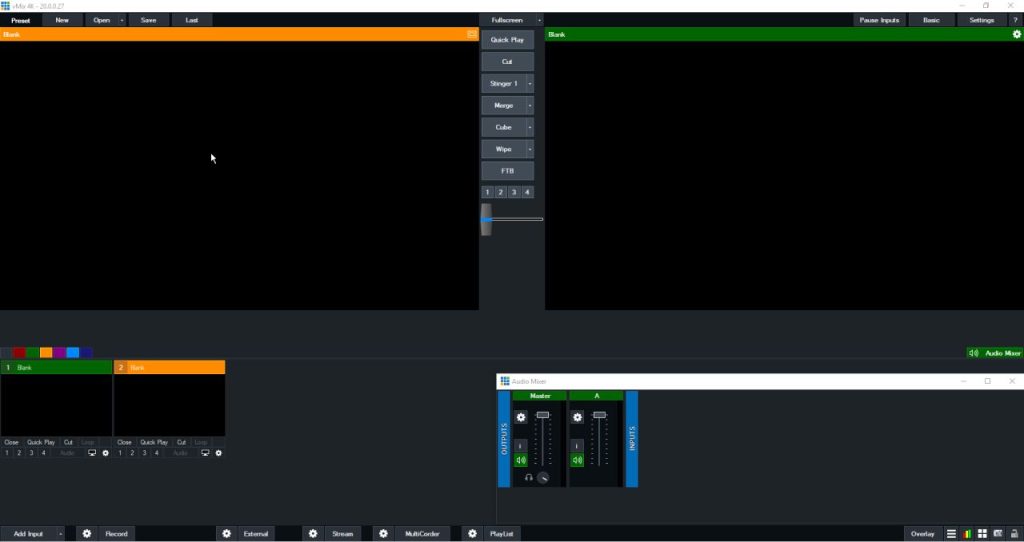
3. vMix
Source: vMix.com
vMix is a Facebook Live streaming software that can turn a regular PC into a professional video production studio. It has wide-ranging advanced features and is relatively less costly than Wirecast. vMix allows you to create professional-looking live productions using a single Windows PC. You can mix and switch between multiple video sources, including cameras, video files, images, and even live streams from other sources.
GameShow is a free and open-source streaming software for Facebook Gaming. It is designed to be easy to use and accessible to streamers of all levels, from beginners to professionals. GameShow boasts a comprehensive suite of features for live capture, encoding, and production. This means you don’t need to juggle multiple programs to set up your stream.
Key Features:
Easy setup and use
Powerful features
Stream Analytics
Monetization options
Pros:
Cross-platform compatibility
Professional-grade production tools
All-in-one solution
Seamless integration with hardware
Easy customization
Cons:
Limited community and resources
Learning curve
Paid software
Best Streaming Apps for Facebook Gaming on Mobile
In addition to streaming software on your PC, you can also use mobile apps to stream games on Facebook. Here are a few of the best streaming apps for Facebook gaming.
1. Twitch App
Source: play.google.com
Twitch is a live-streaming platform focused on video games, but it offers more than just gameplay! The basic functionality of Twitch is free. You can watch streams, chat, and even start your stream without spending a dime. For streamers who build a following, there are ways to make money on Twitch.
Key Features:
Live chat
Stream games and IRL
Detailed alerts for follows, bits, and subs or to view chat
Intuitive streaming info screen to monitor audio quality
Pros:
Beginner-friendly
Built-in features
Potentially resource-efficient
Free and regularly updated
Guided setup
Cons:
Platform lock-in
Limited customization for overlays
Potential performance issues
2. Prism Live Studio
Source: Prismlive.com
Prism Live Studio is a mobile and desktop application designed for creating and sharing live streams, recorded videos, and photos. It caters to a broad audience, from casual social media users to aspiring content creators. It’s particularly well-suited for those who want to stream or record on their mobile devices or get started with live streaming without a steep learning curve.
Key Features:
Stream directly to Facebook
Record high-quality videos
Capture photos and add various effects
Manage playlists for background music
User-friendly interface for beginners
Pros:
Mobile-Friendly
Easy to use
Customization options
Free with Freemium
Features Versatile
Cons:
Limited platform integration
Unclear monetization features
Potential performance issues
3. Streamlabs App
Source: Streamlabs.com
Streamlabs offers a mobile app for live streaming on platforms like Facebook. Unlike some streaming apps that limit you to their network, Streamlabs lets you use your existing channel credentials. This means you can go live and connect with your fans directly on your preferred platform. The app is versatile and allows you to stream gameplay, your phone’s screen, or even just yourself using the front-facing camera.
Key Features:
Full-fledged Editor for personalized streams
Add Alert Box, Chat Box, Event List, Donation Goal, and more widgets.
Integrated in-stream alerts on follows, subs, donations, and more.
Add a profile image and cover image once your page has been created.
Click Create Live Video on your page to set up a stream.
Copy and paste your Facebook live stream key and stream URL into your encoding software.
Start streaming!
2. Is Facebook gaming good for small streamers?
Facebook Gaming is a popular choice for console streamers and those who want extra help finding people to watch their streaming. It is fairly easy to start streaming on Facebook and, like YouTube and Twitch, they provide in-built ways to monetize the channel through subscriptions and donations.
3. How do Facebook Gaming streamers make money?
Facebook pays the creator USD 0.01 per Star.
Final Thoughts
Choosing the best streaming software for Facebook gaming for PC and mobile is important. Whether you go for free ones like OBS Studio or fancy paid ones like Wirecast, make sure it fits your needs. Remember, learning how to use it might be tricky, but it’s worth it to connect with your audience and have fun. So, pick your software, get creative, and enjoy gaming with your fans!
And remember, promoting your stream is key! Making highlight clips for Facebook Live is awesome but can be a hassle. Luckily, Eklipse, an AI-powered tool, helps you make highlight clips in no time with just a few clicks. Sign up for a free Eklipse account today to simplify your streaming highlights.
Are you a streamer in search of an AI tool that automatically generates clips from your live broadcasts? If so, you might have come across the battle of Eklipse vs Framedrop.gg, two popular options for this purpose. The question is, which one is right for you? How do these platforms stack up in terms of features, functionality, and pricing? What are the benefits and drawbacks of each?
In this article, we’re going to compare Eklipse and Framedrop.gg, focusing on critical factors like clip quality, customization options, integration with other platforms, and user reviews. We’ll also offer our take on which tool delivers the best value for your streaming needs. By the end, you should have a clear idea of which service fits your requirements.
Eklipse.gg is an all-in-one solution for editing needs that automatically generate highlights from your Kick Twitch, YouTube, and Facebook streams and videos. It is an advanced AI tool that creates highlights from your gaming streams for free, helping you grow your channel faster by converting Twitch clips into TikToks in 30 seconds. Eklipse is compatible with any console and supports all top streaming platforms. It allows users to easily share highlights on social media platforms like TikTok with just one click and provides custom templates and copyright-free music for editing.
Key Features
Automatic clip generation: Eklipse automatically generates clips from your gaming streams, making it easy for you to share your content with your audience.
Video editing: Eklipse offers video editing features that allow users to edit their videos to create engaging content for their audience.
TikTok video editing: Eklipse allows users to edit their videos specifically for TikTok, ensuring that their content is optimized for the platform.
Reel video editing: Eklipse also allows users to edit their videos for Instagram Reels, another popular social media platform.
Shorts video editing: Eklipse offers video editing features for YouTube Shorts, allowing users to create short, engaging videos for the platform.
Compatibility with all popular titles: Eklipse supports all popular titles and many more of your favorite games, making it a versatile tool for gamers.
Custom templates and copyright-free music: Eklipse offers custom templates and copyright-free music for editing, allowing users to create unique and engaging content.
Share clips directly to social media platforms: Eklipse allows users to share their clips directly to social media platforms like TikTok, Instagram, and YouTube, making it easy for them to reach a wider audience.
Schedule posts for future posting: Eklipse also allows users to schedule their posts for future posting, ensuring that their content is shared at the most optimal times.
Pros
Supports more games and stream types
Offers more editing options and templates
Faster, higher quality, and more reliable
Unlimited clips download
Copyright-free music
Cons
Not completely free (has premium plans)
Requires sign-up to use
Limited compatibility for older streams
What is Framedrop.gg?
Source: Framedrop.gg
Framedrop.gg is an AI-powered tool that helps gamers, streamers, and video creators find and share the best highlights from their live streams. It automatically clips the top moments from a VOD URL and offers smart editing tools to make the clips shine even brighter. The highlight detector uses advanced AI algorithms to quickly process the stream and find the most exciting plays.
Framedrop also has a clip dashboard where users can access all their clips in one place, saving them from the hassle of manually searching through hours of footage. It is lightweight and won’t occupy valuable storage space on your PC. Framedrop supports popular games like Valorant, Call of Duty: Warzone, and Apex Legends, with more games to be added in the future. It is free to use, with optional paid features available for extra functionality.
Key Features
AI-powered tools: Framedrop uses advanced AI to automatically detect and clip the best moments from streams, saving streamers time and effort.
Easy-to-use approach: The platform is designed to be user-friendly, making it easy for streamers to find and share their highlights without the need for manual editing.
Game support: Framedrop currently supports Valorant, Call of Duty: Warzone, Apex Legends, and Rocket League, with more games to be added in the future.
Stream processing: Over 2.8 million minutes of content have been processed, 16k streams have been analyzed, and 304k highlights have been detected, demonstrating the platform’s effectiveness.
Both Eklipse and Framedrop.gg offer similar features: they can process your streams from Twitch, YouTube, or Facebook, and generate highlights using AI. They also allow you to edit, caption, and share your clips on social media platforms like TikTok, Instagram, YouTube, and Twitter.
However, Eklipse has some advantages over Framedrop.gg in terms of features. For example, Eklipse supports more games than Framedrop.gg, including popular titles like Call of Duty, Fortnite, Apex Legends, and more. Eklipse also supports other types of streams, such as Just Chatting, podcasts, sports broadcasts, and more.
Another advantage of Eklipse is that it offers more editing options than Framedrop.gg. You can personalize and spice up your clips with AI-animated auto-captions, stickers, and AI emojis. You can also use voice commands to create perfect highlights exactly the way you want them. Framedrop.gg, on the other hand, only offers basic editing tools, such as cutting, dragging, and dropping.
User Experience
Source: Eklipse.gg
Both Eklipse and Framedrop.gg are easy to use, as they do not require any software download or installation. You just need to paste your stream URL or upload your video file, and wait for the AI to do its magic. You can then access, review, and export your clips from their websites.
However, Eklipse has a better user experience than Framedrop.gg in terms of speed, quality, and reliability. Eklipse can process your streams faster than Framedrop.gg, as it uses cloud-based servers to find your best gaming moments. Eklipse can also produce higher quality clips than Framedrop.gg, as it offers 1080p resolution, while Framedrop.gg only offers 720p. Moreover, Eklipse is more reliable than Framedrop.gg, as it can handle longer streams and videos, while Framedrop.gg has a limit of 5 hours.
Pricing
Both Eklipse and Framedrop.gg have free plans, but they also have premium plans that offer more benefits and perks. Eklipse has two plans: Free and Premium. Framedrop.gg has two plans: Free and Pro. Here are the details of their prices:
Eklipse
Framedrop.gg
Free Plan
Free Plan
720p clips3 hours of stream processing per day14 days of storageBasic editing features
720p clipsUnlimited stream processing7 days of storageBasic editing features
Premium Plan
Pro Plan
$19.99/month or $149.99/year1080p clips12 hours of stream processing per day90 days of storageFree 600 YouTube Video MinutesWatermark freeAdjustable video minutes for podcasts, reviews, etc.
$9.99/month or $99.99/year1080p clipsUnlimited stream processing30 days of storageSmart editing featuresWatermark free
Key Differences Between Eklipse.gg vs Framedrop.gg
Criteria
Eklipse.gg
Framedrop.gg
Compatibility
Twitch, YouTube, Facebook Live, mobile app
YouTube, Twitch
Price
Free plan, $19.99 per month or $149.99 per year
Free plan, $9.99 per month or $99.99 per year
AI Tool
Automatically detects and clips best moments
Automatically finds best moments in YouTube, Twitch content
Ease of Use
Easy-to-use interface
No software required
Export Quality
High-quality exports, including 1080p in free plan
Quick exports for easy sharing
Performance
Excellent performance, AI subtitle generator, compilations, background rendering
Speeds up finding and promoting highlights
Image Editing
Offers a range of powerful editing tools
Does not explicitly mention image editing features
Video Editing
Wide range of editing tools, advanced recording and streaming settings
Primarily focuses on finding the best moments in content
Good for
Gamers who need to communicate and collaborate in real-time
Creators who want to save time finding and promoting highlights
Final Thoughts
Eklipse vs Framedrop.gg: while both tools are impressive contenders, Eklipse emerges as the clear winner for streamers seeking a comprehensive AI clip-generating experience. Its robust feature set, including advanced editing capabilities,empowers you to craft highlight reels that truly stand out.
Framedrop.gg may suit those on a tight budget, but Eklipse’s ability to elevate your stream’s production value and audience engagement is undeniable. So, if you’re serious about taking your content to the next level, Eklipse is the ultimate weapon in your streaming arsenal. Now go forth, conquer those live streams, and let Eklipse work its AI magic!
Eklipse can help you save time, energy, and money, and achieve viral success with your content. If you want to try Eklipse for yourself, you can visit our website at eklipse.gg. Go sign up for a free account, and start creating amazing clips today!
For today’s gamers, capturing and sharing their in-game achievements is a breeze thanks to the abundance of best gaming recording software available. With a vast array of options on the market in 2024, each offering its own unique set of features, choosing the right one can feel overwhelming.
This in-depth review cuts through the noise, meticulously examining the top contenders for best gaming recording software. We’ll delve into the crucial aspects that matter most to gamers, including the richness of features, pricing models, recording quality, and user experience.
Whether you’re a beginner seeking a user-friendly interface or a seasoned veteran craving advanced editing tools, there’s a platform out there perfectly suited for your needs. This exploration aims to equip you with the knowledge you need to make an informed decision, empowering you to capture and share your gaming exploits with stunning clarity and impressive finesse.
Gaming recorder software is a tool designed for capturing gameplay footage directly from your computer. Ideal for gamers who wish to record their gaming sessions for streaming, tutorials, or personal archives, these applications can record high-resolution videos and even stream live gameplay to platforms like Twitch or YouTube.
Reviews of Best Gaming Recording Software
Ready to elevate your gaming experience? Look no further! Below, you’ll find a curated list of the best game recording software available. Whether you’re a seasoned streamer or just starting, these apps will help you capture every epic moment with ease. Dive in and discover the perfect tool to record and share your gaming prowess!
1. OBS Studio – Best Streaming Software For Facebook Live
Source: Downloader System
As a live streamer, you’ve likely heard of Open Broadcaster Software (OBS). This program is known as the perfect tool for both professionals and beginners. While the interface may appear complex, it’s not necessarily difficult to use.
OBS is a great streaming software that offers everything you need. It has advanced video editing features, lets you add extra tools, and most importantly, it’s free.
So, if you’re looking for an all-in-one solution to create high-quality videos, consider adding OBS to your list. Happy streaming!
Key Features:
High-Performance Real-Time Video/Audio Capturing and Mixing: Create scenes made up of multiple sources including window captures, images, text, browser windows, webcams, and capture cards.
Intuitive Audio Mixer with Filters: Features an intuitive audio mixer with per-source filters such as noise gate, noise suppression, and gain, plus VST plugin support for full audio control.
Powerful Configuration Options: Offers a user-friendly interface with powerful and easy-to-use configuration options, allowing for the addition of new sources, duplication of existing ones, and effortless property adjustments.
Streamlined Settings for Broadcasting: Includes settings for general use, streaming, recording, audio, and video, enabling users to change themes, manage hotkeys, and set up streaming services with ease.
Support for All Major Streaming Platforms: Compatible with all major streaming services, providing versatility for live broadcasting across various platforms.
Modular ‘Dock’ UI: Allows users to customize their layout to fit their workflow, enhancing the overall user experience1.
Advanced Features for Veteran Users: While designed to be accessible to novices, OBS Studio also offers advanced features like modular UI and VST plugin support for seasoned broadcasters.
Pros:
Open Source: Because it’s open-source, OBS Studio is not only free but also constantly improves thanks to the community.
Customization: It offers extensive customization options, allowing users to tailor their streaming and recording setup to their specific needs.
Multi-Platform Support: OBS Studio works across multiple operating systems, making it accessible to a wide audience.
Plugin Support: Support for plugins and scripts provides additional functionality and flexibility for advanced users.
Free: OBS Studio is completely free to use. There are no hidden costs, premium versions, or subscription fees.
Cons:
Learning Curve: New users may find the software somewhat complex, requiring time to learn and master its features.
Hardware Requirements: High-quality streaming and recording require good hardware, which might be a limitation for some users.
No Built-in Video Editing: After recording, users will need to use separate video editing software as OBS Studio does not offer this functionality.
Pricing: Free
Availability: Windows, macOS, Linux
2. Nvidia Shadowplay – Best for High-Quality Game Recording and Streaming
Source: NVIDIA
Nvidia Shadowplay, also known as Nvidia Share, is a feature-rich application designed for gamers who want to record and share their gaming experiences with ease. It caters to those who seek a seamless way to capture gameplay, create highlights, and broadcast live streams.
This powerful tool is integrated into the Nvidia GeForce Experience software and is available to users with Nvidia GPUs, particularly the GTX 600 series and newer models.
Shadowplay’s standout feature is its hardware acceleration, which allows for high-quality recording without compromising game performance.
It’s perfect for gamers who want to showcase their skills, create tutorials, or simply share memorable gaming moments with friends or an online audience. With Shadowplay, capturing your greatest gaming achievements is just a hotkey away.
Key Features:
Instant Replay: Save the last 30 seconds of gameplay with a single hotkey press, ensuring you never miss a moment.
Manual Recording: Record gameplay videos at resolutions up to 8K HDR at 30 FPS or 4K HDR at 60 FPS.
Broadcast Live: Stream your gameplay to platforms like Facebook Live, Twitch, or YouTube Live with just two clicks.
Capture GIFs and Screenshots: Create GIFs from your gameplay or take screenshots up to 8K resolution.
Pros:
User-Friendly: The Alt + Z keyboard shortcut provides quick access to Shadowplay’s features while in-game.
Performance: Hardware acceleration ensures minimal impact on game performance.
Quality: Supports recording at high resolutions and frame rates.
Flexibility in Recording: Shadowplay supports a wide range of games, including those using OpenGL, Java, and web-based games in various modes.
Social Media Integration: It offers seamless integration with social media platforms, allowing users to instantly share gameplay on YouTube, Twitch, or Facebook.
Cons:
Compatibility: Only available for users with Nvidia graphics cards.
Overlay Limitations: The Share UI overlay may not function optimally when not in-game.
Performance Impact in SLI Mode: While Shadowplay generally has minimal impact on performance, users running multiple Nvidia GPUs in SLI mode may experience up to a 20% performance hit.
Pricing: Free
Availability: Windows
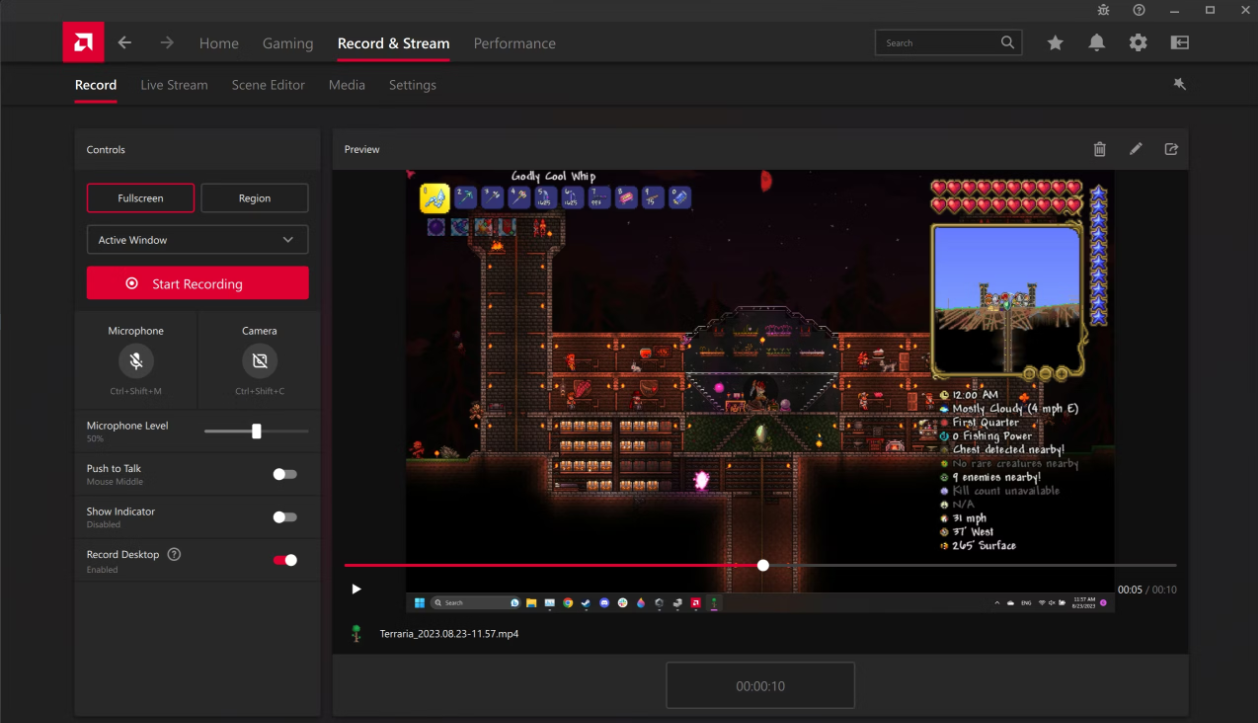
3. AMD ReLive – Best for High-Quality Game Capture and Streaming
Source: XDA Developers
AMD ReLive is a powerful tool designed for gamers and content creators who want to capture and stream their gameplay with minimal performance impact.
It’s part of the AMD Radeon Software suite, which is best known for its robust driver support and additional features for AMD graphics card users. ReLive stands out for its user-friendly interface and the ability to record and stream high-quality gameplay footage.
Key Features:
Instant Replay: Save your best gaming moments after they happen with a customizable time window.
Streaming Capabilities: Stream your gameplay live to various platforms with easy-to-use settings.
Customizable Settings: Tailor your recording and streaming experience with a variety of options, including resolution, bitrate, and FPS.
User-Friendly Interface: Access all features from within the Radeon Software with a simple click.
Pros:
Minimal Performance Impact: Record and stream without significant drops in FPS, maintaining game performance.
Support for Latest APIs: Compatible with DirectX® 9, 10, 11, 12, and Vulkan® APIs, offering broad game support.
VR Support: Capture and create content for VR gameplay, expanding your creative possibilities.
Enhanced Recording Quality: AMD ReLive supports HEVC (High Efficiency Video Coding) which provides better compression, leading to higher-quality recordings at the same bitrate.
Performance Differential: When compared to other similar tools, AMD ReLive shows a significant performance advantage, offering a smoother experience with less impact on system resources.
Cons:
Basic Editing Options: The in-game editing features are relatively basic compared to other software.
Audio Management: First-time users may find the audio management settings a bit complex.
Hardware Requirements: While AMD ReLive is a robust tool, it does have specific hardware requirements. It is not supported on APUs with integrated graphics, and some discrete GPUs may not support ReLive, such as the RX 6400
Pricing: Comes bundled with the Radeon Software package and does not require a separate purchase.
Availability: Windows
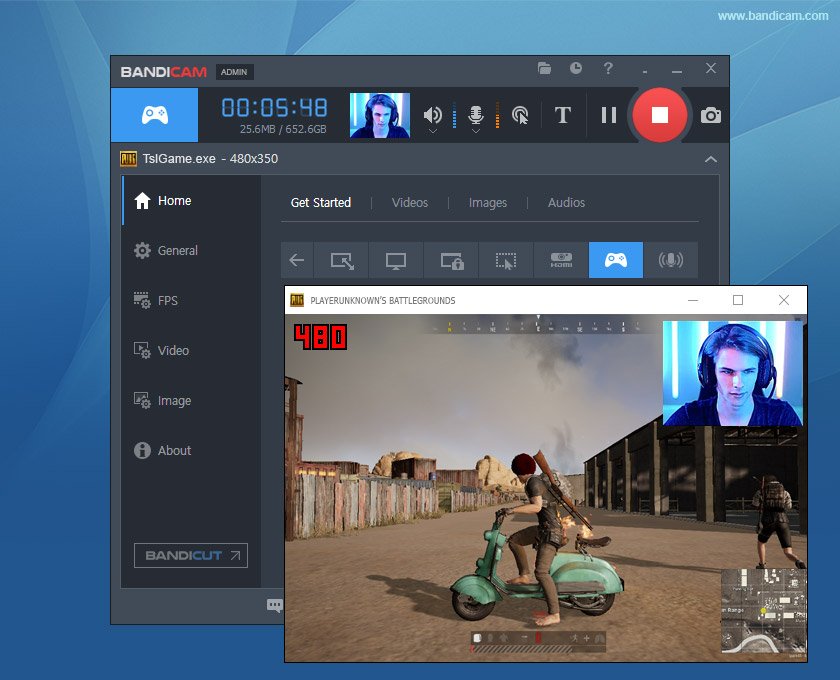
4. Bandicam – Best for High-Quality Screen Recording
Source: Bandicam
Bandicam is a robust screen recording software designed to capture everything on your PC screen with high quality. It’s best known for its ability to record high-resolution gameplay, live streaming videos, and various applications with ease.
Whether you’re a professional content creator, a gamer looking to share your playthroughs, or an educator creating tutorials, Bandicam offers a suite of features tailored to meet your recording needs.
Key Features:
High-Quality Recording: Bandicam allows you to record 4K Ultra HD videos up to 3840×2160 resolution.
Long-Duration Recording: With Bandicam, you can record over 24 hours without stopping.
Compression: The software compresses the video while recording, resulting in smaller file sizes compared to other recording software.
Direct Upload: Easily upload recorded videos to platforms like YouTube, Google Drive, or Vimeo without the need to convert.
Game Recording: It can capture various 2D/3D games with high compression ratio and performance.
Pros:
Versatility: Bandicam is an all-in-one screen recorder, capable of capturing computer screens, games, and webcam footage with audio.
User-Friendly Interface: The software comes with an easy-to-understand user interface and advanced recording features like real-time drawing and scheduled recording.
Efficiency: The recorded file size is significantly smaller (20% to 95%) than files created by other software, making it efficient for storage and sharing.
Real-Time Drawing: While recording, you can draw and outline your video or screenshot in real-time.
Customizable Recording Options: Bandicam offers a variety of recording modes, including the ability to record just a portion of the screen, apply the Chroma key for webcam overlay, and customize cursor effects.
Cons:
Platform Limitation: Bandicam is only compatible with Windows OS and does not support Mac, Android, or Linux systems.
Recording Quality: While it is excellent for screen recording, the ‘Screen Recording Mode’ may not be suitable for recording high-quality games with high frame rates.
Separate Editing Software Required: For users looking to do simple editing, it’s important to note that Bandicam requires an additional piece of software called Bandicut, which is sold separately.
Pricing:
Annual Personal License: $33.26 per year, offering unlimited recording with no time limit or watermark and free updates and tech support.
Lifetime Personal License: A one-time payment of $44.96 for unlimited lifetime screen recording.
Bandicam + Bandicut Package: Various discounted packages are available, combining Bandicam with Bandicut, a video cutting software.
Availability: Windows
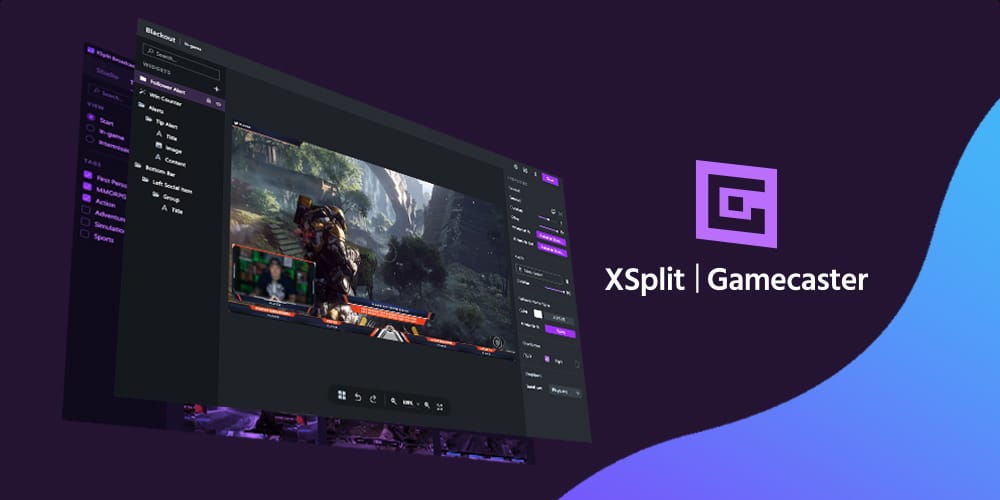
5. XSplit Gamecaster – Best for Streamlined Game Broadcasting
Source: XSplit
XSplit Gamecaster is a live streaming and recording application tailored for gamers who want to share their gameplay with the world.
Launched in 2014, it has evolved into a user-friendly platform that simplifies the streaming process.
Whether you’re a seasoned streamer or just starting, XSplit Gamecaster offers an intuitive interface that lets you go live with just a few clicks.
It’s designed to work seamlessly with popular platforms like Twitch, Facebook, YouTube, and Mixer, making it accessible to a wide audience.
Key Features:
Simple Setup: Begin streaming or recording at the click of a button.
In-Game HUD: Control your broadcast without leaving the game.
Theme Support: Over 300 themes to personalize your stream.
Optimized Performance: Tuned settings for a lag-free experience.
Capture Card Support: Compatible with various capture cards.
Pros:
Ease of Use: The app’s simplicity is perfect for newcomers to streaming.
Free Access: XSplit Gamecaster is free to use, which is great for those on a budget.
Integration: Direct support for multiple streaming platforms.
Reward Program: XSplit Gamecaster offers a reward program that includes emotes, overlays, alerts, and more, which can greatly benefit streamers who are just starting up.
Test Center: There’s a test center feature to ensure your overlay is working correctly before you go live, helping to reduce the risk of troubleshooting issues during a live stream.
Royalty-Free Music: The platform provides free royalty-free music for streamers, showing a commitment to supporting the streaming community.
Cons:
Limited Customization: Compared to other streaming tools, customization options may be limited.
Potential Bugs: As with any software, users may encounter bugs that can affect performance.
Noise Gate Issues: The noise gate can sometimes be too powerful, cutting off the broadcaster’s voice if not configured properly.
Pricing:
Free: basic features.
VCam Premium: USD 30 for 1 month.
Broadcaster Premium: USD 60 for 1 month.
Premium Bundle: USD 70 for 1 month, which includes early access to new releases and private beta access.
Availability: Windows
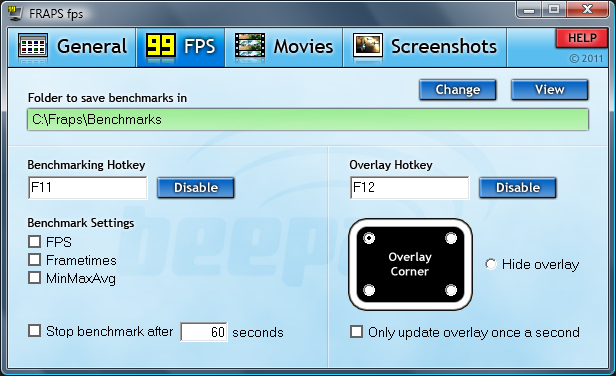
6. Fraps – Best for Real-Time Video Capture and Benchmarking for Gamers
Source: Fraps
Key Features:
Benchmarking: Fraps overlay your game’s frame rate (FPS) in real-time, allowing you to assess performance. It can also perform custom benchmarks, measuring FPS between designated points and saving statistics for reference.
Screenshot Capture: Capture crisp screenshots of your gameplay with a simple hotkey press. Fraps automatically timestamps and names each screenshot, saving you time and effort.
Video Recording: Record gameplay footage at various resolutions and frame rates, with options to capture audio as well. This functionality is particularly useful for creating gaming videos, and tutorials, or capturing those epic in-game moments.
Pros:
Lightweight: Fraps run efficiently in the background without causing a significant performance impact on most systems.
Ease of Use: A user-friendly interface with intuitive hotkeys makes capturing screenshots and recording video effortless.
Flexibility: Fraps offers various customization options for video recording, including resolution, frame rate, and audio capture.
High-Quality Recordings: Fraps produces uncompressed video recordings, preserving the highest possible quality for editing or archiving gameplay footage. (While this can lead to larger file sizes, it offers more flexibility for post-processing).
Works with Older Games: Since Fraps utilizes DirectX and OpenGL technologies, it can even function with older PC games that might not be compatible with newer recording software.
Cons:
Disk Space Usage: Videos recorded with Fraps can consume a significant amount of disk space.
Performance Impact: Some users with budget systems may experience a performance hit while recording.
Limited Features: Compared to some competitors, Fraps might offer fewer features
Pricing:
Standard License: $37 (one-time purchase unlocks unlimited video recording and removes watermark)
Availability: Windows
Final Thoughts
The world of gaming recording software is vast, offering a multitude of options to suit the needs of various gamers and content creators. Whether you’re a seasoned streamer, a casual gamer looking to capture funny moments, or an educator creating tutorial videos, there’s a perfect tool out there to help you share your gameplay experiences.
From the feature-rich options like OBS Studio and XSplit Gamecaster to the user-friendly yet powerful applications like Bandicam and Fraps, there’s software that caters to every level of experience and budget.
When making your choice, consider the key features you need, the level of quality you desire, and your budget. If you’re a beginner, starting with a free option like OBS Studio or XSplit Gamecaster might be a good idea. If you’re a streamer or content creator demanding high-quality recordings and a robust feature set, Bandicam or Fraps could be ideal choices.
Want to grow your gaming audience? Look no further than Eklipse!
Experience the magic of our AI-powered tool, seamlessly transforming your best gaming livestream moments into captivating TikTok/Short/Reels content with just a single click!
Sign up for free at Eklipse.gg and dive into the world of effortlessly creating gaming video clips like never before. Elevate your channel with Eklipse and watch your community thrive!
Boost Your Streaming Presence in Social Media with AI Highlights
You’ve spent hours creating awesome webinars and video podcasts, but how do you turn them into viral social media clips? You need a tool that can help you edit, customize, and share your videos in minutes. But which one should you choose: Eklipse vs Chopcast?
In this article, we’ll reveal the truth about these two tools and how they stack up against each other. Let’s go!
Eklipse and Chopcast are both cloud-based tools that help you repurpose your long videos into short engaging social media clips. But both have unique features, so you must know the difference between them to choose the best video repurposing application according to your needs. Here is a description of each application.
About Eklipse
Source: Eklipse.gg
Eklipse shines in automating Twitch stream editing using artificial intelligence. Streamers can link their Twitch account and let Eklipse automatically generate clips during their streams. Eklipse also allows further editing of these clips, including trimming and formatting them for vertical short-form content (like TikTok, Instagram Reels, and YouTube Shorts) to gain more engagement.
Pros:
Supports more sources, such as Kick and local files, besides Twitch, YouTube, and Facebook.
Offers more customization options, such as captions, stickers, emojis, filters, and music.
Has more templates and themes to choose from, as well as the option to save your templates.
Has higher quality and resolution for the clips, up to 1080p.
No watermark on the clips.
Cons:
There might be a chance that the AI could miss important moments, especially in fast-paced streams.
The advanced feature is not available for free.
It doesn’t offer direct monetization features; a separate platform is still needed.
User review: “Eklipse is a super good app. I dig it. It makes clipping so much easier. I don’t have to sit there and go through hours of footage and clip what I want after my streams if I miss something,” – @suuurf_god on Product Hunt
About Chopcast
Source: producthunt.com
Chopcast focuses on multi-platform streaming and overall stream management. Streamers can simulcast their content to various platforms like Twitch, YouTube, and Facebook simultaneously, saving them the hassle of setting up individual streams on each platform. Chopcast also offers features like cloud recording, live chat moderation, and analytics to monitor stream performance.
Pros:
The AI system will suggest topics and clips; you don’t have to search for them manually.
More affordable compared to similar tools.
User interfaces are modern, minimalist, and clean.
Plenty of educational resources available to help users
Has a feature focused on YouTube Shorts
Cons:
Some usability issues occur occasionally, particularly with player responsiveness and buttons.
Limited ability to capture great moments
Transcription issues with specific words
User review: “Amazing tool! Easy to use and efficient!,” – @FelipeIacabo on Product Hunt
Eklipse vs Chopcast: Key Differences
Similar to other apps or software, Eklipse and Chopcast exhibit variances that cater to different user preferences, making one more suitable than the other for specific needs. Here, we have outlined several factors that set these applications apart.
Features
Eklipse
Chopcast
Content Sources
Supports game streams, webinars, podcasts, interviews on Twitch, YouTube, Kick, Facebook
Focuses on webinars and video podcasts
AI Usage
AI for automatic repurposing of long videos into short ones; Adding captions, emojis, filters, or templates
AI for generating clips from webinars and podcasts; Identifying engaging segments
User Experience
Easy integration with Twitch, YouTube, and Facebook; Automatic processing and editing
Requires manual upload and editing; Search functionality available
Compatibility
Windows, MacOS, Android, iOS
Windows, Mac, Linux
Popularity
Emerging player with innovative AI clipping; Smaller user base
Established presence with robust multi-platform capabilities; Larger user community
Performance
AI may miss crucial moments; Editing options available
Smooth streaming dependent on internet connection; No automated clip creation
Pricing
Free plan with basic tools; Premium plan at $19.99/month for advanced features
Free plan with basic features; Starter Plan at $12/month, Pro Plan at $19/month, Enterprise Plan (custom pricing)
Features
Eklipse provides a range of tools for creating captivating video clips from various sources like game streams, webinars, podcasts, or interviews on platforms like Twitch, YouTube, Kick, or Facebook. Its advanced AI enables automatic repurposing of long videos into short ones, suitable for platforms like TikTok, Reels, or Shorts. Eklipse also offers features for adding captions, emojis, filters, or templates to enhance videos.
Similarly, Chopcast utilizes AI to generate clips from webinars and video podcasts, identifying the most engaging segments. Users can edit, customize, and preview these clips before publication. Chopcast also assists in optimizing clips for platforms like Instagram, Twitter, LinkedIn, and TikTok.
User Experience
Eklipse and Chopcast offer user-friendly interfaces but with differing levels of automation. Eklipse seamlessly integrates with Twitch, YouTube, and Facebook, automatically processing streams and videos to find the best gaming moments. It also allows for the upload of videos or use of YouTube videos as sources, with editing capabilities in the online video editor and scheduling through the content planner.
On the other hand, Chopcast requires more manual input. Users must upload videos or podcasts, wait for analysis, and then select and edit clips using the clip editor. Search functionality by keywords and topics is available, with the option to create custom clips. However, clips must be downloaded and manually posted to social media platforms.
Compatibility
Eklipse. gg is dedicated to Twitch streams, seamlessly integrating with Twitch to generate clips automatically during live streams, without requiring additional software. It works on Windows, MacOS, and also for Android, and iOS (app version available).
On the other hand, Chopcast is a versatile tool that supports simulcasting to Twitch, YouTube, Facebook, and other platforms simultaneously. Chopcast works perfectly on Windows, Mac, and Linux. To use Chopcast, you’ll need to set up the software and connect it to your chosen platforms.
Popularity
When it comes to streamer popularity, Eklipse.gg and Chopcast carve out distinct niches. Based on reviews on Product Hunt (a platform for tech discovery), Eklipse emerges as the intriguing player. Users praise its innovative AI-powered clipping and user-friendly interface. However, reviews are still limited, suggesting a smaller user base compared to Chopcast.
Chopcast boasts a more established presence. Reviews highlight its robust multi-platform capabilities and ability to streamline workflows across platforms like Twitch and YouTube. The wider range of reviews suggests a larger and more active user community compared to Eklipse.
Performance
Eklipse leverages AI to automatically generate clips. You can also activate the clip with voice by simply saying “Clip this” or “Clip that”. While convenient, there’s a chance the AI might miss crucial moments, especially in fast-paced streams. Editing options allow for some control over the final clips.
Chopcast focuses on smooth multi-platform streaming. Performance hinges on your internet connection and the chosen platforms’ capabilities. While it doesn’t offer automated clip creation, it provides cloud recording and the ability to manage live chat across platforms.
Pricing
Eklipse offers both a free and premium plan. The free plan provides basic editing tools, 720p clip quality, and 30 minutes of video processing per month. The premium plan, priced at $19.99 per month, offers up to 600 minutes of gaming stream processing, 1080p clip quality, and advanced features.
Chopcast also offers a free plan with basic features like simulcasting to two platforms and basic analytics. Their premium plans include the Starter Plan at $12 per month, which includes cloud recording, priority queue for content requests, and batch content sending. The Pro Plan, priced at $19 per month, offers priority support, access to a dedicated Slack channel, and the ability to handle more content requests. Lastly, the Enterprise Plan, which has custom pricing, caters to streamers with high-volume needs.
Eklipse vs Chopcast: Which Is Better for Video Repurposing Tools?
While Chopcast boasts a strong presence and multi-platform capabilities, for many streamers, Eklipse emerges as the more innovative and content-focused champion.
Sure, Chopcast offers multi-platform support, but for many streamers, the focus is on building a strong presence on YouTube alongside their Twitch channel. Eklipse understands this and provides the perfect tools to achieve that goal effortlessly.
Admittedly, Chopcast has a larger user base, but Eklipse’s innovative approach and focus on content creation make it a compelling option for streamers who prioritize efficiency and building a YouTube audience. With its free plan and competitive premium plan, Eklipse is a budget-friendly choice for tech-savvy streamers seeking an edge.
Final Thoughts
Eklipse vs Chopcast are both great tools for repurposing your webinars and video podcasts into social media clips, but they have different strengths and weaknesses. Ultimately, the best tool for you depends on your needs, preferences, and budget. You can try both tools for free and see which one works better for you.
But if you’re a streamer who values streamlining your workflow, optimizing content for YouTube, and staying ahead of the curve with AI, Eklipse is the perfect champion for you. It empowers you to focus on creating great content while Eklipse takes care of the time-consuming editing magic.
Boost Your Streaming Presence in Social Media with AI Highlights
Eklipse helps streamer improve their social media presence with AI highlights that clip your Twitch / Kick streams automatically & convert them to TikTok / Reels / Shorts
Struggling to carve out time to edit your epic gameplay moments for your fans? As a streamer, capturing those highlights is crucial, but manually clipping through hours of footage can be a real grind. That’s where AI gaming highlights generators come in, like Eklipse vs Sizzle. These innovative tools leverage artificial intelligence to automate the process, turning your streams into bite-sized, shareable highlights in a flash.
This article dives into a head-to-head comparison of Eklipse and Sizzle, two of the most popular options on the market. We’ll break down their features, strengths, and weaknesses to help you decide which AI warrior is best suited to supercharge your streaming channel.
AI Gaming Highlight Generator: A Necessity in 2024
Source: Megaxus Infotech
AI has evolved so much that it can help us be as productive as we want. AI automatic gaming highlight is a tool that can help a streamer make highlights automatically while they are streaming. Traditionally, you’d need hours of video editing to create 1-minute highlight content.
Thankfully, with an AI gaming highlight tool, you can create dozens of short highlight content in seconds! How good is that! It even sounds too good to be true! In this field of AI gaming highlight generators, two apps are constantly battling: Eklipse.gg and Sizzle.gg.
Eklipse Vs Sizzle: The Overview
Today, for gamers who want to share their best moments effortlessly, it’s easier than ever. AI-powered highlight creators like Eklipse and Sizzle.gg analyze your gameplay footage and make highlight reels automatically. But which one is better? Let’s compare Eklipse and Sizzle.gg to see who comes out on top.
About Eklipse.gg
Eklipse.gg is a video editing tool powered by AI. It’s made to help you easily create highlight videos from your Twitch, YouTube, and Facebook streams. This user-friendly tool analyzes your streams and finds the most exciting or funny moments automatically, saving you hours of searching through footage.
Eklipse.gg isn’t just for one platform; it works with Twitch, YouTube, and Facebook, giving you flexibility no matter where you stream. Plus, it understands the needs of short-form content platforms like TikTok, Instagram Reels, and YouTube Shorts.
Pros:
Multi-platform Support
Social Media Friendly
Basic Editing Tools
Customization Options
Free Plan Available
Cons:
New and Evolving
Limited Manual Editing
Paid Features for Benefits
About Sizzle.gg
Sizzle.gg is a platform powered by AI, made for gamers who want to easily make highlight videos. Picture software that looks through your Twitch streams or local gameplay recordings, finding the most exciting moments like big wins, great kills, or funny mistakes. Sizzle.gg uses artificial intelligence to do just that, making action-packed clips and compilations of your gaming skills automatically.
Not only does Sizzle.gg automate this process, but it also gives you detailed control. You can choose which highlights to include based on specific events in the game, such as kills, headshots, or wins. This means the final video reflects exactly what you want. It’s a big deal for streamers who can now spend less time editing and more time growing their audience or getting better at gaming.
Pros:
AI-powered highlight creation
Granular control
Frees up streamers’ time
Suitable for all gamers
Premium option
Cons:
Reliance on AI.
Limited editing features (free tier)
Potential for bugs
Eklipse vs Sizzle: AI Gaming Highlight Battle
Eklipse and Sizzle utilize AI to analyze your gameplay and generate highlight clips. However, they differ in their feature sets, compatibility, and the level of control they offer. The following table provides a detailed comparison to assist you in making an informed choice.
Feature
Eklipse
Sizzle
Platform
Windows and Mac
Windows and Mac
Price
Free with a premium plan (Start from $19,99/month)
Free with a premium plan (Starting from $4,99/month)
Clip Detection
Wide range of games (hundreds)
Limited games (around 15)
Clip Variety
Captures beyond kills and wins
Primarily captures kills and wins
Capture Rate
May miss around 30% of a stream
Covers nearly 90% of a stream
Content Creation
Full-featured TikTok conversion
TikTok conversion (beta, may have bugs)
Montage Maker
Creates long-form highlights (weekly)
Creates short-form highlights
Integration
Facebook, TikTok, YouTube
Twitter, TikTok
Additional Features
Capture Twitch clips for TikTok conversion, AI Voice Command
Not available
TikTok Conversion
Stable
Beta
AI Auto Clipping Feature
Source: Sizzle.gg
The automatic clip-making feature is crucial for both tools. They both excel in this area, but let’s delve into the details. Firstly, let’s discuss the quantity of clips generated. Sizzle outperforms in this aspect as it can produce a large number of clips, often in the hundreds, from just a few hours of streaming. However, it’s important to note that a higher quantity doesn’t necessarily guarantee quality.
Regarding accuracy, Eklipse takes the lead. Despite generating fewer clips compared to Sizzle, Eklipse ensures precise clip creation. Whether it’s a single kill, multiple kills, or a significant moment, Eklipse delivers accurate results. Additionally, Eklipse offers a voice command feature for convenient clip creation.
Convert to TikTok
Source: Eklipse.gg
In the comparison between Eklipse and Sizzle, it appears that Eklipse offers a more comprehensive “Convert to TikTok” feature compared to Sizzle. Eklipse provides users with a variety of customization options, including templates, copyright-free music, channel name stickers, and auto-captioning, allowing for seamless editing of different types of content for TikTok.
On the other hand, Sizzle’s “Convert to TikTok” feature has been reported to be less reliable. While it offers a “share to TikTok” button for each clip, users have encountered difficulties, particularly with the “Post like this” option, which often remains stuck at 0% progress.
This area was primarily dominated by Athenascope until its unfortunate shutdown in April 2022. Eklipse emerged as a recent contender in this domain, while Sizzle also appears to be gearing up for competition. As previously noted, Sizzle’s capabilities are limited in this regard, lacking features for automatic long-form montage-style content generation.
Presently, Sizzle can only produce short-form gaming highlight clips, typically lasting between 30 to 60 seconds, sourced from your stream. In contrast, Eklipse offers a “Weekly showcase” feature that automatically generates longer-form montages, ranging from 1 to 5 minutes in length, utilizing AI technology. However, it’s worth noting that the accuracy of Eclipse’s AI montage maker is not flawless, achieving success rates of approximately 80%.
Eklipse vs Sizzle: Which Is Better for AI Gaming Highlights Generator?
Eklipse
Sizzle
AI Stream Highlight Generator👍 Though Decision– Eklipse generates more accurate high-quality clips that can be shared straight to social media
AI Stream Highlight Generator👍 ThoughDecision– Sizzle generates many more clips, up to hundreds to choose from one 3-4 hours stream session
Convert to TikTok👍 Eklipsewins this– Easy drag and drop TikTok video editor, many templates to choose and various customization for the video
Convert to TikTok👎 Features are not yet readyIt has a “Convert to TikTok” feature, but it barely works. It does not load anything when we try it
AI Montage Maker👍 Eklipse wins this– Can create a 3-5 minutes long-form montage style of content once a week automatically, even though the content accuracy is still around 80%
AI Montage Maker👎 Sizzle AI can only create clips (At least for now … ?)Don’t have any “AI montage maker” feature, can only create short-form 30-60secs duration clips from your stream
Eklipse and Sizzle both demonstrated their own “best” version iteration of AI gaming highlight generators. Eklipse with more quality clips generated, while Sizzle with more quantity clips generated.
In the battle between Eklipse and Sizzle, both AI Gaming Highlights Generators have their strengths. Eklipse is good at making precise and high-quality clips, perfect for sharing on places like TikTok. It also can make longer videos automatically. Sizzle, on the other hand, can make a ton of clips, but it’s not as good at some things like turning clips into TikTok videos or making longer videos automatically.
If you’re ready to step up your game and share your best gaming moments effortlessly, Eklipse is the way to go. Click below to try Eklipse’s exclusive features for free today.
In the world of streaming, Eklipse.gg and Vidyo.ai stand out as top contenders for editing tools. Eklipse.gg offers a user-friendly interface and a wide range of features, meanwhile Vidyo.ai harnesses AI technology to automate editing tasks, promising efficiency and consistency.
While Eklipse.gg emphasizes simplicity and versatility, Vidyo.ai focuses on cutting-edge innovation. Ultimately, the choice between the two depends on individual preferences and the specific needs of each streamer.
In this article, we will review their features, as well as the pros and cons, helping you make an informed decision on which tool aligns best with your content creation goals.
This overview delves into the strengths and unique selling points of each platform, providing streamers with valuable insights to navigate their editing tool selection journey effectively.
Features
Eklipse and Vidyo.ai are both AI-powered video editing platforms that allow you to make short videos from long ones instantly.
They both support multiple streaming platforms and social media platforms and offer editing features such as captions, music, filters, stickers, and more.
However, they also have some differences in their features. One of which is Vidyo can’t support gaming streams, they only support YouTube videos. While Eklipse specializes in processing clips for gaming streams plus YouTube videos.
About Eklipse
Source: Eklipse
For content creators who love gaming, Eklipse.gg offers a dream solution. Gamers can effortlessly connect their Twitch, YouTube, or Facebook accounts and let Eklipse work its magic. Here are some key features you can enjoy in Eklipse:
Key features:
Supports Twitch, YouTube, Facebook, and Kick as source platforms
Support both gaming streams and YouTube talking videos
Supports TikTok, Instagram, YouTube, and more as destination platforms
Uses AI to automatically generate highlights from your streams, videos, and podcasts
Offers a free online video editor to convert your gaming clips to TikTok and create viral content
Allows you to review every game session on the website and choose your favorite clips
Lets you save your clips into custom playlists and pin them to be featured in a weekly showcase
Enables you to use voice commands to create perfect highlights on stream
Allows you to craft your montage by adding clips to a playlist and hitting compile
Supports all types of streams, including just chatting, podcasts, sports broadcasts, and other unique broadcasts
Supports all types of games, from popular games like COD and Fortnite to niche titles like Phasmophobia
Pros:
User-friendly interface
Wide range of editing features
Community support
Cons:
Limited AI integration
About Vidyo.ai
Source: Vidyo.ai
On the other hand, if your video editing needs extend beyond the realm of gaming, Vidyo.ai offers a more versatile toolbox. This platform caters to a broader audience, from YouTubers and podcasters to educators and businesses. Other features include the following:
Key features:
Supports YouTube as a source platform (beta version)
Supports TikTok, Insta Reels, and YouTube Shorts as destination platforms
Uses AI to analyze your videos and automatically generate short clips that capture the most engaging and relevant moments
Allows you to preview, edit, and export your clips with just a few clicks
Lets you set preferences for platforms, formats, and templates
Enables you to post directly to all social media platforms in a single click
Provides cutting-edge features such as auto-video captioning, video clipping tools, instant video resizing, and social media templates
Works well with talking head segments or split-screen interviews
Pros:
AI-driven automation
Smoother editing process
Cutting-edge innovation
Cons:
Learning curve
Dependency on AI
Specific compatibility requirements
Eklipse vs Vidyo.ai: Key Differences
By highlighting the distinct advantages of Eklipse and Vidyo.ai, you can discern which tool aligns best with your specific needs and preferences. To make it clear, take a look at some factors that can differentiate these applications in the table below.
Features
Eklipse
Vidyo.ao
Users
Streamers, gamers, content Creators
Content creators, social media savvy
Source
Kick, Twitch, TikTok, Facebook, YouTube
TikTok, Instagram, YouTube
Export Quality
Up to 1080p
Up to 1080p
AI-Highlight Clip
Yes
Yes
Convert Clips
Yes
Yes
Templates
Yes
Yes
AI Voice Command
Yes
No
Auto-caption
Yes
Yes
Stickers and Special Effects
Yes
Yes
Compatibility
Eklipse focuses on gamers and streamers. Works seamlessly with Twitch, YouTube, and Facebook streams, automatically analyzing footage for highlights. Supports a wide range of popular games for optimized clip generation.
On the other hand, Vidyo.ai offers broader compatibility for various video and audio sources. It can also handle pre-recorded videos, podcasts, webinars, and even meetings. However, Vidyo is not specifically developed for gaming content, requiring manual editing for specific highlights.
Price
In terms of pricing, both Eklipse and Vidyo have free plans with limited features. But, if you opt for complete features to make your content more unique, you can choose the paid version.
For Eklipse, you can choose Eklipse Premium for $19.99 per month and unlock higher-quality clips, faster processing, and extended editing options.
Meanwhile, Vidyo.ai has three monthly packages including Essential for $21, Growth for $25, and Custom for $42 to unlock advanced features like AI-powered transcription and cloud storage.
User Interface
Eklipse.gg offers a streamlined interface designed for gamers. Easy to connect your streaming accounts and browse automatically generated highlights. You can also enjoy intuitive editing tools for adding titles, captions, and adjustments.
On the other hand, Vidyo.ai provides a more general-purpose interface. It may require a learning curve for beginners, as it offers a wider range of editing tools catering to various video content, but it might feel overwhelming for users focused solely on gaming highlights.
Performance
In terms of performance, Eklipse.gg boasts cloud-based processing, ensuring swift turnaround times for highlight generation. Leveraging AI specifically trained on gaming content, it provides intelligent clip selection based on action and excitement cues.
Conversely, Vidyo.ai’s performance can fluctuate depending on the chosen plan and the complexity of the video. While its AI capabilities offer potential efficiency, it may not be as adept at automatically identifying gaming highlights, potentially necessitating more manual editing for desired results.
Popularity
Eklipse is geared specifically towards the gaming community, gaining popularity among streamers and content creators for its ease of use and focus on generating engaging gaming highlights.
Alternatively, Vidyo.ai caters to a more diverse audience with varied video editing requirements. However, it may not have the same level of brand recognition within the gaming community as Eklipse.
Conclusion
Eklipse.gg and Vidyo.ai are both useful tools for streamers and content creators who want to create and share clips from their long videos. However, you may want to consider one tool to choose based on your preference.
Here we can summarize that Eklipse.gg is more suitable for streamers who want to reach a wider audience, create more engaging and personalized clips, and have more control over their clips. Meanwhile Vidyo.ai is more suitable for content creators who want a simple and fast tool, and who are satisfied with the basic features and functionality of Vidyo.ai.
Ultimately, the choice depends on your preferences, needs, and budget. But we can say that Eklipse is better in most parts, including its pricing. Just try it for yourself. Sign up for free here to enjoy more features, better quality, and more flexibility.
Instagram Reels are short, engaging videos that are constantly evolving as a key format for social media engagement. Leveraging the power of AI Reel generators is essential to keep up with the trends and create content that truly stands out. This article dives into the top AI-powered tools available, including popular options like InVideo, VEED.IO, and Vizard, each offering unique features to elevate your video creation process.
In this article, we will introduce you to the best AI Reel generators for making Instagram Reels in 2025. These online tools offer both free and paid options, allowing you to edit videos, and add effects, music, and captions. Whether you’re a beginner or a seasoned pro, you’ll find valuable resources to elevate your content and engage your audience.
1. Eklipse – The Best AI Reels Generator For Gamers
Source: Eklipse
Need help to create engaging Instagram Reels? Look no further than Eklipse! This AI-powered editor is perfect for anyone, from seasoned content creators to those just starting.
Eklipse saves you tons of time by automatically turning your videos from YouTube, Twitch, and Facebook into Reel-ready clips, all within seconds.
And the best part? It’s completely free and won’t leave any watermarks on your masterpiece. Plus, Eklipse offers a wide variety of TikTok templates to help your Reels shine.
Simply pick your favorite template and boom! You’ll be the star of the show. Ready to see how Eklipse works its magic? Try it out for yourself! The mobile app lets you edit on the go, so you can create captivating content wherever inspiration strikes.
Key Features:
Eklipse utilizes AI technology to analyze your live streams (Twitch, YouTube, Facebook Gaming) and automatically identify the most engaging or exciting moments
Easily manage the clips generated from your streams within the Eklipse mobile app
Effortlessly download and share your generated clips directly to popular social media platforms like TikTok, YouTube Shorts, and Instagram Reels.
Convert lengthy Twitch streams or videos into bite-sized, engaging content specifically tailored for social media consumption.
Offers templates, customization options, and auto-captions
Pros:
Free to use
No watermark and ad-free
Beginner friendly
Produce high-resolution video
Convert streaming video to Reel clip in a snap
Cons:
Limited editing tools
Doesn’t allow video importing from the device library
Doesn’t allow direct sharing on Instagram
Pricing:
Free plan available
Premium plan: $19.99/month
2. Veed.io – Best Online Video Editor for Content Creators and Businesses
Source: Veed
Are you a video creator looking for an easy-to-use editing tool? Then you’ve probably heard of Veed.io. It’s a popular platform that offers a range of features to help you personalize your videos, including reels.
Is Veed.io great for editing and boasts an AI reel maker that can create high-quality videos in a snap. The free version allows you to try out the platform but includes a watermark.
You can upgrade to a Basic or Pro membership if you want to remove the watermark and access additional features.
Key Features:
Veed.io has an intuitive user interface that makes it easy for beginners to navigate and use.
It provides a comprehensive set of editing tools including cutting, trimming, cropping, adding subtitles, transitions, animations, stickers, and more.
AI-Powered Tools
High-Quality Video Output
Multilingual Support
Web-Based Platform.
Allows you to capture your screen, although it is limited to one-hour recording sessions.
Pros:
User-friendly interface and easy to learn
Produce high-quality output for the Basic and Pro version
Featured with various tools, templates, and music library
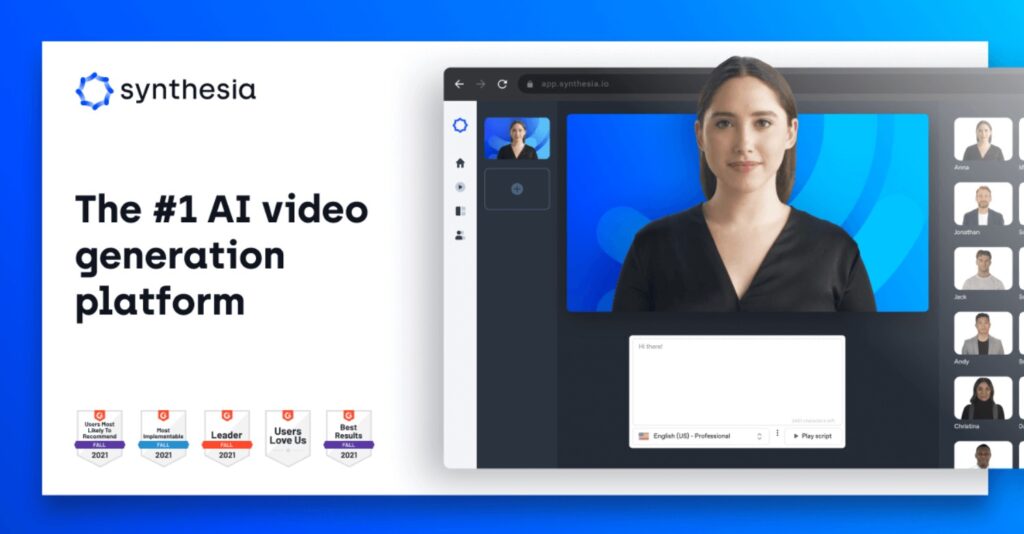
3. Synthesia – Best AI Video Generator for Personalized Content
Source: Synthesia.io
If you are looking for an automatic Instagram reel creator without needing a manual filming process, Sytnthesia might be the best solution for you. With its powerful AI, Synthesia can help to simulate human presenters and create real-life videos. Thus, you can save your working hours.
Although Synthesia is great for experts, doesn’t mean beginners can’t use it. However, it might take a little bit of time to learn how to use this tool.
Key Features:
Synthesia offers over 150 ethnically diverse AI avatars or custom avatars on more expensive plans.
Text-to-Speech
Synthesia can replicate users’ voices and pair them with an avatar.
AI Script Assistant
Supports over 120 languages.
Screen Recorder
It houses video templates, images, icons, and soundtracks.
PowerPoint Import
Pros:
Fairly friendly for beginners
Provides template customizations and built-in presenters
Allows video sharing to social media platforms
Allows the addition of text, shapes, and images to videos
Supports 40 languages
Cons:
Supports only front-facing poses which might look unnatural
4. Designs.ai – Best AI-Powered Online Creative Platform for Everyone
Source: designs.ai
Design skills are necessary if you want to enhance your video. However, not everyone is experienced in design. No worries, you can still create engaging reel videos using Designs.ai.
Not only provides various pre-designed templates, but it also lets you convert texts to video in the blink of an eye. Say bye to the time-consuming process of video creation!
Key Features:
Seamlessly integrates your face into any image or video.
Use the AI logo generator to launch your brand with a unique logo and a full brand identity kit.
Use the text-to-image generator to effortlessly craft custom-made images from your creative prompts and ideas.
Transform articles, posts, and text scripts into powerful, fully edited videos in more than 20 languages.
Convert text scripts into realistic voiceovers with multiple languages, tones, and pitches.
Pros:
Ease of use
Offers a wide range of tools for creating written content, audio content, and visual content like logos, designs, and videos.
Allows for easy asset sharing to increase productivity.
Uses artificial intelligence to create great designs
Integration with Existing Tools
Cons:
Limited Free Version
User-friendly
Lack of Mobile App Suppor
Pricing:
Basic plan: $19/month
Pro plan: $49/month
Enterprise plan: $169/month
5. InVideo – Best Online Video Editor for Beginners and Small Teams
Source: VideoCreek
If you’re looking for an easy and quick way to create videos, then InVideo is another great option to consider alongside the other tools we’ve mentioned.
With InVideo, you can simply drag and drop elements to create your video – no editing experience is required!
InVideo also produces high-quality videos, even in the free version. The only catch is that there will be a small watermark on your videos. If the watermark bothers you, InVideo offers two paid plans that let you remove it.
Key Features:
Allows you to work with multiple layers of video, giving you more control over your final product
Offers a wide range of templates and elements that you can customize to suit your needs.
Allows you to work on a project as a team, making it a great tool for small teams.
Pros:
Allows you to work with multiple layers of video, giving you more control over your final product.
Offers a wide range of templates and elements that you can customize to suit your needs.
Allows multiple users to work on a project simultaneously, making it an excellent tool for team collaboration.
Offers AI-powered video themes that can help enhance the overall look and feel of your videos
Ease of use
Cons:
Uploading media takes a while
Small lags when editing
The free tier lacks an export option
Pricing:
Free version (with watermark)
Business plan: $15/month
Unlimited Plan: $30/month
6. Lumen5 – Best AI-Powered Video Creation Platform for Marketers and Brands
Source: Lumen5
Struggling to create videos from scratch? If you’re a beginner looking to learn the ropes, Lumen5 can be a game-changer. This user-friendly platform boasts an AI-powered “Reels generator” that lets you create high-quality videos without any fancy editing skills.
In other words, Lumen5 can transform your text into an engaging video in just a few minutes. Plus, they offer a variety of templates to give your creation a polished look.
You can even customize your video’s resolution, colors, and text! However, the free version does leave a watermark on your final product, which might give it an unprofessional feel.
Key Features:
Uses artificial intelligence to help you create videos quickly and efficiently.
From marketing to internal communications, Lumen5 can be used for a wide range of purposes.
Custom templates
Pros:
Ease of use
It can be used for a variety of purposes, making it a versatile tool for all your video creation needs.
With custom templates, you can ensure that all your videos maintain consistent branding.
AI assistance can help you choose the right images and videos to match your script, saving you time and effort.
Text-to-Video
Cons:
Lumen5 may not offer the same level of control and customization as some other video editing software.
Limited free version
Despite its user-friendly interface, there might be a slight learning curve for users who are new to video editing or content creation.
Pricing:
Free version with a watermark
Creator plan: $15/month
Premium plan: $79/month
Business plan: $199/month
Enterprise plan: Custom pricing
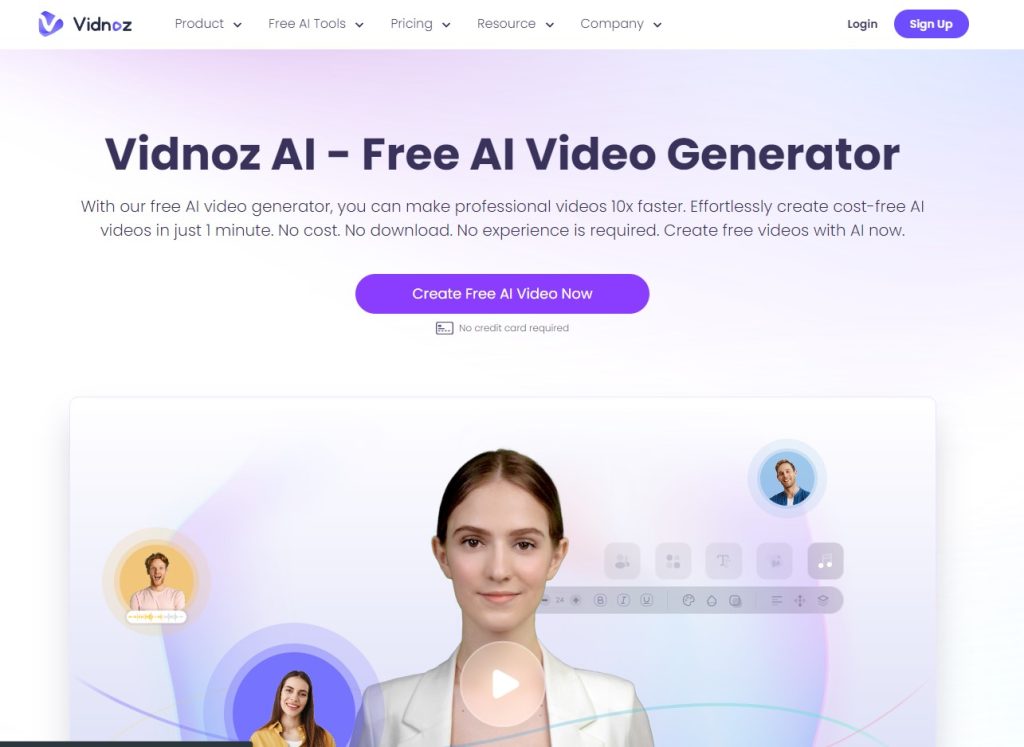
7. Vidnoz – Best AI Video Generator for Rapid Content Creation
Source: Vidnoz
Vidnoz – the AI-powered video creation tool that transforms the video-making process into a breeze. With Vidnoz, you can effortlessly produce captivating videos within mere seconds.
This best AI Reels generator boasts an extensive array of templates, enabling you to choose the perfect one for your content. Enhance your videos with dynamic text overlays and a selection of music tracks, making your visuals and audio truly resonate. But that’s not all – Vidnoz goes above and beyond by providing an AI assistant that streamlines the editing journey, ensuring your final product shines.
Key Features:
Offers an extensive library of over 300 customizable templates, 300+ realistic AI avatars, and 470+ AI voices that can speak 140+ languages.
Allows users to create custom AI voice clones and avatars to match their brand’s identity.
Text-to-video transformation
User-friendly interface
Compared to traditional video editing software, Vidnoz is a much cheaper and user-friendly alternative.
Pros:
Vidnoz’s AI technology empowers you to create videos in a matter of seconds, saving you valuable time.
Choose from a wide range of templates to suit different video styles and themes, helping you maintain a unique visual identity.
Elevate your videos with engaging text overlays, conveying your message effectively and creatively.
Access a collection of music tracks that complement your video’s mood, enhancing the overall viewing experience.
Vidnoz’s AI assistant simplifies the editing process, providing valuable suggestions and ensuring a polished final result.
Cons:
Limited customization
Dependence on AI
Template constraints
Pricing:
Basic Plan: Free
Starter Plan: $29.99/month
Business Plan: $74.99/month
8. Pictory – Best AI-Powered Video Creation Tool
Source: Pictory
Pictory is an AI video generator that empowers users to create reels from text, images, and existing videos. This versatility makes it an ideal choice for those who want to experiment with various content formats within their Instagram Reels.
Key Features:
Script to Video: Convert your transcript into a video effortlessly.
Article to Video: Transform your written articles into engaging videos.
Edit Video using Text: Upload your video and let Pictory automatically add captions.
Visuals to Video: Create slideshow videos by uploading your images.
AI Video Editor: Edit videos with ease using Pictory’s AI Video Editor.
AI Subtitles & Captions: Automatically add subtitles and captions to your videos.
Pros:
Ease of Use: Pictory is designed to be user-friendly, requiring no complex editing skills.
AI-Powered: It uses ai to make reels, saving users time and effort.
Collaboration: The Teams Plan allows for collaboration among team members.
Wide Variety of Avatars, Voices, and Language Support: Pictory offers a wide variety of avatars, voices, and language support, making it versatile for different types of content.
Automated Video Captioning: Pictory provides automated video captioning, which can be a great help in making your videos more accessible.
Cons:
Limited Free Trial: The free trial plan only allows you to create 3 video projects, each of up to 10 minutes long.
Limited Avatar Customization Options: While Pictory offers a variety of avatars, the customization options for these avatars are limited.
Occasional Video Clip Mismatch with Audio Script: There can be occasional mismatches between the video clip and the audio script.
Pricing:
Starter Plan: $29/month
Professional Plan: $59/month
Teams Plan: $149/month
9. Vizard – Best AI-Powered Video Editor for Social Media Content
Source: AI Tool Details
When it comes to video creation and editing, Vizard stands out as a top choice. This best AI Reels generator offers comprehensive and impressive features for personalizing your videos, including those intended for Instagram reels.
Moreover, Vizard is capable of producing videos of exceptional quality. You can add subtitles and generate video from text easily in seconds with this impressive tool.
10. Otter.ai – Best AI-Powered Transcription Service for Meetings
Otter.ai leverages its cutting-edge speech recognition and AI editing to analyze your video’s audio. This AI product video generator will automatically identify key moments, generate captions, add music and sound effects, and even throw in trendy transitions to keep viewers glued to the screen.
Key Features:
Offers the best live editing of any transcription service tested.
It integrates easily with video conferencing apps.
Provides a generous free plan for live audio transcription.
Well-designed mobile apps
Pros:
AI-generated transcripts have more errors than human-made ones.
Does not offer an option for human transcription.
Language Limitation: It only works for English and struggles with accents.
Allows you to add another layer of accuracy and speed to your transcriptions by teaching Otter unique name spellings, jargon, and acronyms
Compatible with popular video conferencing platforms, including Zoom, Google Meet, and Microsoft Teams
Cons:
AI-generated transcripts have more errors than human-made ones.
Does not offer an option for human transcription.
It only works for English and struggles with accents.
Pricing:
Basic Plan: Free
Pro Plan: $9.17/month
Business Plan: $20/month
11. GravityWrite – Best AI Content Generator for Marketers and Creators
Source: GravityWrite
GravityWrite is an AI writer, content generator, and assistant that helps you create a variety of content, including blogs, ad copies, emails, social media posts, images, and more.
It’s designed for anyone who needs to create content quickly and efficiently, from marketers and creators to small business owners.
The platform was built to solve the problem of spending hours writing content for your business. With GravityWrite, you can generate customized, optimized content for any business with just a few clicks.
Key Features:
115+ Templates and 2,300+ Tasks: GravityWrite offers a large collection of writing tools for quicker writing, more effective marketing, and smoother business operations.
Tell GravityWrite about your business once and generate unlimited content.
Turn your words into pictures. Generate photo-realistic images or illustrations for any of your marketing needs.
Upgrade your website’s copy for better conversions and higher sales with just a simple URL input
Pros:
Can be used for everything from writing help to marketing insights and business solutions.
Ease of use
Uses AI to generate content, eliminating the problem of writer’s block.
Allows you to customize the content according to your needs, making it a flexible tool for various content creation tasks.
GravityWrite can save you a significant amount of time that you would otherwise spend on writing and brainstorming.
Cons:
It may not always produce accurate or original content, depending on the quality of your input and the availability of data.
It may not be able to capture the nuances and emotions of human speech and expression, especially for creative or humorous content.
It may require some editing and fine-tuning to ensure that your reels meet your expectations and standards.
Pricing:
Basic Plan: Free
Starter Plan: $33.6/month
Pro Plan: $68/month
12. Predis.ai – Best AI-Powered Social Media Marketing Tool
Predis.ai is an AI animation generator that helps you create and share social media content in your brand language.
This AI generates text to video and can generate engaging images, videos, and copy for various platforms, such as Instagram, Facebook, Twitter, and LinkedIn. You can customize the designs, collaborate with your team, and integrate with your workflow using Predis.ai.
Key Features:
Uses AI to generate carousels and social media posts in your brand language.
You can create captivating video and image content.
Allows you to publish your content and provides AI-powered content analysis.
You can get your team onboard and work together.
Watch AI make content in your brand colors and logo.
Pros:
User-friendly and easy to navigate
AI-Powered
Offers a wide range of features for social media marketing.
Offers excellent customer support
A cloud-based tool so users can access Predis.ai anytime they want
Cons:
The free plan offers limited features.
Some users might find the pricing a bit high, especially for the premium plans.
New users might face a learning curve to understand all its features and how to best utilize them.
Pricing:
Basic Plan: Free
Lite Plan: $32/month
Premium Plan: $59/month
Agency Plan: $249/month
FAQ
1. What is the best AI for generating reels?
Eklipse is often regarded as the best AI for generating reels, especially for gamers, as it automatically creates engaging clips from live streams and videos.
2. What’s the best AI content generator?
Synthesia is considered one of the top AI content generators, capable of producing personalized videos with AI avatars and text-to-speech features.
3. Is there a free AI reel generator without watermark?
Yes, Eklipse offers a free plan that allows you to create reels without any watermarks, making it an excellent choice for users looking for a cost-effective solution.
Final Thoughts
Instagram Reels is evolving fast, thanks to AI-powered tools that boost creativity and efficiency. These tools do more than save time—they open up new ways to engage with your audience. From Eklipse’s easy video conversion to Veed.io’s editing features and Synthesia’s AI avatars, there are plenty of options to explore. Try these tools to improve your content strategy and grow your social media presence.
Visit Eklipse.gg and join our Discord community to create engaging content and connect with other streamers. With the right AI tool, social media success is within reach!
If you are looking for a simple and powerful online video editor, you might have heard of VEED. It is a popular web-based tool that lets you create stunning videos in minutes. But what if you want to try something different? Maybe you need more features, better pricing, or a different user interface. Or maybe you just want to explore other options and see what else is out there. We will show you the top 7 VEED alternatives of 2024 that you need to try.
Whatever your reason, you are not stuck with VEED. Many other online video editors can rival or even surpass VEED in terms of quality, functionality, and ease of use. Whether you are a beginner or a pro, you will find something that suits your needs and preferences. So, let’s get started!
Veed is an online video editor that allows you to create and edit videos directly in your web browser, without the need to download any software. It’s designed to be user-friendly and accessible for people of all skill levels.
Here are some of the key features of Veed:
Basic editing tools: You can cut, trim, and crop your videos, as well as add text, images, and music.
Auto-subtitles: Veed can automatically generate subtitles for your videos, which can help make your content more accessible.
Stock footage and music: Veed provides a library of stock footage and music that you can use in your videos.
Templates: Veed offers a variety of pre-made templates that you can use to get started on your videos quickly and easily.
Social media optimization: You can easily resize your videos to fit the aspect ratio of different social media platforms.
1. Eklipse – The AI-Powered Highlight Tool Streamers Crave
Source: Eklipse.gg
Eklipse is a powerful AI-based clipping software that allows you to conveniently generate highlights of your best gaming moments. But that’s not all, you can also edit your clips and videos using Eklipse.
Eklipse allows you to cut, trim, resize, and add text, subtitles, themes, transitions, sound effects, and filters to your video. You can also change your video’s aspect ratio to fit a square or a vertical screen.
You can easily edit your videos professionally using Eklipse and upload them to your social media platforms such as Instagram, Facebook, Twitter, and TikTok. In summary, Eklipse will serve you as a clipping as well as editing software.
The best thing about Eklipse is, that we support gaming streams and general talking videos like podcasts. While VEED is better for content creators and professional content creators, but doesn’t support gaming streams.
Key Features:
Automatic highlight generation: Eklipse automatically generates highlights from Kick Twitch, YouTube, and Facebook streams and videos, making it easier for users to create and share their best moments.
Clip conversion and sharing: Eklipse allows users to convert their Twitch clips into TikTok-compatible videos and share their clips to social media platforms like Twitter, Instagram, and Facebook.
Manual editing and customization: Users can manually edit and trim their clips, and choose from custom templates and copyright-free music to create unique and engaging content.
Weekly showcase and compatibility: Eklipse showcases the best clips from users every week and is compatible with any console and all top streaming platforms.
Mobile app availability: Eklipse is available on a mobile app, allowing users to create and share content on the go.
Pros:
Easy-to-use interface for all skill levels
AI-driven features that improve stream quality
Affordable premium plans
Intuitive editing tools
No video editing required
Cons:
Maximum 30 minutes of video processing without a premium subscription
No free templates
Limited editing features
Price:
Free: The free plan includes all of the essential features that you need to create and edit videos, such as trimming, cutting, merging, splitting, adding text, graphics, and music, and creating highlight clips.
Premium: The premium plan includes all of the features in the free plan, plus additional features such as AI-powered editing tools, collaboration features, and custom branding. The premium plan is available for two billing cycles:
Monthly: $19.99/month
Annual: $12.49/month (billed $149.99 annually)
If you’re looking for a video editor that can help you create professional-looking videos for your gaming stream, then try Eklipse today. You won’t be disappointed.
2. WeVideo – Feature-Rich Alternatives to VEED
Source: Groover
WeVideo is an online video editing software that is convenient for beginner video editors. The best part about using WeVideo is its simple interface and ease of access. You will find everything you need in WeVideo. It’s free and available for everyone to use. Furthermore, several people can work on a single video and save it to Google Drive.
Overall, WeVideo is an excellent cloud-based collaborative video creation tool that is both powerful and simple to use. WeVideo, which has 30 million customers, is the first option for corporations, consumers, educators, and students, as well as the video backbone for many third-party media solutions.
WeVideo is accessible from any computer or device, whether at school, home, work, or on the road. Users may simply shoot, edit, view, and share films, and their material is securely stored in the cloud.
Key Features:
User-friendly interface: WeVideo offers a simple and intuitive interface that is suitable for both beginners and professionals.
Collaborative features: The platform allows users to collaborate in real time, making it easy to work together on projects.
Cloud-based: WeVideo is a cloud-based platform, which means that users can access their projects from any device with an internet connection.
Templates: WeVideo offers a variety of templates for quick video creation, making it easy to create professional-looking videos without the need for extensive editing.
Basic color correction tools: The platform provides basic color correction tools, allowing users to adjust the color balance and contrast of their videos.
Built-in stock media library: WeVideo offers a built-in stock media library with high-quality footage, images, and audio tracks that users can use in their videos.
4K resolution: WeVideo supports 4K resolution, which allows users to create high-quality videos with stunning visuals.
Free version: WeVideo offers a free version with limited features, making it accessible to users who want to try out the platform before committing to a paid subscription.
Pros:
User-friendly interface suitable for beginners and professionals
Offers a variety of templates for quick video creation
Provides basic color correction tools
Offers a built-in stock media library for high-quality footage
Supports 4K resolution
Cons:
Lacks advanced color grading options
Does not support 3D editing or effects
Does not support the H.265 codec
Price:
Free – $0
Power – $4.99/month Billed annually
Unlimited – $7.99/month Billed annually
Professional- $17.99/month Billed annually
3. Magisto – VEED Alternative for Beginners
Source: Magisto YouTube
Magisto’s online editing service is great for beginners. You can easily convert a simple-looking video into a professional one. Make use of simple yet helpful video editing tools to make aesthetic-looking videos. Magisto provides a diverse set of tools at your disposal.
Magisto allows you to sign in using Facebook, Google, or your Apple ID. If none of these options appeal to you, you may just use your email address. We were perplexed that you couldn’t join in using your Vimeo account, even though Magisto is produced by that firm.
You also have the option of using Google Photographs (you must check in with your Google Account to do so) or iStock’s photos and videos.
Even while you may use the service for free, you’ll immediately discover that you’ll be frequently prompted to subscribe to the premium service. It starts when you log in and returns when you try to access subscription-only services.
Key Features:
AI-powered video editing: Magisto uses AI to analyze your photos and videos and automatically generates a professional-looking video from them.
Ready-made templates: Magisto offers a variety of ready-made templates for different occasions and purposes, such as birthdays, anniversaries, and business presentations.
Basic editing features: Magisto allows you to edit your videos as a video merger, trimmer, cutter, and organizer.
Add and customize videos: You can add text to your videos with different fonts and colors based on your preferences, as well as add fun stickers.
Access to iStock: Magisto has access to iStock, allowing you to access high-grade videos and photos on the platform.
Share the final output: After editing your video, you can easily share it on various social media sites and messaging apps.
Pros:
AI-powered workflow
No setup fee
Free trial and freemium version
Premium consulting/integration services
Easy footage management
Cons:
Limited video length to 10 minutes
Limited editing options
Limited access to 1080p downloads
Price:
Premium – $4.99 per month on a yearly plan
Professional – $9.99 per month on a yearly plan
Business – $34.99 per month on a yearly plan
4. Wideo – VEED Alternatives for Animated Videos
Source: Wideo
Wideo allows editors to edit their videos and create animated videos of their own. The convenient drag-and-drop feature makes it easy to edit your videos. You can use a vast array of video elements to create professional-looking animated videos in no time. Furthermore, you can use those elements as many times as you want.
Video is a web-based animated marketing video creation tool for small and medium-sized businesses (SMBs), marketing professionals, and digital agencies.
Using templates, you may create films quickly and easily. Add your photos and sounds, or make a new movie from the start, and then animate in a matter of seconds. Video is the most effective approach to attract your target audience, enhance social media engagement, and raise CTRs.
Key Features:
Superb video analytics: Wideo provides detailed analytics on video performance, such as views, clicks, and engagement rates, which can help users understand how their videos are performing and make data-driven decisions.
Unlimited photos and videos: Users can upload as many photos and videos as they want to create their videos.
Interactive elements: Wideo allows users to add interactive elements to their videos, such as clickable calls-to-action and forms, which can help increase engagement and conversions.
Good selection of audio, fonts, and templates: Wideo offers a range of audio tracks, fonts, and templates to help users create visually appealing and engaging videos.
Accommodating customer service: Wideo’s customer service team is known for being responsive and helpful, which can be a big plus for users who need assistance with the platform.
Pros:
Attention-grabbing and high-engagement
Increases conversion rates
Boost social media reach
Improves learning and retention
Engaging and customizable
Cons:
Limited accessibility
Complexity of production
Technical issues risk
Price:
Basic $19 per month (billed annually)
Pro $39 per month (billed annually)
Enterprise $79 per month (billed annually)
5. PowToon – Best VEED Alternative to Create Animated Visuals
Source: YouTube
PowToon boasts an interactive and beginner-friendly interface, making it a breeze to create videos for social media or professional settings. With its convenient drag-and-drop function, editing tasks are a cinch.
This easy-to-use software empowers you to produce high-quality, studio-grade animations and live-action videos, all without the hefty price tag of hiring a video production crew. PowToon offers a vast library of professionally designed templates, scenes, characters, and more to jumpstart your creativity. You can even upload your own media, including movies, GIFs, pictures, and voiceovers, to truly engage and connect with your audience.
Key Features:
Animated Characters and Visuals: Access a vast library of customizable animated characters, props, and backgrounds to bring your presentations to life
Drag-and-Drop Editor: Easily arrange and manipulate elements using Powtoon’s intuitive drag-and-drop editor
Animation Tools: Enhance your presentations with a variety of animation effects, transitions, and motion paths to captivate your audience
Voice-Over and Audio Integration: Record your voice-overs or import audio files to add narration and sound effects to your presentations
Collaboration and Sharing: Collaborate with team members in real time and share your presentations seamlessly across various platforms
Analytics and Tracking: Gain insights into your presentation’s performance with detailed analytics and tracking capabilities
Integrations: Powtoon seamlessly integrates with popular tools like Google Drive, Dropbox, and YouTube, streamlining your workflow
Pro: $89/month billed monthly ($228 billed yearly) with 2GB of storage and access to Pro and free content.
Pro+: $197/month billed monthly ($708 billed yearly) with 10GB of storage and access to all content.
Agency: $1188 billed yearly with 100GB of storage and access to all content.
6. Kapwing – Best Web-based VEED Alternative
Source: Eklipse.gg
Kapwing is a famous online video editing software. The best part about using Kapwing is automation. It has auto subtitles and the editor takes care of the background for you. This automation makes the editing process much faster and easier for editors. Whether you’re a casual video editor or a professional, Kapwing will serve you well.
Kapwing’s huge library of pre-built templates, stock footage, and assets enables users to make films from scratch. Users may build the film they desire by layering photos, videos, and sounds. All projects and work are immediately saved in the cloud because Kapwing is a cloud-based solution.
Key Features:
Drag-and-drop video editing: Users can easily upload their media files and start editing right away.
Text, image, and audio customization options: Kapwing offers a wide range of customization options, including the ability to add text, images, and audio to videos.
Ability to add subtitles and captions: Kapwing allows users to add subtitles and captions to their videos to make them more accessible and engaging.
Various video editing tools: Kapwing offers a variety of video editing tools, including trimming, cropping, filters, and more.
Support for popular video file formats: Kapwing supports a wide range of video file formats, making it easy to work with existing media files.
Pros:
Free version with basic features available
Easy to use
Wide range of video editing tools
Compatible with MP4s, GIFs, and JPEGs, etc
No need to download and install software
Cons:
Occasional glitches and issues
Watermark in the free version
Limited functionality in the free version
Price:
Free – 0$
Pro – $16 PER MONTH, BILLED ANNUALLY
For Teams – $16 PER USER PER MONTH, BILLED ANNUALLY
Invideo is an online video editor that uses AI to help you create professional videos in minutes. It has some smart features that set it apart from other video editors, such as: AI Script Generator, Automated Text-to-Speech, and Text-to-Video.
Invideo also has a large library of templates, stock media, and editing tools that you can use to customize your videos. You can export your videos in different formats and resolutions, and share them on various platforms.
Key Features:
Creating Storyteller videos: InVideo allows users to create storyteller videos, which are videos that tell a story or convey a message. These videos can be used for various purposes, such as marketing, education, or entertainment.
The Media Library: InVideo provides access to a large library of royalty-free images and videos that users can use in their videos. This library includes a wide range of media types, such as photos, illustrations, and footage, which can be used to enhance the visual appeal of the videos.
Support: InVideo offers customer support to help users with any issues they may encounter while using the platform. This support can be accessed through various channels, such as email, live chat, or phone.
The Advanced Editor: InVideo’s advanced editor allows users to customize their videos by adding text, images, and other elements. This editor also provides tools for editing audio, adjusting video speed, and adding transitions between clips.
Templates & Video Types: InVideo offers a variety of templates and video types, which can be used as a starting point for creating videos. These templates can be customized to fit the specific needs of the user, and they cover a wide range of video types, such as explainer videos, promos, and tutorials.
Pros:
Easy to use and affordable
Customer support
AI technology for readability enhancement
Customizability with your designs
Access to royalty-free images and videos
Cons:
The quality of built-in text-to-speech is too robotic
Lack of advanced editing capabilities
Not suitable for those who require advanced editing features
8. Multimedia5 – Best VEED Alternative For Windows
Source: AlternativeTo
If you’re looking to create a professional presentation for your product in a short amount of time, Multimedia5 could be the best choice for you. Some of this video editor’s key features include brand overlay, video stabilization, and social sharing, among others. Additionally, the platform offers a free version that can be accessed by visiting the official site.
Multimedia5 is designed for users with no prior video editing experience. It features a drag-and-drop interface and easy-to-use editing tools, allowing users to focus on their creative vision without being overwhelmed by technical complexities. The platform supports HD resolution and offers a video speed controller, enabling users to adjust the playback speed of their videos.
Multimedia5 also features media mapping, which allows users to add interactive elements to their videos, such as clickable hotspots or quizzes. The platform is praised for its ease of use, making it accessible to users who are not professional video makers.
Key Features:
Video Stabilization: This feature helps in stabilizing shaky or blurred video images, ensuring that the final product is smooth and professional-looking
Text Overlay: Users can superimpose text on their videos, allowing them to add captions, titles, or other text elements to their content
3D Video Editing: Multimedia5 supports 3D video editing, enabling users to create visually stunning videos
Video Capture: The platform allows users to capture video directly within the platform, making it easier to create content
Social Sharing: Multimedia5 makes it easy to share videos on social media platforms, helping users to reach a wider audience
Media Library: The platform offers a library of stock media, including images, videos, and audio tracks, which can be used to enhance the content
Brand Overlay: Users can add their brand elements, such as logos or color schemes, to their videos, ensuring consistency across their content
Audio Tools: Multimedia5 provides audio tools, allowing users to add music, voiceovers, or other audio elements to their videos
Pros:
AI-powered video creation environment
Ease of use
Accessibility to users with no prior video editing experience
Quick and efficient video content creation
Offers a vast library of stock media assets
Cons:
Limited stock media library for technical and manufacturing topics
More suited to businesses that require engagement management with video and content management
Focused on everyday social content rather than technical topics
Price:
Free plan available
Paid plan at US$54 per month
9. Fleeq – Best VEED Alternative For Guides or Tutorials
Source: Fleeq
Fleeq lets you embed, localize, optimize, and even share videos with employees, customers, and partners instantly. One standout feature is its ability to automatically translate videos into various languages. Talk about versatility!
What sets Fleeq apart is its focus on video guides and tutorials. If you often produce instructional content, Fleeq has you covered with features like screen recording, voiceovers, and step-by-step annotations, all designed to make your tutorials clear and effective.
Key Features:
Recording in different languages: Fleeq supports recording in different languages, which can be useful for creating guides in multiple languages.
Narration: Fleeq allows you to add narration to your recordings, which can help clarify the steps in your guides.
Screenshot highlighting: Fleeq enables you to highlight specific parts of the screen in your recordings, which can make the instructions more accurate.
Course feature: Fleeq allows you to create courses or series of videos, which can be useful for organizing and presenting a set of related content.
Wiki feature: The Wiki feature allows you to create a collection of videos that can be easily accessed and updated, which can be useful for creating and maintaining a library of guides.
Embedding and sharing: Fleeq allows you to embed your videos on websites and share them with others, which can help you reach a wider audience.
Pros:
Multilingual support
Easy to use
Useful for remote teams and educational purposes
Customer support
Custom branding
Cons:
Limited editing options
The high price point for a premium plan
Limited integrations
Price:
Custom pricing
10. Clipchamp – Best VEED Alternative for Professional Editing
Source: Clipchamp
Clipchamp is a video editing platform designed for ease of use, catering to both novices and seasoned editors. It operates on a freemium model, allowing you to explore its features without any upfront costs. Whether you prefer working from a web browser, a Windows application, or a mobile app, Clipchamp gives you the flexibility to import, edit, and export videos seamlessly.
With a variety of stock templates, royalty-free media, and an array of editing tools, you can create professional-quality videos quickly and efficiently. The platform lets you export your projects in high-resolution 4K and share them with your audience with ease.
Clipchamp offers a broader range of advanced editing features, including color correction, motion graphics, and other precision tools. This makes it a great choice for those who need more control and flexibility in their video projects.
Key Features:
User-friendly interface: Clipchamp’s interface is designed to be intuitive and easy to use, making it accessible for beginners.
Auto-generated subtitles: Clipchamp automatically generates subtitles for your videos, which can be edited and customized.
Stock library: Clipchamp offers a stock library of images, videos, and music that can be used in your videos.
Flexible video editing: Clipchamp allows you to edit your videos in a variety of ways, including trimming, splitting, and adding transitions.
Online accessibility: Clipchamp is accessible via an in-browser app, a desktop app for Windows users, and a mobile app for iOS devices, making it convenient for users without high-end hardware or expensive software.
Pros:
User-friendly interface
Smart tools suits including AutoCaptions and Text-to-Speech
Unlimited creation without watermarks
Speaker Coach tool
Real-time collaboration
Cons:
Limited free plan
Internet dependency
Stock image selection isn’t as complete as other video editing platform
Price:
US$11.9 per month for a premium plan
Final Thoughts
In conclusion, we’ve explored a range of alternatives to VEED, each offering its own unique set of features and capabilities. Whether you’re a content creator, marketer, or just someone looking to enhance your video editing experience, there’s a tool on this list that’s tailored to your needs.
Ultimately, the choice of the best VEED alternative depends on your specific requirements and preferences. So, take your time, explore these options, and find the tool that empowers you to bring your video visions to life.
Still on the fence? Give Eklipse a try for free and discover the incredible capabilities of AI-driven video editing. Sign up for a free trial of Eklipse today and start creating amazing videos for your gaming stream!
Framedrop.gg is an AI-powered tool that helps gamers, streamers, and video creators find and share the best highlights from their live streams. However, several alternatives to Framedrop offer similar or enhanced features to cater to the needs of content creators.
Here are the top alternatives to Framedrop.gg you could also try
Framedrop.gg is gaining popularity as a helpful tool for content creators. It uses AI to make it easier to create highlights from your streams and videos.
This online platform is designed to analyze your Twitch streams and YouTube videos, finding the most interesting moments using smart algorithms. Instead of spending hours searching through footage, Framedrop.gg automatically finds exciting plays, funny moments, or insightful comments that your audience will enjoy.
What sets it apart is its ability not only to find highlights but also to turn them into short clips perfect for platforms like TikTok, YouTube Shorts, and Instagram Reels.
1. Eklipse – Best for Auto-generating Twitch, YouTube, and Facebook Highlights
Source: Eklipse.gg
Eklipse is an advanced AI tool that automatically generates highlights from your Twitch, YouTube, and Facebook streams and videos. It captures a wide range of content, from exciting gaming moments to hilarious in-game experiences, which can be easily transformed into TikTok / Reels / YouTube shorts.
Eklipse also provides editing tools, such as trimming, cropping, and adding music, filters, stickers, and captions, to customize your clips. You can then share your clips directly to your social media platforms, or download them to your device.
Key Features:
Automatically finds funny moments and epic plays from Twitch, YouTube, and Facebook streams.
Works with major streaming platforms, consolidating highlight creation.
Edit and polish clips for optimal social media formats (TikTok, Reels, Shorts).
Streamlines the process of turning VODs into bite-sized social media content.
Pros:
Saves time and effort on editing highlights.
Uses AI to identify unique and engaging moments.
Caters to the growing trend of short-form social media content.
Helps streamers expand their reach beyond their main streaming platform.
Boosts discoverability and potential growth.
Cons:
Relies on AI accuracy, which might miss some key moments.
Limited editing capabilities compared to dedicated video editors.
May not be ideal for streamers with highly edited, specific highlight needs.
Price: Free Plan and starts from $19,99 per month for Premium Plan.
Available on: Windows and Mac
2. Powder – Best for Shortening Gameplay Streams into Social Media Clips
Source: Powder.gg
Powder.gg is a social network and a video editing tool for gamers. It’s essentially an AI-powered editing assistant that specializes in transforming lengthy gameplay streams into bite-sized, social media-friendly clips. Powder uses clever algorithms to identify the most exciting moments in your stream, from funny outbursts and epic wins to intense battles and viewer engagement spikes.
It can even analyze the audio to detect things like laughter and shouting, making highlight reels even more dynamic. But Powder doesn’t stop there. It also boasts speech-to-text transcription and game-specific AI models that can recognize key events in popular titles like Fortnite and Valorant. This lets you search your streams for specific moments by keyword and easily clip them, saving you tons of time editing. With Powder AI in your arsenal, turning your streams into viral content has never been easier.
Key Features:
Analyze gameplay streams to identify exciting moments and automatically generate clips.
Uses algorithms and audio analysis to find funny moments, victories, intense battles, and audience engagement spikes.
Transcribe audio from your stream for keyword search.
Recognizes key events in popular games like Fortnite and Valorant.
Quickly clip specific moments based on keywords or AI suggestions.
Pros:
Automates highlight reel creation, freeing up time for content creators.
Creates dynamic clips perfect for social media sharing.
Search streams by keyword using speech-to-text transcription.
Tailored AI models for popular games improve highlight accuracy.
The streamlined interface simplifies clip creation.
Cons:
Relies on AI for highlight selection, potentially missing creator-specific preferences.
AI might not always capture the most relevant moments, especially in niche games.
Uploading gameplay data to the cloud might raise privacy issues for some users.
Price: Free Plan and starts from $19,99 per month for Premium Plan.
3. Qlip.ai— Best for Automating Clip Creation from Long Videos
Source: Qlip.ai
Qlip.ai is an AI-powered productivity platform for video clipping. It helps you save hours repurposing your long videos for TikTok, Insta Reels, and YouTube Shorts. Qlip.ai uses AI to automatically generate short clips that capture the most engaging and relevant moments and lets you preview, edit, and export your clips with just a few clicks.
Qlip.ai supports multiple streaming platforms and social media platforms and offers editing tools to enhance and personalize your clips. However, Qlip.ai is more expensive than Framedrop.gg, and requires an internet connection and a browser to use the service. Qlip.ai offers four pricing plans, including a free trial that lets you upload one hour of video for free.
Key Features:
Uses AI to identify the most engaging moments in long-form videos (podcasts, lectures, etc.)
Transforms highlights into short, social media-friendly clips.
Automatically transcribes speech to text and generates subtitles.
Reformats videos to vertical orientation for mobile viewing.
Pros:
Eliminates manual video editing for content repurposing.
Creates engaging clips for social media platforms, potentially attracting a wider audience.
Automatic subtitles make content more accessible for viewers with hearing impairments.
Reformatted videos are optimized for mobile viewing, where a large portion of video consumption occurs.
Allows creators to squeeze more mileage out of their existing content by creating fresh, social media-ready pieces.
Cons:
Users may have limited control over the specific highlights chosen by the AI.
AI transcription may not be perfect, especially for complex content or speakers with accents.
Lacks advanced editing features for those who want more creative control over their clips.
Price: Free Plan and starts from $32.5 per month for Premium Plan.
Available on: Windows and Mac
4.Chopcast — Best for Generating Social Content from Videos and Podcasts
Source: Chopcast.io
Chopcast is a video clipping tool that helps you turn your long-form videos and podcasts into tons of social content. You can search your videos by topic and keyword to generate clips and edit them with captions, logos, and titles. You can also schedule your clips to be posted automatically to your social media channels, and track the performance of your clips with analytics and insights.
Chopcast works with both videos and podcasts and allows you to search your videos by topic and keyword to generate clips. However, Chopcast is still in beta, so it may have some bugs or issues and does not support Twitch as a source or a destination platform.
Price: Free Plan and starts from $12 per month for 90 Minutes.
5. Spikes Studio— Best for Repurposing Videos for YouTube, TikTok, and Reels
ource: Spikes.studio
Spike Studio is an AI clip generator that repurposes long videos for YouTube, TikTok, and Reels. It uses generative AI to create short clips that are optimized for virality and engagement. It also offers editing features, such as captions, music, filters, stickers, and more.
Spike Studio supports multiple devices and platforms and offers more editing features and customization options than Framedrop.gg. However, Spike Studio is only available as a web app and requires a Spike Studio account to use the service. Spike Studio is free to use but offers in-app purchases to unlock more features and benefits.
Key Features:
Automatically extracts captivating moments for video clips using AI analysis.
Imports video links from various platforms for editing.
Simplifies sharing edited videos across different social media platforms.
Offers a web-based editor for professional-grade editing without downloads.
Includes features like auto-captions, automatic hashtags and descriptions, and source quality maintenance to expedite editing.
Pros:
Saves time with AI-powered clip selection and editing tools.
Auto-generated features like captions and hashtags improve discoverability.
Offers flexible pricing plans, including a free tier.
The User-friendly interface makes it accessible for beginners.
Handles large video files and allows for batch processing of multiple videos simultaneously.
Cons:
AI selection of highlights may not always align with the creator’s vision.
Auto captions and descriptions might require revisions for optimal accuracy.
Overreliance on AI-generated clips could lead to homogenized content across different platforms.
Price: Free Plan and starts from $10 per month for 90 Minutes.
While Framedrop.gg offers a convenient solution for gamers, streamers, and video creators to automate the process of finding and sharing highlights from their content, there are several Framedrop.gg alternatives for streamers available with similar or enhanced features. Eklipse, Powder, Qlip.ai, Chopcast, and Spikes Studio each provide unique approaches to streamline the creation of social media-friendly clips from long-form videos or streams.
Eklipse stands out for its ability to auto-generate highlights from multiple streaming platforms and provide editing tools for customization. Sign up for a free Eklipse account today or subscribe to our Premium Plan for more amazing features.
Looking for some Twitch alternatives? You’re in the right place! Here, we present the top 5 Twitch alternatives for conducting interactive live streaming, whether it’s for gaming or other types of entertainment content.
Many streamers are exploring alternatives to Twitch due to inflexible guideline changes and a revenue split that no longer seems fair to them. Fortunately, several platforms can serve as substitutes for Twitch, offering similar features but with more flexible rules.
So, without any further ado, let’s take a look at the list below and decide where to migrate.
1. YouTube Gaming – Best for Aspiring Streamers Leveraging a Massive Audience
Source: Maxmanroe
YouTube Gaming isn’t entirely new, but it’s a dedicated platform within the YouTube ecosystem specifically designed for gamers and gaming content. Launched in 2015, it offers live streaming functionalities similar to Twitch, catering to streamers and viewers with a passion for video games.
So, you’re an aspiring streamer looking to build a fanbase and connect with a gaming community? YouTube Gaming might be the perfect platform for you, and here’s why.
Key Features:
Live Streaming: The core functionality of YouTube Gaming allows you to broadcast your gameplay live, complete with live chat interaction with your viewers.
Super Chat & Memberships: Monetize your streams through features like Super Chat (highlighted messages with donations) and channel memberships, where viewers gain exclusive perks for a monthly fee.
Clips & Highlights: Create easily shareable clips of your most epic moments to keep viewers engaged and attract new ones through the YouTube recommendation engine.
Integration with YouTube: Leverage the massive user base of YouTube. Existing viewers of your YouTube channel can easily discover your streams, fostering audience growth.
Pros:
Massive Built-in Audience: Tap into YouTube’s existing user base, potentially reaching millions more viewers than starting fresh on a dedicated streaming platform.
Monetization Options: Earn through ads, Super Chat donations, and channel memberships, creating a sustainable income stream.
Content Ecosystem: Easily integrate live streams with pre-recorded gameplay videos and other content, creating a well-rounded YouTube channel.
Familiarity & Ease of Use: If you’re already familiar with YouTube, navigating YouTube Gaming feels intuitive, with a minimal learning curve.
Strong Community Features: Live chat, polls, and other interactive features foster a strong sense of community with your viewers.
Cons:
Established Streamers Dominate: Breaking into the scene can be challenging with popular streamers already having a large audience.
Focus on Long-Term Growth: Building a following takes time and consistent content creation compared to platforms with a more immediate focus on discovery.
Potential for Copyright Issues: Streaming copyrighted games requires navigating usage rights to avoid copyright strikes.
Users/Popularity:
YouTube Gaming has carved out a niche for itself in the world of live streaming, especially for those who are passionate about PC and mobile games. It may not always rival Twitch in terms of viewership for certain games, but it offers substantial opportunities for audience expansion, thanks to the vast user base of YouTube.
Based on data gathered from various sources, YouTube Gaming is a thriving platform for streamers. As of 2024, it has over 1.9 million broadcast channels and 443,000 unique streaming channels. The platform averages 544,000 concurrent viewers. Revenue is estimated at $3 to $5 per 1,000 video views. The most popular gaming channel has 49 million subscribers, and over 350 channels have more than 10 million followers.
In summary, YouTube Gaming is a platform with immense potential for streamers, offering a large and diverse audience, substantial revenue opportunities, and a thriving community of gamers.
2. Facebook Gaming – Best for Streamers Leveraging Social Media Integration
Source: Facebook Gaming
Facebook Gaming isn’t just about hopping on the live-streaming bandwagon; it capitalizes on the immense popularity of Facebook to connect streamers with their existing social circles and new audiences. Launched in 2018, Facebook Gaming integrates seamlessly with Facebook, allowing streamers to leverage their established network and Facebook’s powerful recommendation engine.
So, you’re a streamer who wants to combine your passion for gaming with the reach of social media? Look no further than Facebook Gaming.
Key Features:
Live Streaming: Broadcast your gameplay live and interact with viewers through comments and reactions in real time.
Facebook Integration: Share your streams easily across your Facebook profile and groups, notifying friends and followers when you go live.
Stars (Virtual Currency): Viewers can purchase Stars to tip you during your streams, contributing to your income.
Level Up Program: Earn rewards and in-platform recognition as you stream more and reach milestones, keeping you motivated.
Pros:
Built-in Audience: Reach out to your existing Facebook friends and followers, fostering a familiar and potentially loyal viewership.
Social Discovery Features: Facebook’s algorithms effectively recommend your streams to potentially interested viewers within the platform.
Stars Monetization: Generate income through Stars received from viewers, creating a way to support your streaming activities.
Level Up Gamification: The Level Up program adds a fun layer to the experience, motivating streamers to keep creating content.
Easy Interaction with Viewers: Leverage familiar Facebook comment sections and reactions for a seamless chat experience.
Cons:
Focus on Casual Gamers: The platform might cater more towards casual gamers compared to hardcore esports or competitive titles.
Monetization Might Be Lower: Depending on your audience and content, revenue from Stars might be lower compared to platforms with established donation features.
Technical Limitations: Some users report technical limitations compared to dedicated streaming platforms.
Users/Popularity:
Based on data gathered from various sources, Facebook Gaming is a growing platform for live streaming. As of 2022, it had an average of 173,000 concurrent viewers.
Full-time Facebook streamers earn on average between $2750- $5500 per month. Streamers earn through methods such as donations, subscriptions, or Facebook’s on-platform currency, Facebook Gaming Stars. Each star can be cashed out for the equivalent of USD 0.01 and will be paid to the streamer when they have reached 10,000 (or $100).
The number of unique channels on the platform has declined since the beginning of 2021. However, Facebook Gaming accumulated 382 million hours of live streams watched in the third quarter of 2022.
3. Trovo – Best for Esports and Competitive Gaming Enthusiasts
Source: DotEsports
Trovo is a rising star in the live streaming space, specifically carving a niche for esports and competitive gaming content. Launched in 2017, it offers a platform designed to cater to the competitive gaming community, with features and functionalities tailored to enhance the experience for both streamers and viewers.
So, you’re a streamer passionate about esports and competitive titles, and want a platform that prioritizes that content? Trovo might be your perfect match.
Key Features:
Focus on Esports: Trovo curates content and elevates esports tournaments, providing a dedicated space for competitive gaming enthusiasts.
Clips & Hype Moments: Easily create and share short clips of those clutch plays and epic wins, keeping viewers engaged and excited.
Trovo Level-Up System: As you stream and interact with viewers, you progress through Trovo’s level system, unlocking in-platform rewards and recognition.
Stream Discoverability Features: Trovo’s algorithms prioritize discoverability for new and up-and-coming streamers, giving you a fair shot at building an audience.
Pros:
Targeted Audience: Reach a community specifically interested in esports and competitive gaming, fostering a more focused and potentially engaged viewership.
Focus on Streamer Discoverability: Trovo’s algorithms are designed to help new streamers get noticed, unlike established platforms dominated by big names.
In-Platform Rewards & Recognition: The level system incentivizes consistent streaming and viewer interaction, keeping streamers motivated.
Hype Moments & Clip Sharing: Trovo’s features cater to the fast-paced, highlight-reel nature of competitive gaming content.
Supportive Community: The platform fosters a community of esports enthusiasts, potentially leading to stronger streamer-viewer relationships.
Cons:
Newer Platform & Smaller Audience: Compared to giants like Twitch, Trovo has a smaller user base, which might take longer to build a substantial following.
Limited Monetization Options: Monetization features might be under development compared to more established platforms.
Focus on Specific Genre: If your content strays beyond esports and competitive titles, Trovo might not be the most optimal platform.
Users/Popularity:
Based on data gathered from various sources, as of 2024, Trovo has 1,065 live channels and averages 11,479 concurrent viewers.
In terms of revenue, it’s challenging to provide an exact figure due to various factors. However, streamers on Trovo can earn through methods such as donations, subscriptions, or Trovo’s on-platform currency, Trovo Gems. Each Gem can be cashed out for the equivalent of USD 0.01.
The number of unique channels on the platform has declined since the beginning of 2021. However, Trovo accumulated 26.7 million hours of live streams watched in the first quarter of 2024.
4. DLive – Best for Streamers with an Interest in Blockchain and Crypto
Source: DLive
DLive is a unique live-streaming platform that integrates blockchain technology, offering streamers the potential to earn cryptocurrency for their content. Launched in 2018, it caters to a more tech-savvy audience and streamers who want to explore new avenues for monetization beyond traditional methods.
So, you’re a streamer who’s curious about blockchain and crypto, and wants a platform that rewards you with digital currency? DLive might be the innovative platform you’ve been looking for.
Key Features:
Lino Tokens: Earn Lino tokens, a form of cryptocurrency, for your streams and viewer interactions. These tokens can be exchanged for other cryptocurrencies or fiat currencies.
Focus on Community Engagement: DLive prioritizes features that encourage streamer-viewer interaction, like interactive polls and giveaways.
Livestream Discovery: The platform offers tools to help streamers get discovered by viewers interested in similar content.
DRM (Digital Rights Management): DLive offers optional DRM features for streamers who want to protect their copyrighted content.
Pros:
Cryptocurrency Earnings: Potentially earn Lino tokens for your streams, creating a new avenue for income generation.
Focus on Community: Features like interactive elements foster a strong sense of community between streamers and viewers.
Stream Discoverability Tools: DLive helps you reach viewers interested in the kind of content you create.
DRM Option for Copyright Protection: An extra layer of security for streamers concerned about protecting their copyrighted content.
Tech-Savvy Audience: Connect with a viewer base that embraces blockchain technology and cryptocurrencies.
Cons:
Newer Platform & Smaller Audience: Similar to Trovo, DLive has a smaller user base compared to established platforms, potentially limiting initial reach.
Cryptocurrency Fluctuations: The value of Lino tokens can fluctuate, making income less stable compared to traditional methods.
Technical Learning Curve: Understanding blockchain and cryptocurrency might require some additional research for new users.
Users/Popularity:
Based on the data available from various sources, DLive is a growing platform in the live-streaming industry. However, we are unable to provide the exact numbers for DLive’s live channels, concurrent viewers, or revenue at this time.
Despite the lack of specific figures, it’s clear that DLive offers substantial potential for streamers, with opportunities for audience growth, revenue generation, and participation in a thriving community of gamers. It is a popular choice for streamers interested in exploring blockchain technology and crypto-based monetization.
While its user base is smaller than giants like Twitch, it offers a unique and potentially lucrative opportunity for streamers who embrace this innovative approach. The platform caters to a tech-savvy audience and fosters a strong sense of community.
5. Steam – Best for Streaming Directly to Your Existing Gaming Community
Source: Lifewire
Steam, the behemoth of PC gaming platforms, also offers a built-in live-streaming feature. Launched in 2014, it allows you to broadcast your gameplay directly to your Steam friends and the broader Steam community. If you already have a network of friends on Steam and want to share your gaming experiences with them, Steam’s live streaming functionality might be a convenient option.
Key Features:
Integrated with Steam: Stream directly from your Steam client, eliminating the need for additional software.
Broadcast to Steam Friends & Community: Share your gameplay with your Steam friend list and potentially reach a wider audience within the platform.
Chat Interaction: Interact with viewers through the Steam chat functionality.
Highlight Clip Creation: Easily capture highlights from your stream to share on your Steam profile or social media.
Pros:
Convenience for Established Steam Users: Stream directly from your Steam client, eliminating the need to set up additional accounts or software.
Connect with Existing Network: Share your gameplay with your Steam friends and potentially reach a familiar audience within the platform.
Highlight Clip Feature: Easily create highlight clips to showcase your best moments or funny fails.
No Additional Cost: Since it’s a built-in feature of Steam, there are no additional costs for using Steam Broadcasting.
Simple Setup: Minimal setup is required compared to dedicated streaming platforms.
Cons:
Limited Features: Offers a more basic set of features compared to dedicated streaming platforms.
Smaller Potential Audience: Reach might be limited to your Steam friend list and the broader Steam community, which might not be as vast as dedicated streaming platforms.
Focus on PC Games: Primarily suited for streaming PC games purchased through Steam.
Less Emphasis on Monetization: Monetization options might be limited compared to dedicated streaming platforms.
Users/Popularity:
Steam Broadcasting is a popular choice for casual streamers who already have an established network of friends on Steam and want to share their gameplay experiences directly within the platform.
Based on data gathered from various sources, as of 2024, Steam has a peak of 35.4 million concurrent users. The platform averages 11.08 million concurrent in-game users.
In terms of revenue, Steam’s annual revenue is estimated to be around USD 8.49 billion. Streamers on Steam can earn through methods such as sales of games, in-game microtransactions, and subscriptions.
Unfortunately, we couldn’t find the exact number of streamers on Steam. However, considering the large number of concurrent users, it’s safe to say that the platform hosts a significant number of streamers. While the audience reach might be smaller compared to dedicated streaming platforms, it offers a convenient and familiar way to connect with your Steam community.
6. Vimeo Livestream – Best for Professional Broadcasters and High-Production Streams
Source: Vimeo
Vimeo Livestream isn’t your average live streaming platform. Launched in 2013, it caters to professional broadcasters and content creators who require high-end features and functionalities for their live streams. If you’re a streamer who demands top-notch quality and control over your productions, Vimeo Livestream might be the answer you’ve been searching for.
Key Features:
Multi-Camera Support: Broadcast your stream using multiple cameras, allowing for professional-looking productions with dynamic angles and cuts.
Real-Time Editing: Make edits to your stream on the fly, adding intro/outro segments, overlays, and graphics for a polished presentation.
Global Content Delivery Network (CDN): Ensure smooth and reliable delivery of your stream to viewers worldwide with Vimeo’s robust CDN.
Analytics & Reporting: Gain valuable insights into your viewership and stream performance with detailed analytics and reporting tools.
Pros:
High-End Production Features: Multiple camera support, real-time editing, and CDN delivery elevate your streams to a professional level.
Detailed Analytics & Reporting: Track your stream performance and audience engagement with in-depth analytics to optimize your content.
Targeted Audience: Reach viewers who appreciate high-quality productions, potentially including businesses and organizations.
Suitable for Paid Events: Vimeo Livestream can be used for paid ticketed events, allowing you to monetize your professional streams.
Security & Privacy Features: Stream with confidence knowing Vimeo offers robust security and privacy features.
Cons:
Learning Curve: Mastering the advanced features might require some technical knowledge and a steeper learning curve.
Cost: Vimeo Livestream might have higher pricing structures compared to basic streaming platforms.
Focus on Professional Content: Not ideal for casual streamers who prioritize a simple and user-friendly experience.
Users/Popularity:
Vimeo Livestream has carved out a niche for itself as the preferred platform for professional broadcasters, educational institutions, and businesses seeking top-tier live streaming services. Although it may not boast the extensive user base of some gaming-centric platforms, it serves a distinct audience that values high-quality productions and comprehensive analytics.
As of 2021, Vimeo Livestream had approximately 1.7 million paid subscribers, marking an increase of more than 10% from the previous year. While the exact number of streamers is not publicly available, it’s worth noting that Vimeo caters to a wide range of users, from individual creators to large organizations.
In terms of financial performance, Vimeo’s revenue increased by 11% year-over-year to reach $433.0 million in 2022. This growth was largely driven by Vimeo Enterprise, which saw a revenue increase of 69%. For 2023, the company projected its revenue to be at least $100 million.
7. StreamYard – Best for Streamlining Multi-Platform Broadcasts
Source: StreamYard
StreamYard isn’t a traditional live-streaming platform itself. Launched in 2014, it functions as a live-streaming studio in the cloud. Here’s the beauty: StreamYard allows you to broadcast your stream simultaneously to multiple platforms like Twitch, YouTube, and Facebook Live. This eliminates the hassle of managing separate streams on each platform, saving you time and effort.
Key Features:
Multistreaming: Broadcast your live stream to multiple platforms like Twitch, YouTube, and Facebook Live at the same time.
Guest Invites: Easily invite guests to your stream remotely, allowing for interviews, collaborations, and engaging discussions.
Content Overlays & Branding: Customize your stream with overlays, logos, and graphics to maintain consistent branding across platforms.
Live Chat Management: Manage chat conversations from all your streaming platforms in one central location, keeping you organized.
Pros:
Multi-Platform Streaming: Stream to all your chosen platforms simultaneously, saving time and effort.
Streamlined Workflow: Manage your entire stream from a single platform, simplifying the broadcasting process.
Guest Collaboration Features: Easily invite and interact with guests on your stream, fostering engaging content.
Branding & Customization: Maintain a consistent brand identity across all your streaming platforms.
Centralized Chat Management: Monitor and respond to chat conversations from all platforms in one place.
Cons:
Focus on Stream Management: StreamYard focuses on managing your stream, not necessarily on building an audience from scratch.
Potential Cost: StreamYard offers free and paid plans, with some advanced features requiring a subscription.
Reliance on External Platforms: You still need accounts and audiences established on the platforms you stream to.
Users/Popularity:
StreamYard is a popular live streaming studio in your browser, catering to a wide range of users from individual creators to large organizations.
As of 2024, StreamYard’s estimated annual revenue is approximately $19.1 million. The platform has seen significant growth, with the number of employees increasing by 48%. However, the exact number of streamers and average number of subscribers on StreamYard is not publicly available.
StreamYard allows up to 6 participants in the stream on its free plan, and this limit increases with its paid plans. This flexibility makes it a preferred choice for many users who want to host interviews, debates, and more on their streams.
These figures highlight StreamYard’s commitment to providing a robust platform for live streaming, catering to a diverse audience that values quality and interactive content. Despite a more focused user base compared to some platforms, StreamYard continues to grow in both user numbers and revenue.
8. Dacast – Best for Businesses and Organizations with Enterprise-Level Streaming Needs
Source: Dacast
Dacast isn’t your average live-streaming platform for individual creators. Launched in 2007, it caters to businesses and organizations with high-end streaming requirements. Dacast offers robust features, security, and scalability to handle complex live streams for a variety of purposes.
Key Features:
Enterprise-Grade Streaming: Dacast delivers smooth, high-quality streams with low latency, ideal for professional presentations, webinars, and large-scale events.
DRM (Digital Rights Management): Protect your copyrighted content with advanced DRM features, ensuring secure delivery to authorized viewers.
CDN (Content Delivery Network): Dacast’s global CDN ensures reliable and buffer-free delivery of your stream to a worldwide audience.
Advanced Analytics & Reporting: Gain detailed insights into your stream performance and audience demographics with comprehensive analytics.
Pros:
High-Performance Streaming: Delivers reliable and high-quality streams for even the most demanding applications.
Content Security & DRM: Protects your copyrighted content with advanced security measures.
Global Reach with CDN: Ensures smooth delivery of your stream to viewers worldwide.
In-Depth Analytics: Provides valuable data to understand your audience and improve future streams.
Scalability for Large Events: Handles complex live streams with a large number of viewers seamlessly.
Cons:
Focus on Enterprise Needs: Not ideal for individual streamers due to its complexity and potentially higher costs.
Steeper Learning Curve: Mastering all the features might require technical expertise within your organization.
Subscription-Based Model: Dacast offers paid subscription plans, with pricing likely higher than basic streaming platforms.
Users/Popularity:
Dacast is a professional video streaming solution that caters to a wide range of users, from individual creators to large organizations.
As of 2021, Dacast’s estimated annual revenue was approximately $8 million, and it had around 49 employees. However, the exact number of streamers and the average number of subscribers on Dacast are not publicly available.
Dacast offers a range of pricing plans to suit various business needs and budgets. Its plans start from $39 per month and go up to $188 per month, depending on the features and bandwidth required. This flexibility makes it a preferred choice for many users who want a professional video streaming solution.
These figures highlight Dacast’s commitment to providing a robust platform for professional live streaming, catering to a diverse audience that values quality and interactive content. Despite a more focused user base compared to some platforms, Dacast continues to grow in both user numbers and revenue.
9. Restream – Best for Streamlining Multi-Platform Scheduling and Automation
Source: Dacast
Restream, launched in 2014, functions similarly to StreamYard by allowing you to broadcast your stream to multiple platforms simultaneously. However, Restream places a strong emphasis on automation and scheduling. If you’re a streamer who wants to pre-record content or schedule your live streams in advance across various platforms, Restream might be the perfect tool for you.
Key Features:
Multistreaming: Broadcast your live stream to multiple platforms like Twitch, YouTube, and Facebook Live at the same time.
Stream Scheduling: Schedule your live streams in advance across all your chosen platforms, saving you time on launch day.
Pre-Recorded Content Integration: Seamlessly integrate pre-recorded videos into your live streams, allowing for a mix of live and pre-produced content.
Automated Overlays & Branding: Apply branding elements and overlays automatically to your streams across all platforms.
Pros:
Automated Multistreaming: Schedule and broadcast your streams to multiple platforms simultaneously, saving time and effort.
Pre-Recorded Content Integration: Enhance your live streams with pre-recorded segments or outros.
Automated Branding: Maintain consistent branding across all your streaming platforms without manual adjustments.
Stream Recording & Archiving: Record your streams automatically for future reference or VOD (Video on Demand) purposes.
Analytics & Reporting: Gain insights into your stream performance across all platforms.
Cons:
Focus on Automation & Scheduling: This might not be ideal for streamers who prefer a more hands-on approach during live broadcasts.
Potential Cost: Restream offers free and paid plans, with some advanced features requiring a subscription.
Reliance on External Platforms: Similar to StreamYard, you still need accounts established on the platforms you stream to.
Users/Popularity:
Restream is a popular live streaming studio in your browser, catering to a wide range of users from individual creators to large organizations.
As of 2024, Restream’s estimated annual revenue is approximately $12.5 million. The platform has seen significant growth, with the number of employees increasing. However, the exact number of streamers and average number of subscribers on Restream is not publicly available.
Restream allows broadcasting live video to multiple social network channels at the same time along with other capabilities like analytics, scheduling, shared chat monitoring, and seamless integration with encoders. This flexibility makes it a preferred choice for many users who want to host interviews, debates, and more on their streams.
These figures highlight Restream’s commitment to providing a robust platform for live streaming, catering to a diverse audience that values quality and interactive content. Despite a more focused user base compared to some platforms, Restream continues to grow in both user numbers and revenue.
10. Picarto – Best for Creative Streamers and Artistic Communities
Source: Picarto
Picarto, launched in 2011, caters to a specific niche: creative streamers and artistic communities. It’s a platform designed for artists, illustrators, and other creative individuals to showcase their work in progress, host tutorials, and connect with other like-minded creators.
Key Features:
Focus on Creative Content: Stream your art creation process, host drawing tutorials, or collaborate with other artists in real time.
Chat & Community Features: Interact with viewers through chat, polls, and drawing requests, fostering a creative community atmosphere.
Screen Sharing & Collaboration Tools: Share your screen seamlessly and collaborate with other artists on projects live.
VOD (Video on Demand) Archiving: Archive your past streams for viewers to access later and learn from your creative process.
Pros:
Dedicated Platform for Creative Content: Connect with a community of artists, illustrators, and other creative individuals.
Interactive Features for Collaboration: Stream your art creation process, host tutorials, and collaborate with other artists in real time.
VOD Archiving for Learning: Offer viewers the opportunity to learn from your past streams and archived creative sessions.
Focus on Community Building: Chat, polls, and drawing requests foster a sense of connection and engagement with your audience.
Monetization Options: Monetize your streams through subscriptions and virtual currency features.
Cons:
Niche Audience: Reach might be limited compared to platforms with a broader focus on gaming or entertainment.
Focus on Visual Arts: Not ideal for streamers outside the creative and artistic fields.
Technical Requirements: Streaming high-resolution art creation might require a powerful computer setup.
Users/Popularity:
Picarto is a unique platform that specializes in providing a space for artists to share their creative process in real-time. It’s a small-scale broadcasting streaming service with a total number of simultaneous viewers of around 1,000 people. However, the exact number of streamers and average number of subscribers on Picarto is not publicly available.
In terms of financial performance, as of 2021, Picarto’s estimated annual revenue was approximately $8 million. It had around 49 employees. The platform allows users to collect revenue through Picarto subscriptions or kudos, provided they have a verified and valid PayPal account.
Picarto offers a unique feature where premium users can have up to three streamers. This allows for multi-stream broadcasting, making it a preferred choice for many users who want to host collaborative streams.
These figures highlight Picarto’s commitment to providing a robust platform for creative live streaming, catering to a diverse audience that values quality and interactive content. Despite a more focused user base compared to some platforms, Picarto continues to grow in both user numbers and revenue.
Absolutely. Some Twitch alternative apps that you can try are Periscope, Vimeo Livestream, Stream Yard, Restream, Dacast, and Facebook Live.
Q2. Who is Twitch’s competitor?
Twitch is a social video network and community for gamers. YouTube, Metacafe, Activision Blizzard, Caffeine, and HUYA are among Twitch’s alternatives and main competitors.
Q3. What is the new rival to Twitch?
Kick is the new and user-friendly alternative to Twitch. The platform asserts to provide creators with an unparalleled 95-5 revenue split, a feat unmatched in the industry.
Q4. How is Twitch dominating live streaming?
Twitch’s major source of viewing has been gaming even before it was bought by Amazon. It has subsequently blossomed into its own culture, branching out into non-gaming areas including painting, food, podcast creation, and real-life relationships. Not many of its competitors are the same, and the bulk of them offer a one-of-a-kind service or level of quality that cannot be found elsewhere.
Q5. What platform is best for streaming?
StreamYard is a simple live streaming platform that is ideal for public broadcasting to a wide audience via social media platforms like YouTube and is the best-streaming alternative to Twitch.
Final Thoughts
In conclusion, the live-streaming landscape is vast and caters to a diverse range of content creators. From established platforms like Twitch and YouTube Gaming to niche communities like Picarto for creative minds, there’s a platform perfectly suited for your streaming goals.
Whether you’re a hardcore esports enthusiast, a casual gamer looking to share your experiences, or an artist showcasing your creative process, there’s a place for you to connect with a like-minded audience and potentially build a following. Remember, the key to success lies in understanding your target audience, choosing the right platform, and creating engaging content that resonates with your viewers.
For aspiring streamers in the gaming world, Eklipse offers a mobile-friendly solution to elevate your content creation process. Packed with features like automatic highlight generation and seamless social media sharing, Eklipse empowers you to transform your raw gameplay footage into captivating clips ready to ignite your audience’s engagement. Head over to Eklipse’s website today and discover how Eklipse can streamline your workflow and take your gaming content to the next level!