Home Blog Page 147

Create Viral Short Clips from YouTube with Our New YouTube Video Highlights!

0

Want to create viral clips for non-gaming videos? Now, Eklipse Studio has a new feature called YouTube Video Highlights specifically for converting popular YouTube content like podcasts, product reviews, talk shows, educational videos, and motivational content!

Eklipse.gg, known for its advanced AI video editing tool for gaming streamers, is now expanding its innovation. The latest version offers maximum flexibility for streamers and content creators from all niches.

Still confused about what exactly YouTube Video Highlights is and how it can transform your content creation experience? Keep reading to find out!

What is the YouTube Video Highlights Feature?

YouTube Video Highlights is Eklipse’s newest feature for helping content creators make short vertical clips from longer videos automatically using advanced AI. Originally, Eklipse was known for creating highlights from live gaming streams, but this new feature is available for all types of content (non-gaming).

These clips are ideal for sharing on social media platforms like TikTok, YouTube Shorts, and Instagram Reels. Here’s a closer look at YouTube Video Highlights’ key features:

  • Unlimited Video Editing: YouTube Video Highlights has no maximum duration limit, allowing you to edit as much content as you need.
  • Ease of Use: Simply copy and paste the YouTube link of your desired video directly onto the Eklipse website.
  • Customization: Tailor your content with trimming options, template selection, channel stickers, and AI auto-captioning to make your highlights uniquely yours.
  • Vertical Format: Automatically convert your edited content into a vertical format, ideal for TikTok, YouTube Shorts, and Instagram Reels.
  • AI Virality Score: Gain insights into the potential virality of your content.
  • Social Media Integration: Share your highlight clips directly to your favorite social media platforms.
  • Affordability: Eklipse offers more features and video credits cheaper than others.

More on Eklipse Blog>>> How to Edit YouTube Live Stream Videos Automatically Using AI [Beginner’s Guide]

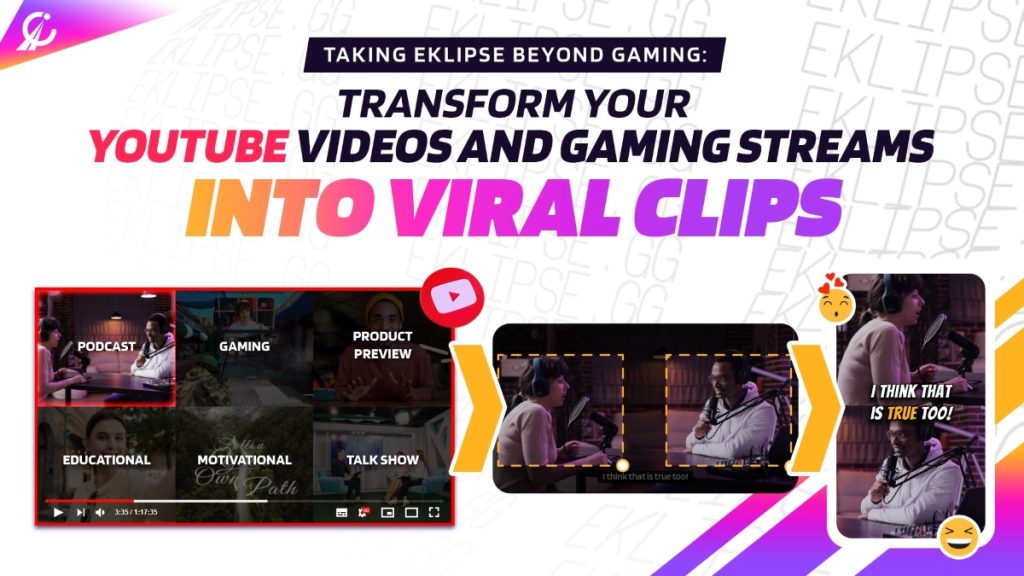
What Kind of Videos Can You Clip with Eklipse YouTube Video Highlights?

Source:Eklipse

YouTube Video Highlights covers a diverse range of content online besides the gaming niche. You can clip video podcasts, motivational content, product reviews, self-improvement guides, commentary videos, or educational material. Its versatility makes it a valuable asset for creators across various niches.

How Can I Try It?

Making YouTube video highlights with Eklipse is a straightforward process. Just copy and paste the YouTube link on the Eklipse website, and let the AI work its magic. Here’s a step-by-step guide:

  1. Log in to your Eklipse account.
  2. Go to the Home page and select the Video tab.
  3. Paste the URL of the chosen YouTube video or upload a video from your local files. The video should be at least 5 minutes long.
  4. Click “Get Clip” and wait a few minutes for our AI to process the video.
  5. Check back after a few minutes to enjoy your viral clips.

Is YouTube Video Highlight Free to Use?

YouTube Video Highlights is available to all users, absolutely free of charge. As a free user, you’ll automatically receive 30 minutes of YT Credits every month. These credits are renewed at no extra cost, giving you a taste of what this innovative tool can offer.

YT Credits are specific credits used for the YouTube Video feature. These credits are separate from the ones used for clipping live gaming stream videos. One credit equals one minute of video.

More on Eklipse Blog >>> How to Clip a YouTube Video into TikTok-Ready Viral Highlights Using AI

How Much is the Eklipse Premium Plan?

If you want to get more accessibility to use Eklipse’s YouTube Video Highlights feature and YT Credits, it’s advised to subscribe to Eklipse’s Premium Plan. Eklipse’s premium plan is priced at $19.99 monthly, but you can also get the annual plan and save up to 37% at $149.99.

As a premium user, you will have the flexibility to purchase additional add-ons as needed. So you do not have to worry about being out of limit. Other amazing benefits for premium users are:

  • Full access to convert clips to vertical Shorts/Reels.
  • Watermark free.
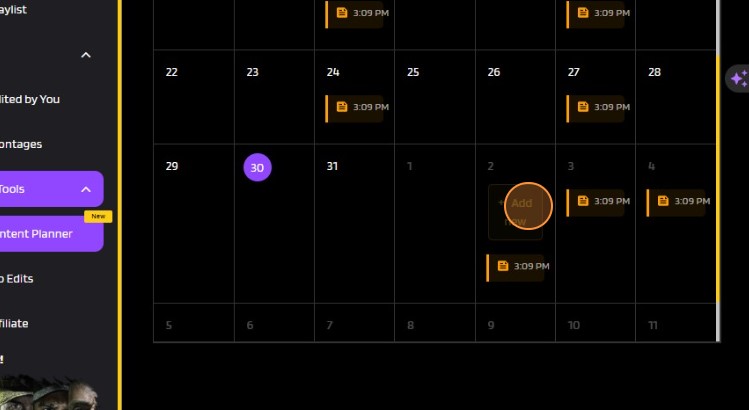
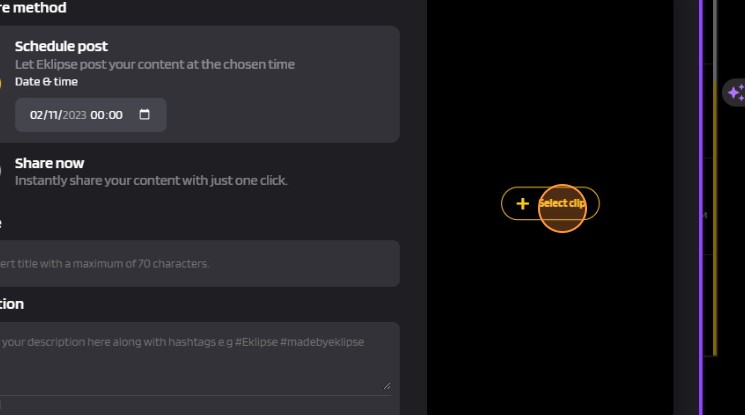
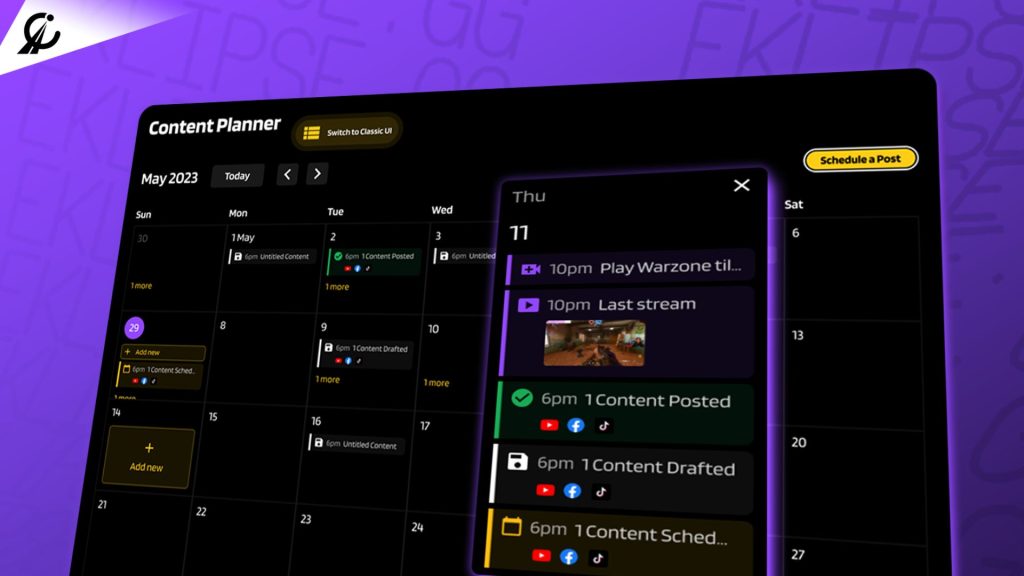
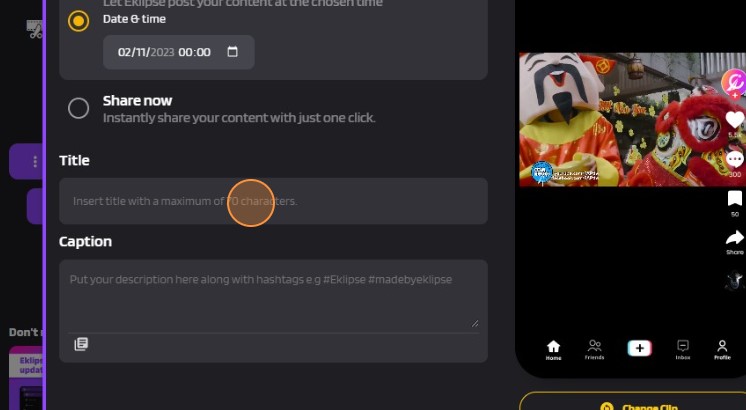
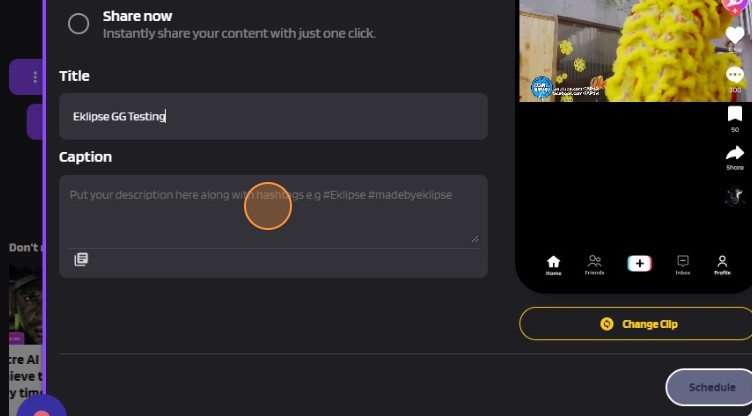
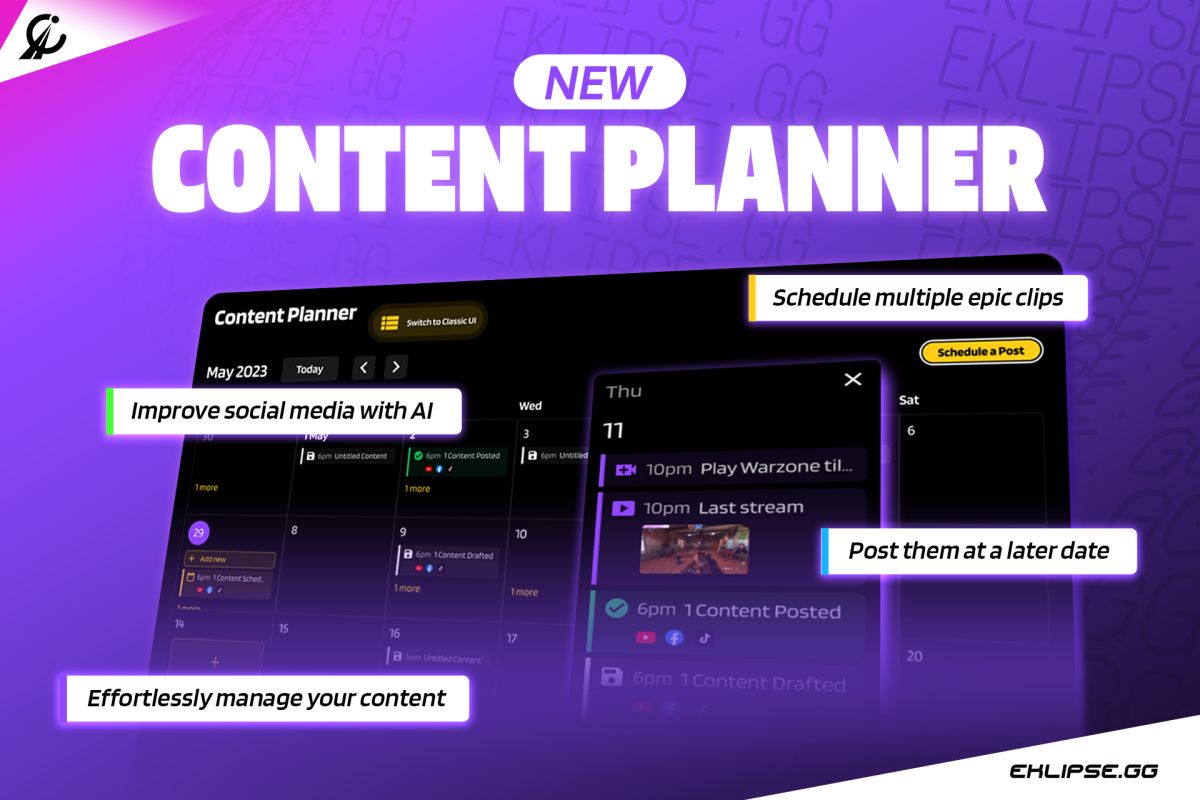
  • Schedule posts with Eklipse’s Content Planner.
  • Process 3 streams of up to 12-hour streams per day (3x faster processing speed than basic).
  • 1080p clip quality.
  • Access to Voice Command feature.
  • 90 days storage.

Final Thoughts

In conclusion, YouTube Video Highlights is a game-changer for content creators across various niches. If you’re as excited as we are about YouTube Video Highlights, there’s no need to wait. Sign up for an Eklipse account and explore this game-changing feature right now!

How to Write Kick Stream Bio: 17 Tips to Stand Out

0

In the fast-paced world of Kick streaming, a captivating bio can be the key to attracting and engaging viewers.

When crafted effectively, your Kick streamer bio can provide essential information about yourself while generating curiosity and encouraging others to follow your channel.

Let’s dive into the art of creating an enticing Kick streamer bio that sets you apart on this exciting new platform.

1. Establishing Your Unique Kick Streamer Identity

To create an attractive Kick streamer bio, highlight uniqueness among other streamers. Share your streaming passion and primary content focus.

If you’re a gamer, mention captivating games and reasons for finding them thrilling. Also, acknowledge preferred partners and team members for collaborations. These insights entice potential viewers.

2. Personalizing Your Kick About Me Section

Your Kick profile’s About Me section reveals aspects of your personal life. Include your name, age, interests, hobbies, and how you spend your free time.

Share favorite places or pets. Connect with streamers to foster a supportive Kick community. Be mindful of sensitive information. Maintain a positive and welcoming persona to attract a thriving community.

3. Showcasing Exclusive Rewards for Subscribers

To expand Kick’s subscriber base, highlight the perks and rewards viewers get by joining your channel. Use this template to outline the special offerings for loyal supporters.

Each Kick streamer has unique perks like rewards, free content, and exclusive events. Clearly communicate these incentives to attract dedicated followers.

4. Acknowledging and Appreciating Kick Donations

Enable Kick donations to improve streaming, increase channel success. Thank all donors, existing or potential. Use Kick for donation alerts and visible tier list in bio to show appreciation. Gratitude fosters audience connections.

More on Eklipse Blog >> How to Setup Kick Alerts for Increased Viewer Engagement

5. Connecting and Engaging through Social Media

If you have active profiles on other social media platforms like YouTube, Twitter, Instagram, or TikTok, leverage them to strengthen your presence on Kick.

By linking these accounts to your Kick channel, viewers can explore more about you and decide if they want to continue supporting your content. Establishing a strong cross-platform presence can help expand your reach and foster deeper connections with your audience.

More on Eklipse Blog >> How to Edit a Kick Clip to TikTok In 5 Steps

6. Stream Schedule for Enhanced Interaction

Image Credit: Nerd or Die YouTube Channel

Organizing and sharing your Kick stream schedule is crucial for fostering viewer engagement. This template simplifies your streaming organization and enables your followers to anticipate your upcoming streams. It’s especially beneficial for viewers residing in different time zones, as they can plan accordingly to join your live sessions. By making your stream schedule easily accessible, you ensure that your community stays informed and engaged.

7. Facilitating Communication through Contact Details

The Contact section of your Kick bio serves as a means for viewers to reach out to you conveniently and securely. Provide an email address that you check regularly, whether it’s your primary address or one dedicated to your Kick account.

This enables open and genuine conversations with your audience and creates opportunities for collaborations and valuable feedback from viewers who appreciate your content.

8. Establishing Clear Kick Streamer Guidelines

Setting clear guidelines for your Kick channel demonstrates your commitment to maintaining a positive and enjoyable environment for your viewers.

Use concise and straightforward language to communicate your rules effectively, avoiding any confusion. By establishing these guidelines, you foster a respectful community that thrives on constructive interactions.

9. Promoting Collaborations and Content

Promoting your Kick channel and the content you offer is essential for success on this platform. Consider including links to collaborations with other creators in your Kick bio to showcase your partnerships and shared work.

Collaborations not only expand your reach but also foster a sense of community among content creators on Kick.

10. Highlighting Your Streaming Setup

Sharing details about your streaming setup is valuable for potential partnerships and understanding your streaming environment.

Alongside basic specifications, viewers might be interested in your video and audio equipment, such as the camera, microphone, and lighting setup you use. By providing these insights, you offer transparency and allow others to appreciate the technical aspects of your Kick streams.

11. Setting Kick Channel Goals

Setting goals for your Kick channel is a powerful way to drive growth and engagement. Clearly state your objectives in your bio, enabling viewers to understand what you aim to achieve.

Sharing updates on your progress inspires both you and your followers to strive for even greater accomplishments. By involving your community in your journey, you create a sense of purpose and encourage active participation.

More on Eklipse Blog >> Kick vs Twitch: Exploring the Differences and Advantages

12. Interactive Chat Commands

Enhance viewer engagement on Kick by incorporating fun and interactive chat commands. These commands can serve as enjoyable features for your audience, encouraging them to stay longer and actively participate in the chat.

By creating a vibrant and interactive community, you foster engagement and camaraderie among your viewers.

13. Sharing Game Recommendations and Server Information

If you want to share your favorite games and servers with your Kick followers, provide a brief explanation of how they can join you. Establish participation rules, mention specific playtimes, and indicate who is eligible to join your games.

Including relevant links to different game servers can be particularly helpful for your followers. By streamlining this information in your bio, you make it easy for viewers to join you and encourage community participation.

14. Rewarding Kick Loyalty Points

Kick loyalty points are an excellent way to reward and engage your audience. Link this section of your bio with the unique content you offer, allowing viewers to understand the benefits of accumulating loyalty points.

Implement point-related commands on your channel and ensure they are visible to everyone. Rewarding your loyal supporters not only boosts engagement but also fosters a sense of appreciation within your Kick community.

15. Building a Kick Community Discord

Creating a Kick community Discord server offers a platform for your viewers to connect and forge new friendships.

This optional template aids in growing your Kick community and reinforcing your brand identity. By setting up a Discord server, you provide a space for your audience to interact with one another and establish lasting relationships based on shared interests.

16. Dedicated Game Channels for Kick Streams

To foster closer connections with your Kick followers, consider adding dedicated game channels to your Kick bio layout. Carefully select games that cater to a wide audience, ensuring they appeal to both male and female viewers.

By providing a variety of game channels, you create opportunities for diverse interactions and engagement within your Kick community.

17. Sharing Your Favorite Music

If music plays a significant role in your Kick brand or you possess musical talent, curate a list of your favorite songs. These can be tracks that you regularly feature during your streams

or original compositions. Additionally, you may choose to share videos showcasing your musical skills, providing your audience with an immersive experience.

Quick Tips for Your Kick Bio

In addition, here are some key things to keep in mind when creating your own Kick bio:

  1. Character Limit: Ensure your bio remains concise, staying within the 300-character limit.
  2. Professional and Persona Balance: Strike a balance between professionalism and personal flair. Your bio should offer a glimpse into your personality while aligning with your channel’s theme.
  3. Embrace Hobbies: Don’t hesitate to share captivating hobbies that contribute to your uniqueness.
  4. Incorporate Pronouns: Include your preferred pronouns, fostering an inclusive environment.
  5. Humor Infusion: Infuse a touch of humor to captivate readers, making your bio more engaging.
  6. Highlight Uniqueness: Convey what sets you apart within your niche, showcasing your distinctiveness as a streamer.
  7. Social Media Integration: Remember to link your social media profiles, conveniently displayed to the right of your bio. This interconnection enhances your online presence.

Conclusion

Crafting a compelling Kick streamer bio requires creativity, clarity, and a thorough understanding of your audience. By implementing these guidelines and incorporating relevant keywords, you can create an engaging bio that captivates viewers, fosters connections, and sets you apart on the exciting new Kick streaming platform.

Want to grow your Kick audience and become a social media sensation? Eklipse is the AI-powered tool you need!

With Eklipse, you can seamlessly transform your Kick LIVE moments into captivating TikTok/Shorts/Reels content with just a single click. Sign up for free today here and watch your audience thrive!


Maximize your Black Ops 6 rewards—Create highlights from your best gameplay with with Eklipse

Eklipse help streamer improve their social media presence with AI highlights that clip your Twitch / Kick streams automatically & converts them to TikTok / Reels / Shorts


How to Use TikTok and YouTube Shorts to Grow on Twitch

0
how to use TikTok and youtube shorts to grow on twitch
Source: TwitstArticle

Beginning a journey as a Twitch streamer can be really tough. It requires not giving up, being focused, and having a smart plan. 

Luckily, we live in a modern world where you can spread the word across different platforms. This means you can share your stuff on TikTok or YouTube Shorts. But, you must understand how to use TikTok and YouTube Shorts to grow your Twitch audience.

No need to worry, though. This article has included all the information you need to make TikTok and YouTube Shorts work for you. So, let’s dive right in without any more delay.

How to Use TikTok Grow on Twitch

TikTok are perfect to showcase incredible short clips. With various editing tools, you can create amazing videos to enjoy. Now, we’re going to break down why you should use these platforms to be a successful streamer.

Why You Should Post Your Twitch Clips to TikTok? 

How to Use TikTok and YouTube Shorts to Grow on Twitch
Source: Search Engine Journal

As we all know, TikTok has turned out to be a king of sharing platforms. In early 2020, it surpassed 800 million monthly active users and thus, this makes this great for driving traffic to your streams and promoting your brand. Other than that, TikTok is also perfect in terms of discoverability.

What’s better is TikTok has a wide variety of topics. It’s not limited only to dancing content, photography, or a short vlog, but it also shows comedy, even video games and streaming. No wonder many Twitch or YouTube streamers determine TikTok as their secondary video platform to share the Twitch stream clips and get connected with their audiences.

How to Use TikTok to Promote Your Twitch Channel

If you want to create cool stream highlights, you can try Eklipse, an AI highlights tool that will generate clips from your stream in a couple of clicks.

Here’s how you can give Eklipse AI a try to create clips from your stream:

  1. Create an Account: Begin by creating your Eklipse account, you can do it easily by visiting Eklipse.gg and hit the sign up button.
  2. Link to Twitch: Connect your newly created account to your Twitch channel.
  3. Let AI Generate Clips: Simply continue your regular streaming, and Eklipse will automatically generate clips from your stream.
  4. Tweak for TikTok: You can easily modify the generated clips to fit TikTok using provided templates.
  5. Share Your Content: Eklipse offers a direct sharing feature, allowing you to instantly share your edited content on TikTok once you’re done.

This way, you can seamlessly use Eklipse AI to create, edit, and share clips from your streams with ease.

To make your TikTok be seen, make sure that you post your content at the best time, and put the best hashtags in the description box. It can help your content to be included in recommending videos or For Your Page (FYP). In addition, post your Twitch link onto your TikTok bio to lead viewers to your Twitch channel.

To make your TikTok be seen, make sure that you post your content at the best time, and put the best hashtags in the description box. It can help your content to be included in recommending videos or For Your Page (FYP). In addition, post your Twitch link onto your TikTok bio to lead viewers to your Twitch channel.

More on Eklipse Blog >> How to Create TikTok with AI Generator: Streamer Must-Know

Why YouTube Shorts and How to Use It to Promote Twitch Channel?

Source: Century Media360

Although YouTube Shorts is younger than TikTok, this platform is also great for posting quick and consumable content. If you think TikTok is a bit more competitive (at least to appear in FYP), you can try YouTube Shorts since it can obtain thousands of views in a short time.

As a relatively new feature, YouTube always promotes Shorts to attract more users. As a result, YouTube will promote your Short clips to a vast audience, allowing you to easily be seen.

A creator has stated that she can obtain more than 1,000 views for her Shorts in less than a day. That was amazing! With only a 58-second or less vertical video and put a #short hashtag, YouTube will notice your short.

To use the YouTube shorts, you can directly shoot a short video from the YouTube app on your device, or create a clip from Twitch streams using Eklipse, just like you do to produce a TikTok clip. Let yourself establish and gain views as many as you can.

Tips and Tricks to Promote Your Stream on TikTok

Still not sure how to promote your stream on TikTok? You can start with these simple tips:

  • Create engaging content: Make your short videos interesting and engaging; ensure you grab viewers’ attention in the first few seconds.
  • Avoid obvious advertising: Hide ads cleverly, presenting them as an unassuming gift. You can also entertain viewers before introducing the ads in a friendly manner.
  • Tell viewers what you do: Highlight your unique selling points to stand out from other streamers. Make sure the audience know why it’s worth to tune in your content.
  • Tease future projects: Draw attention to upcoming projects in your stream. Post about special occasions, game releases, giveaways, or 24-hour streams.
  • Show highlight clips: Share highlights from past streams, or the best moment during your livestream, to entertain viewers.
  • Post at the right times: Schedule your posts strategically for maximum visibility. You can utilize TikTok LIVE and analytic features to identify your followers’ active times.
  • Maintain visual consistency: Ensure your TikTok channel visually aligns with your streaming brand. Try to use logos, graphics, and designs from your Twitch or YouTube channel.

By following these tips, you can effectively promote your stream on TikTok and enhance your online presence. Try them out and watch your success unfold!

Conclusion

That’s how to use TikTok and YouTube Shorts to grow on Twitch. Since both platforms implement similar concepts, you don’t need more time to learn about each of them.

So, which platform is better to promote your Twitch channel then? The answer is both. The more you share your content on social media, the greater the chances of it being seen. Why don’t you give it a shot now?

You can also rely on Eklipse, the AI-powered tool for effortlessly turning your Twitch LIVE into TikTok/Short/Reels content with just one click! This free application not only detects, but also automatically creates short videos of your best live moments.

Still not convinced? Try Eklipse for free here now and watch your online presence soar!


Maximize your Black Ops 6 rewards—Create highlights from your best gameplay with with Eklipse

Eklipse help streamer improve their social media presence with AI highlights that clip your Twitch / Kick streams automatically & converts them to TikTok / Reels / Shorts


How to Fix Lagging in OBS: Tips for Smoother Streaming

0

Are you frustrated with lagging issues while streaming or recording with OBS (Open Broadcaster Software)?

Lagging can disrupt the smoothness of your playback, affect the viewing experience for your audience, and even lead to dropped frames or connection problems. It can be caused by various factors, from hardware limitations to software settings. 

In this article, we’ll guide you through practical solutions to troubleshoot and overcome lagging issues. Read on to learn how to optimize your setup and ensure a smooth streaming experience in OBS.

1. Fix Lagging in OBS by Checking Your Hardware

how to fix lagging OBS for streamers
Source: Eklipse Blog – Streaming Hardware

First things first, let’s not forget the importance of checking your streaming hardware when fixing the lagging in OBS. Sometimes, lagging issues in OBS can be attributed to problems with your hardware components, such as your Ethernet connection, ports, or router.

Take a moment to inspect these elements and ensure they are in good condition. If you notice any loose or damaged parts, it’s crucial to repair or replace them to improve your OBS performance.

2. Check the Security and Firewall of Your Device

tips to fix lagging OBS streaming
Source: Eklipse Blog – Security and Firewall

If you’re still facing OBS lagging and streaming issues, it’s worth investigating if any security software is causing interference with proper movie playback. Temporarily uninstalling your security software can help identify if it’s the culprit. 

Additionally, check your system firewall settings to ensure they are not contributing to OBS lags. Remember to restore the original settings once the troubleshooting process is complete. Meanwhile, to adjust your firewall settings on Windows, you can follow these steps:

Step 1: Windows Settings

Go to the Windows icon (Start) located at the bottom left of the desktop (the flag icon). Click on the gear icon for the Settings menu.

Step 2: Windows Security

Hover over “Update & Security” in the Settings menu and select “Windows Security.”

Step 3: Firewall & Network Protection

Within Windows Security, navigate to “Firewall & network protection.”

Step 4: Microsoft Defender Firewall

Locate “Microsoft Defender Firewall” and turn off the firewall.

More on Eklipse Blog >> How to Update OBS on Windows and Mac: Get The Best Live Streaming

3. Use a Stable Network

fix lagging in OBS streaming with stable network
Source: Eklipse Blog – WiFi

To avoid visual lag or freezing issues in OBS, you need a fast internet connection. Dropped frames are an indicator of an unreliable connection. It’s essential to check your connection speed using a speed test program.

If you’re unable to resolve the connection issue on your own, it’s advisable to contact your internet service provider for assistance in troubleshooting speed or network problems.

4. Use a Wired Connection

maximizing OBS streaming with wired connections
Source: Eklipse Blog – Wired Connections

While wireless connections offer convenience, they may not always be reliable or stable, particularly for streaming purposes.

If you’re experiencing trouble with your wireless internet connection, consider connecting your computer directly to the router using an Ethernet cable.

This wired connection ensures a consistent network connection, reducing the chances of lag or disruptions during your streams.

5. Change OBS Settings to Fix Lag

OBS encoder settings to avoid lagging stream
Source: Eklipse Blog – Change OBS setting to avoid lag

Customizing OBS settings according to your device’s performance can significantly fix lagging in OBS. Here are some straightforward steps to help you optimize OBS settings:

Step 1: Encoding Settings

You can change your encoding settings for better streaming performance on OBS. If you have NVIDIA graphic cards, you might wanna try the NVENC encoder rather than the default x264.

To change your encoder go to “Settings > Encoding.” You can find the “Settings” option in the sidebar.

Step 2: Adjust Max Bitrate

Another way to reduce video lag on your OBS is by adjusting your bitrate. To change it, go to encoding settings, modify the maximum bitrate to 500,000 (or 800,000 if using 720p) in kilobits per second (kb/s)

Step 3: Modify Base Resolution

According to your specific needs, adjust the base resolution to either 1080p or 720p. If you’re unsure about the exact size, you can refer to the Resolution Downscale section for additional guidance.

More on Eklipse Blog >> How To Mute Discord On OBS Studio: 3 Methods to Try

Final Thoughts

In conclusion, optimizing your OBS settings and addressing lagging issues can greatly enhance your streaming experience. Remember, a seamless streaming experience benefits both you as a streamer and your audience

Now you’re done fixing your OBS, it’s time to take your streaming journey to the next level with Eklispe, an AI highlight generator that can effortlessly clip and convert your live-stream content into engaging TikTok videos. 

Grow your presence on social media effortlessly! Visit Eklipse.gg to learn more and sign up now to start growing your channel.

How to Add Twitch Link to TikTok: Maximize Your Impact

0
how to add twitch link to tiktok
Source: Eklipse Blog - how to add twitch link to tiktok

Are you a Twitch streamer looking to expand your audience on TikTok? You can achieve this with a simple hack—adding a Twitch link to TikTok.

While Instagram and YouTube can be directly linked to TikTok, adding a Twitch link requires a few extra steps. But don’t worry; it’s actually quite simple! In this article, we will guide you on how to add a Twitch link to TikTok, whether it’s in your bio or video caption. Let’s get started!

How to Link Your Twitch to TikTok Bio

how to add twitch link to tiktok
Source: Eklipse Blog – how to add twitch link to tiktok

To begin, let’s explore how you can add your Twitch link to your TikTok bio. Here are the steps:

  1. Open the TikTok app and go to your profile page.
  2. Tap on the “Edit Profile” button.
  3. Instead of selecting the “Website” option, choose the “Bio” option.
  4. In the bio section, you can write a description about yourself and include your Twitch link.
  5. Save your changes.

Now, when users visit your TikTok profile, they will be able to see and access your Twitch link from your bio.

More on Eklipse Blog >> Best Twitch Clip Editor for TikTok in 2023

How to Add Link to TikTok Video Caption

If you prefer to have your Twitch link displayed directly on your TikTok videos, here’s how you can do it:

  1. Create or select a video that you want to upload on TikTok.
  2. Before posting the video, tap on the text box where you usually add captions.
  3. Write a caption for your video and include your Twitch link within the text.
  4. Post the video.

By following these steps, viewers watching your TikTok videos will be able to see and potentially visit your Twitch channel by clicking on the provided link in the caption.

Why Can’t I Add a Link to My Tiktok Bio Or Video Caption?

It’s important to note that there are certain requirements set by TikTok before you can add clickable links in your bio or video captions. Here are some of the requirements you need to fulfill:

  1. Your TikTok account must be a Business account.
  2. You need to have at least 1,000 followers on TikTok.

If you don’t meet these requirements, don’t worry! There’s still a way to add your Twitch link to your TikTok bio, although it won’t be clickable. Users can still copy and paste the link into their browser to access your Twitch channel.

More on Eklipse Blog >> 6 TikTok Trends to Boost Your Social Video Content in 2023

How to Alternatively Add Unclickable Link

If you don’t have a Business account or enough followers, you can still include your Twitch link in your TikTok bio. However, keep in mind that it will be unclickable. Here’s what you can do:

  1. Go to your profile page on TikTok.
  2. Tap on the “Edit Profile” button.
  3. Instead of selecting the “Website” option, choose the “Bio” option.
  4. Write a description about yourself in the bio section and include your Twitch link.
  5. Save your changes.

Even though the link won’t be clickable, other users can still manually copy and paste it into their browser to visit your Twitch channel.

Conclusion

In conclusion, linking your Twitch account to TikTok is a great way to increase engagement and attract more viewers and subscribers to your Twitch channel. By following the steps outlined in this guide, you’ll be able to seamlessly connect these platforms and reach a wider audience for your live streams and gaming content.

But if you want to grow your TikTok audience faster, then go try Eklipse.gg!

Our top-notch AI editor is tailor-made for streamers and content creators. Eklipse effortlessly transforms your live streaming highlights into captivating TikTok videos in minutes.

Curious but unsure? Take Eklipse for a spin—try it for free here and witness the magic of AI editing today.


Maximize your Black Ops 6 rewards—Create highlights from your best gameplay with with Eklipse

Eklipse help streamer improve their social media presence with AI highlights that clip your Twitch / Kick streams automatically & converts them to TikTok / Reels / Shorts

How to Update OBS on Windows and Mac: Get The Best Live Streaming

0
how to update OBS
Source: Eklipse Blog - how to update OBS

Are you looking for some tips on how to update OBS on Windows and Mac? Congrats, you’re in the right place. In this article, we guide you on updating OBS (Open Broadcaster Software), a popular game recording software for content creators and gaming streamers.

Keeping OBS updated is crucial for accessing new features, enhancing performance, and avoiding bugs. Follow our step-by-step instructions for updating OBS on both Windows and Mac devices to stay current with the latest advancements in live streaming and video editing. Let’s go!

Updating OBS on Windows

how to update OBS
Source: Eklipse Blog – how to update OBS

1. Check for Updates within the Application

  • Open OBS Studio on your Windows device.
  • Go to the Help menu and select “Check For Updates.”
  • If an update is available, a small download window will appear.
  • Click the “Update Now” button to install the latest version of OBS.

2. Manual Update from Official Website

  • Visit the official OBS Studio website obsproject.com.
  • Select your operating system as Windows.
  • Download the OBS installer for Windows.
  • Run the installer and follow the on-screen instructions.
  • The latest version of OBS will replace the older version without affecting your files or settings.

3. Enable Automatic Checks for Updates

  • Open OBS Studio on your Windows device.
  • Go to Settings in the top menu bar.
  • Click on General in the left sidebar.
  • Check the “Automatically check for updates on startup” option.
  • This feature ensures OBS checks for updates every time you launch it.

More on Eklipse Blog >> Best OBS Settings for Streaming in Low-end PC

Updating OBS on Mac

1. Check for Updates within the Application

  • Launch OBS Studio on your Mac device.
  • Navigate to the top menu bar and click on “OBS Studio.”
  • Select “Check For Updates” from the dropdown menu.
  • If an update is available, a small download window will appear.
  • Click the “Update Now” button to install the latest version of OBS.

2. Manual Update from Official Website

  • Visit the official OBS Studio website obsproject.com.
  • Choose your operating system as Mac.
  • Download the OBS installer for Mac.
  • Run the installer and follow the on-screen instructions.
  • The latest version of OBS will replace the older version without affecting your files or settings.

3. Enable Automatic Checks for Updates

  • Launch OBS Studio on your Mac device.
  • Go to Preferences in the top menu bar.
  • Click on General in the toolbar.
  • Tick the “Automatically check for updates on startup” checkbox.
  • This feature ensures OBS checks for updates every time you open it.

More on Eklipse Blog >> How to Update Streamlabs OBS Fast and Easy [Update 2023]

FAQ about Updating OBS

1. Why should I update OBS regularly?

Updating OBS ensures access to new features, bug fixes, and performance improvements, enhancing your live streaming and video editing experience.

2. Can I update OBS automatically?

Yes, you can enable automatic checks for updates in OBS settings, allowing it to check for updates every time you launch the application.

3. What if I don’t see the “Check For Updates” option?

If you can’t find the “Check For Updates” option within OBS, manually update it by downloading the latest version from the official website based on your operating system.

Conclusion

Follow these simple steps to easily update OBS (Open Broadcaster Software) on both Windows and Mac devices. Keeping your software up-to-date ensures optimal performance and access to new features for live streaming and video editing.

But why stop there? Elevate your live content to new heights with Eklipse. While OBS excels at broadcasting, Eklipse steps in to transform your exceptional live moments into captivating clips for TikTok, Shorts, and Reels content.

Try Eklipse for free here or go big with all the best features for just $8.33 a month. Share your best stuff, grab attention worldwide!


Maximize your Black Ops 6 rewards—Create highlights from your best gameplay with with Eklipse

Eklipse help streamer improve their social media presence with AI highlights that clip your Twitch / Kick streams automatically & converts them to TikTok / Reels / Shorts

How to Mute Discord on OBS: Distraction-Free Streaming Tips!

0
How to Mute Someone on Discord
Source: Yoken's Domain YouTube

Being a streamer, it’s super important to know how to mute Discord on OBS. This helps keep your streaming experience smooth and interruption-free. Sometimes, all those Discord notifications and background noises can be a bit too much, making it distracting for both you and your viewers.

No worries, though! In this article, we’ll show you step by step how to mute Discord on OBS, making your streams better and more enjoyable for everyone. Keep on streaming without any hiccups!

How to Add Discord Audio on OBS Studio?

How to Mute Someone on Discord
Source: Yoken’s Domain YouTube

If you’re new to OBS and want to integrate it with Discord, follow these steps:

  1. Open OBS Studio.
  2. Go to the “Sources” panel and click the “+” button.
  3. Select “Audio Output Capture” from the dropdown menu.
  4. Name the audio source (e.g., “Discord Audio”) and click “OK”.
  5. In the “Properties” window, choose your desired audio device (e.g., speakers or headphones) from the dropdown menu.
  6. Click “OK” to save the settings.

Now, you have successfully added Discord audio to OBS Studio.

More on Eklipse Blog >> Discord Screen Share No Audio: Troubleshooting and Fixes

How to Mute Discord on OBS?

There are two methods you can use to mute Discord on OBS: through Discord Streamer Mode or through the OBS Studio Audio Mixer.

1. Discord Streamer Mode

  • Open your Discord application.
  • Click on the gear icon in the bottom left corner of your screen to open User Settings.
  • Select “Streamer Mode” from the left sidebar.
  • Toggle on the “Enable Streamer Mode” option.

By default, Discord will automatically mute all notifications and sounds while OBS is running. If you want to customize the settings, click on “Streamer Mode” and make the necessary adjustments.

2. OBS Studio Audio Mixer

  • Open OBS Studio.
  • Locate the Audio Mixer panel in the bottom center of the screen.
  • Find the audio source for Discord (e.g., “Discord Audio”) and click on the speaker icon next to it to mute or unmute Discord’s audio.

More on Eklipse Blog >> 3 Easy Ways to Record Audio on Discord for PC

Muting Discord Notifications

If you only want to mute specific sounds or notifications from Discord while using OBS, follow these steps:

  1. Open your Discord application.
  2. Click on the gear icon in the bottom left corner of your screen to open User Settings.
  3. Select “Notifications” from the left sidebar.
  4. Scroll down to find the specific sound or notification you want to mute.
  5. Toggle off the switch next to that sound/notification.

FAQs

1. How to mute Discord on Streamlabs OBS?

Muting Discord on Streamlabs OBS can be done by following these steps:

  • Open Streamlabs OBS.
  • Go to “User Settings” and select “Streamer Mode”.
  • Toggle on “Disable Sounds” to mute Discord.

2. Should I restart the stream to mute Discord audio on OBS?

No, restarting the stream is not necessary. You can simply enable streamer mode on Discord without any interruption.

3. How do I completely remove the Discord audio source?

To remove the Discord audio source from OBS Studio:

  • Go to the “Sources” panel in OBS Studio.
  • Select the Discord audio source (e.g., “Discord Audio”).
  • Click on either ‘Delete’ or ‘Remove’ (right-click) and confirm your action.

Conclusion

In conclusion, muting Discord on OBS is crucial for a seamless streaming experience. By following the steps outlined in this guide, you can eliminate background noise and distractions, allowing your viewers to focus on your content. Experiment with different settings to find the configuration that works best for you.

Besides optimizing your audio, it’s also important to capture your best streaming moment on Discord. Now, it’s the perfect time to try Eklipse.gg for editing the best highlight of your live session and share it to the world!

Eklipse is the most powerful clipping tool with AI designed for streamers and content creators. Our seamless editing studio offers AI animated auto-captions, stickers, and emojis, allowing you to personalize your gaming content effortlessly.

Keen to discover more? Sign up for free on Eklipse today by clicking here. Don’t let this opportunity slip away—supercharge your streaming channel effortlessly!


Maximize your Black Ops 6 rewards—Create highlights from your best gameplay with with Eklipse

Eklipse help streamer improve their social media presence with AI highlights that clip your Twitch / Kick streams automatically & converts them to TikTok / Reels / Shorts

Is It Worth Streaming on Twitch Today?

0
is it worth streaming on twitch
Source: Eklipse Blog - is it worth streaming on twitch?

Is it worth streaming on Twitch today? With its vibrant community and potential for success, it’s no wonder that many individuals are considering starting their own Twitch streams. However, as the platform becomes increasingly saturated, you might be wondering if starting a Twitch stream in 2023 is still worth it.

If you have the same question, then this article is the right answer for you. Here, we will address whether Twitch streaming is still worth it and provide you with valuable insights to help you make an informed decision. Let’s go!

is it worth streaming on twitch
Source: Eklipse Blog – is it worth streaming on twitch?

The Benefits of Streaming on Twitch

  • Engage with a passionate community: Twitch boasts a large and dedicated user base that actively interacts with streamers.
  • Monetization opportunities: Through subscriptions, donations, and sponsorships, successful streamers can generate income from their content.
  • Skill improvement: Streaming your gameplay allows you to receive feedback from viewers, helping you refine your skills.
  • Networking opportunities: Connect with fellow gamers, industry professionals, and potential collaborators.

More on Eklipse Blog >> Twitch Hype Train: Everything You Need to Know

Building Your Twitch Stream

1. Equipment and Setup

  • High-quality microphone: Clear audio is crucial for engaging with viewers.
  • Webcam: Adding a visual component enhances viewer connection.
  • Stable internet connection: A reliable internet connection ensures smooth streaming without interruptions.

2. Stream Overlay and Branding

  • Create visually appealing overlays that reflect your personal brand.
  • Use eye-catching graphics to enhance viewer experience.

3. Consistent Schedule

  • Establishing a consistent streaming schedule helps build an audience and increases viewer retention.

Leveraging Twitch Features

1. Chat Interaction

  • Engage with your viewers through real-time chat interactions.
  • Respond to comments, questions, and suggestions to foster a sense of community.

2. Subscriber Benefits

  • Offer exclusive perks to subscribers, such as emotes, badges, and access to subscriber-only content.

3. Raids and Hosts

  • Collaborate with other streamers by raiding their channels or hosting their streams.

More on Eklipse Blog >> Top 5 Twitch Alternatives: Platforms, Sites, and Apps

Strengths of Twitch Streaming

  • Established platform: Twitch is the leading live streaming platform with a large user base.
  • Gaming-focused community: Twitch’s core audience consists of gamers, making it an ideal platform for gaming content creators.
  • Discoverability options: Various features like tags, categories, and recommended streams help users discover new content.

Weaknesses of Twitch Streaming

  • Oversaturation: With millions of streamers on the platform, standing out can be challenging.
  • Limited non-gaming content: While Twitch primarily focuses on gaming, other genres may have limited reach.
  • Algorithmic challenges: The discovery algorithm can sometimes favor established streamers over newcomers.

Conclusion

In conclusion, starting a Twitch stream in 2023 can still be worth it if you approach it strategically. Remember to invest in quality equipment and establish a consistent schedule to attract and retain viewers.

You can also boost your Twitch channel easily by generating your best live video clip with Eklipse. Our ultimate AI-video clippers is designed for streamers to turn your Twitch live into popular TikTok/Shorts/Reels video. Everything is free and automatic!

Don’t miss out—sign up Eklipse now by clicking here and watch your content go viral!


Maximize your Black Ops 6 rewards—Create highlights from your best gameplay with with Eklipse

Eklipse help streamer improve their social media presence with AI highlights that clip your Twitch / Kick streams automatically & converts them to TikTok / Reels / Shorts

Top 5 Livestreaming Software for Kick Streamer

0

Kick is a growing livestreaming platform with many creators. If you want to join Kick creator program, you’ll need good livestreaming software. However, many streamers are still unsure about which livestreaming application is right for them.

Don’t worry. In this post, we’ll explore the top livestreaming software for Kick streamer to help you start your career. Let’s dive in!

1. OBS Studio

recommendation Livestreaming Software for Kick Streamer

OBS Studio is a renowned free and open-source software widely used by streamers.

It offers an intuitive interface and a range of features, including overlays, transitions, and effects. Customize your livestream with OBS Studio to captivate your audience.

Learn more >> How to Stream on Kick Using OBS Studio

2. Streamlabs OBS

Best Livestreaming Software for Kick Streamer

Streamlabs OBS is a customized version of OBS Studio designed for streamers.

It provides unique features like an integrated chatbot and an online store for overlays and resources. Streamlabs OBS is an excellent choice for streamers seeking additional functionality.

3. XSplit Broadcaster

Livestreaming Software for Kick Streamer

XSplit Broadcaster is a popular livestreaming software available in free and paid versions.

Its user-friendly interface allows quick setup, and it supports simultaneous streaming to multiple platforms. Consider XSplit Broadcaster for simplicity and multi-platform streaming capabilities.

4. Restream Studio

Restream Studio is a cloud-based livestreaming software that enables concurrent streaming to multiple platforms, including Kick, Twitch, YouTube, and Facebook. Reach a wider audience by expanding your livestreaming presence with Restream Studio.

5. vMix

Vmix

vMix is a professional-grade livestreaming software trusted by broadcasters and businesses.

It offers real-time switching between sources, advanced graphics and effects, and multi-platform streaming capabilities. Elevate your streams with vMix’s powerful live streaming features.

Bonus: Eklipse

Eklipse - Livestreaming Software for Kick Streamer
Source: Eklipse.gg

Well … Eklipse might not a livestreaming software for broadcasting gameplay on Kick, but it’s an essential tool for aspiring Kick streamers.

Eklipse is an AI-powered tool that automates the generation of highlights from your Kick, Twitch, YouTube, and Facebook streams and videos. It captures captivating moments, from thrilling gaming experiences to hilarious in-game moments.

With this AI tools, you can easily grow your Kick channel by sharing your stream highlights on TikTok, Reels, or YouTube shorts and across various platforms.

More on Eklipse Blog >> How to Clip Kick Stream Automatically: Create Content in Seconds!

How to Go Live on Kick

Are you ready to go live on Kick? Here’s the complete steps to start your live streaming on Kick:

  1. Obtain your Stream Key + Server URL in the ‘Settings’ > ‘Stream Key’ menu.
  2. Integrate your Kick Stream Key with OBS.
  3. Optimize your output settings by checking your internet connection’s maximum upload speed and ensuring your bitrate settings align with your upload speed.
  4. Open ‘Edit Stream Info’ to edit your live title and category.
  5. Go live by pressing the ‘Start Streaming’ button in the OBS software.
  6. End your stream gracefully by hitting the ‘Stop Streaming’ button.

More on Eklipse Blog >> How to Become Kick Streamer: A Step-by-Step Guide

Conclusion

In conclusion, we have explored all the top livestreaming software for Kick streamer. Whether you’re a beginner or experienced streamer, these software choices enhance your streaming journey on Kick.

Choose the software that suits your needs and preferences, and embark on an exciting streaming adventure on the Kick platform.


Maximize your Black Ops 6 rewards—Create highlights from your best gameplay with with Eklipse

Eklipse help streamer improve their social media presence with AI highlights that clip your Twitch / Kick streams automatically & converts them to TikTok / Reels / Shorts

6+ Best Valorant Recording Software for Live Video Editing

0
valorant recording software
Source: Eklipse Blog - valorant recording software

Are you a passionate gamer eager to share your Valorant victories with the world? Whether you’re a seasoned content creator or just starting your streaming journey, choosing the right Valorant recording software is crucial for delivering top-notch gameplay footage.

In this comprehensive guide, we’ll explore the best Valorant clipping software options, each offering unique features to enhance your streaming experience. Let’s dive in and level up your content creation game!

valorant recording software
Source: Eklipse Blog – valorant recording software

1. OBS Studio

OBS Studio is a popular valorant recording software that offers a range of features for live streaming and video editing. It is free and open-source, making it accessible to content creators of all levels. With OBS Studio, you can easily record your gameplay sessions and cut/clip specific segments without the need for additional video editing software.

Key Features:

  • Free and open-source
  • Easy to use
  • Supports various file formats
  • Allows cutting/clipping of recordings
  • Offers real-time audio/video capturing

2. Nvidia ShadowPlay

Nvidia ShadowPlay is another popular choice for valorant recording software, especially for gamers with Nvidia graphics cards. It provides high-quality recording with minimal impact on system performance. ShadowPlay also offers the ability to capture highlights automatically or manually, making it easy to create engaging gameplay clips.
Key Features:

  • Specially optimized for Nvidia graphics cards
  • High-quality recording with low system impact
  • Automatic or manual highlight capture
  • User-friendly interface
  • Easily share recordings on social media platforms

More on Eklipse Blog >> How to Post Valorant Clips on TikTok

3. Bandicam

Bandicam is a versatile valorant recording software that offers both screen recording and game recording capabilities. It allows users to capture high-quality videos with customizable settings such as resolution, frame rate, and codec. Bandicam also supports real-time drawing during recording, making it ideal for tutorial or instructional videos.

Key Features:

  • Screen recording and game recording
  • Customizable video settings
  • Real-time drawing during recording
  • Supports hardware acceleration
  • Allows adding watermarks and logos

4. XSplit Gamecaster

XSplit Gamecaster is a feature-rich valorant recording software designed specifically for gamers. It offers intuitive controls and a user-friendly interface, making it easy to capture and stream gameplay. With XSplit Gamecaster, you can easily create professional-looking streams with overlays, transitions, and other customizable elements.

Key Features:

  • User-friendly interface
  • Customizable overlays and transitions
  • Built-in video editor for quick edits
  • Supports streaming to popular platforms like Twitch and YouTube
  • Integrates with social media for easy sharing

5. Action!

Action! is a powerful valorant recording software that offers high-quality video capturing with minimal system impact. It supports various file formats and allows users to add live commentary or webcam footage while recording. Action! also includes a built-in video editor with features like slow motion, green screen effects, and time-lapse.

Key Features:

  • High-quality video capturing with low system impact
  • Add live commentary or webcam footage during recording
  • Built-in video editor with advanced editing features
  • Social media integration for easy sharing
  • Supports streaming to popular platforms

6. Fraps

Fraps is a classic valorant recording software known for its simplicity and reliability. It offers real-time video capturing with high frame rates, making it ideal for recording fast-paced gameplay. Fraps also provides detailed statistics about the performance of your system while recording.

Key Features:

  • Real-time video capturing with high frame rates
  • Detailed system performance statistics
  • User-friendly interface
  • Supports various file formats
  • Easily share recordings on social media platforms

More on Eklipse Blog >> Top 5 Entertaining Valorant Streamers to Follow in 2023

Bonus: Eklipse – The Best Gaming Clips!

What if recording is not enough? Some people want more than just a mere record of their gaming experience. Many streamers still tend to miss their best playing moments because they are too caught up in the game.

Well, in that case, Eklipse is the perfect solution for you! Eklipse is an AI gaming highlights clipper that automatically generates highlights from your streams, so you can focus on streaming and let Eklipse take care of the rest.

With Eklipse, you can:

  • Effortlessly convert and share your gaming clips to TikTok, Reels, and YouTube Shorts
  • Edit your clips to perfection with Eklipse’s powerful tools
  • Share your clips directly to your social media platforms with just a few clicks

Sign up for a free trial of Eklipse today and see how easy it is to create amazing gaming highlights for TikTok, Reels, and YouTube Shorts!

Strengths and Weaknesses of Valorant Recording Software:

Strengths:

  • All of the listed valorant recording software provide high-quality recordings.
  • Most options are user-friendly and offer intuitive interfaces.
  • The majority of the software supports various file formats and allows cutting/clipping of recordings.
  • Many valorant recording software options have additional features like live commentary, webcam footage, or built-in video editors.
  • Social media integration makes it easy to share recordings with others.

Weaknesses:

  • Some valorant recording software may have limited functionality in their free versions, requiring users to purchase premium versions for access to all features.
  • The system requirements of certain software may be demanding, potentially impacting overall performance while using them.
  • In some cases, there may be compatibility issues with specific hardware or software configurations.

Conclusion

Congratulations! You’ve now explored the top Valorant recording software options to elevate your streaming and video editing game. Remember, the right recording software can make all the difference in showcasing your gaming prowess to the world. So, pick your favorite, hit that record button, and let your Valorant adventures unfold for your audience to enjoy!

Also, don’t forget to level up your game with Eklipse! Click here to sign up for a free trial of Eklipse and boost your gaming session like no other.


Maximize your Black Ops 6 rewards—Create highlights from your best gameplay with with Eklipse

Eklipse help streamer improve their social media presence with AI highlights that clip your Twitch / Kick streams automatically & converts them to TikTok / Reels / Shorts