Background noise can significantly detract from the overall quality of your video, making it difficult for viewers to focus on your content. Fortunately, several methods and tools can help you remove noise from video online for free.
This guide will walk you through the most effective techniques and tools to ensure your video’s audio is crisp and clear, providing a better experience for your audience. Keep reading!
How to Get Rid of Background Noise in a Video Online
Source: TechViral
There are several video editing software options that you can use to remove background noise from videos for free. Whether you use manual video editing software or AI, the steps are simple. Here are the general steps to follow:
Load your video into the desired video editing software.
Click on the audio track you want to edit.
Go to the “Effects” panel, search for “Audio Enhancement”.
Click on “Remove Noise” button.
Wait until the process is done and save your video.
Best Tools to Remove Background Music from Video Online Free
Unwanted background noise can be a real buzzkill for your videos. Luckily, there are several apps that can help you achieve crystal-clear audio:
Descript: Descript boasts AI-powered features that automatically transcribe your video audio, making it a breeze to edit and clean up dialogue. The free version even allows you to reduce background noise for videos up to 10 minutes long.
VEED.IO: If you’re looking for a user-friendly online solution, VEED.IO is your answer. This platform utilizes AI to automatically detect and eliminate background noise, from common culprits like traffic and wind to air conditioner hum.
Adobe Podcast Enhance Speech: Upload your video audio and leverage Adobe’s advanced algorithms to reduce background noise and enhance speech clarity. Perfect for podcast and quick noise reduction on the go.
Lalal.ai: For a cloud-based option with impressive results, Lalal.ai is a great choice. This service utilizes source separation technology to isolate and remove unwanted noise from your video while preserving the quality of your main audio track.
Bonus Tips: Maximize Your Video Audio with Eklipse
Once the unwanted sound is removed, you have to proceed to the next step: maximizing your video audio with Eklipse.gg.
While Eklipse doesn’t offer direct noise reduction features, it can still be a valuable tool for improving your video’s overall audio quality. You can add various viral sounds, free-copyrighted music, or sound effects from Eklipse to your clips, ensuring viewers are hooked from the start.
In addition, Eklipse utilizes AI to automatically generate short, highlight clips perfect for sharing on social media (YouTube, TikTok, Instagram, Facebook and more). You can create various types of videos or repurpose content with ease, saving a lot of time and effort.
FAQ
1. How can I remove background noise from a video?
Upload your video to a free online noise removal tool.
2. Click on your video on the timeline.
3. Tap “Clean Audio”.
4. Edit your video further (if needed), like adding music or sounds effect.
5. Save or download your video.
2. Is there a way to remove background noise from a video on iPhone?
Yes. You can get rid of background noise in a video on an iPhone by using tools like iMovie.
3. How to remove background noise for free?
Try using free online noise removal tools for videos, such as Media.io, Capcut, VEED, and more.
Conclusion
Removing noise from a video is crucial for producing high-quality content. By using video editing software, you can significantly improve your video’s audio clarity.
For more advanced features and easier editing, consider using Eklipse, which provides AI-powered video editing tools that simplify the process and enhance your content effortlessly. Sign up on Eklipse for free and watch your content thrive!
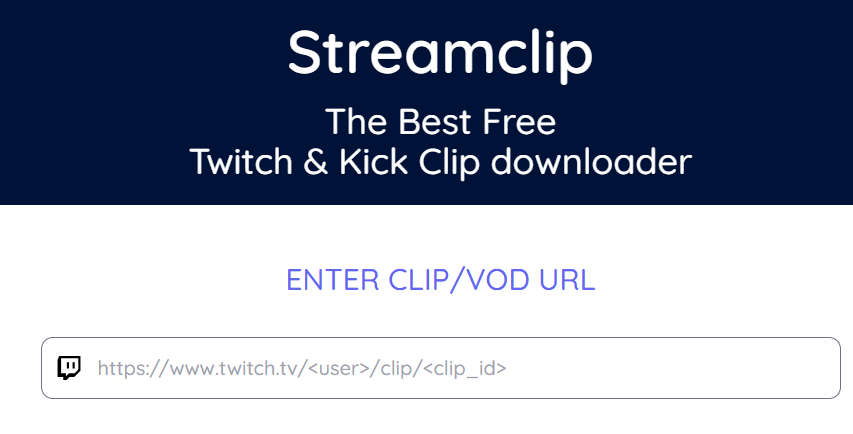
Downloading videos from Rumble can be straightforward if you follow the right steps. Whether you want to save videos for offline viewing, keep a backup of your favorite content, or edit videos for personal use, there are several effective methods to download Rumble videos.
This guide will walk you through different ways to download videos from Rumble, including using four different methods: online video downloaders, browser extensions, desktop software, and Streamclip.ai. Let’s go!
Check Legality: Ensure that downloading the video complies with Rumble’s terms of service and copyright laws.
Internet Connection: A stable internet connection will ensure smooth and quick downloads.
Storage Space: Make sure you have enough storage space on your device for the downloaded videos.
Bonus: Download and Edit Video Seamlessly with Eklipse
Source: Eklipse.GG
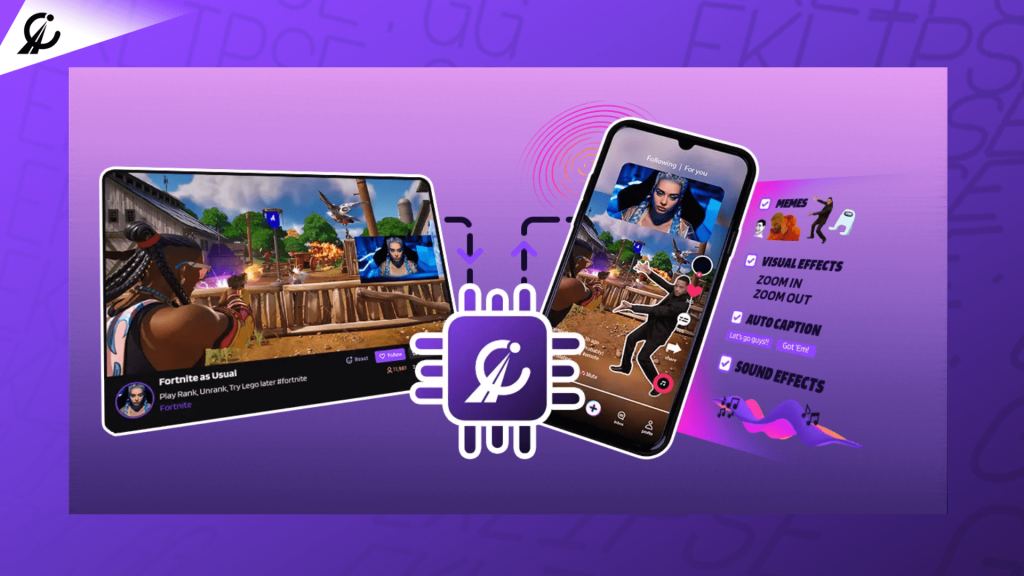
Saving Rumble videos is the first step. Next, you may want to repurpose those clips into something new and innovative. Therefore, you can utilize Eklipse! This app lets you automatically download those epic moments from Twitch, YouTube, and other platforms. No more manually searching for highlights.
Eklipse goes beyond simple downloads. Its built-in AI editing tool also seamlessly converts your videos into any format (TikTok/Reels/Shorts). You can also add sound effects and captions in seconds, transforming your clips into share-worthy content that grabs audiences’ attention instantly. Try Eklipse today for free!
Conclusion
Downloading Rumble videos can be done efficiently using online downloaders, browser extensions, desktop software, or Streamclip.ai. Each method has its benefits, so you can choose the one that best suits your needs and enjoy your favorite videos offline.
Additionally, consider using Eklipse’s new AI-Edit feature to connect to Rumble and create AI-generated highlight clips, enhancing your video content effortlessly. Sign up on Eklipse for free and elevate your content creation game!
Maximize your Black Ops 6 rewards—Create highlights from your best gameplay with with Eklipse
Eklipse help streamer improve their social media presence with AI highlights that clip your Twitch / Kick streams automatically & converts them to TikTok / Reels / Shorts
When comparing the monetization strategies of Rumble and YouTube, several key differences and similarities stand out. Both platforms offer unique opportunities for content creators, but they cater to different needs and audiences. Here’s an in-depth look at how each platform compensates its creators.
This guide will take you through the requirements for monetization on YouTube, the different revenue streams available, and some of the challenges you might encounter along the way.
Monetization Requirements
Source: Support.Google.com
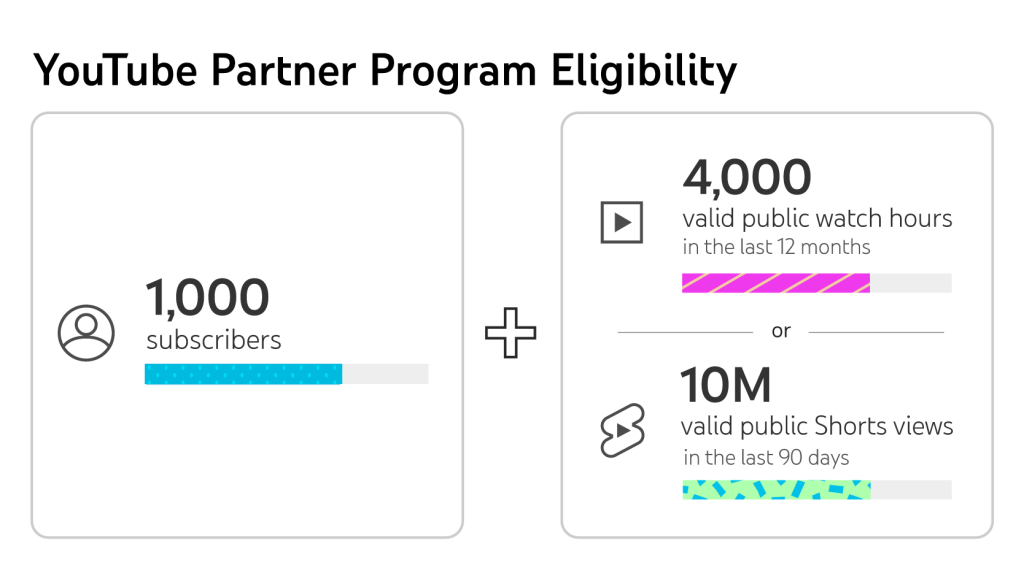
To start earning money on YouTube, creators must join the YouTube Partner Program (YPP). This requires:
1,000 subscribers
4,000 hours of watch time in the last 12 months or 10 million Shorts views in the last 90 days
Let’s delve into Rumble’s monetization requirements, revenue streams, advantages, and some key considerations to keep in mind.
Monetization Requirements
Source: Rumble.com
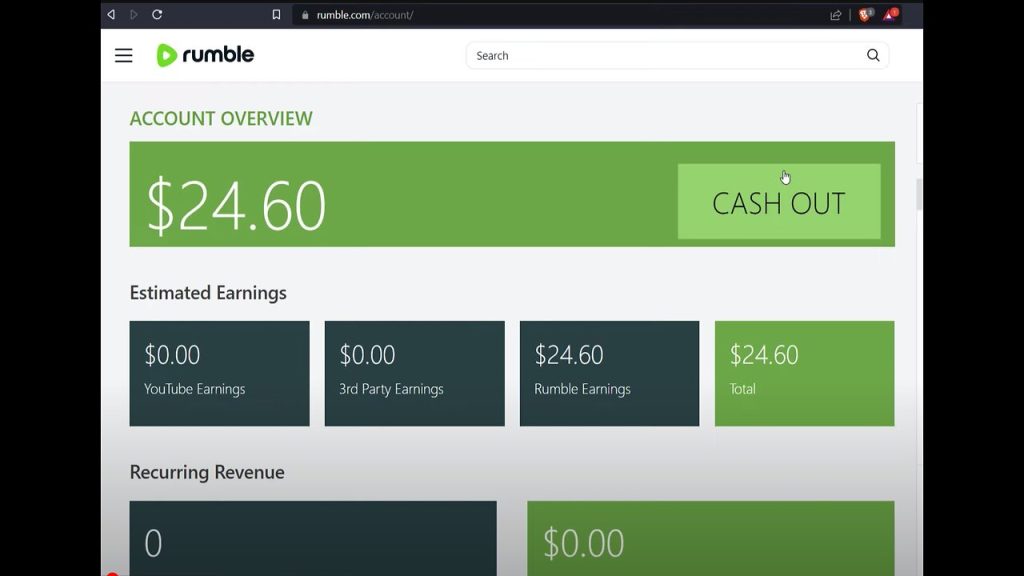
Rumble offers immediate monetization opportunities without stringent subscriber or watch time requirements. This makes it more accessible for new creators.
Revenue Streams
Rumble provides several ways to earn:
Ad Revenue: Creators earn 60% of the ad revenue, with Rumble retaining 40%.
Video Licensing: Rumble offers various licensing deals, including exclusive and non-exclusive agreements. Creators earn from licensing fees negotiated by Rumble.
Rumble Rants: Viewers can donate during live streams. Rumble takes a 20% fee from these donations.
RumbleTalk’s PayWall: Creators can charge for access to group chats, either per time or per access. Rumble charges a 10% fee.
Platform Partnerships: Videos syndicated through high-traffic websites like Yahoo and MSN can generate additional revenue.
Advantages
Lower Payout Threshold: Creators can receive payouts starting at $50, compared to YouTube’s $100 threshold.
Less Competition: Rumble’s smaller user base means less competition and potentially higher engagement rates.
Viral Video Bonuses: Additional earnings for videos that achieve high view counts in a short period.
Considerations
Niche Audience: Rumble’s user base is smaller and more niche, which might affect the potential reach compared to YouTube.
Less Advanced Advertising: Rumble’s ad targeting capabilities are not as sophisticated as YouTube’s, which could impact ad revenue.
Statistics
Monthly Active Users: 44 million
Videos Uploaded Per Month: Over 3 million
Top Earning Rumbler (2021): Dan Bongino, earning $9 million
1,000 subscribers, 4,000 hours watch time or 10 million Shorts views
No strict requirements
Ad Revenue Split
55% to creator, 45% to YouTube
60% to creator, 40% to Rumble
Channel Memberships
Available with 500 subscribers and 3,000 hours watch time
Not available
Super Chats
70% to creator, 30% to YouTube
80% to creator, 20% to Rumble
Video Licensing
Limited
Various deals, up to 90% to creator
Viral Bonuses
Not available
Available
Payout Threshold
$100
$50
User Base
2 billion monthly active users
44 million monthly active users
Top Earner (2021)
MrBeast ($54 million)
Dan Bongino ($9 million)
Conclusion
Understanding how Rumble pays creators compared to YouTube is crucial for making an informed decision. Both Rumble and YouTube offer viable monetization opportunities for content creators, but they cater to different needs:
YouTube is ideal for those looking to tap into a vast, global audience and leverage multiple income streams despite higher entry barriers and competition.
Rumble provides a quicker path to monetization with lower thresholds and less competition, making it suitable for new creators or those with niche content.
By understanding the strengths and challenges of each platform, creators can choose the one that best aligns with their content strategy and audience engagement goals.
Calling all content creators! Ever dreamt of sharing your talents with a live audience? Rumble, with its user-friendly platform and focus on creators, is the perfect launchpad for your streaming journey!
This guide simplifies everything for you. We’ll cover Rumble account setup, platform features, and optimizing your stream for an amazing experience. Whether you’re a new streamer or a pro looking to expand, Rumble welcomes you!
Ready to unlock your full streaming potential on Rumble? Keep reading to discover everything you need to know!
Sign Up: Head over to Rumble and create an account if you haven’t already. Fill in the required information and verify your email address to complete the registration process.
Profile Powerhouse: Don’t underestimate the power of a compelling profile! Add a captivating profile picture, write a descriptive bio that reflects your streaming style and content, and include any relevant links to attract viewers and build an audience.
Step 2: Customize Your Streaming Haven
Channel Flair: Dive into your account settings and personalize your channel. Design a unique banner, upload a profile picture that matches your overall theme, and craft a detailed channel description that entices viewers to tune in.
Monetization Marvels: If you’re aiming to turn your passion into profit, explore Rumble’s monetization options. Review the requirements and apply if your channel meets the criteria.
Step 3: Gear Up for Stream Success
Crystal Clear Communication: Invest in a good quality camera and microphone. Crisp audio and video are fundamental for creating engaging streams that keep viewers hooked.
Light Up Your Stream: Lighting can dramatically enhance your stream’s visual appeal. Consider investing in softbox lights or ring lights to create a professional and well-lit environment.
Rock-Solid Connection: A stable and high-speed internet connection is vital to prevent frustrating lag and buffering during your live streams. Ensure your internet plan can handle the demands of streaming.
Step 4: Choose Your Streaming Software Companion
Open Broadcaster Software (OBS) Studio: It is a popular free and open-source streaming software trusted by many streamers. Download and install OBS Studio from https://obsproject.com/.
Streamlabs OBS: Another user-friendly choice, offering additional features like built-in alerts and chat management tools. Download it from https://streamlabs.com/.
Step 5: Configure Your Streaming Weaponry
Unlocking Your Stream: Locate your Stream Key within your Rumble channel settings. This key acts as a bridge, connecting your streaming software to your Rumble channel.
OBS Setup Walkthrough: Open OBS Studio and navigate to Settings. Head over to the Stream tab and select “Custom…” as the service. Enter the Rumble server URL and paste your Stream Key.
Dialing in Your Settings: Configure your video and audio settings to match your internet speed and equipment capabilities. Popular settings include a video resolution of 1920×1080 at 30 FPS and ensuring your microphone and desktop audio devices are correctly selected.
Step 6: Craft Your Streaming Experience
Setting the Stage: Create different scenes in OBS for various segments of your stream. This could include an engaging “starting soon” scene to build anticipation, your main gameplay scene, and an intermission scene for short breaks.
Building Your Stream World: Add elements to your scenes using sources within OBS. Here are some commonly used sources:
Display Capture: Showcase your entire screen for content-sharing streams.
Window Capture: Focus on a specific window or application, ideal for tutorials or showcasing specific software.
Video Capture Device: Include your webcam feed to connect with your audience on a personal level.
Audio Input Capture: Capture your microphone audio to ensure clear communication with your viewers.
Step 7: Go Live and Captivate Your Audience!
Once everything is configured, click “Start Streaming” in OBS to launch your live broadcast on Rumble.
Keep an eye on your stream’s health metrics and viewer interaction. Actively engage with your audience through the chat to foster a dynamic and interactive experience.
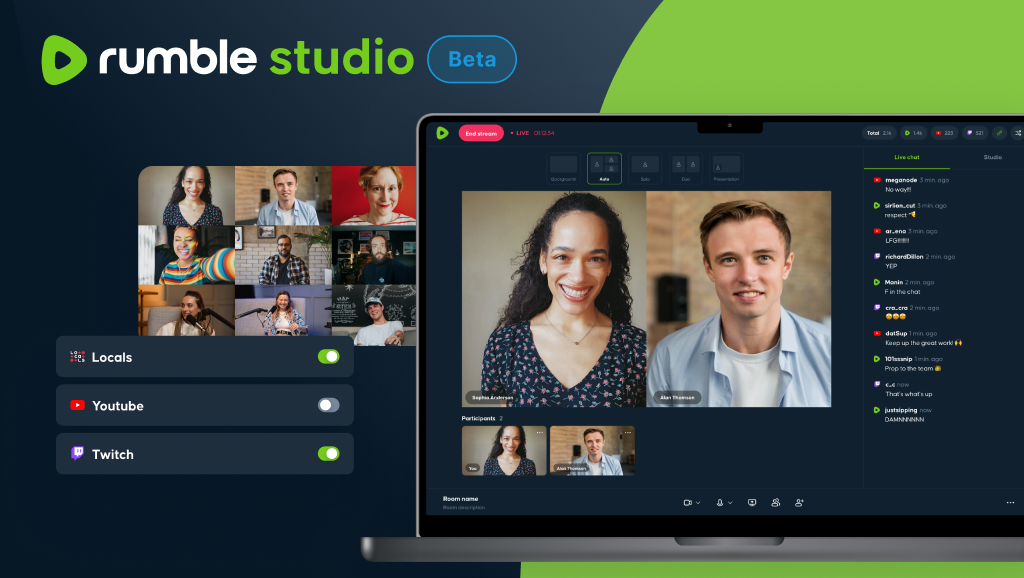
Bonus Tips to Level Up Your Rumble Streams
Source: Rumble Studio
Spread the Word: Promote your upcoming streams on social media platforms and other relevant online communities to attract viewers and build anticipation.
Consistency is Key: Stream regularly to establish a consistent schedule and cultivate a loyal audience. Viewers appreciate knowing when they can expect to catch your content.
Building a Community: Actively interact with your viewers during your streams. Respond to comments, answer questions, and create a welcoming atmosphere to foster a sense of community around your channel.
Final Thoughts
With a captivating stream and a dedicated audience, you’re well on your way to becoming a Rumble superstar! Remember, consistency is key. Stream regularly, engage with your viewers, and keep experimenting to find your unique voice.
But what if you could effortlessly capture the best moments of your streams and share them on other platforms like YouTube, TikTok, and Instagram? Look no further than Eklipse! This innovative software automatically identifies the highlights from your Rumble streams, transforming them into bite-sized, engaging clips perfect for social media.
Imagine growing your audience across multiple platforms and building a thriving online presence. Eklipse streamlines the process, letting you focus on what you do best – creating incredible content. Visit and sign up Eklipse today and unlock the full potential of your Rumble streams!
Kick, launched in 2022, offers a lucrative opportunity for new streamers with its favorable 95/5 revenue split compared to Twitch’s 50/50 (now 70/30). This generous split allows content creators to retain more of their earnings, making it an attractive option for monetization.
The platform has successfully attracted top streamers with high-profile contracts, creating a buzz in the streaming community. With fewer streamers and less competition, beginners may find it easier to gain visibility and build an audience on Kick.
However, Kick’s association with gambling content and questions about its long-term stability pose challenges. Despite these concerns, the platform’s commitment to user-driven improvements and its rapid growth provides a promising environment for new streamers to start and succeed.
Keep reading to find out everything you need to know!
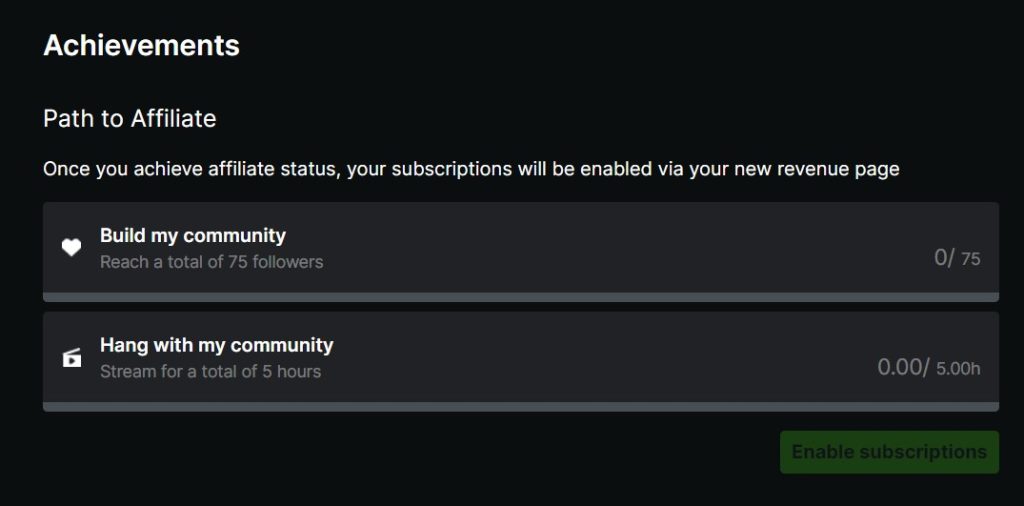
Start earning on Kick by joining the Kick Creator program, which requires 75 followers and 5 hours of streaming. As a Creator, you get a 95/5 subscription revenue share and 100% of donation income.
To become a verified Kick creator, confirm your phone number, enable 2FA, have 20 subscribers in 30 days (excluding gifted subs), average 75 viewers in 30 days, stream 12 days and 30 hours in 30 days, and engage with 300 unique chatters in 30 days.
You can earn $16 per hour if you stay active, interact with chat, stream 4 hours daily for 30 days each month, and keep your face visible during streams. Use Kick’s tools to engage and grow your audience.
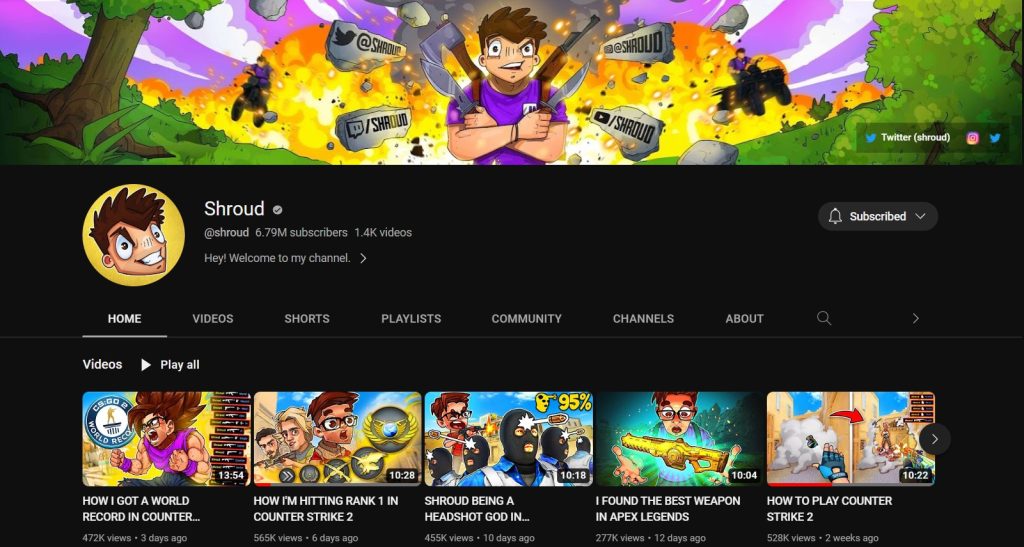
2. Repurpose Your Kick Stream for YouTube Content with Eklipse
Source: YouTube/Shroud
Repurpose your Kick Stream as YouTube content to earn money. Use tools like Eklipse.gg, an AI highlight generator, to automatically clip your stream.
Share your stream highlights on YouTube and monetize your channel once it becomes popular. To do so, you’ll need 1000 subscribers, 4000 public watch hours, or 10 million Shorts views.
Repurposing your Kick content for YouTube helps you reach a wider audience and earn more money. Include calls to action in your videos to direct viewers to your Kick channel and support your content.
3. Earn Donations
Source: Medium.com
Even if you’re not a Kick partner, you can still earn donations. You can use PayPal as a way to receive donations from your audience.
Encourage your followers to support your content by donating, and you’ll earn some extra cash. Tipping allows your followers to donate to you in real-time during your streams.
The more engaged your audience is, the more likely they are to donate to you. Make sure to thank your supporters and show your appreciation to keep them engaged.
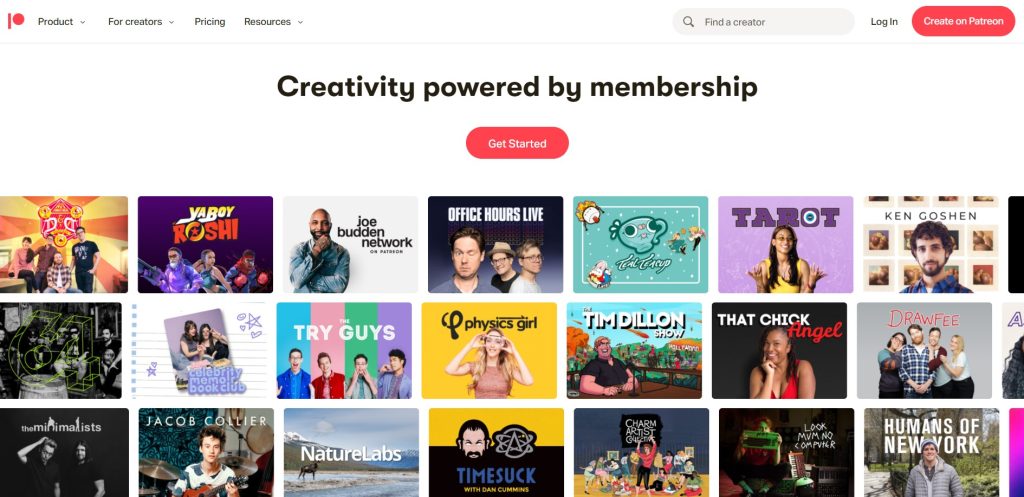
4. Offer Memberships
how to get paid hourly on kick
Another way to make money on Kick is by offering memberships. Use platforms like Patreon to offer your fans the chance to be part of your community. You can offer different levels of membership with exclusive content, rewards, and perks.
As a Kick Creator, you can offer your members exclusive content that they can’t find anywhere else. This could be behind-the-scenes looks at your content creation process, early access to new content, or exclusive merchandise.
By offering your members something unique, you’ll be able to grow your community and earn more money.
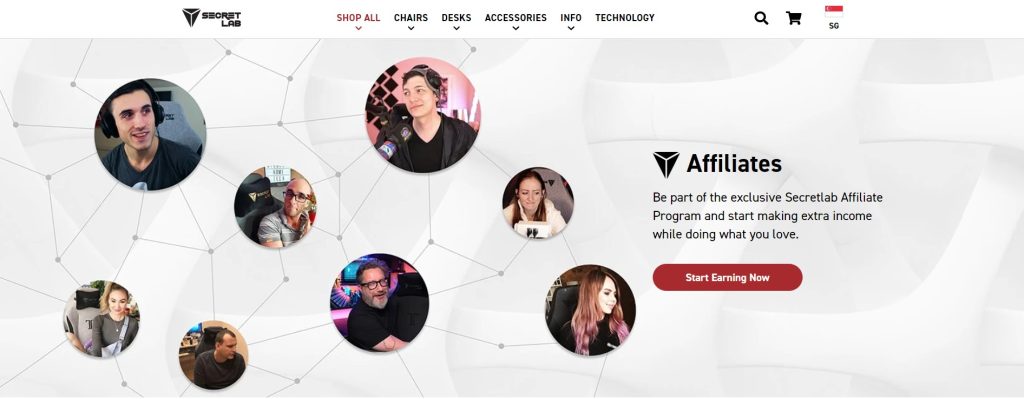
5. Try Affiliate Marketing
Source: Secretlab.co
Affiliate marketing is another excellent way to make money on Kick.
You can promote products related to your niche, and you’ll get a commission for every sale that happens via your channel. It’s a great way to earn passive income and promote products that you believe in.
Make sure to only promote products that you believe in and that are relevant to your audience. By promoting products that your audience would actually use, you’ll be able to earn more money and build trust with your followers.
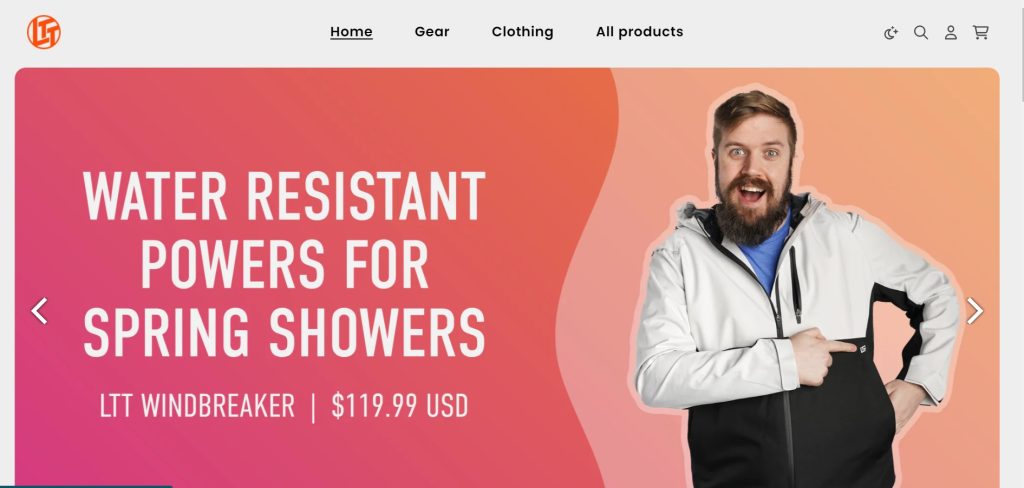
Although he’s not a streamer, Linus Tech Tips’ store is one of the success stories of creator merch stores that you can learn from.
Starting your own store is another option. You can sell merchandise like T-shirts, mugs, and other items related to your niche. Use your Kick platform to promote your store, and you’ll be able to earn money from sales.
By selling merchandise, you’ll be able to monetize your Kick channel and offer your followers something tangible in return for their support. Make sure to create high-quality merchandise that your audience would want to buy and use.
7. Sell Sponsorships or Partnerships
Source: Pajak.com
Once you’ve built a sizable audience, consider selling brand sponsorships or partnerships. Besides paid promotions, partnerships can also provide valuable tools or services you may need.
For instance, a gaming streamer could partner with a chair company for a free gaming chair in exchange for promotion.
Choose partnerships wisely to align with your values and audience interests, ensuring you promote relevant products to build trust and maximize earnings.
FAQ
1. How much does Kick pay per hour?
The initial phase of the Kick Creator Incentive Program is underway, offering creators a base pay of at least $16 per hour in addition to a 95/5 split on subscription revenue.
2. Does Kick pay $16 dollars an hour?
Yes. Kick introduces the Creator Incentive Program, prioritizing payment for streamers based on their time rather than viewership numbers. Eligible streamers can earn a minimum hourly wage of $16.
3. Does Kick pay more than Twitch?
Kick is a newer streaming platform that offers a more generous revenue share model for creators than Twitch. Kick takes a 5% cut of creator revenue, while Twitch takes a 30% cut. This means that creators on Kick keep 95% of their revenue, while creators on Twitch keep 70%.
4. What are the conditions to get paid on Kick?
To get paid on Kick, maintain wakefulness, and engage consistently with the chat during your streams, stream for at least 4 hours daily throughout each month, and keep your face visible throughout the stream. These conditions are essential for qualifying to earn around $16 per hour on Kick.
Conclusion
Kick offers creators various earning opportunities. As a Kick Creator, you can earn through donations, memberships, YouTube content, affiliate marketing, running a store, or selling sponsorships and partnerships. Consistently deliver quality content, engage your audience, and endorse relevant products to grow your following and turn your Kick channel into a profitable income source in 2024.
Looking to boost your Kick earnings and easily clip and share your favorite Kick moments on TikTok, Shorts, or Reels? Try Eklipse now to expand your audience—it’s beginner-friendly and free!
Are you wondering how to upload YouTube Shorts from a PC? If so, you’ve come to the right place. This post will show you how to get it done.
YouTube Shorts is an excellent way to gain popularity. It works similarly to its competitors, allowing you to create interesting short-form videos. However, you might notice there’s no button to make or upload Shorts on the website. Does that mean you can’t do it from your PC? Of course not.
Luckily, uploading YouTube Shorts from a PC or laptop is as easy as publishing regular videos. Just follow the guide below to showcase your masterpiece. Are you ready? Let’s go!
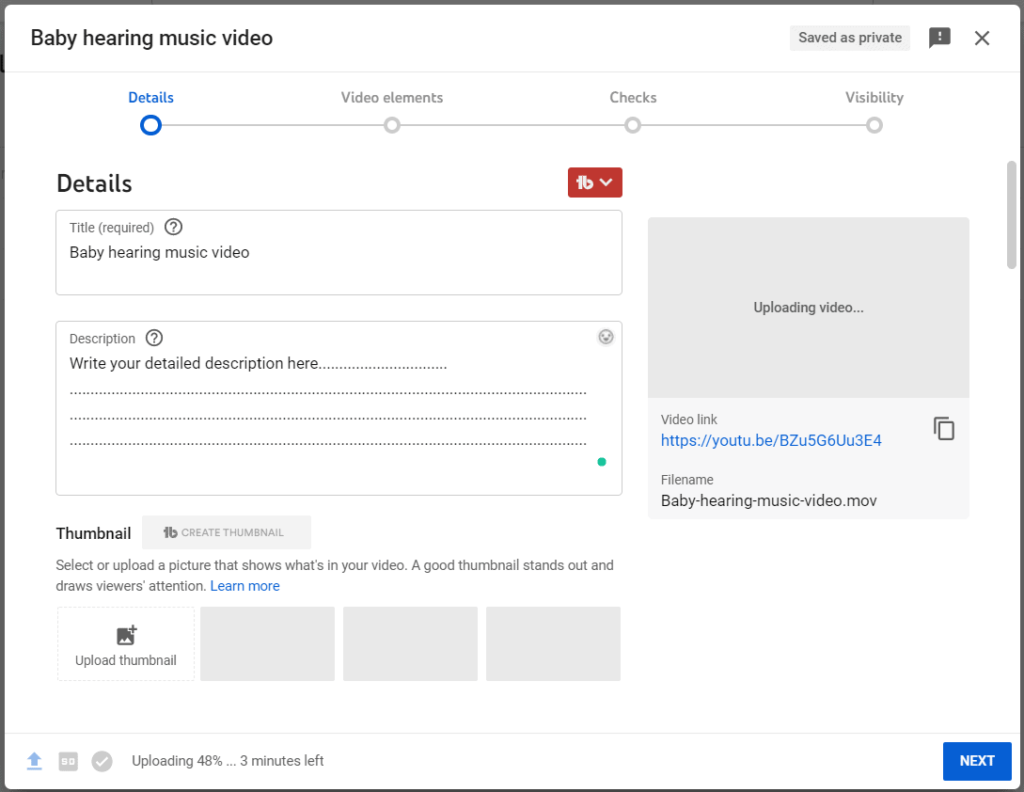
Ready to upload your fantastic video to YouTube Shorts? Follow these steps:
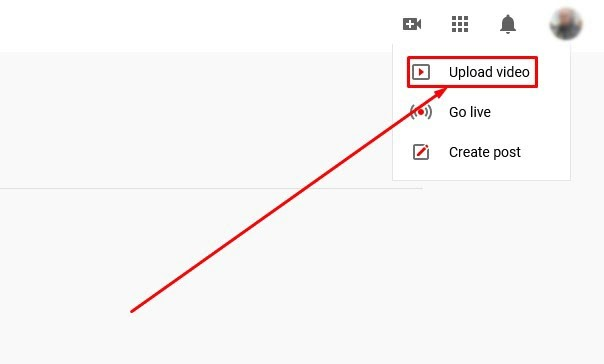
Open YouTube in your browser and log in to your account.
On the homepage, click the video camera button at the top right side of the screen.
Choose the Upload Video option from the menu.
Source: InVideo.io
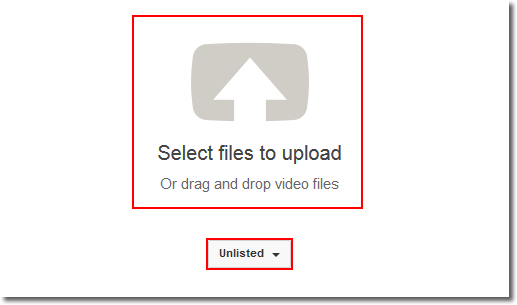
Click the Select files button to open your folder, or drag and drop your video onto the upload screen.
Source: Deakin.edu.au
Wait for the video to upload and the video editing screen to appear.
Fill in the video details, including the title, description, and thumbnail.
Click the Next button in the bottom right corner of the screen.
Source: StrangerShow.com
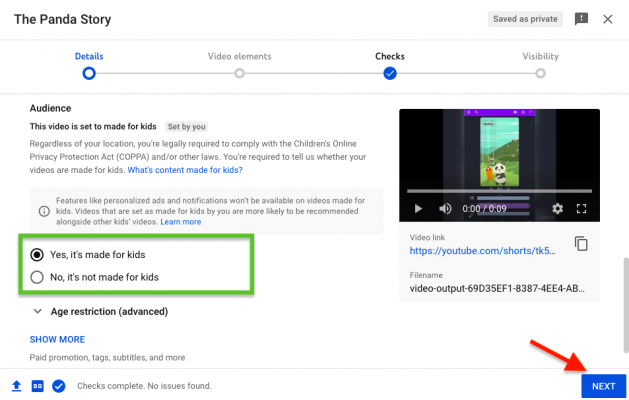
On the Video Elements page, select the audience for your YouTube Shorts.
Click the Next button again.
Source: Animaker.com
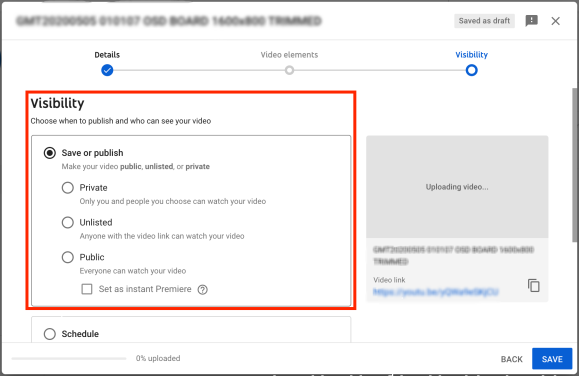
Set your video’s visibility to Private, Unlisted, or Public.
Once all details are complete, click the Save button.
Source: Heresthescoopdc.com
Alternatively, you can schedule your post by entering the desired date and time for publishing.
Bingo! Your YouTube Shorts is now live and ready to attract views.
Additional Details
Preparing your video is crucial. You can create the video on your PC or phone. Additionally, there are several guidelines to ensure YouTube identifies your video as a YouTube Short:
Your video must be between 15 and 60 seconds long.
Now that you know how to upload YouTube Shorts from a PC, you’re ready to go! If you want to make your YouTube Shorts more attractive, try Eklipse. This AI-based tool lets you add cool templates, soundtracks, and even your channel name to your videos, enhancing their appeal.
Don’t worry, you won’t need advanced editing skills or much time because everything can be done automatically in seconds! You can even do it on the go. This opportunity is too precious to miss, so what are you waiting for? Give it a shot and showcase your best creation now!
Looking for the best sports highlight video maker to make your sports content stand out? You’re in the right place. These tools will help you create dynamic sports highlights effortlessly.
Each of these video editing apps offers unique features tailored for sports content, from quick edits to capturing key moments. Whether you’re a parent, friend, or coach, there’s a tool for you.
Discover powerful, user-friendly software that makes sports video editing a breeze. Say goodbye to complicated edits and hello to professional-quality highlights with these top picks.
Want to relive those epic sports moments? Look no further! We’ve compiled the best sports highlight video makers to help you create show-stopping reels.
1. Eklipse – Best for Streamers Who Want AI-Powered Highlights
Source: Eklipse.GG
Eklipse.gg is an AI-powered tool specifically designed for streamers and content creators. It uses advanced algorithms to automatically generate highlight clips from your live streams or pre-recorded gameplay footage. This allows you to save significant time and effort in the editing process, letting you focus on creating engaging content and interacting with your audience.
Key Features:
Eklipse.gg analyzes your streams or videos and identifies key moments like kills, wins, funny fails, and clutch plays.
The AI automatically assembles these moments into highlight clips, complete with transitions and music.
Choose from a variety of pre-made templates designed for different platforms like TikTok, YouTube Shorts, and Instagram Reels.
Schedule your highlight clips to be automatically posted to your social media channels directly from Eklipse.gg
Control the AI with your voice, telling it which moments to include in your highlights. (This feature is currently in beta testing)
Pros:
Eklipse.gg automates the highlight creation process, freeing up your time for other tasks.
The intuitive interface makes it easy for anyone, regardless of editing experience, to create professional-looking highlights.
The AI gets better at identifying your best moments the more you use it.
Create highlights specifically tailored for different social media platforms.
Schedule your content directly from Eklipse.gg for a seamless workflow.
Cons:
The free tier has limitations, including lower video quality and processing limits.
While there are templates, advanced editing features are not available in the free tier.
Some features like voice commands are still in beta testing and may have bugs.
Pricing:
Free: Access to basic features with limitations (720p video quality, 1 clip per day)
Premium: $19.99 per month (1080p video quality, unlimited clips, priority processing, access to all templates)
Annual Plan: $149.99 per year (same benefits as Premium, discounted price)
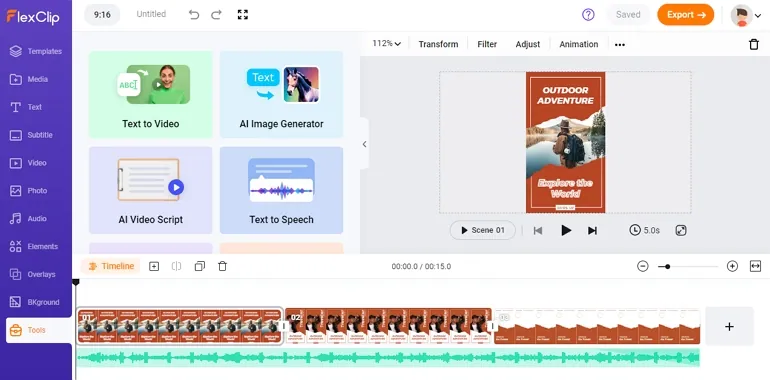
2.FlexClip – Best for Easy Online Video Editing
Source: FlexChip
FlexClip provides a user-friendly interface with drag-and-drop functionality, allowing you to easily import your video clips, photos, and music. It boasts a vast library of stock media, including video clips, images, and music tracks, that you can incorporate into your projects.
FlexClip also offers a variety of customizable text overlays, transitions, and effects to enhance your videos. Whether you’re creating social media content, marketing presentations, or educational tutorials, FlexClip empowers you to bring your creative vision to life without needing complex video editing software.
Key Features:
FlexClip’s drag-and-drop editing makes it easy to arrange your clips, photos, and text overlays on a timeline.
Access a vast collection of royalty-free stock videos, images, and music to elevate your video projects.
Customize your videos with a variety of pre-designed text templates and add visual interest with transitions and other effects.
FlexClip offers advanced AI features (available in paid plans) like text-to-speech conversion, AI-generated video creation from text descriptions, and automatic subtitle generation.
Pros:
Ideal for beginners and casual users who want a user-friendly editing experience.
Saves time searching for stock footage and music.
Edit your videos from any device with an internet connection.
The free plan offers basic editing features and allows you to export videos with a watermark.
Unlocks advanced functionalities like text-to-speech and automatic subtitles.
Cons:
The free plan has limitations on video export resolution and project duration.
Free plan exports include a FlexClip watermark on your videos.
Lacks some advanced editing features found in professional video editing software.
Pricing:
FlexClip offers a free plan with limitations and three paid subscription tiers:
Free Plan: Allows basic editing with a watermark and limitations on video resolution and project duration.
Basic Plan ($7.99/month): Provides longer projects, HD video exports, and removes the watermark.
Plus Plan ($12.99/month): Unlocks additional features like screen recording, project collaboration tools, and access to the stock media library.
Business Plan ($19.99/month): Includes all features, full HD video exports, and priority customer support.
Availability:
FlexClip is a web-based application accessible through any web browser on devices with an internet connection. There is currently no mobile app available.
3. Pictory – Best for Easy and Fast AI-Powered Video Creation
Source: Pictory
Pictory is a cloud-based video editing platform that leverages artificial intelligence (AI) to streamline the video creation process. Designed with ease of use in mind, Pictory allows anyone, regardless of their editing experience, to create professional-looking videos in minutes.
Pictory empowers users to transform various content formats like blog posts, scripts, existing videos, and even text outlines into engaging videos. This makes it a valuable tool for marketers, educators, social media content creators, and anyone who wants to leverage the power of video without the complexities of traditional editing software.
Key Features:
Pictory offers several AI-powered features that automate tasks like script-to-video conversion, video summarization, and text-to-speech generation. These features significantly reduce editing time and effort.
Access a vast library of royalty-free stock footage, images, and music to enhance your videos and add visual interest.
Pictory offers a collection of pre-made video templates for various purposes, such as social media promos, explainer videos, and product demonstrations. These templates provide a quick and easy starting point for your video projects.
Despite the AI automation, Pictory allows you to customize your videos with your branding elements, including logos, fonts, and color palettes. You can also add transitions, effects, and call-to-action buttons.
Pros:
Pictory boasts a clean and intuitive interface that makes it easy for beginners to learn and use.
AI-powered features significantly reduce editing time, allowing you to create videos quickly and efficiently.
Compared to hiring a professional video editor, Pictory offers a more affordable solution for creating high-quality videos.
Visually engaging video content is proven to capture attention and increase audience engagement.
Pictory allows you to create videos specifically formatted for different social media platforms.
Cons:
While Pictory offers customization options, it might not be suitable for projects requiring highly specific editing techniques or granular control over every aspect of the video.
Overuse of pre-designed templates could lead to a lack of originality in your videos.
The free plan has limitations on video length, exports, and access to stock media.
Pricing:
Pictory offers a free plan with limited features. Paid plans start at $19 per month for individuals and go up to $99 per month for enterprise plans with extended features and team collaboration capabilities.
Availability:
Pictory is a web-based platform accessible through any web browser. There are currently no mobile apps available.
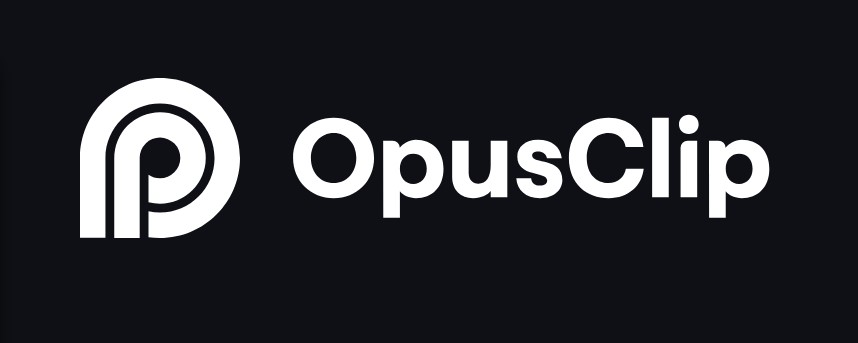
4. Opus Clip – Best for Repurposing Long-Form Videos into Engaging Short Clips
Source: Opus Clip
Opus Clip is an AI-powered video editing tool designed to help you transform long-form videos into bite-sized, viral-worthy short clips. It’s ideal for content creators, social media managers, and anyone who wants to maximize the reach of their video content without spending hours editing.
Key Features:
Opus Clip utilizes advanced AI to analyze your video and automatically identify the most engaging moments. This saves you the time and effort of manually sifting through long videos to find the best snippets.
The AI intelligently adjusts the video layout (full screen, split-screen, etc.) based on the content to create visually appealing clips.
Tailor your short clips perfectly for any social media platform with a variety of aspect ratio options, including 1:1 (Instagram), 16:9 (YouTube), and 9:16 (TikTok).
(Starter & Pro Plans) Opus Clip goes beyond just generating clips; it analyzes them and provides a score predicting their potential for virality. This helps you prioritize which clips to share first.
Pros:
Opus Clip automates the editing process, allowing you to quickly create multiple short clips from a single long video.
Catchy short-form videos are more likely to grab viewers’ attention and increase engagement on social media.
Turn one long video into multiple pieces of engaging content for different platforms.
The AI features help you identify the most compelling parts of your video and predict their potential success.
Opus Clip offers a user-friendly interface that makes it easy for anyone to create high-quality short video clips.
Cons:
The free plan has limitations on processing time, video quality, and watermark removal.
While Opus Clip is improving, it currently works best with videos featuring talking heads, not music videos or heavily edited content.
While some branding options are available, the free plan offers less control over the final look and feel of your clips.
Pricing:
Opus Clip offers a free plan with limitations, along with paid Starter ($10/month) and Pro ($20/month) plans that unlock additional features like faster processing, social media scheduling, and team collaboration.
Availability:
Opus Clip is currently available as a web-based application accessible through any web browser.
5. Vimeo Create – Best for Easy and Quick Video Creation
Source: Geeky Mint
Vimeo Create is an AI-powered online video maker that simplifies the video creation process, allowing anyone to produce high-quality videos in minutes.
Vimeo Create caters to anyone who wants to create engaging videos for social media, marketing campaigns, presentations, or personal projects. It provides a user-friendly interface and a library of pre-designed templates to streamline the video creation process, enabling users with no prior editing experience to create polished videos.
Key Features:
Vimeo Create offers a vast collection of over 3,000 customizable video templates across various categories like business, education, social media, and lifestyle. These templates provide a strong foundation and inspiration for your videos.
The intuitive editing tools allow you to add, arrange, and trim video clips, images, and text overlays. You can also adjust the duration of your video and control the pacing.
Enhance your videos with a diverse selection of royalty-free music tracks and sound effects included within the platform.
Maintain brand consistency by incorporating your brand colors, logos, and fonts into your videos using the customization tools.
Pros:
User-friendly interface for beginners
Wide variety of customizable video templates
Easy-to-use editing tools
Extensive royalty-free music library
Brand customization options
Cons:
Limited editing capabilities compared to professional video editing software
Free plan has watermark on exported videos
Some advanced features require a paid subscription
Pricing:
Vimeo Create offers a free plan with limited features. Paid plans start at $20 per month and offer additional features like unlimited video creation, HD exports, and the ability to remove the watermark.
Availability:
Vimeo Create is a web-based application accessible through any web browser on desktops, laptops, and tablets. There is also a mobile app available for iOS and Android devices.
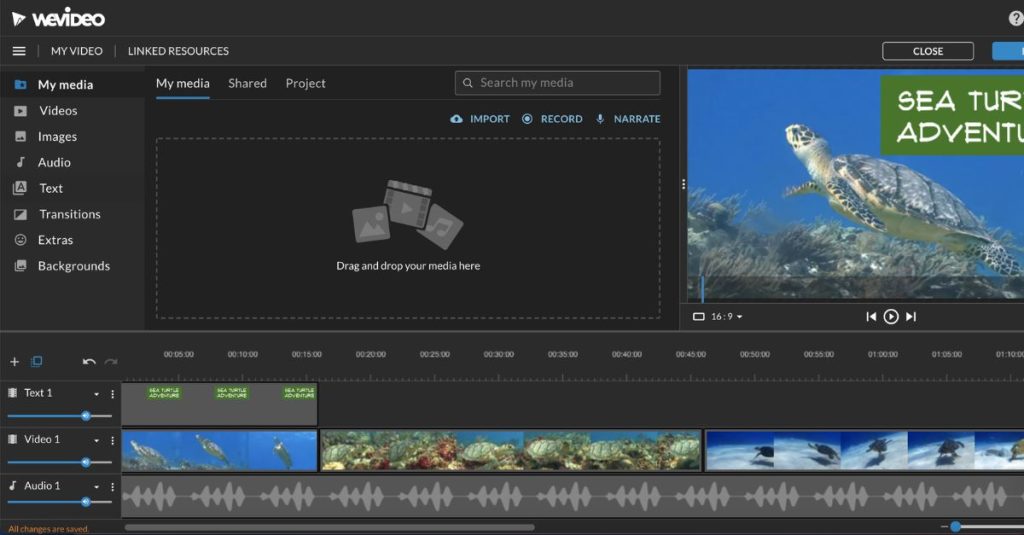
6. WeVideo – Best Cloud-Based Video Editor for Beginners and Educators
Source: Eklipse Blog
WeVideo is a user-friendly cloud-based video editing platform that allows you to create and edit stunning videos from anywhere, directly in your web browser.
No software downloads are required! Whether you’re a social media enthusiast, a teacher creating engaging lessons, or a small business owner crafting promotional content, WeVideo offers a powerful and accessible solution for your video editing needs.
Key Features:
WeVideo boasts an intuitive drag-and-drop interface that makes editing videos a breeze. Even if you have no prior editing experience, you can quickly learn to add clips, photos, text overlays, and music to your projects.
Access a vast collection of royalty-free stock videos, photos, and music to enhance your creations without copyright concerns.
Store your video projects and media files securely in the cloud. WeVideo also facilitates seamless collaboration, allowing multiple users to work on the same project simultaneously.
Take your video editing to the next level with green screen technology, allowing you to add dynamic backgrounds and special effects. WeVideo also offers social media-specific export options to ensure your videos are perfectly sized and formatted for each platform.
Pros:
Perfect for beginners with its intuitive interface and drag-and-drop functionality.
No software downloads or powerful computers required, edit videos from any device with an internet connection.
WeVideo offers a free plan with basic features, and paid plans cater to individual and team needs at reasonable prices (See Pricing below).
Extensive collection of royalty-free stock media to elevate your videos.
Enables real-time collaboration on video projects within teams.
Cons:
Compared to professional video editing software, WeVideo offers a more streamlined feature set.
Free and lower-tier plans come with limited cloud storage space.
The free plan exports videos with a WeVideo watermark.
Pricing:
WeVideo offers a free plan with limited features and storage. Paid plans range from $4.99 per month (billed annually) to $36.99 per month (billed annually) depending on features, storage space, and collaboration capabilities.
Availability:
WeVideo is a web-based platform accessible through any web browser on devices running Windows, macOS, ChromeOS, Android, and iOS.
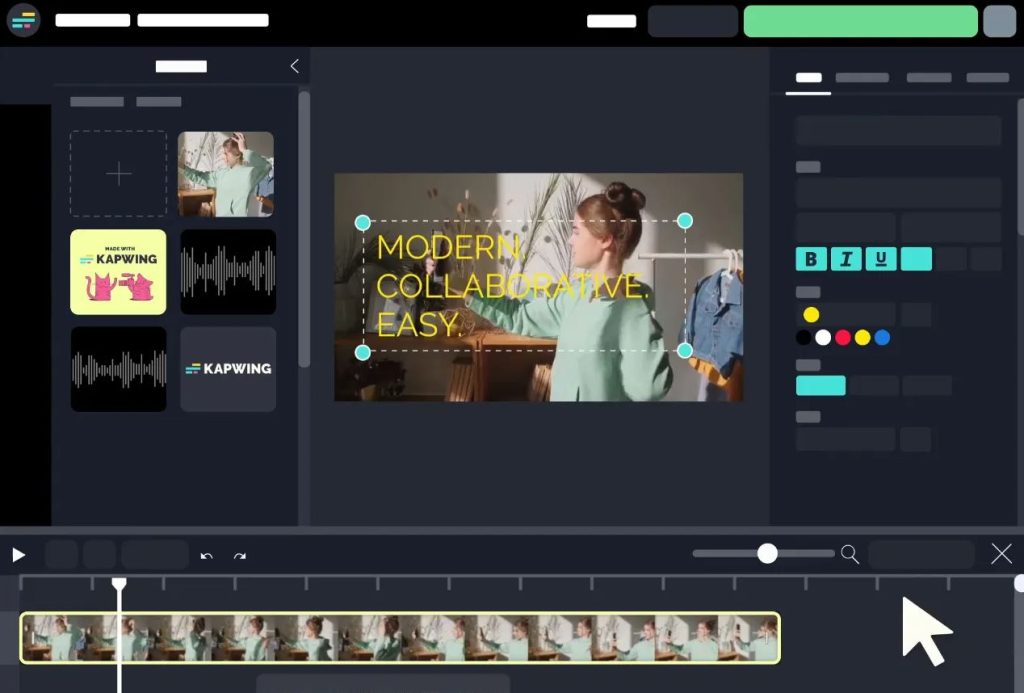
7. Kapwing – Best Online Video Editing Tool for Beginners
Source: Kapwing
Kapwing is a cloud-based video editing platform designed to make creating engaging video content accessible to everyone. Here’s a closer look at what Kapwing offers:
Kapwing allows users to edit videos, images, and gifs directly in their web browser, eliminating the need for complex software downloads. With an intuitive interface and a free plan with watermark-free exports, Kapwing empowers anyone to create professional-looking content without a hefty price tag or a steep learning curve.
Key Features:
Kapwing offers a suite of basic editing tools like trimming, cutting, resizing, adding text, and overlays. These tools are straightforward and perfect for beginners who want to create simple yet impactful videos.
Take advantage of Kapwing’s innovative AI features to streamline your workflow. Generate captions automatically, create video scripts from text, or even transform text into stunning video content.
Access a vast collection of royalty-free music, sound effects, images, videos, and gifs directly within the Kapwing editor. No need to search for additional resources – you can find everything you need in one place.
Kapwing allows seamless collaboration with teammates. Simply share a project link, and your team can work on the same video simultaneously, streamlining feedback and revision processes.
Pros:
The free plan offers watermark-free exports for up to 3 projects per month, making it an excellent option for casual users or those new to video editing.
No software downloads are required. Access Kapwing from any device with an internet connection, making it perfect for on-the-go content creation.
Kapwing’s AI features save time and effort, allowing you to focus on the creative aspects of video editing.
Find all the music, images, and video clips you need right within the Kapwing editor.
Work together with your team on projects in real-time, fostering efficient communication and streamlined workflows.
Cons:
While Kapwing is great for basic editing, it may lack the advanced features needed for professional video editors.
The free plan has limitations on video length and project exports per month. Upgrading to a paid plan removes these restrictions.
Free exports include a Kapwing watermark unless you upgrade to a paid plan.
Pricing:
Kapwing offers a free plan with limitations and three paid tiers:
Pro ($36/month): All Creator features plus priority processing and team management features.
Business (Custom Pricing): All Pro features plus custom enterprise features and priority support.
Availability:
Kapwing is a web-based platform accessible from any device with a web browser. There are currently no mobile apps available.
Final Thoughts
Choosing the best sports highlight video maker depends on your specific needs, technical skills, and budget. AI-powered tools like Eklipse, Pictory, and Revid AI offer efficient, automated solutions for quick highlight creation. Mobile apps such as CapCut and YouCam Video are perfect for on-the-go editing, while desktop software like Adobe Premiere Pro and DaVinci Resolve cater to professionals demanding the highest quality. For sports teams and coaches, specialized platforms like Hudl provide valuable performance analytics in addition to video editing.
By considering features like automated highlight detection, AI-powered editing, customizable templates, and social sharing capabilities, you can select the right tool to create stunning sports highlight videos. Whether you’re sharing epic moments on social media or analyzing game footage for performance improvement, the right video editor will help you capture and showcase the excitement of every play.
Ready to take your sports video editing to the next level? Try Eklipse today and experience AI-powered editing that simplifies your workflow and enhances your sports content. Visit Eklipse Sports to register and get started now!
Maximize your Black Ops 6 rewards—Create highlights from your best gameplay with with Eklipse
Eklipse help streamer improve their social media presence with AI highlights that clip your Twitch / Kick streams automatically & converts them to TikTok / Reels / Shorts
When it comes to creating engaging video content for platforms like TikTok, Instagram Reels, and YouTube Shorts, choosing the right tool can make a significant difference. Two prominent tools in this space are Eklipse GG and Vidyo.ai.
Both offer powerful features to help streamline your video editing process, but they cater to different needs and types of content creators. Here’s a detailed comparison to help you decide which one suits your needs best.
Simplifies editing, integrates with multiple platforms
Efficient repurposing, suitable for various content types
Cons
Requires internet, focused on gaming
Learning curve, subscription costs for advanced features
Detailed Comparison: Eklipse GG and Vidyo.ai
Eklipse GG
Overview
Eklipse GG is an AI-powered tool designed to automatically generate highlights from gaming streams. It identifies key moments in your streams and converts them into short, shareable clips. This makes it particularly useful for gamers and streamers who want to produce engaging content quickly and effortlessly.
Key Features
AI Highlight Detection: Automatically detects and clips the best moments from your streams.
Voice Command: Allows hands-free clipping while streaming, making it incredibly convenient for gamers.
Customizable Templates: Offers various templates to customize your clips and enhance their appeal.
Social Media Optimization: Tailors clips for platforms like TikTok, Instagram, and YouTube, ensuring they are ready for immediate sharing.
Mobile App: Features a mobile app for on-the-go editing and clip management, adding to its versatility.
Pros
Automated Clipping: Reduces the time and effort needed to create highlight reels.
Easy to Use: Intuitive interface suitable for both beginners and experienced users.
Versatile: Works with multiple streaming platforms including Twitch, YouTube, and Facebook Gaming.
Cons
Internet Dependence: Requires a stable internet connection for AI features.
Gaming Focused: Primarily designed for gaming content, which might not suit all users.
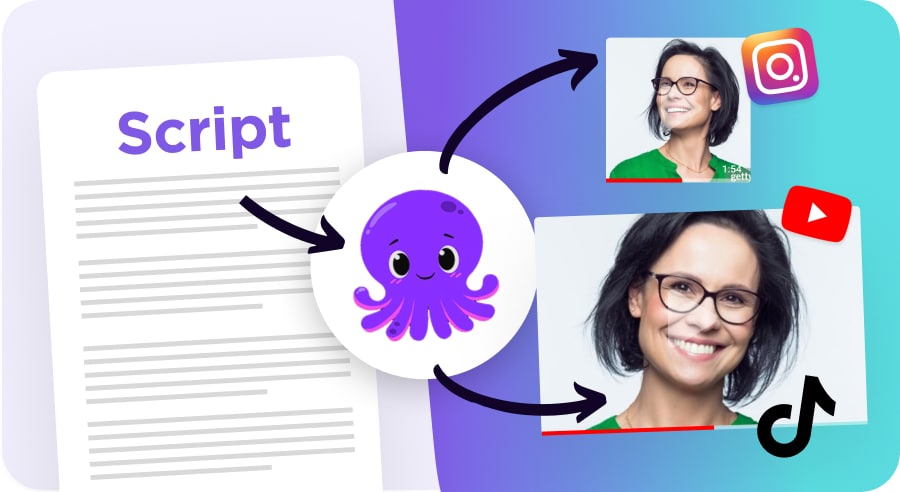
Vidyo.ai is a robust AI-driven video editing tool that converts long-form content into short, engaging clips. It is ideal for content creators looking to repurpose their YouTube videos, podcasts, webinars, and other long-form content into shorter videos for social media. This versatility makes it suitable for a wide range of users beyond just gamers.
Key Features
Text-to-Video: Converts text into engaging videos with AI-driven automation, making it easy to create content from scripts or articles.
Automatic Editing: Auto-generates short clips from longer videos, perfect for social media where shorter content performs better.
Customizable Styles: Offers various themes and styles to personalize your videos, enhancing their visual appeal.
Multi-Platform Sharing: Optimizes videos for multiple platforms, including TikTok, Instagram, and YouTube, ensuring your content reaches a broad audience.
Pros
Efficient Repurposing: Great for converting long-form content into bite-sized clips, saving time and effort.
Multi-Purpose: Suitable for various types of content beyond gaming, such as educational and marketing videos.
Customizable: Provides extensive customization options for videos, allowing for creative flexibility.
Cons
Learning Curve: May require some time to learn all the features effectively.
Subscription Costs: Some advanced features may require a subscription, which could be a consideration for budget-conscious users.
Choosing between Eklipse GG and Vidyo.ai depends on your specific needs and the type of content you create. If you are a gamer or streamer seeking an easy way to create highlights, Eklipse GG is the way to go. It simplifies the process of generating engaging clips from gaming streams with minimal effort.
On the other hand, if you need a versatile tool for repurposing long-form videos into engaging short clips, Vidyo.ai would be the better choice. It offers powerful AI-driven features to help content creators across various domains create professional-quality videos quickly.
Both tools offer significant advantages and can greatly enhance your video creation process, ensuring high-quality output with minimal effort. Explore these platforms to find the one that best fits your content creation needs.
Making eye-catching videos is key to getting noticed on social media platforms like TikTok, Instagram Reels, and YouTube Shorts. Luckily, there are tons of tools available to help you create awesome content. With so many options, picking the right one can be tough. This is where Eklipse GG and Framedrop come in.
Both Eklipse GG and Framedrop are powerful video editing tools designed to simplify content creation. They use AI to automate some tasks, saving you time, and offer advanced features for customizing your videos. Whether you’re a gamer, streamer, or just someone who loves making cool content, this comparison will help you pick the perfect tool for you.
Want to learn more about Eklipse GG and Framedrop’s features and see which one suits your needs best? Keep reading to see an in-depth comparison of everything you need to know!
Extensive customization options, branding elements
Ease of Use
User-friendly, designed for gamers and streamers
Intuitive interface with advanced features
Best For
Gamers and streamers
Content creators looking for detailed clip editing
Availability
Online via their web-app
Online via their web-app
Pros
Simplifies editing, integrates with multiple platforms
Detailed clip editing, supports various content types
Cons
Requires internet, focused on gaming
Learning curve, subscription for advanced features
Detailed Comparison: Eklipse GG and Framedrop
When choosing the right tool for your streaming needs, Eklipse GG and Framedrop stand out as two prominent options.
Both platforms offer unique features and capabilities, catering to different aspects of the gaming and streaming experience.
This detailed comparison will help you make an informed decision on which service best suits your requirements.
Eklipse – Best for Streamers Who Want Effortless Highlight Creation
Source: Eklipse.GG
Eklipse GG is a web-based video editing platform launched in 2014, specifically designed to streamline content creation for streamers and creators.
It leverages AI technology to automatically identify and clip highlight moments from Twitch streams, YouTube videos, podcasts, and more. This allows creators to focus on producing high-quality content rather than manually sifting through hours of footage.
Key Features:
AI Highlight Detection: Automatically detects and clips the best moments from your streams.
Voice Command: Allows hands-free clipping while streaming, making it incredibly convenient for gamers.
Social Media Optimization: Tailors clips for platforms like TikTok, Instagram, and YouTube, ensuring they are ready for immediate sharing.
Mobile App: Features a mobile app for on-the-go editing and clip management, adding to its versatility.
Pros:
Free plan available for basic use.
User-friendly interface designed for creators of all skill levels.
AI-powered highlights save creators significant time and effort.
Multi-platform support for capturing highlights from various sources.
Streamlines content creation workflow and simplifies content repurposing.
Cons:
Limited editing capabilities compared to dedicated video editing software.
Free plan has watermark on exported videos.
Certain advanced features, like voice command editing and Pro Edits, are exclusive to premium plans.
Pricing:
Eklipse offers a free plan to get you started. However, for access to more features, you can upgrade to the Premium Plan. The Premium Plan starts at $19.99 per month. If you prefer a more cost-effective option, the annual plan is available for $149.99 per year, representing a 37% savings.
Availability:
Eklipse is accessible through a web browser and has a mobile app available for iOS and Android devices.
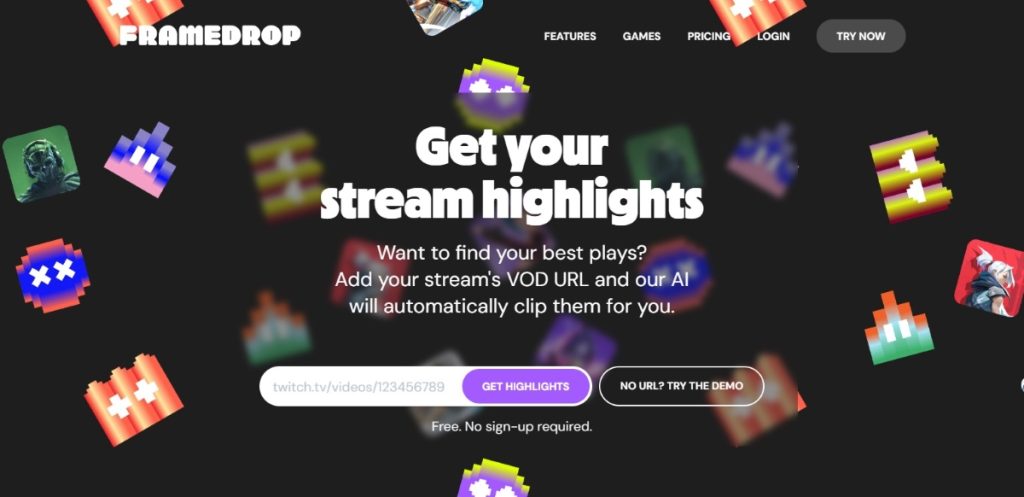
Framedrop: Level Up Your Gaming Content with AI Editing
Source: Framedrop
Framedrop is a cloud-based video editing tool specifically designed for gamers and content creators who primarily work with gaming footage. Launched in 2020, Framedrop focuses on utilizing AI automation to simplify the editing process for gamers, allowing them to create highlight reels and other engaging video content for platforms like Twitch, YouTube, and social media.
Key Features
Automatic Clip Generation: Automatically generates clips from long-form videos, allowing for customizable clipping intervals.
Detailed Clip Editing: Provides advanced editing features such as trimming, adding transitions, and applying effects.
Customizable Branding: Allows users to add logos, watermarks, and other branding elements to their clips.
Multi-Platform Sharing: Optimizes videos for multiple platforms, including TikTok, Instagram, and YouTube, ensuring your content reaches a broad audience.
Pros:
Tailored specifically for gamers, offering features and templates that cater to gaming content.
AI-powered editing focuses on the most exciting moments in gameplay footage.
Cloud-based processing allows for faster processing times, especially for large video files.
Pre-made templates simplify content creation and save time.
Easy integration with popular social media platforms for seamless sharing.
Cons:
Limited support for non-gaming content compared to Eklipse GG.
Free plan has limitations on processing time and video resolution.
Lacks some advanced editing features found in dedicated video editing software.
Pricing:
Framedrop is free, but to access more features, you can upgrade to the Premium Plan. Framedrop AI offers two upload credit plans, the Individual Plan at $6.67 per month, which includes up to 300 talking minutes and 1200 gaming minutes each month. The Professional and Team Plan at $15.42 per month, which provides 600 talking minutes and 2400 gaming minutes each month, making it ideal for handling more complex content.
Availability:
Framedrop operates as a cloud-based service accessible through a web browser. There is currently no mobile app available.
Final Thoughts
Both Eklipse GG and Framedrop offer powerful tools to streamline your content creation process. Framedrop excels for gamers with its specialized AI editing and game-specific recognition. However, if you’re a content creator who works with a wider variety of content beyond gaming, Eklipse GG’s broader platform support and repurposing features offer a more versatile solution.
Ultimately, the best choice depends on your specific needs. But if you’re looking for a platform that empowers you to effortlessly create highlights, repurpose content across platforms, and manage your entire workflow – Eklipse GG is a compelling option worth exploring. With its user-friendly interface, free plan, and powerful AI features, Eklipse GG can help you create engaging content and reach new audiences faster.
Maximize your Black Ops 6 rewards—Create highlights from your best gameplay with with Eklipse
Eklipse help streamer improve their social media presence with AI highlights that clip your Twitch / Kick streams automatically & converts them to TikTok / Reels / Shorts
Editing videos on Discord has become a seamless process thanks to several AI-powered bots that offer a variety of editing features. Whether you’re looking to add captions, create memes, or produce professional-quality videos, these bots have you covered.
Recognizing this trend, Discord now offers a variety of bots designed to streamline the video editing process. As its capabilities expand, the integration of video editing bots has become a game-changer, enabling users to create, share, and enhance their content seamlessly within the platform.
Ready to discover the best Discord video editing bots that can transform your server’s multimedia capabilities? Here are the top six Discord video editing bots in 2024, including the newly launched Eklipse AI-Edit video editing bot.
Eklipse AI-Edit is a powerful video editing tool designed to simplify content creation directly within Discord. This bot uses advanced AI to automatically generate highlights and clips from your videos, making it perfect for streamers, gamers, podcasters, sellers, and more. With its AI-driven capabilities, it effortlessly identifies and edits top gameplay clips.
Key Features
AI Highlight Detection: Automatically identifies and clips the best moments from your videos.
Customizable Templates: Offers a range of templates to enhance your clips.
Multi-Niche Support: Caters to gamers, podcasters, sellers, and sports highlight creators.
Pros
Free to use
Significantly reduces editing time
Versatile and supports various content types
Cons
Requires an internet connection for AI features
Limited features in the free version
Learn More
Check out the Eklipse AI-Edit Bot for detailed information and to get started.
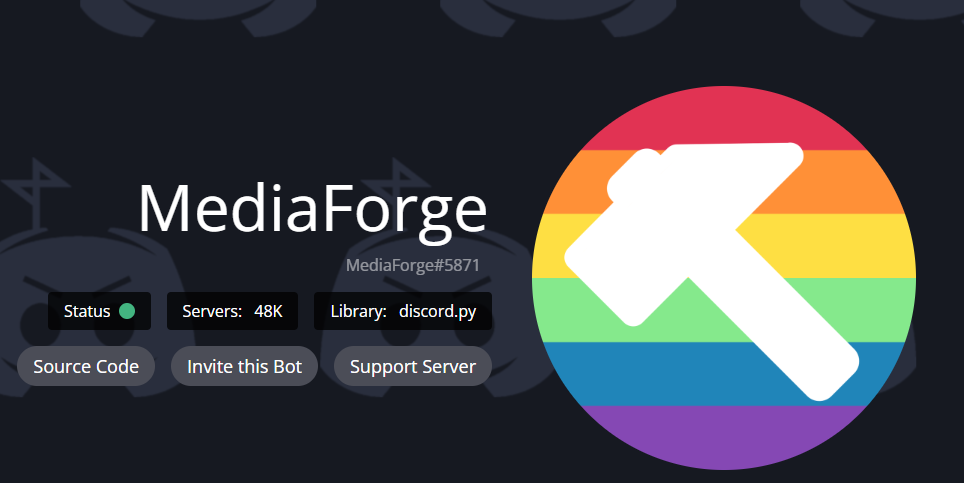
2. MediaForge
Source: discord.bots.gg
MediaForge is a versatile Discord bot that offers a wide array of video editing tools, including trimming, merging, and adding effects. Its intuitive interface and powerful features make it an excellent choice for both novice and experienced users looking to enhance their video content directly within Discord.
Key Features
Editing Commands: Add audio, compress, resize, reverse, and apply effects to videos.
Meme Creation: Create memes with various templates and overlays.
Multi-Format Support: Convert between different media formats, such as GIF to video.
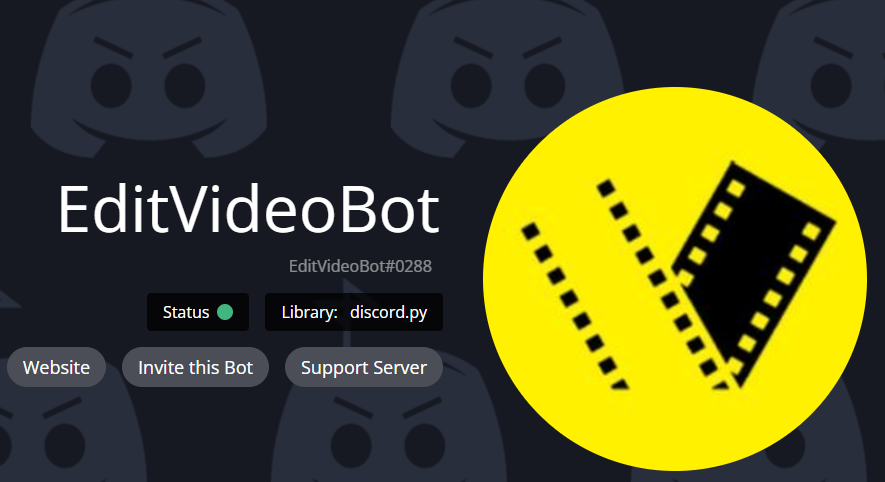
EditVideoBot is a user-friendly Discord bot that simplifies the video editing process with its straightforward commands and features. It allows users to edit videos and images directly within Discord, offering a range of commands to enhance media files. It also supports basic editing tasks like trimming, cropping, and adding subtitles.
Key Features
Text Overlays: Add text overlays to videos and images.
Audio Integration: Add music from YouTube to your videos.
Various Effects: Apply over 50 different editing commands to your media.
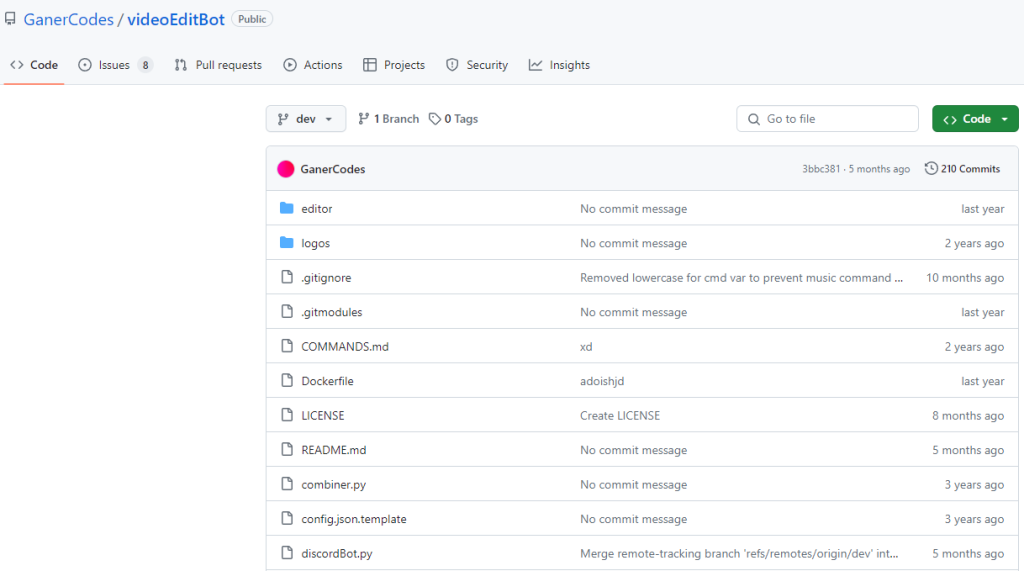
videoEditBot is designed for simple yet effective video and image editing within Discord, providing essential editing tools to users. This bot allows users to execute commands for editing tasks like cropping, trimming, and adding filters to their media files. It also supports complex command chains and integrates seamlessly with Discord.
Key Features
Basic Editing Tools: Crop, trim, and add captions to videos.
Image Editing: Apply filters, adjust brightness, and add effects to images.
User-Friendly: Simple commands make it accessible for beginners.
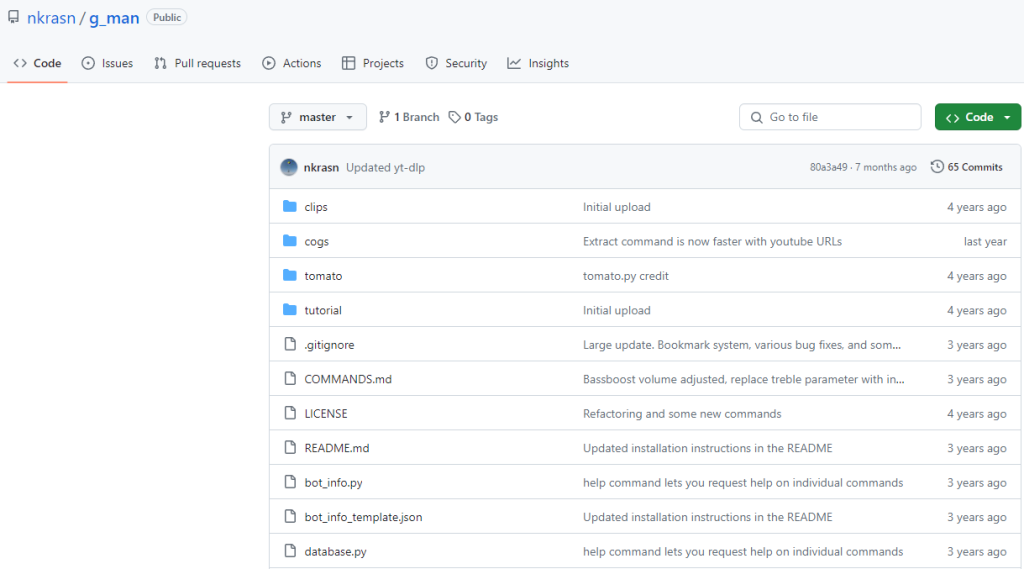
G_man is a comprehensive video editing bot that provides a variety of editing functions directly within Discord, suitable for users needing more advanced editing capabilities. It allows users to apply numerous filters, modify bitrates, and create glitch art, utilizing FFmpeg for most filters and additional tools.
Key Features
Advanced Editing: Offers features like hue adjustment, speed changes, and more.
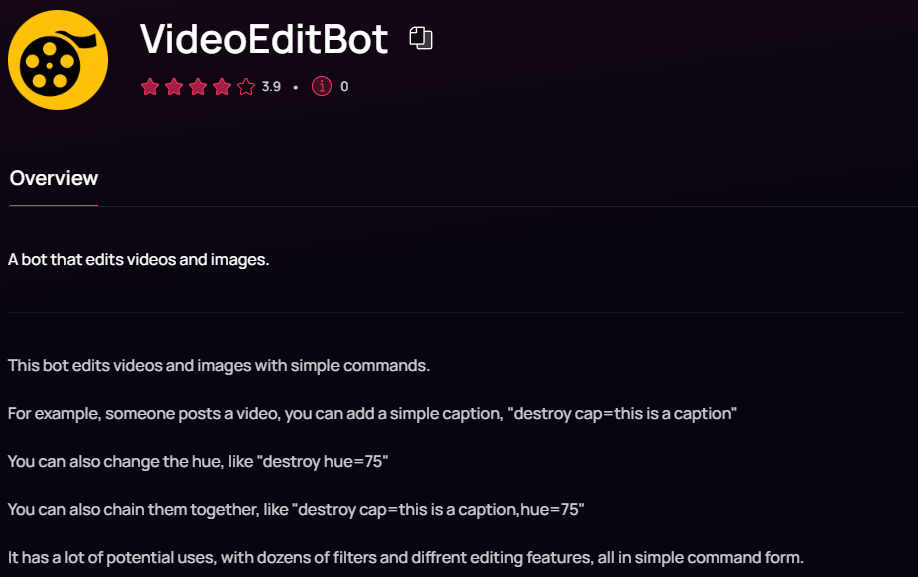
VideoEditBot is a versatile Discord bot that allows users to edit videos and images with simple commands. By using straightforward instructions, users can quickly apply various filters and effects to their media content directly within Discord. Overall, it offers a robust set of editing tools designed to help users quickly and effectively edit their videos within Discord.
Key Features
Comprehensive Editing Tools: Add text, adjust speed, trim, and more.
Music Integration: Add background music from various sources.
Multiple Formats: Supports editing for various video and image formats.
Each of these Discord video editing bots brings its own set of unique features to the table, addressing various editing requirements. Whether you are seeking a straightforward tool for simple edits or a sophisticated bot for more intricate video production, you will find a suitable option here.
If you’re looking for a robust AI-powered editing solution, Eklipse AI-Edit stands out with its user-friendly interface and advanced editing capabilities, making it an excellent choice to elevate your content creation experience on Discord.