Editing videos on your iPhone for YouTube is a straightforward process, thanks to the powerful and user-friendly video editing apps available on iOS. With its advanced camera technology and intuitive user interface, the iPhone provides an ideal platform for creating high-quality videos on the go.
Whether you’re an experienced YouTuber or just starting, mastering iPhone video editing can significantly boost your content quality. With the right techniques and apps, you can turn raw footage into compelling content that grabs your audience’s attention.
In this guide, we’ll walk you through the essential steps of editing videos on your iPhone specifically for YouTube. Whether you’re a beginner or an experienced editor, these steps will guide you in creating high-quality videos directly from your iPhone.
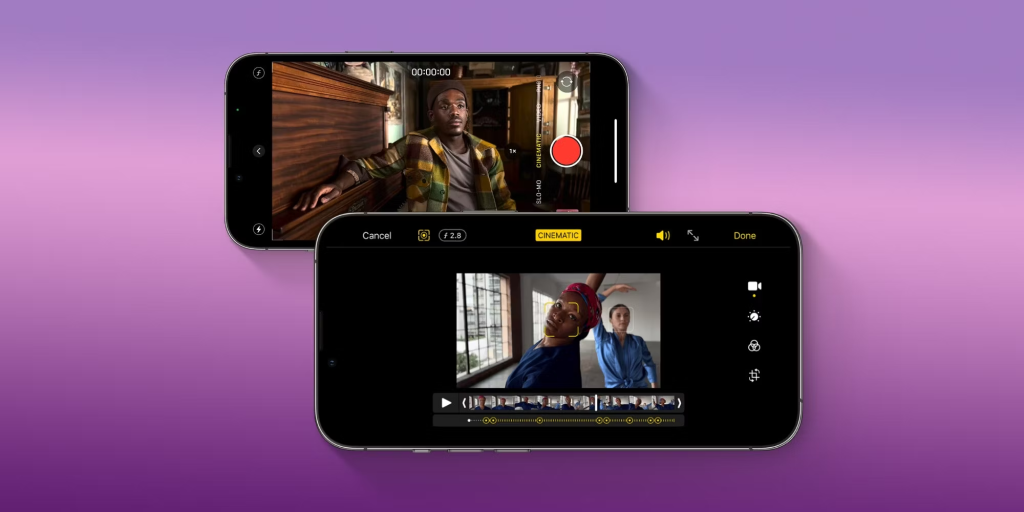
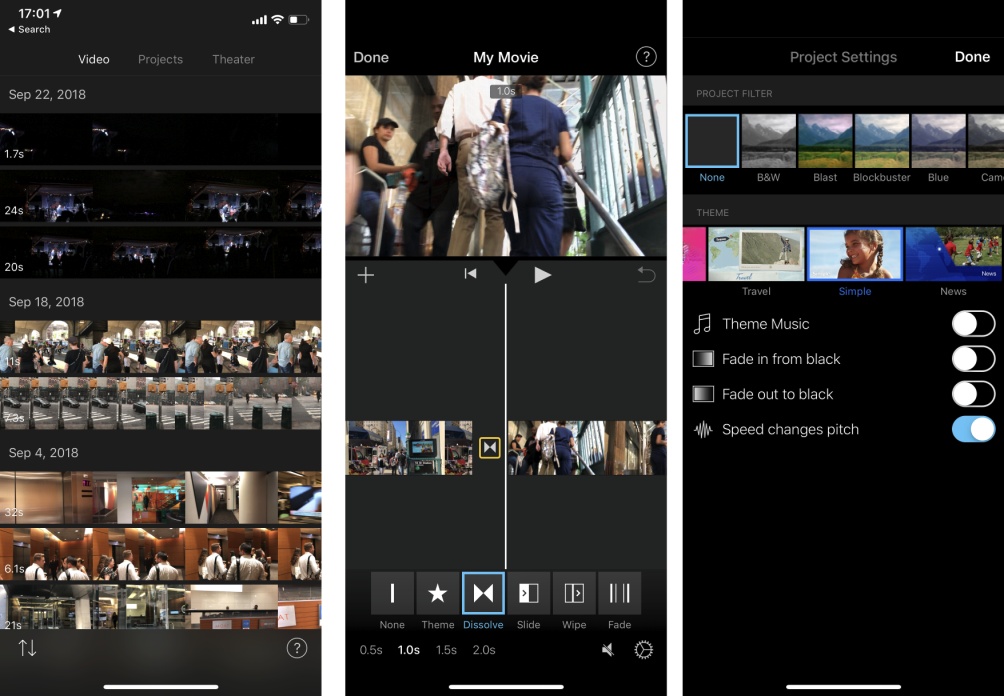
iMovie is an AI video editing app from Apple that offers a range of features perfect for creating YouTube content. With its intuitive interface, iMovie allows you to easily trim clips, add transitions, and incorporate music and text.
Key Features:
Simplified timeline
Built-in templates and themes
4K video support
Seamless integration with other Apple devices
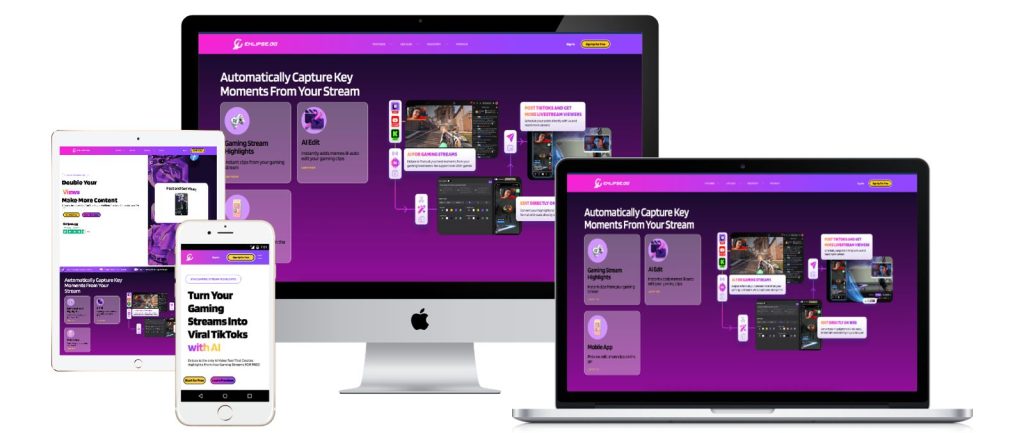
Eklipse Mobile App
Source: Eklipse
Eklipse’s mobile app offers AI-powered editing tools that automatically generate highlights and clips from your videos. This app is ideal for creators looking to streamline their editing process with minimal effort.
LumaFusion: A professional-grade video editor offering multi-track editing, advanced effects, and robust features for serious video creators.
Adobe Premiere Rush: A cross-platform video editor with powerful features and easy integration with Adobe Creative Cloud.
Step 2: Import Your Footage
Once you have chosen your video editing app, import the footage you want to edit.
Open Your App: Launch your chosen video editing app.
Import Videos: Select the footage from your iPhone’s camera roll or directly from your cloud storage.
Step 3: Trim and Arrange Clips
Editing involves trimming and arranging your clips to create a coherent narrative or highlight the key moments.
Trim Clips: Cut out unwanted sections of your video. Most apps, like iMovie and Eklipse, allow you to drag the edges of your clip to trim it.
Arrange Clips: Drag and drop your clips on the timeline to arrange them in the desired order.
Step 4: Add Transitions and Effects
Enhance your video with transitions and effects to make it more engaging.
Add Transitions: Apply transitions between clips to ensure a smooth flow. Apps like iMovie offer a variety of transition effects.
Apply Effects: Use filters, overlays, and other effects to give your video a professional look.
Step 5: Incorporate Music and Sound Effects
Adding music and sound effects can significantly enhance the impact of your video.
Select Music: Choose background music from your app’s library or import your own. Ensure the music complements the tone of your video.
Adjust Audio Levels: Balance the audio levels between your video clips and background music to ensure clear sound.
Step 6: Add Titles and Text
Titles and text can provide context and information to your viewers.
Insert Titles: Add titles at the beginning of your video or new sections.
Overlay Text: Use text overlays to highlight important points or provide additional information.
Step 7: Review and Fine-Tune
Review your edited video to make sure everything looks and sounds perfect.
Watch Your Video: Play back your video from start to finish to catch any mistakes or areas for improvement.
Fine-Tune Edits: Make necessary adjustments to timing, transitions, and effects.
Step 8: Export and Upload to YouTube
Once you are satisfied with your edit, export the video in the highest quality possible and upload it to YouTube.
Export Settings: Choose the appropriate export settings for YouTube. Most apps offer presets for YouTube to ensure optimal quality.
Upload to YouTube: Open the YouTube app or website, log in to your account, and upload your video.
Conclusion
Editing videos on your iPhone for YouTube is a seamless process with the right tools and techniques. Whether you use iMovie, the Eklipse mobile app, or another video editing app, you can create professional-quality content from the convenience of your phone.
Ready to elevate your video editing game? Try Eklipse’s mobile app for AI-powered editing that simplifies your workflow and enhances your video content. Visit Eklipse to get started now!
Finding it challenging to create catchy TikTok videos? You’re not alone. Luckily, AI-powered video generators can help you create high-quality content quickly and easily.
These tools can be your sidekick in crafting engaging TikToks, saving you time and effort. Let’s dive into the top picks for 2024 and get your content creation flowing!
1. Eklipse – Best for Streamers & Content Creators Who Want to Save Time Editing
Source: Eklipse Blog
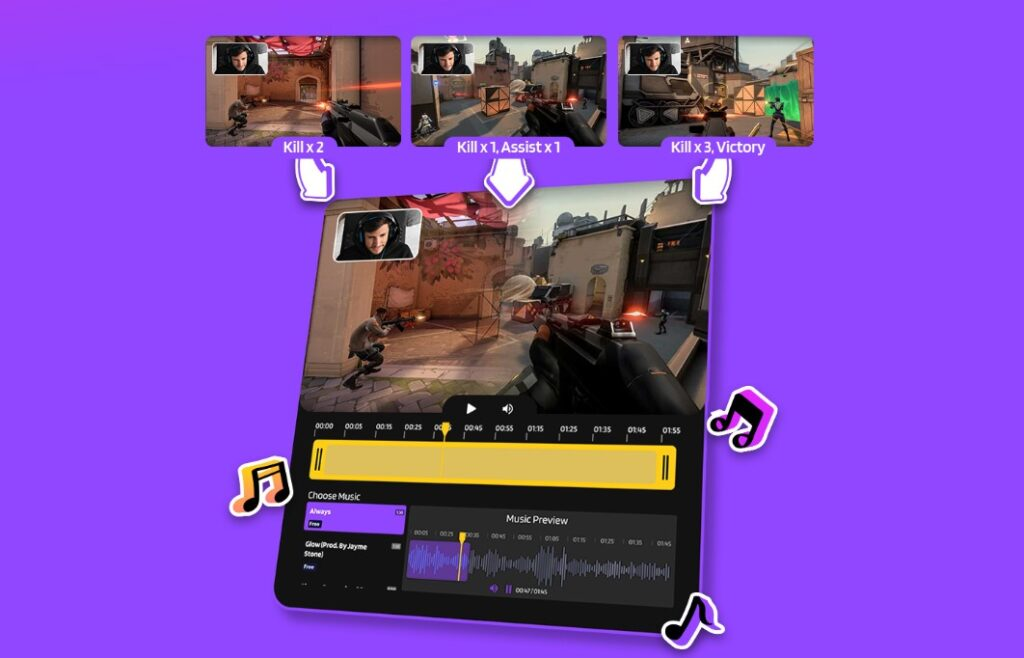
Eklipse is an AI-powered tool designed to streamline the workflow of streamers and content creators. It automatically analyzes your streams or uploads, identifies highlight moments, and even helps you edit them into bite-sized clips perfect for platforms like TikTok, Instagram Reels, and YouTube Shorts.
Eklipse works seamlessly with popular streaming platforms like Twitch and YouTube, allowing you to connect your account and grant access to your past broadcasts. Alternatively, you can upload your own gameplay footage directly to the Eklipse app or website.
The AI then scans your footage for exciting moments like kills, wins, funny fails, or clutch plays. You can customize the criteria for what Eklipse identifies as highlights, ensuring it captures exactly what you want for your content.
Key Features:
AI-powered Highlight Detection: Analyze your streams or uploads to automatically find the most engaging moments.
Automatic Clip Creation:Automatic Clip Creation: Generates short clips ready for editing or sharing.
AI-assisted Editing: Offers basic editing tools with AI suggestions to enhance your clips, including adding memes, transitions, and text overlays.
Multi-platform Sharing: Easily export your finished clips directly to popular social media platforms.
Pros:
Saves time editing by automating the tedious process of finding and editing highlights.
Focuses on capturing the best moments, ensuring you never miss a great clip.
User-friendly interface suitable for both beginners and veteran content creators.
Multi-platform support for Twitch, YouTube, and personal footage uploads.
Free and paid plans available, with paid tiers unlocking additional functionalities like longer clips and watermark removal.
Cons:
Limited editing features compared to full-fledged video editing software.
Some features may be under development or have occasional bugs as the app is relatively new.
AI accuracy may vary depending on the type of game and content.
Pricing:
Eklipse offers a free plan with basic features, including automatic highlight detection and clip creation up to 30 seconds. Paid tiers start at $9.99 per month, unlocking longer clip lengths, watermark removal, and priority processing.
Availability:
Eklipse is available as a web app accessible through any web browser, as well as a mobile app for iOS and Android devices.
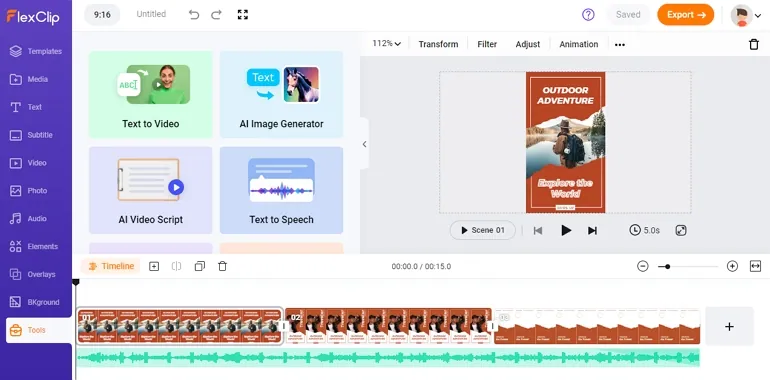
2. FlexClip – Best for Easy Online Video Editing
Source: Flexchip
FlexClip is a cloud-based video editing tool designed with ease of use in mind. Perfect for beginners and casual users, FlexClip allows you to create and edit videos entirely within your web browser, without the need for software downloads.
Whether you’re creating social media content, marketing videos, or personal projects, FlexClip provides the essential tools to get the job done quickly and efficiently.
Key Features
Drag-and-Drop Editing: Effortlessly assemble your video by dragging and dropping media files onto the timeline.
Rich Media Library: Access a vast library of stock videos, photos, and music to enhance your projects.
Text Overlays & Titles: Add titles, captions, and other text elements to your video with a variety of fonts and styles.
Transitions & Effects: Apply professional-looking transitions and effects between video clips to create a smooth flow.
Screen & Webcam Recording: Capture your screen or record yourself directly through FlexClip for tutorials, presentations, or video messages.
Background Removal (AI-powered): Isolate your subject from the background with a single click, perfect for creating clean explainer videos or product demos.
Video Trimming & Cutting: Precisely trim and cut unwanted sections from your video clips.
Speed Adjustment: Control the pace of your video by slowing down or speeding up specific sections.
Multiple Export Formats: Export your finished video in a variety of popular formats, including MP4, MOV, and WEBM, to ensure compatibility with different platforms.
Pros
Intuitive interface makes it ideal for beginners and non-technical users.
Cloud-based, allowing you to edit from any device with a web browser.
Free plan available with basic editing features and export videos with a watermark.
Vast collection of royalty-free stock media to enhance your creations.
Affordable premium plans that unlock higher resolution exports, custom branding, and cloud storage.
Cons
Limited advanced editing features compared to professional editing software.
Free exports include a FlexClip watermark.
Customization options for text overlays and titles might be limited.
Pricing
FlexClip offers a free plan with limited features and watermarked exports. Here’s a breakdown of the premium plans:
Basic: $5.99/month – 720p exports, 1GB cloud storage, and no watermark.
Plus: $7.99/month – 1080p exports, 5GB cloud storage, and access to exclusive features.
Business: $11.99/month – 4K exports, 20GB cloud storage, team collaboration features, and priority support.
Availability
FlexClip is accessible through any web browser on Windows, macOS, Linux, ChromeOS, and mobile devices. There is no dedicated app for download.
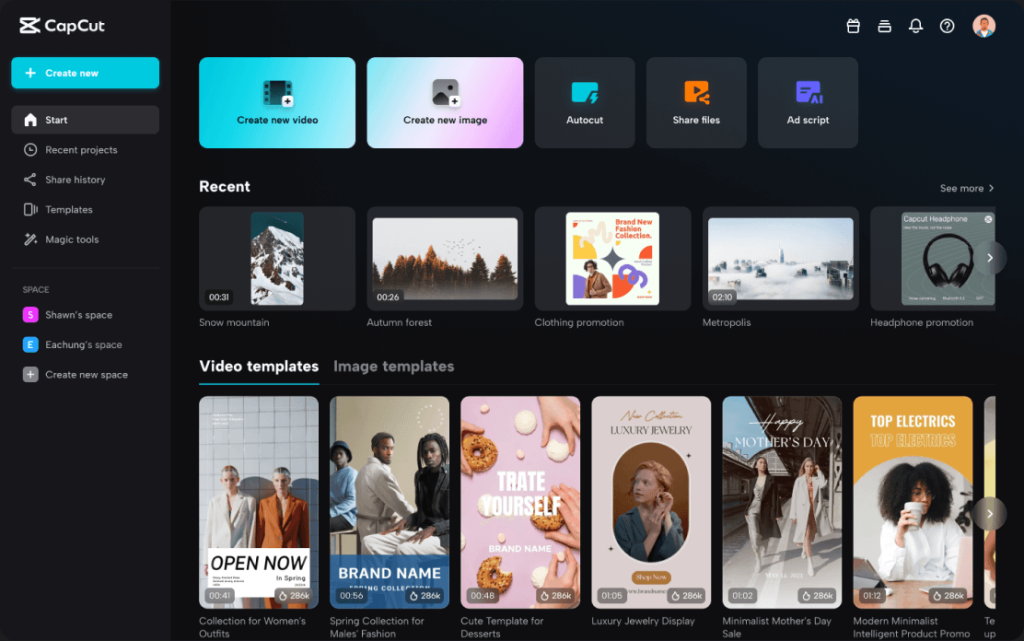
3. CapCut – Best Free Video Editing App for Beginners and Social Media Creators
Source: Capcut
CapCut is a free, user-friendly video editing app for iOS and Android that empowers anyone to create professional-looking videos for social media or personal projects.
Whether you’re a complete beginner or a seasoned social media creator, CapCut’s intuitive interface and extensive features make it a powerful tool for storytelling through video.
Key Features:
Easy Editing Tools: Offers basic editing tools like trimming, cutting, splitting, merging, and adjusting video speed. You can also reverse clips, add text overlays, and incorporate various transitions.
AI-powered Enhancements: Features like automatic background removal, smart audio adjustments, and auto captions streamline the editing process.
Extensive Music Library and Trendy Effects: Includes royalty-free music tracks, sound effects, stickers, filters, and text animations.
Multiple Export Options: Lets you export your finished video in various resolutions and frame rates to suit different platforms.
Pros:
Completely free to use with a user-friendly interface.
AI-powered tools save time and effort in creating professional-looking edits.
Extensive customization options with a vast library of music, effects, and text animations.
Specifically designed for creating engaging videos for social media platforms.
Available on both mobile and PC.
Cons:
Limited advanced editing features, not suitable for professional editors needing complex functionalities.
Free version adds a watermark to exported videos.
Some premium effects and text animations require in-app purchases.
Pricing:
CapCut is free to download and use, with an optional subscription service to remove the watermark on exported videos and unlock additional premium effects and text animations at $4.99 USD per month.
Availability:
CapCut is available for free download on iOS devices from the App Store and Android devices from the Google Play Store.
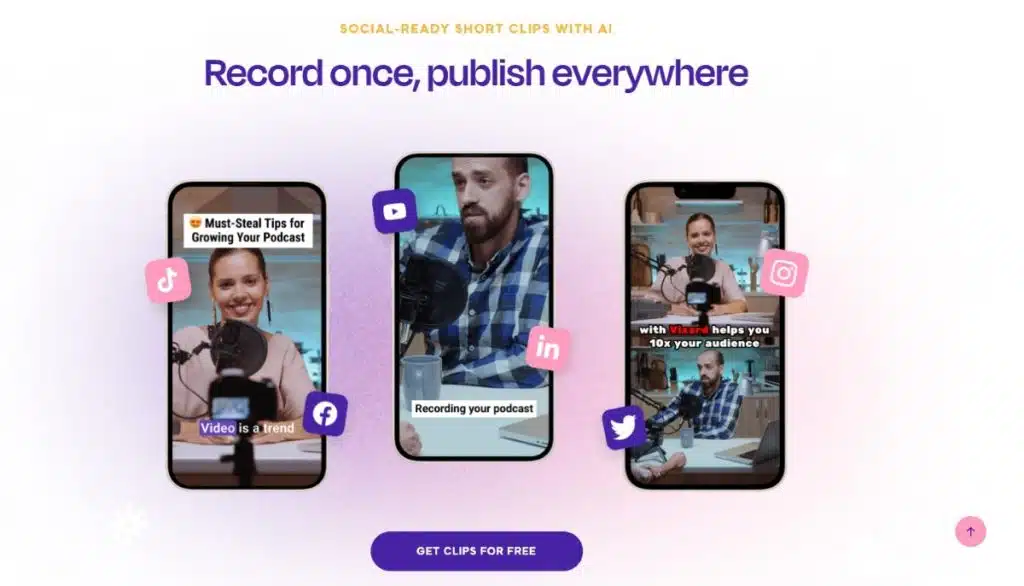
4. Vizard – Best AI-Powered Tool for Turning Long Videos into Social Media Clips
Source: AI Tool Details
Vizard.ai is an innovative platform that leverages artificial intelligence (AI) to simplify video creation, specifically focusing on generating social media-ready content. Vizard.ai caters to a wide range of users, including marketers, content creators, educators, and businesses looking to maximize their video content strategy.
Vizard.ai stands out by automatically identifying engaging segments within long-form videos and transforming them into bite-sized clips perfect for platforms like TikTok, Instagram Reels, and Youtube Shorts. This eliminates the time-consuming process of manually reviewing footage to find highlights.
Key Features:
AI-Powered Clipping: Vizard’s core feature analyzes your video and automatically generates engaging social media clips. This saves creators significant time and effort in the editing process.
Edit by Text: Leveraging AI transcription, Vizard allows users to trim videos simply by deleting sections within the corresponding text transcript.
Multi-lingual Caption Support: Vizard offers the ability to translate captions into over 100 languages, expanding your potential audience reach.
Aspect Ratio Adjustment: With a single click, Vizard can resize your video to fit the specific aspect ratio requirements of different social media platforms.
Timeline Editing: For users who prefer more granular control, Vizard offers a timeline editor for precise trimming down to the second.
Brand Templates: Vizard provides pre-designed templates or allows users to save custom templates for consistent branding across all social media clips.
Link Sharing: Collaborate with team members or share videos easily with a simple link generated by Vizard.
Pros:
Streamlines the process of generating engaging clips from longer videos.
AI-powered features automate repetitive tasks, allowing creators to focus on higher-level aspects of video strategy which save your time and resources.
Vizard helps tailor content to specific social media preferences, potentially leading to higher engagement rates.
Caption translation expands your audience to multilingual viewers.
Cons:
Vizard focuses on social media clip creation, and may not offer the full suite of editing tools found in professional video editing software.
While AI is generally accurate, there might be instances where Vizard misses specific highlights you want to include.
Free options may have restricted features, requiring paid subscriptions to unlock the full potential of the platform.
Pricing:
Vizard offers a free plan with limited features. Paid plans start at around $19 per month and offer increased functionalities like extended video processing time, additional AI clip generation options, and team collaboration tools. Pricing details may vary, so it’s always best to check their website for the latest information.
Availability:
Vizard.ai is currently a web-based platform accessible through most web browsers.
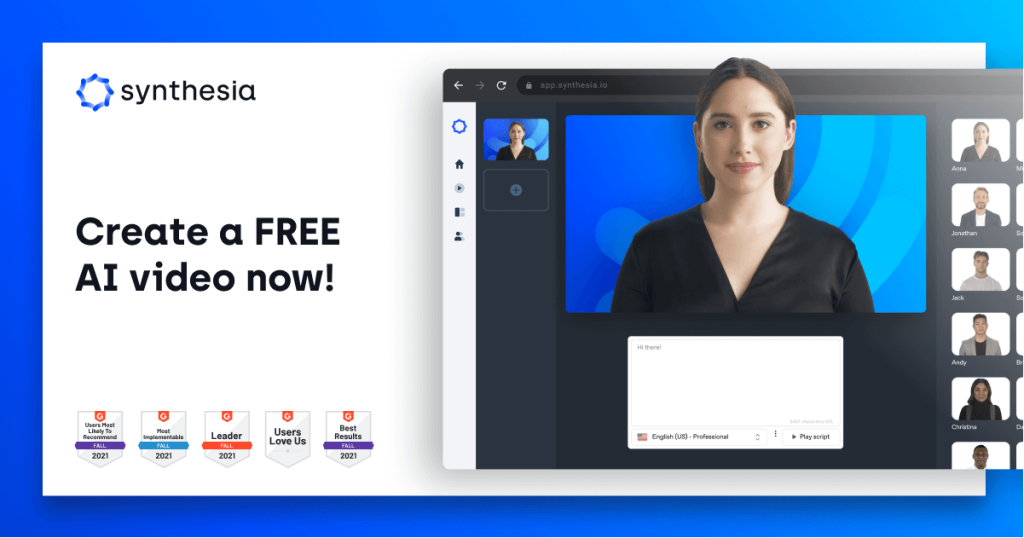
5. Synthesia – Best for Creating AI-Powered Videos in Minutes
Source: Synthesia
Synthesia is a powerful AI video generation platform that allows you to create professional-looking videos with realistic avatars speaking your script.
Whether you need explainer videos, marketing materials, or training content, Synthesia can help you produce high-quality videos quickly and easily.
Key Features:
Large Library of Avatars: Choose from a diverse range of avatars, including different ethnicities, genders, and even cartoon characters.
Text-to-Speech with Emotion Control: Type your script and select the desired tone of voice and facial expressions for the avatar.
Multi-Language Support: Generate videos in over 120 languages.
Video Editing Tools: Includes basic editing features like trimming and adding music.
Pros:
Saves time and money by eliminating the need for actors or filming crews.
Scalable, allowing for multiple videos with different avatars.
Realistic avatars with natural movements and expressions.
Accessible to a global audience with multi-language support.
Easy to use, suitable for beginners.
Cons:
Limited customization options for avatar appearance.
Occasional glitches as AI video generation technology evolves.
Free trial only allows for creating short videos with watermarks.
Pricing:
Synthesia offers monthly and annual plans starting at $30 per month for the basic plan, allowing for 10 video exports per month. More expensive plans offer higher export quotas and additional features.
Availability:
Synthesia is a web-based platform accessible through any modern web browser.
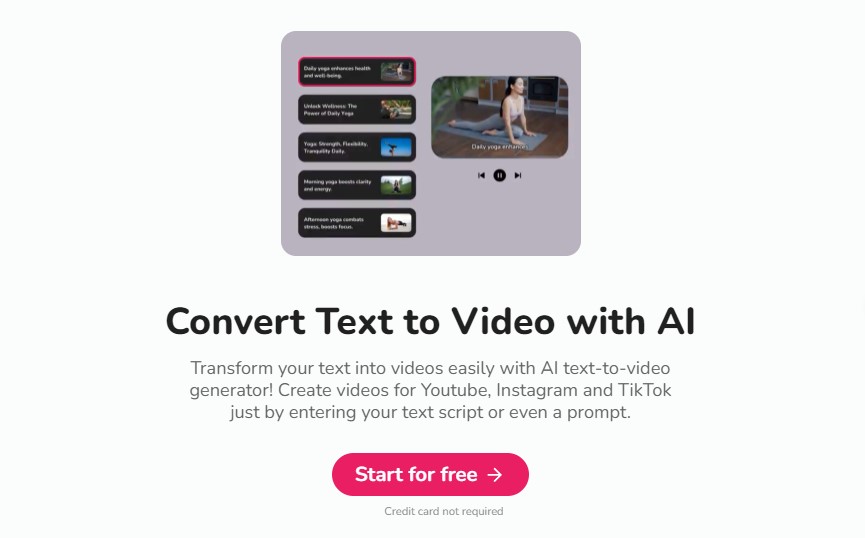
6. Fliki – Best for Effortless Video Creation with AI
Source: Fliki
Fliki is an AI-powered video creation tool that allows you to transform text, scripts, presentations, and even social media posts into engaging videos in minutes.
Fliki caters to a broad audience, including educators, marketers, social media content creators, and anyone who wants to create professional-looking videos without needing video editing experience.
Key Features:
Text-to-Video Conversion: Turn your scripts, blog posts, tweets, or presentations into engaging videos with just a few clicks.
AI-Powered Avatars: Library of lifelike AI avatars.
Extensive Template Library: Pre-designed video templates for different purposes.
Customizable Options: Personalize videos with your own branding, music, and voiceovers (beyond the AI options).
Pros:
Easy to use, perfect for beginners.
Saves time by creating high-quality videos quickly.
Cost-effective subscription plans.
Versatile, suitable for various platforms and purposes.
Realistic AI voices in multiple languages.
Cons:
Limited customization for advanced users.
Reliance on templates can restrict creativity.
The final video quality relies heavily on the quality of the text input.
Pricing:
Fliki offers a free plan with basic features and watermarked exports. Paid plans start at $19/month, unlocking additional features and watermark-free exports.
Availability:
Fliki is available as a web application, accessible through any web browser on your computer.
7. Runway ML – Best for Unleashing Creative Potential with AI
Source: Runway
Runway ML is a versatile online platform that empowers creators of all levels with artificial intelligence (AI).
With a user-friendly interface and a vast library of AI tools, Runway ML assists with various creative tasks. Whether you’re a designer, filmmaker, artist, or someone with a great idea, Runway ML can help you bring your vision to life.
It allows you to generate creative content, edit videos, and explore the possibilities of AI in a collaborative workspace.
Key Features:
Generative AI Tools: Runway ML boasts over 30 “Magic Tools” that leverage AI to generate images and videos from text descriptions. You can create realistic or artistic visuals, compose music, and even write different creative text formats.
Advanced Video Editing: Runway ML offers a robust video editing suite with special effects, transitions, color correction, motion tracking, and the ability to create 3D objects and titles. You can refine your raw footage and craft professional-looking videos.
Image Editing and Enhancement: Runway ML allows for high-resolution image generation and editing. You can use AI to inpaint missing areas of images, transfer artistic styles, and upscale resolutions.
Collaborative Workspace: Runway ML allows teams to work together on projects in real-time, streamlining the creative process and enabling efficient feedback sharing.
Pros:
The interface is beginner-friendly and accessible for professionals, requiring no prior coding experience.
Its diverse tools support video editing, graphic design, concept art creation, and AI-powered storytelling.
Runway ML is actively developing new AI models and features, ensuring users have access to the cutting edge of creative technology.
It fosters a vibrant online community for sharing projects, learning, and inspiration.
Offers a free plan with limited credits for generations and exports, allowing users to experiment with the platform before committing.
Cons:
Some of the advanced AI tools might require familiarization for new users.
The free tier restricts the number of creative outputs you can generate.
Operates on the cloud, requiring a stable internet connection for optimal performance.
Pricing:
Runway ML offers a free tier with limited credits. Paid plans start at $10 per month, providing increased generation limits, project storage, and access to exclusive features. There’s also an enterprise plan with custom pricing for larger teams.
Availability:
Runway ML is a web-based platform accessible through any web browser on devices with a stable internet connection. There are currently no mobile apps available.
Final Thoughts
These TikTok video generators offer a variety of features to suit different content creation needs. Whether you’re a beginner looking for easy-to-use tools or a professional seeking advanced AI capabilities, there’s an app on this list that can help you create engaging TikTok videos effortlessly.
Ready to elevate your TikTok content? Explore these top TikTok video generators and find the perfect tool to streamline your video creation process. For a powerful and intuitive AI video editor, visit Eklipse.
Maximize your Black Ops 6 rewards—Create highlights from your best gameplay with with Eklipse
Eklipse help streamer improve their social media presence with AI highlights that clip your Twitch / Kick streams automatically & converts them to TikTok / Reels / Shorts
Adding captions to TikTok videos is important because it helps make the videos more accessible to a wider audience.
Captions allow viewers to watch videos without sound, which is useful in situations where sound is not allowed, in noisy environments, and for those who are deaf or hard of hearing.
Additionally, captions can improve the discoverability of videos on the platform, as they provide more context and keywords for the video’s content.
But how do you add captions to your TikTok videos? There are several ways to do it. Keep reading for more information.
To add captions to your TikTok videos, you can use the auto-caption feature that TikTok provides, or you can use third-party apps or tools to create and edit your own subtitles. Here are some options you can try:
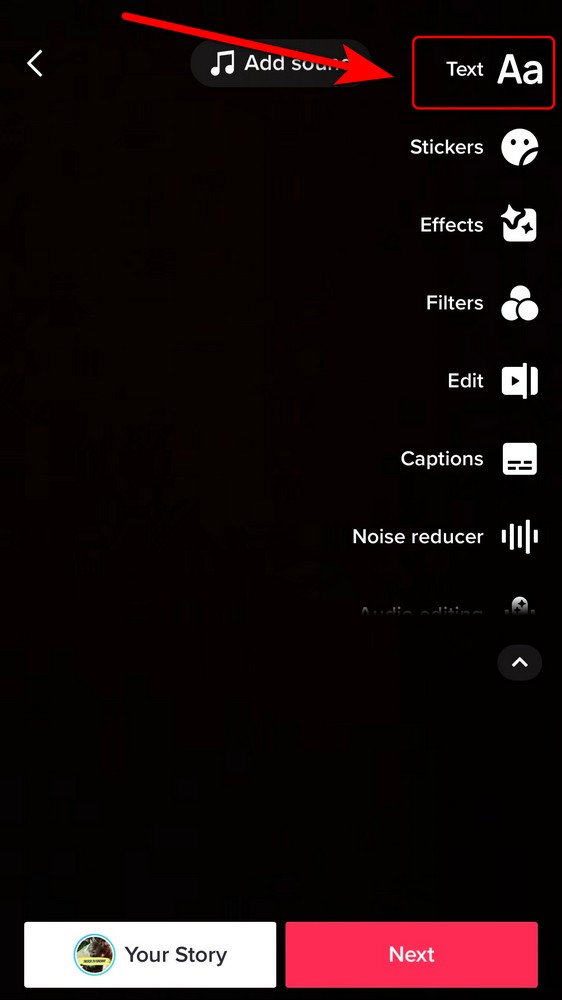
Option 1: Adding Caption Manually on TikTok
Source: Eklipse.gg
TikTok app has powerful video editing features that allow you to add captions manually. To add a caption manually in TikTok, follow these steps:
Open the TikTok app.
Tap the (+) button, then record or upload your video.
Tap the “Aa” icon on the top-right side of the screen.
Type your caption, choose the font style, text alignment, and color, then tap done.
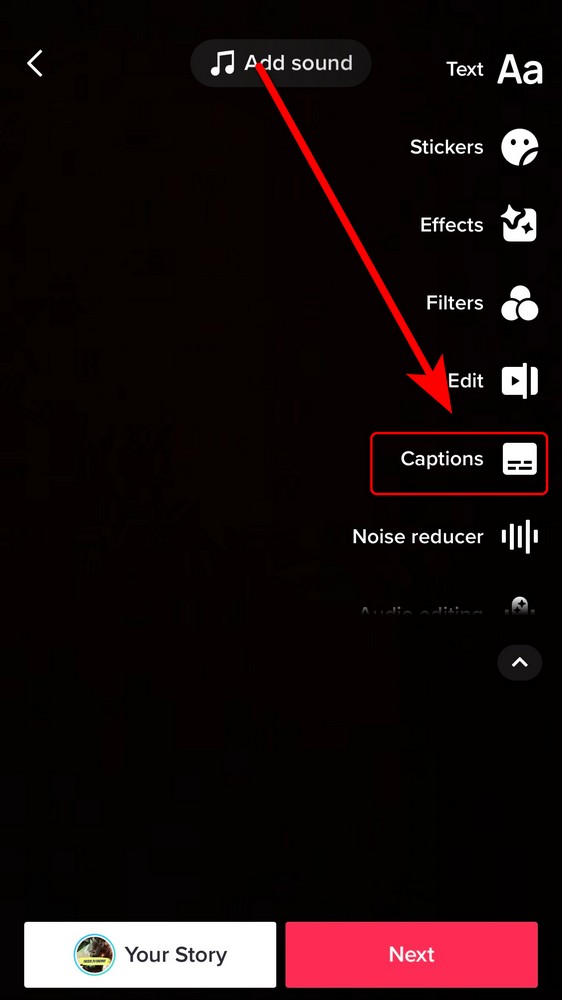
Option 2: How to Automatically Add Captions on TikTok
Source: Eklipse.gg
The best part of the TikTok app is it allows you to add captions or subtitles automatically. This really helps content creators, especially for the “how-to” types of content. Here’s how you do it:
Open the TikTok app.
Tap the (+) button, then record or upload your video.
Tap the “Captions” icon on your right side.
Choose your language.
After a second, your auto-generated captions will be ready.
You can edit the auto-generated captions for accuracy and customize the caption style, including font size and colors.
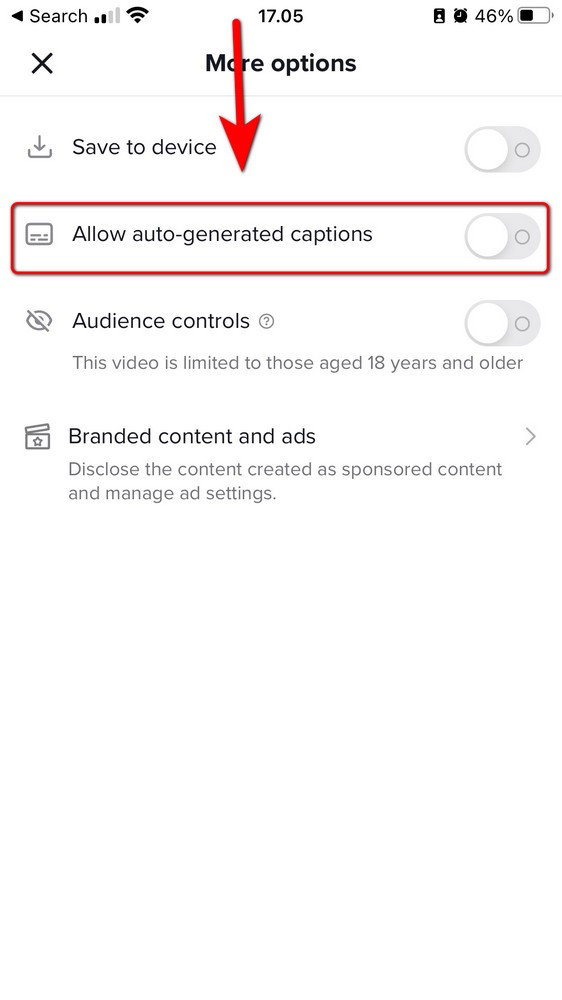
Option 3: How to Add Auto-Generated Captions on Your TikTok Content
Source: Eklipse.gg
Another great feature provided by TikTok is the auto-generated captions. However, this method might lack accuracy. Here’s how to enable auto-captions:
Open the TikTok app.
Tap (+) button, record or upload your video, then tap Next.
Scroll down a bit, tap More options.
Toggle the “Allow auto-generated captions” on.
Go back, tap Post.
Your video will now have auto-generated captions.
Why Do You Need Captions on TikTok?
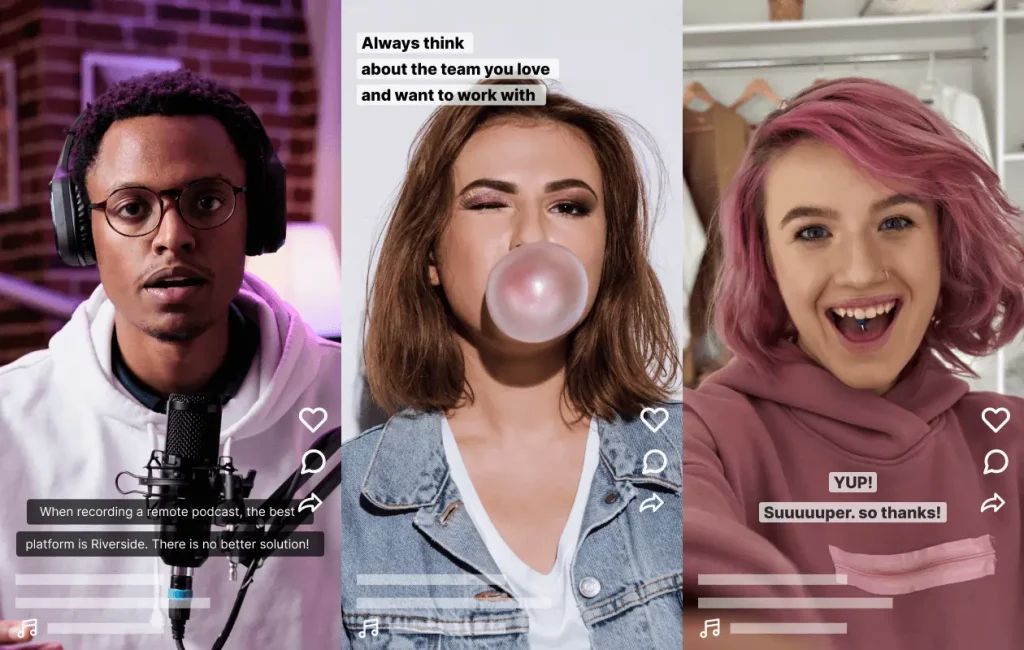
Source: Riverside.fm
Captions on TikTok are subtitles that appear on the screen to show what the audio is saying. They are useful for several reasons:
They make your videos more accessible and inclusive for people who are deaf or hard of hearing, or who watch videos with the sound off.
They help your videos get more views and engagement by capturing the attention of your audience and providing context.
They improve your TikTok SEO by including keywords related to your video topic, which can help you reach the right people and get on the For You Page.
How to Edit Captions on TikTok
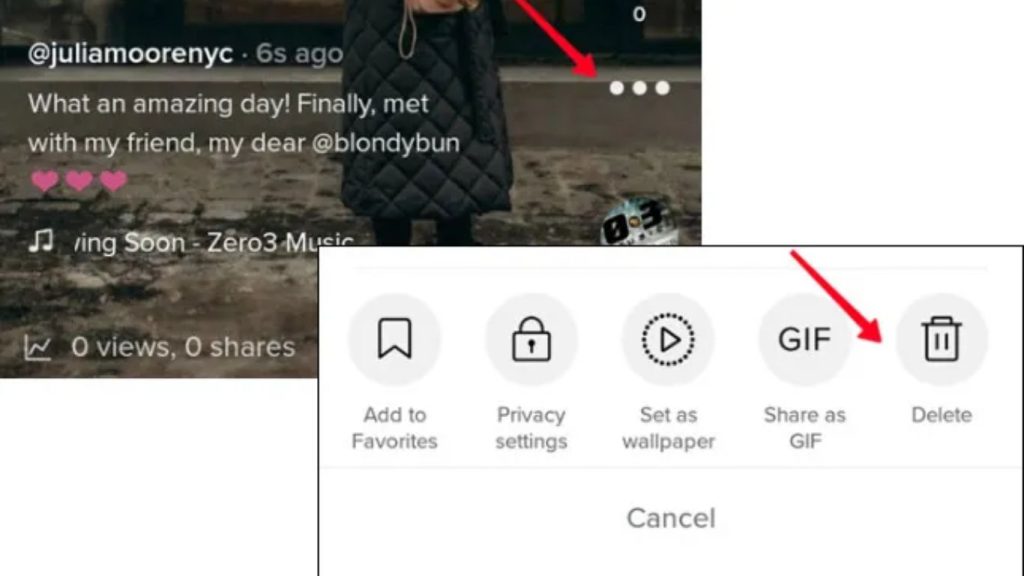
Source: FlexClip.com
Editing captions on TikTok can help you correct mistakes, add keywords, or change the tone of your video description. TikTok does not have a direct option to edit captions after posting. Instead, follow these steps:
Go to your profile and select the video you want to edit.
Tap the three dots icon on the right side of the screen and choose Save Video. This will download the video to your device.
Delete the original video by tapping the three dots icon again and choosing Delete.
Upload the saved video from your camera roll and add a new caption. Check for errors and include relevant hashtags before posting.
Alternatively, you can use the auto-caption feature on TikTok and edit the captions before posting:
Tap the plus icon to record or upload a video.
Tap the check mark to enable editing mode and then tap Captions on the right side of the screen.
Wait for TikTok to automatically generate captions for your video.
Tap the pen icon to edit the captions.
Tap Save and continue editing your video. You can also add a caption to your video description.
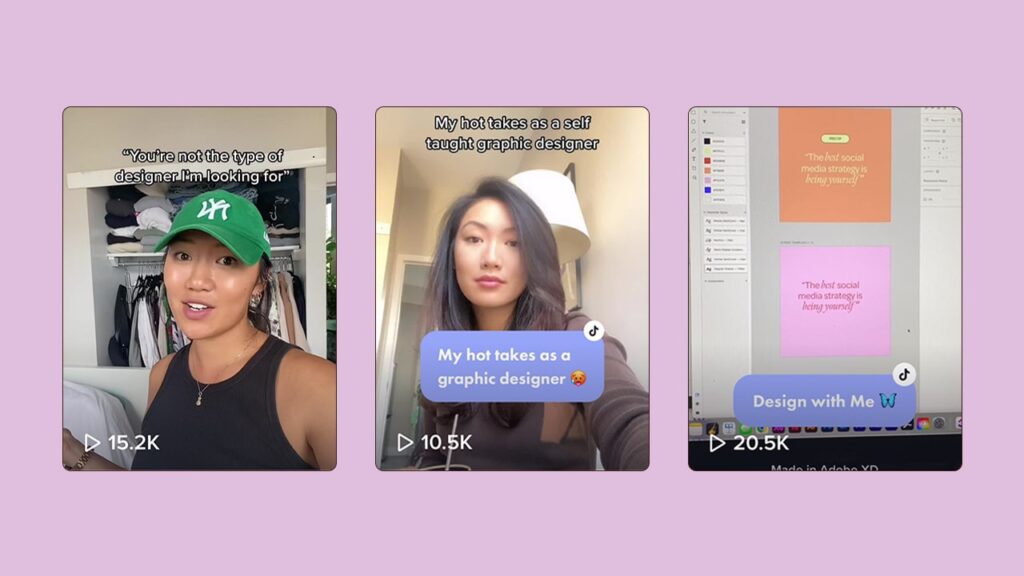
TikTok captions can help you attract more viewers, increase engagement, and improve your TikTok SEO. Here are some tips for creating engaging TikTok captions:
Complement your video content. Your caption should match the tone, style, and message of your video. It should add value or context without repeating what is already shown or said.
Keep it short and simple. TikTok users have a short attention span, so your caption should be concise and easy to read. The optimal length for a TikTok caption is between 100 and 150 characters.
Use humor and wit. A funny or clever caption can make your video more memorable and appealing to your audience. Use jokes, puns, wordplay, or sarcasm, but be careful not to offend or alienate anyone.
Evoke emotions. A caption that triggers an emotional response can increase the impact of your video. Use positive emotions like happiness or excitement, or negative emotions like anger or sadness, to create drama or suspense.
Pose questions. A question can spark curiosity and encourage interaction from your viewers. Ask rhetorical, trivia, personal, or call-to-action questions. For example, “What would you do in this situation?”, “Did you know this fact?”, “How do you feel about this topic?”, or “Can you do this challenge?”.
Use trending sounds. TikTok sounds and music play a vital role in creating viral videos. Reference popular or trending sounds in your caption.
Utilize relevant hashtags. Hashtags help your video get discovered by the TikTok algorithm and users. Use hashtags related to your video topic, niche, or style, but avoid using too many irrelevant hashtags.
Do you want to reach more people on TikTok and grow your channel? Do you want to turn your long live streams into short and catchy videos that can go viral? If yes, then you need Eklipse.
Eklipse is a powerful tool that helps you share your live streams on TikTok and other social media platforms. Eklipse can automatically clip your streams into bite-sized videos perfect for TikTok. You can choose the best moments from your streams, add captions, filters, stickers, and music, and upload them to TikTok with one click.
With Eklipse, you can save time and effort, and increase your exposure and engagement on TikTok. Showcase your personality, skills, and creativity to millions of TikTok users, and attract more followers and fans. Eklipse can also help you monetize your TikTok channel by connecting you with brands and sponsors.
FAQs
1. Why can’t I add captions to my TikTok?
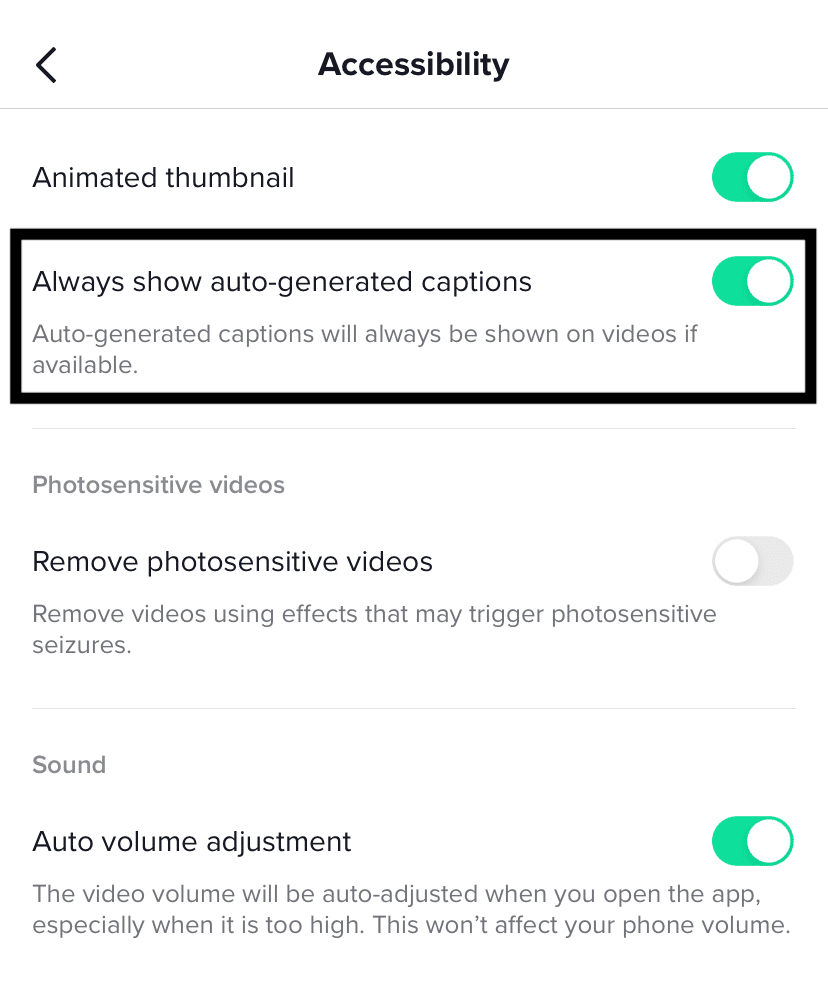
Go to Settings > Accessibility and make sure you’ve turned the captions feature on. When publishing a new video, go to More Options, turn on the captions feature, and select the right language.
2. How do I turn captions on TikTok?
Source: Hootsuite.com
Go to your Settings and Privacy and tap on the Accessibility tab. Here you’ll see the option to Always show auto-generated captions. Make sure the button is switched on.
3. Where do you put captions on TikTok?
You can place captions anywhere on your video, but most content creators prefer to put captions towards the top to avoid confusion with the video’s description.
Conclusion
Adding captions to your TikTok videos can significantly expand your audience. Whether you choose to manually add captions using TikTok’s built-in tools, utilize the convenience of auto-generated captions with the option to refine them for accuracy, or explore third-party applications for added customization, each approach makes your content more inclusive and compelling.
For those looking to automate the process of clipping live streams into TikTok-ready videos, consider tools like Eklipse. Try Eklipse.gg today!
Want to share those epic wins and funny moments from your Twitch streams? Twitch Clips lets you grab the best moments and show them off to your viewers. Picking a part of your stream, trimming it down, and saving it as a clip is that easy!
But what if you want to make your clips even more exciting? That’s where Eklipse comes in! Eklipse is a smart tool that uses AI to find the best moments in your streams and automatically turns them into short, attention-grabbing clips, all without you needing to be a skilled video editor. Plus, it only takes a few seconds!
Eklipse lets you add more to your clips too. You can choose a cool template, add your channel name, and even throw in some background music. Sound exciting? Keep reading to find out how Eklipse can take your Twitch clips to the next level!
Compact and quick—that’s what Eklipse offers you. With just a few clicks, you’ll be all set. Let’s take a closer look at the steps below.
Head over to the Eklipse website and sign in to your account.
You can log in using Facebook, Twitch, or email. Register if you haven’t yet.
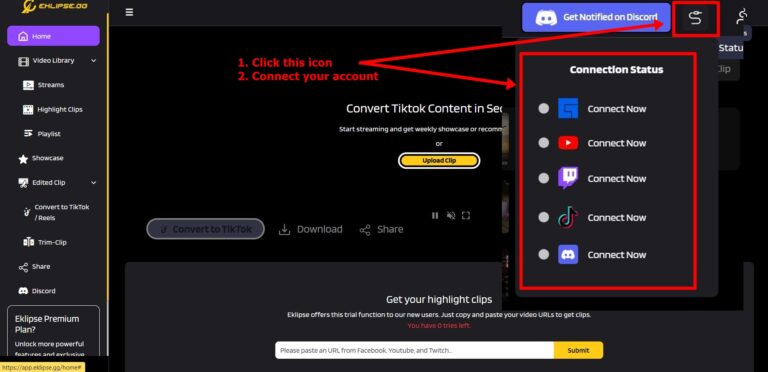
Hit the cable icon to connect Eklipse with your social platforms.
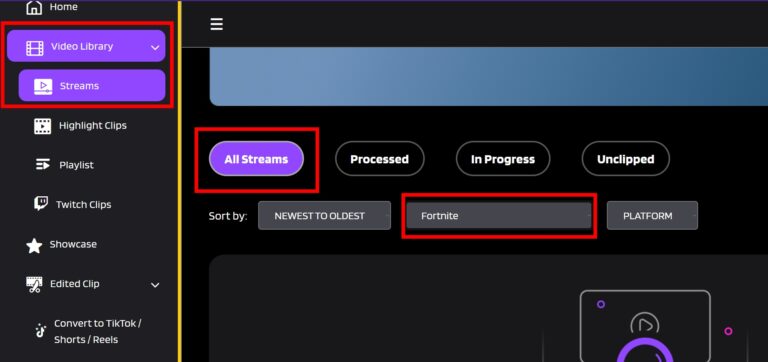
Go to the Streams tab under the Video Library and find your streams there.
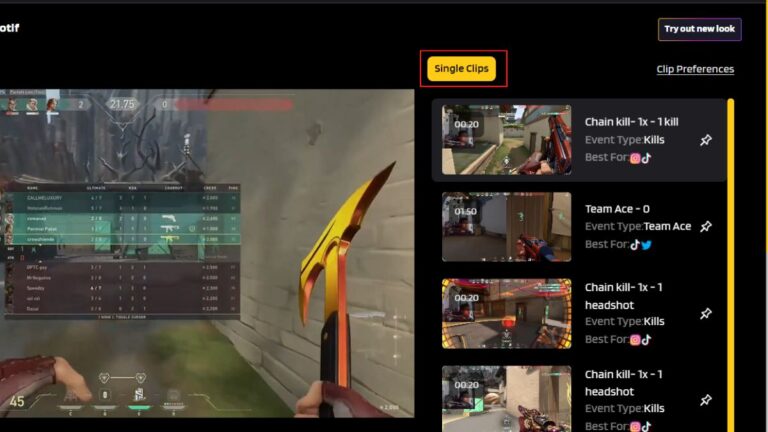
Click on the stream you’d like to clip, and Eklipse will automatically offer some short clips.
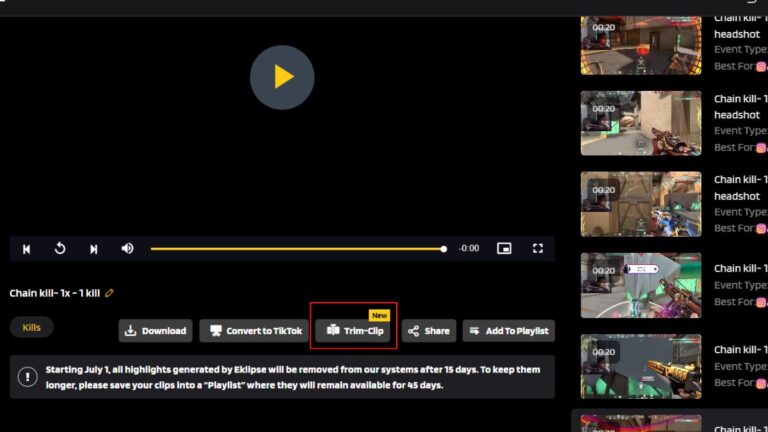
To trim the length of your video, hit the Trim-clip option under the preview.
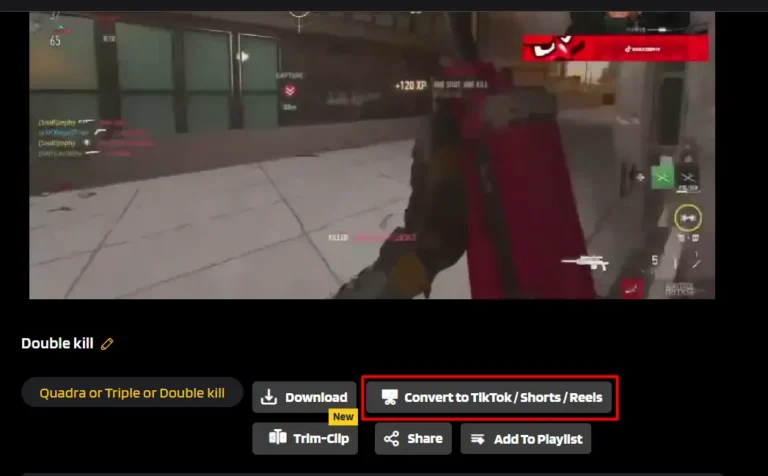
Alternatively, hit the Convert to TikTok/Shorts/Reels button to convert it into a bite-sized video.
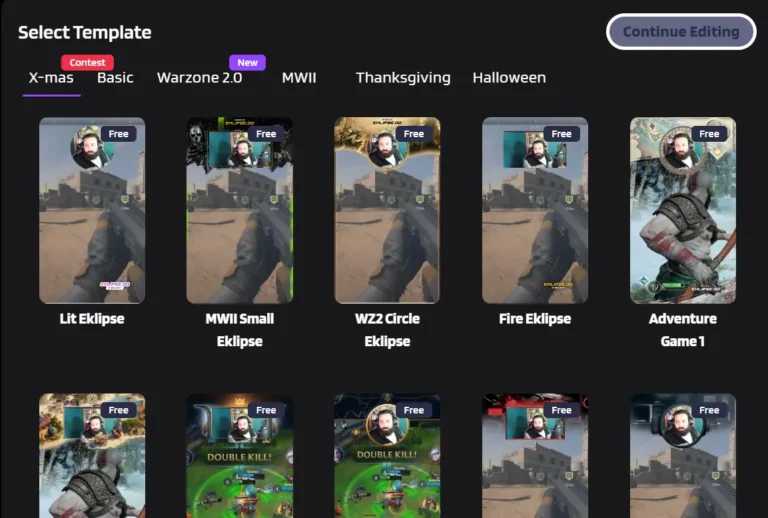
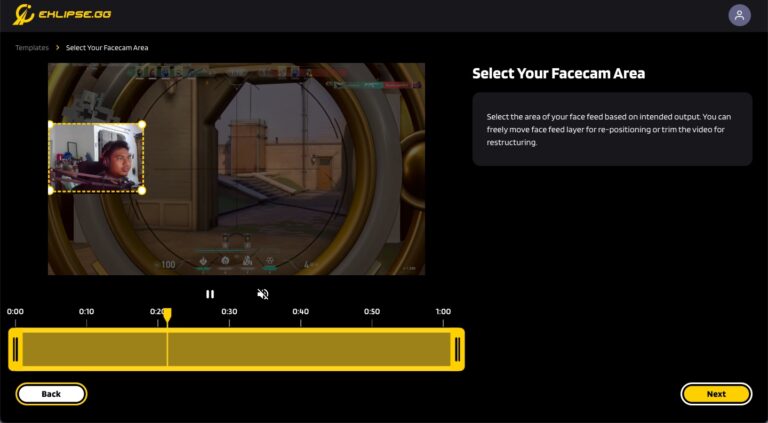
Choose your preferred template and hit Continue Editing.
Customize your game feed and facecam area, as well as the clip length. Hit Next.
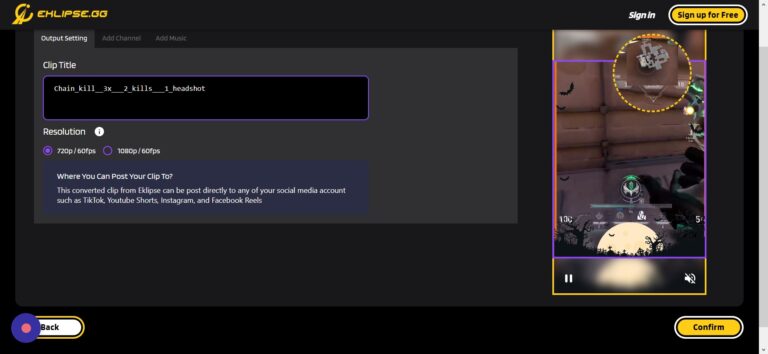
Set the resolution, add channel names, and a catchy soundtrack before you click on the Confirm button.
Wait for a few seconds and boom! Your Twitch clip is now ready!
How to Find Your Edited Clips on Eklipse
Now that you have edited your clip, you can access and instantly share it on your social networks. Here’s how to do it:
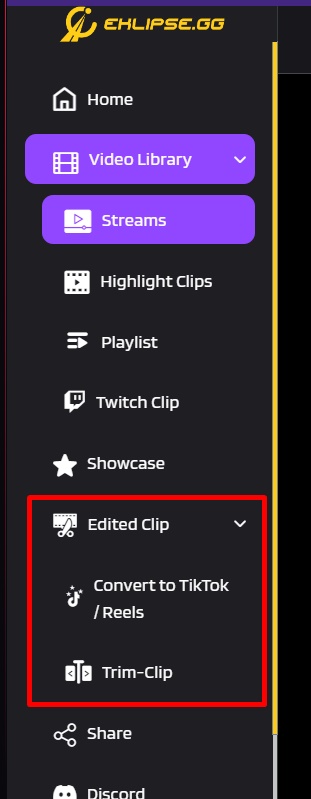
Go to the Edited Clips option and select the Convert to TikTok/Reels section.
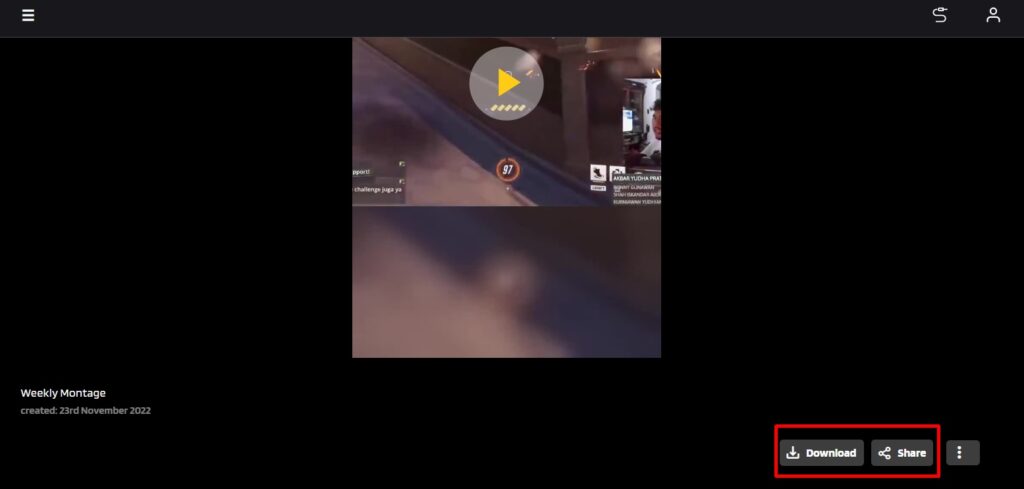
Find your edited clip and click on it.
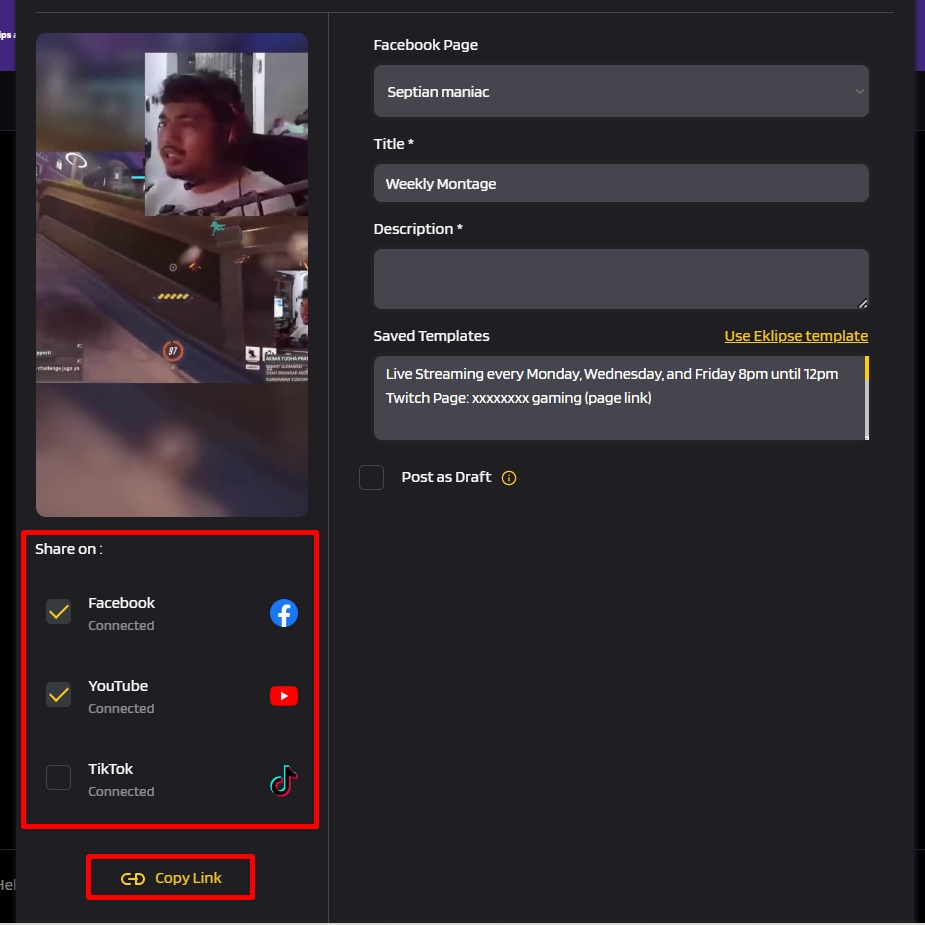
Hit the Share option (or Download if you want to save it).
Select any social media you want your video to be posted on.
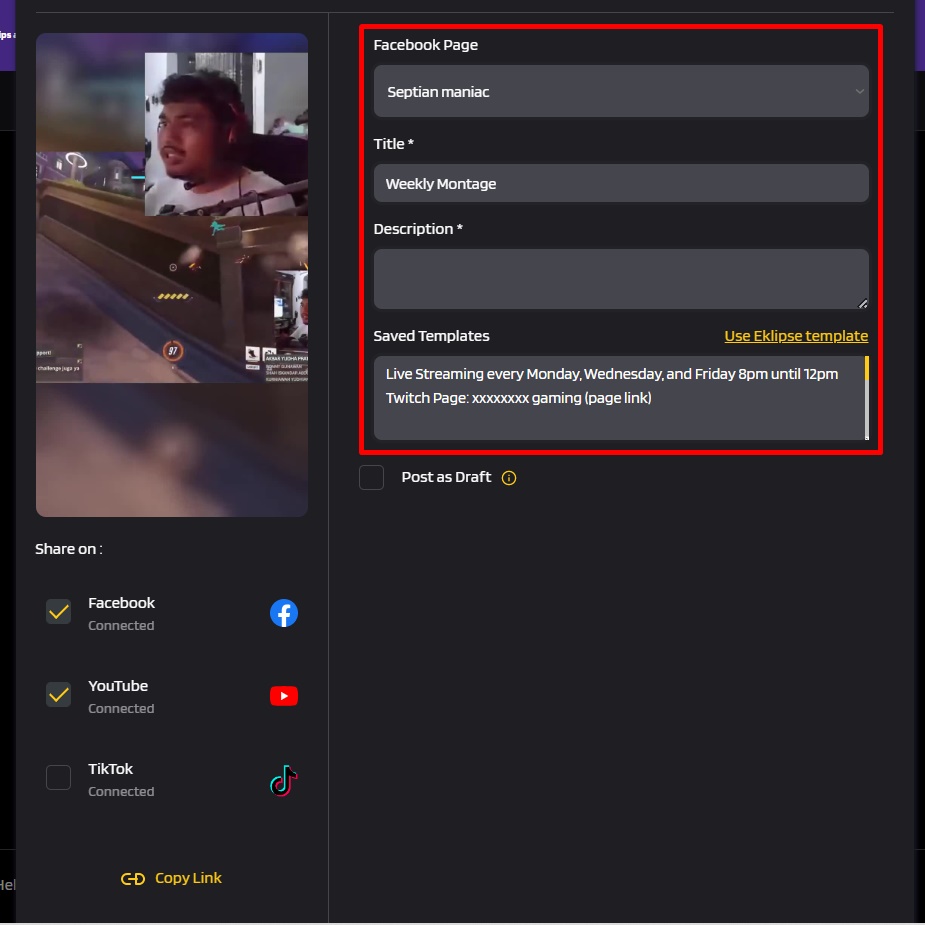
Write a title and description.
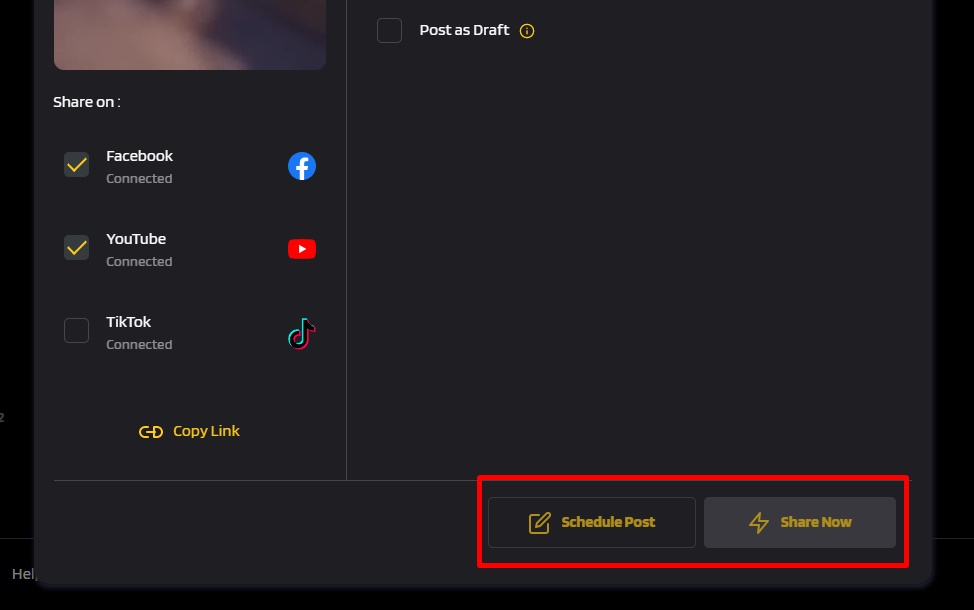
Once done, click on the Share Now button to immediately share it.
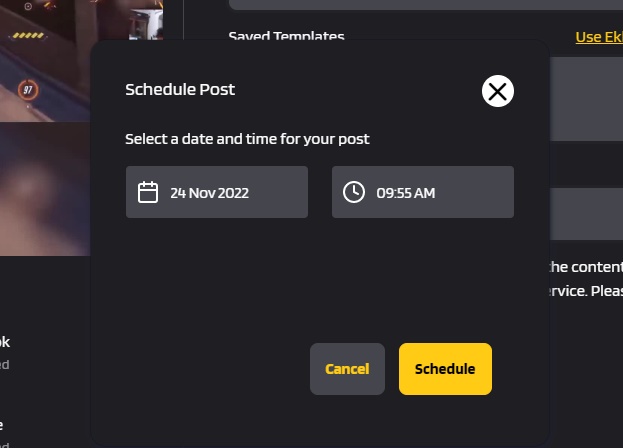
In addition, you can schedule your post by clicking on the Schedule Post button.
Set the date and time and you’re all set.
Conclusion
Ready to enhance your Twitch clips and engage your viewers? Eklipse is a powerful tool designed to help you effortlessly create captivating clips from your streams. Using artificial intelligence, Eklipse identifies the best moments and transforms them into short, shareable videos.
Skip the editing hassle and let Eklipse do the work! With Eklipse, you can quickly produce professional-looking highlights without needing advanced editing skills. Sign up for free at Eklipse.gg and discover an easy way to elevate your content. Watch your channel and audience grow with minimal effort!
Maximize your Black Ops 6 rewards—Create highlights from your best gameplay with with Eklipse
Eklipse help streamer improve their social media presence with AI highlights that clip your Twitch / Kick streams automatically & converts them to TikTok / Reels / Shorts
Rumble and Eklipse join forces to supercharge your content creation! Linking your Rumble account to Eklipse unlocks a treasure trove of features to streamline your workflow and generate killer highlights.
This guide is your key to unlocking this powerful combo, no matter if you’re a seasoned content creator or just starting out.
Follow these simple steps, and in no time you’ll be wielding the power of Eklipse to elevate your Rumble content! Let’s dive in!
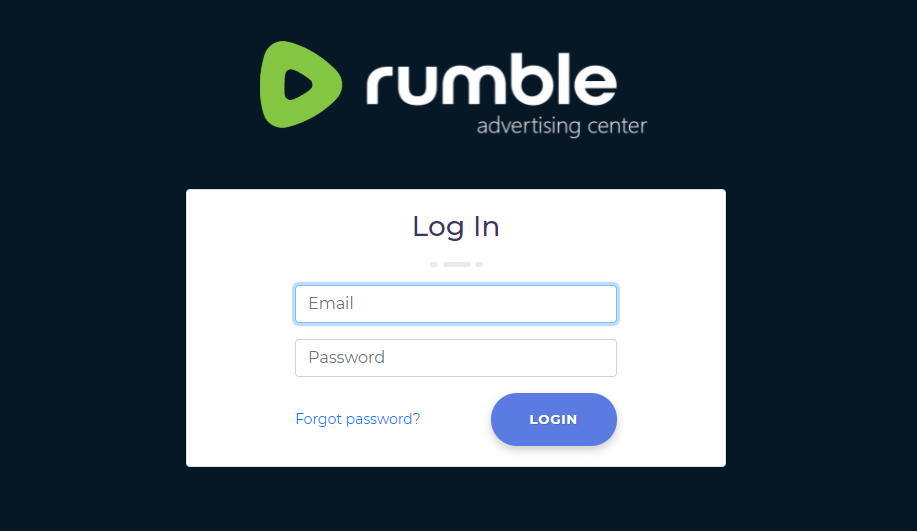
Log in to Rumble: Go to the Rumble website and log in to your account.
Source: Rumble
Access My Channels: Click on your profile icon located in the top-right corner and select ‘My Channels.’
Select Your Channel: Click on the channel you want to connect.
Copy the Channel URL: Copy the URL from your browser’s address bar. It should look something like https://rumble.com/c/c-1111111.
Step 2: Connect to Eklipse
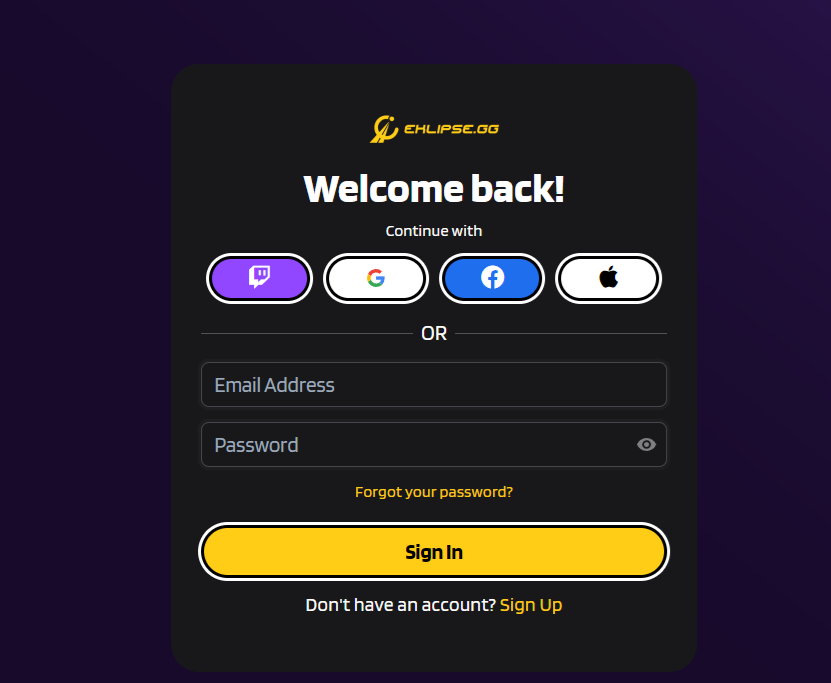
Log in to Eklipse: Navigate to Eklipse and log in to your account.
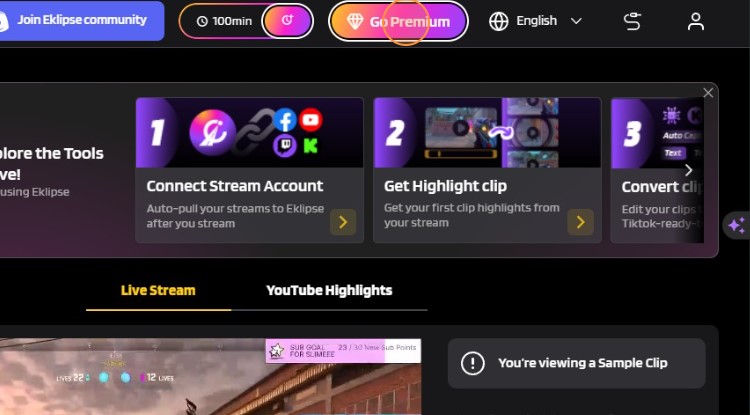
Source: Eklipse Blog
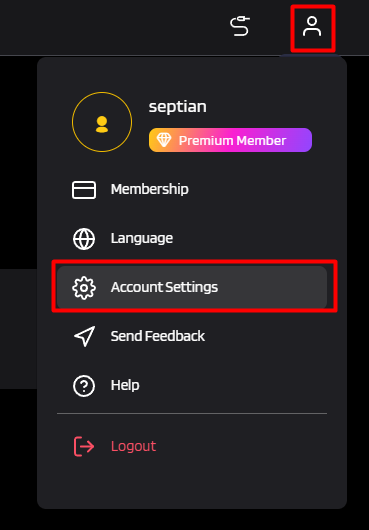
2. Access Account Settings: Click on your profile icon and select “Account Settings.”
Source: Eklipse Blog
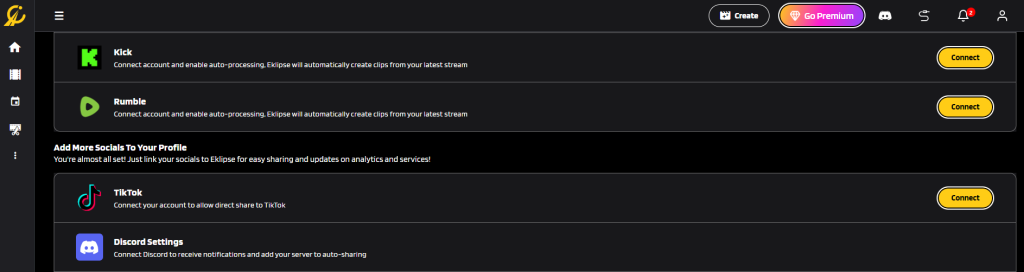
3. Add Rumble Account: Click on “Add Account” and choose Rumble from the list of available platforms.
4. Enter Rumble URL: Paste your Rumble account link into the input field provided.
5. Confirm Connection: Click “Get Clip” to confirm the connection.
Step 3: Submit and Process Your Stream
Source: Steam
Select Content Type: After connecting your Rumble account, submit your stream by selecting the game you played or the type of content you created.
Wait for Processing: Your stream will be processed, and highlights will be generated based on your settings.
Benefits of Connecting Your Rumble Account
Connecting your Rumble account to Eklipse allows you to:
Generate Stream Highlights: Automatically create highlight clips from your Rumble streams.
Access Advanced Features: Utilize additional tools and features available on Eklipse.
Streamline Content Creation: Simplify the process of editing and sharing your content on social media.
Upgrading to Premium
To connect your Rumble account, you need a premium account on Eklipse. Upgrade by clicking the “Go Premium” button available on your profile page or the main dashboard.
Final Thoughts
Connecting your Rumble account to Eklipse is a straightforward process that offers numerous benefits, including automated highlight generation and advanced content creation tools. This integration is designed to enhance your productivity and simplify your workflow, making sharing share engaging content with your audience.
Ready to enhance your video content? Connect your Rumble account to Eklipse today and use of powerful features designed to streamline your content creation process. For more information and to get started, visit Eklipse.
Maximize your Black Ops 6 rewards—Create highlights from your best gameplay with with Eklipse
Eklipse help streamer improve their social media presence with AI highlights that clip your Twitch / Kick streams automatically & converts them to TikTok / Reels / Shorts
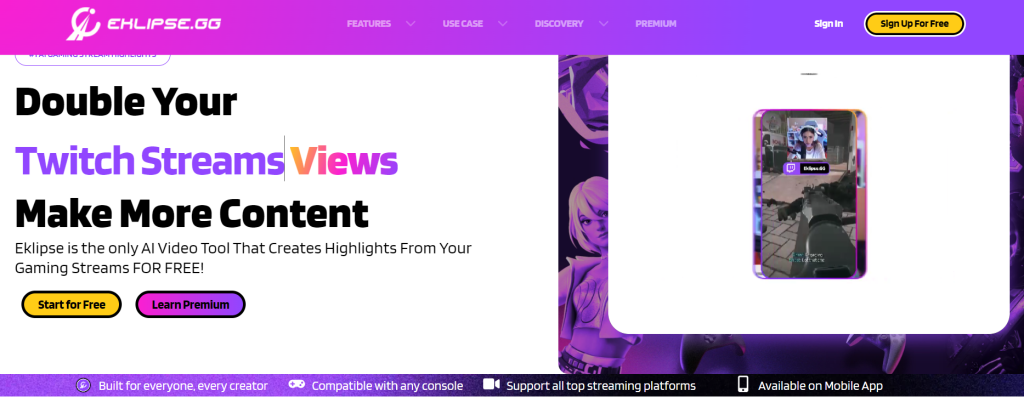
If you’re seeking alternatives to Clipmaker AI, numerous powerful tools are available for efficient video creation and editing. These alternatives offer a variety of features, from automatic editing to advanced customization, accommodating diverse needs and skill levels. Here’s a comprehensive list of the best Clipmaker AI alternatives for 2024.
Eklipse is an AI-powered video editing tool designed to automatically generate highlights from your gaming streams. It identifies key moments and converts them into short clips suitable for social media platforms like TikTok, Instagram Reels, and YouTube Shorts. Eklipse also offers a voice command feature for hands-free clipping while streaming as well as AI Edit for automated editing.
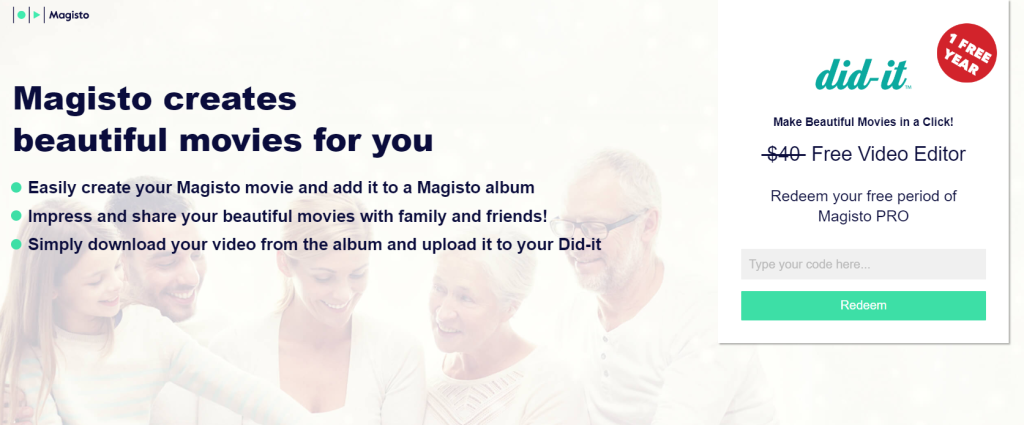
Magisto leverages AI to transform your videos and photos into edited movies with music and effects. It analyzes your footage, selects the best parts, and applies transitions, making it ideal for quick, shareable content. With its intuitive interface, Magisto makes video editing accessible even for those with no prior experience.
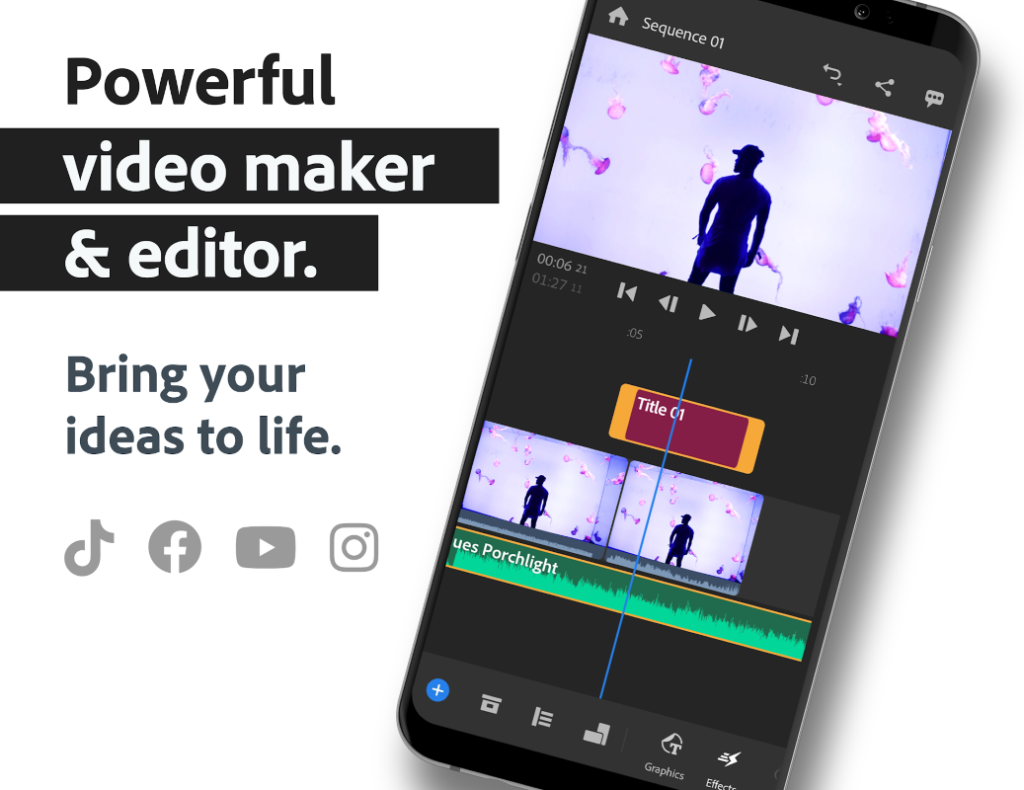
Adobe Premiere Rush is a versatile video editing app that works seamlessly across multiple devices. It provides built-in templates and presets that can automatically arrange your clips and apply transitions and effects. Premiere Rush is perfect for users who want a powerful yet user-friendly tool to edit videos on the go.
Quik by GoPro automatically edits your footage by analyzing your videos to find the best moments, adding transitions and effects, and syncing everything to the beat of the music. Quik is especially beneficial for GoPro users, but it can be used with any video footage.
InVideo offers AI-powered video creation tools that help users turn scripts, articles, and content into professional videos automatically. It’s suitable for marketers, content creators, and businesses looking to produce high-quality videos with minimal effort. InVideo’s extensive template library and text-to-video conversion capabilities make it a versatile choice.
Lumen5 uses AI to turn blog posts, articles, and other text content into engaging videos. It automatically matches text with relevant visuals, animations, and music, making it a popular choice for content marketers. Lumen5’s drag-and-drop interface and multiple brand kits make video creation simple and efficient.
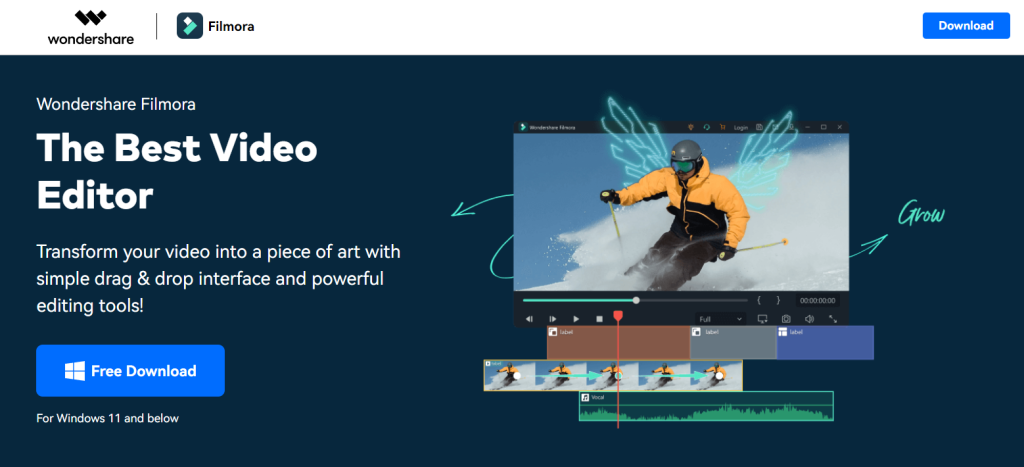
Filmora by Wondershare is known for its ease of use and powerful editing capabilities. It offers an AI-powered mode that can automatically edit videos based on the templates and themes you select. Filmora is suitable for both beginners and advanced users, offering a wide range of features and an intuitive interface.
These Clipmaker AI alternatives offer a variety of features to suit different video editing needs and skill levels. Whether you are looking for a simple tool to create quick clips or a comprehensive platform for professional video editing, there is an app on this list that can meet your requirements.
Ready to enhance your video editing capabilities with AI-powered tools? Explore these top alternatives to Clipmaker AI and find the perfect app to streamline your video creation process. For a powerful and intuitive AI video editor, visit Eklipse.
Automatic video editing apps have transformed the video creation process, enabling users to produce high-quality content with minimal effort. In 2024, these apps have become more accessible than ever.
Leveraging AI and machine learning, these apps analyze footage, select key moments, and automatically apply transitions, effects, and music. They help you produce stunning videos in a fraction of the time it used to take.
Ready to elevate your video editing game effortlessly? Explore our curated list of the top automatic video editing apps in 2024 and discover which one best suits your needs. Keep reading to find out more!
Eklipse is an AI-powered tool that automatically generates highlights from your gaming streams. It identifies key moments in your streams and converts them into short clips suitable for social media platforms like TikTok, Instagram Reels, and YouTube Shorts. Eklipse’s voice command feature allows users to create clips hands-free while streaming.
Magisto uses AI to turn your videos and photos into edited movies with music and effects in minutes. It analyzes the footage, selects the best parts, adds transitions, and overlays music, making it perfect for creating quick, shareable content. This AI-powered clipping software caters to those who want to create professional-looking videos without the hassle of complex editing software.
Adobe Premiere Rush is a cross-platform video editing app that offers automatic editing features. It provides built-in templates and presets that can automatically arrange your clips and apply transitions and effects. This makes it perfect for anyone who needs to create high-quality social media content or whip up quick edits without being chained to a desktop computer.
Quik is an automated video editing app by GoPro that automatically edits your footage. It analyzes your videos to find the best moments, adds transitions and effects, and syncs everything to the beat of the music. The app also includes powerful color correction tools and automatic editing features specifically tailored for GoPro footage, ensuring your action shots look their absolute best.
InVideo offers AI-powered video creation tools that help users turn scripts, articles, and content into professional videos automatically. With a user-friendly interface with a rich library of pre-made templates, InVideo is suitable for marketers, content creators, and businesses looking to produce high-quality videos with minimal effort.
Lumen5 uses AI to turn blog posts, articles, and other text content into engaging videos. It automatically matches text with relevant visuals, animations, and music. This makes Lumen5 ideal for anyone who wants to create effective social media video ads, explainers, or educational content without extensive editing experience.
These automatic video editing apps leverage AI to simplify the video creation process, making it accessible to users with varying levels of expertise. Whether you’re a gamer, content marketer, or casual user, there’s an app on this list that can help you create professional-quality videos effortlessly.
Ready to streamline your video editing process? Try these top automatic video editing apps today and find the one that best suits your needs. For AI-powered gaming highlights, visit Eklipse and embark on a creative journey with the right AI clipping software by your side.
How to clip game clips on PC? The easiest way is by utilizing Eklipse’s voice command feature.
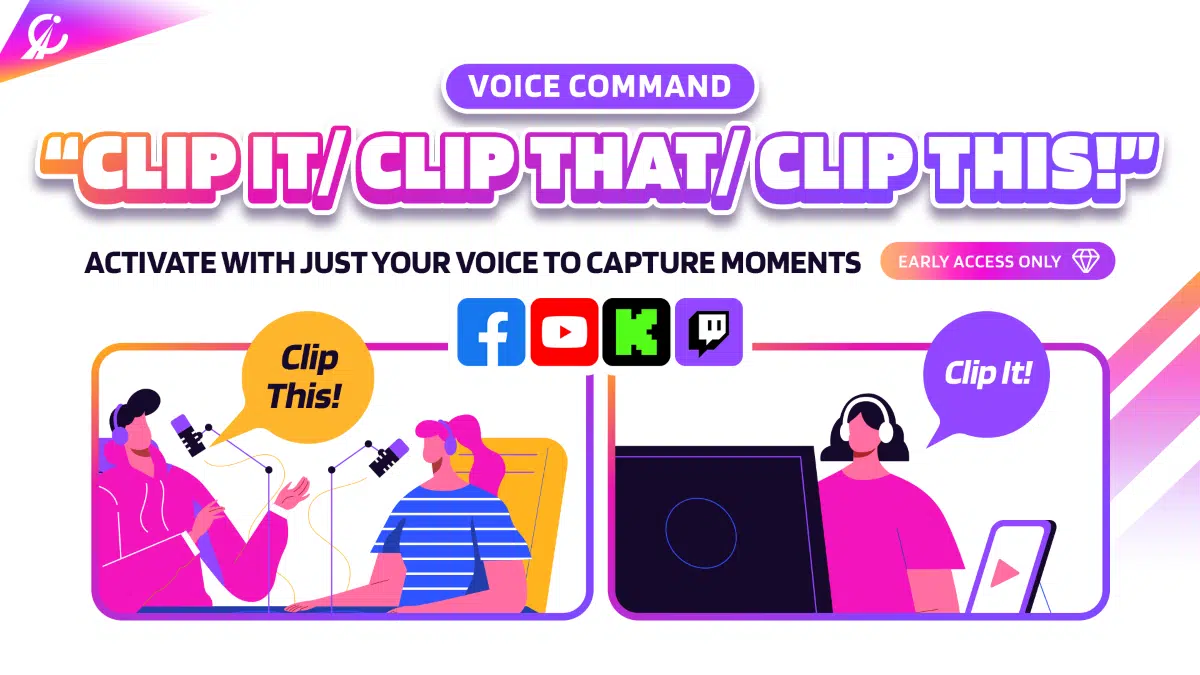
Eklipse is the first AI video live-streaming clipper with a voice command feature. As the name suggests, you can easily capture the best moment during your livestream using your voice. Just say the keywords and the clip will be created automatically.
You can also convert the clip into shareable content for TikTok, Reels, or YouTube Shorts. Keep reading to learn the complete tutorial on clipping game moments on PC (Windows 10, 11, and Mac) using Eklipse’s voice command!
Say “Clip this” or “Clip it” when a highlight-worthy moment occurs during your stream. Eklipse will recognize the command and create a clip from the preceding moments of the stream.
Say “Clip that” to capture the last few seconds of gameplay. Make sure your commands are clear and distinct to avoid any miscommunication.
Once done, navigate to the “Stream/Video” menu.
Find the new clip and edit it using Eklipse’s built-in editor. You can add auto-captions, templates, and channel stickers to enhance your videos.
Once you are satisfied with your edited clips, you can easily share them on social media platforms directly from Eklipse.
Troubleshooting Voice Command Issues
If you encounter issues with the voice command feature, consider the following steps:
Check Microphone Access: Ensure your microphone is properly set up and has access permissions.
Clear Commands: Make sure to use correct voice commands as specified by Eklipse.
Update Software: Ensure your Eklipse software is updated to the latest version.
Conclusion
Eklipse voice command is a cool feature that helps streamers clip their best moment in real-time during a stream. Just say “Clip this” or “Clip that” and Eklipse will automatically save those highlights!
Ready to enhance your gaming content with Eklipse? Sign up on Eklipse today, and experience AI-powered editing that simplifies your workflow and enhances your content quality!
Source: Eklipse Blog - Broadcasting Using Third-Party Hardware or Software
Kick.com is a new streaming platform that has been making waves in the world of online gaming. The great news is, that now you can stream on Kick using OBS Studio!
However, some streamers may still be unsure about how to start streaming on Kick using OBS Studio. Don’t worry though; beginning a Kick livestream on OBS Studio is quite straightforward.
In this tutorial, we’ll show you how to stream on Kick using OBS Studio. Let’s dive in!
Step by Step Guide to Stream on Kick Using OBS Studio
How to stream on Kick using OBS studio? It’s pretty simple! Just go follow these steps:
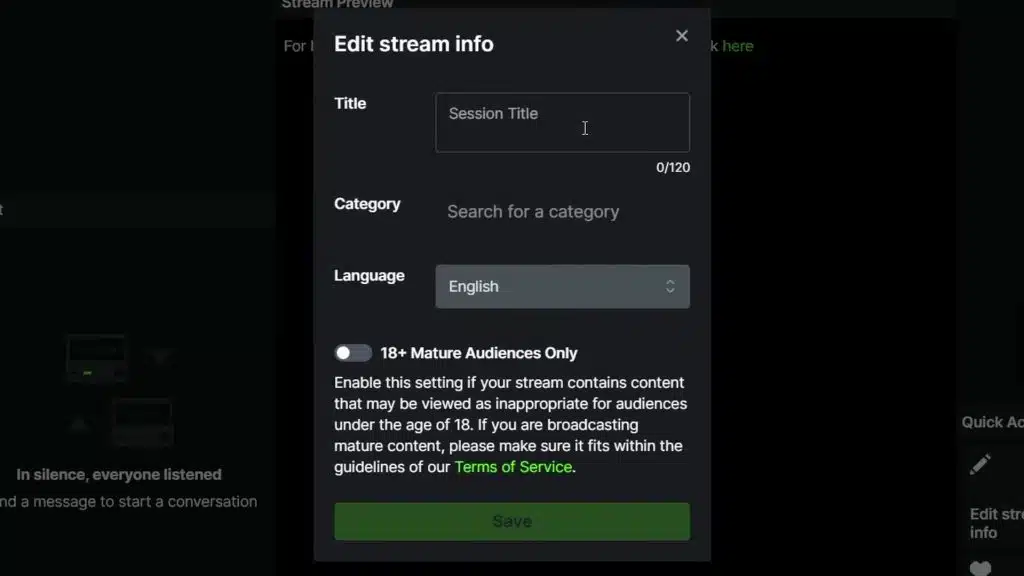
Step 1: Create Your Kick Account and Edit Stream Info
Source: Eklipse.gg
First, head to the Kick website and create an account.
Once you’re done, log in and go to the “Creator Dashboard”. From there, click on the “Edit Stream Info” button in the bottom right corner.
Here, you’ll be able to set your stream title and select the game category you’ll be streaming.
Type the title of your stream and the game that you want to play. Then, hit “Save”.
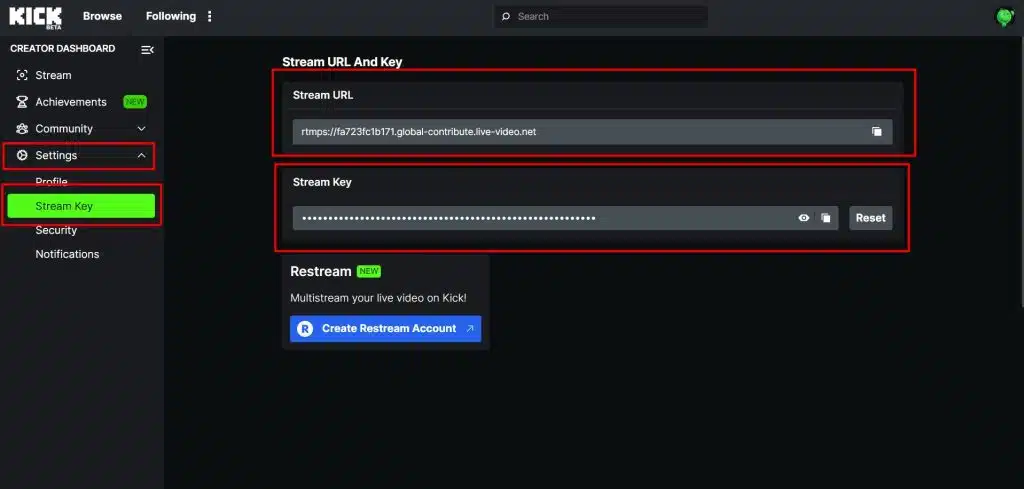
Step 2: Copy Your Stream URL
Source: Obsproject.com
Next, head to the “Settings” tab on the left-hand side of the Creator Dashboard. From there, click on “Stream Key”, then copy your stream URL and your Stream Key using the button provided.
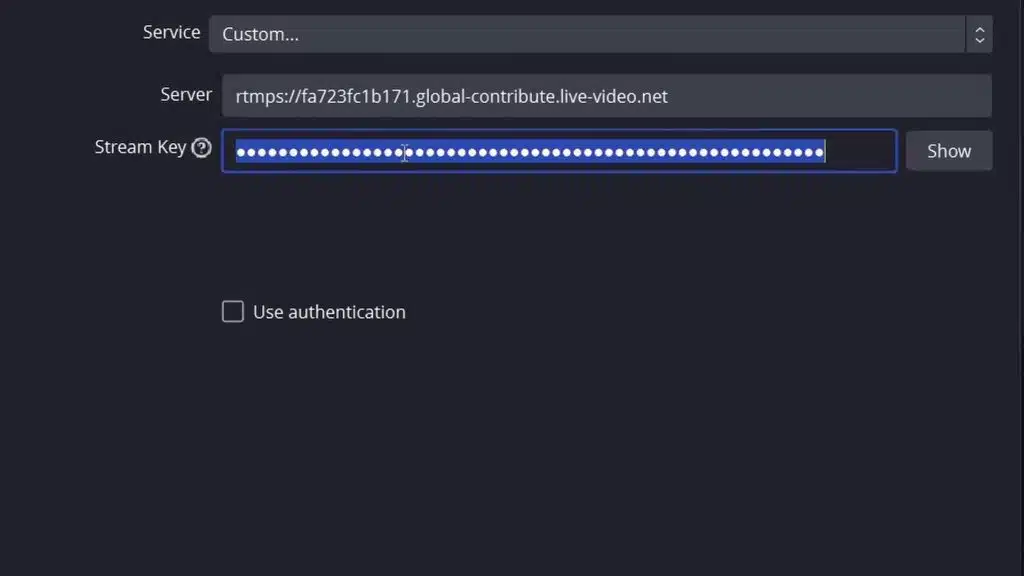
Step 3: Set up OBS Studio
Source: Obsproject.com
Now, it’s time to set up OBS Studio. If you haven’t already, download and install OBS Studio. Once you’ve opened OBS Studio, here’s what you need to do:
Click on “File” then “Settings” in the top left corner.
Then, click on the “Stream” tab and select “Custom” as your streaming service.
Paste in the stream URL you copied earlier on the “Server” box.
Now, copy your stream key from the Kick Creator Dashboard and paste it into the “Stream key” box in OBS Studio.
Hit “Apply” and “OK”.
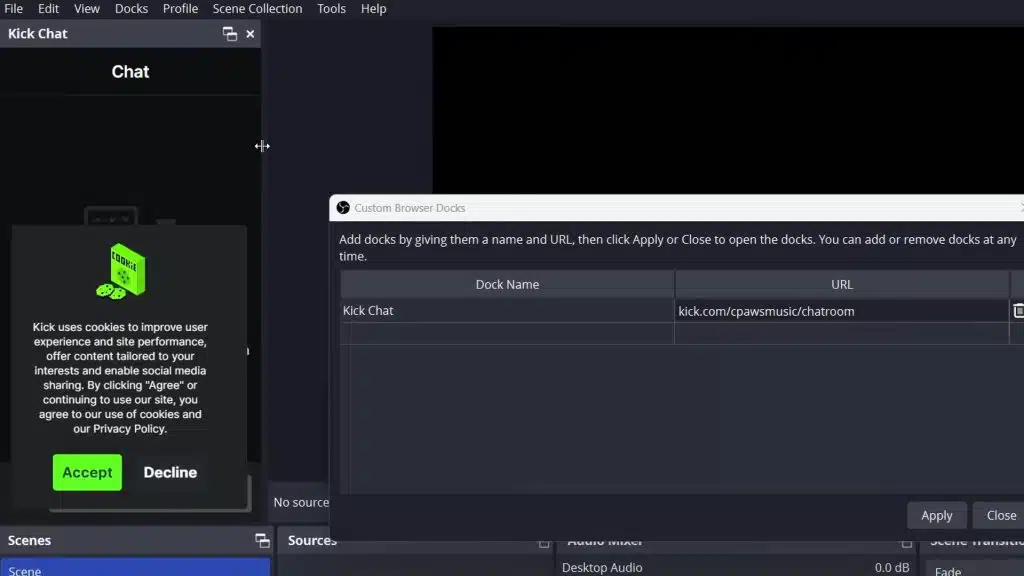
Step 4: Add Your Chat
Source: Obsproject.com
To add your chat to OBS Studio, click on the “Docks” tab in the top left corner of OBS Studio. Then, select “Custom Browser Docs” and add two new browser sources.
Hit “Apply” and dock the source where you want it in OBS Studio.
Now that you’ve added the chat, you might notice that you can’t send messages because you still need to log in.
To log in, create a second browser source, name it “Kick Login”. Click “Apply” and then click “Login”.
Enter your login information and hit “Login”. Then, close the browser source and hit “OK”.
You can delete the second browser source, and now you can chat in the dock that you created before.
Step 5: Setup Your Overlay
In OBS Studio, you can customize your Kick stream overlay to your heart’s content. However, it’s important to set up the basics needed for a stream, including your game capture, webcam, and chat.
Here’s how to stream 1080p on Kick with OBS Studio:
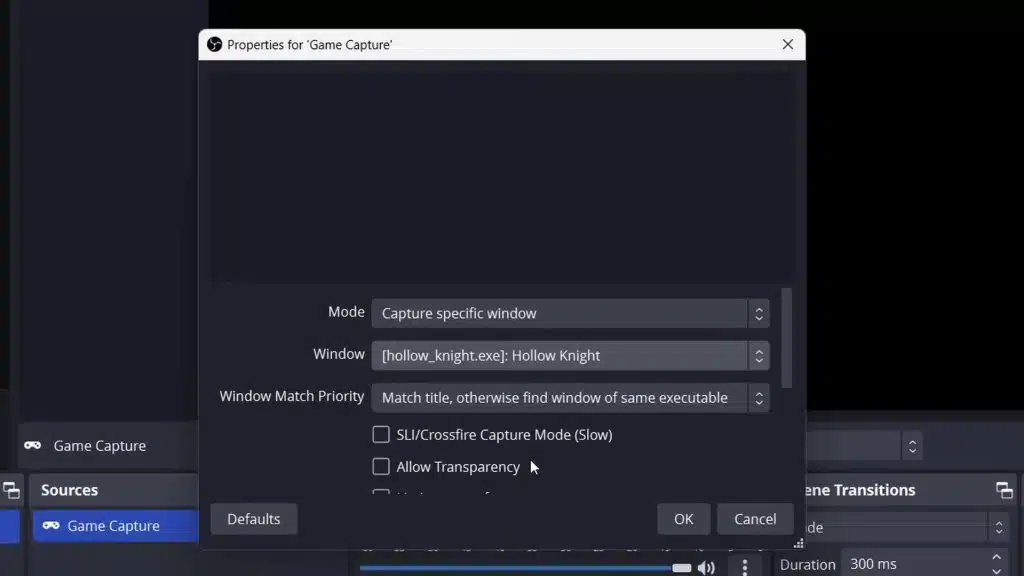
Game Capture
Source: Obsproject.com
Click on the “+” icon under “Sources”.
Select “Game Capture”.
Choose “Capture Specific Window” under “Mode”.
Select your game from the “Window” list.
Click “OK”.
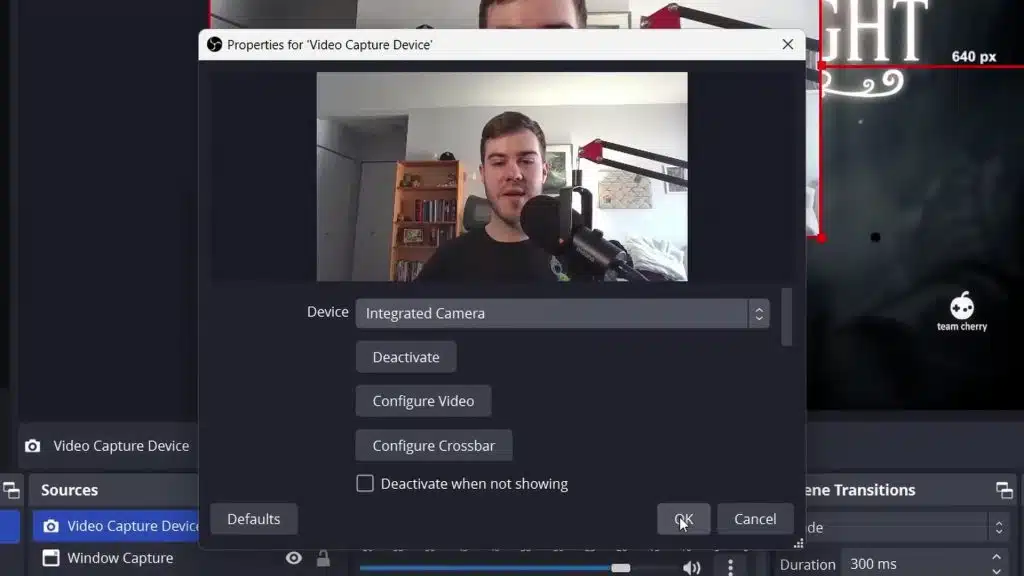
Facecam
Source: YouTube @Cpaws Music
Click on the “+” icon under “Sources”.
Select “Video Capture Device”.
Choose your webcam device.
Click “OK”.
Resize and reposition your facecam as desired.
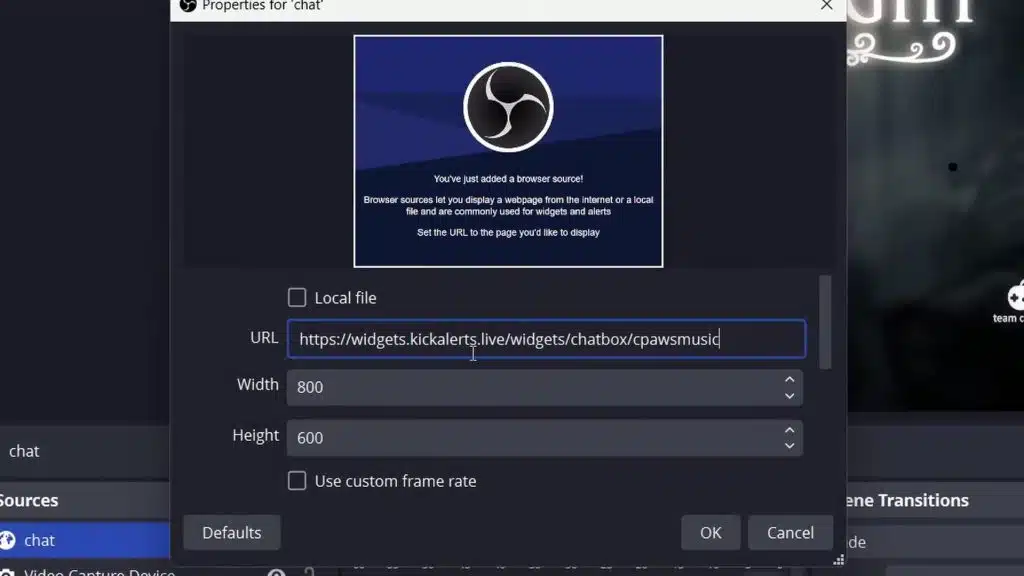
Chat Overlay
Source: Obsproject.com
Click on the “+” icon under “Sources”.
Select “Browser”.
Enter the URL into the “URL” box (https://widgets.kickalerts.live/widgets/chatbox/YOURUSERNAME).
Click “OK”.
Resize and reposition your chat overlay as desired.
Before you start streaming, you must confirm that your OBS Studio settings are correct.
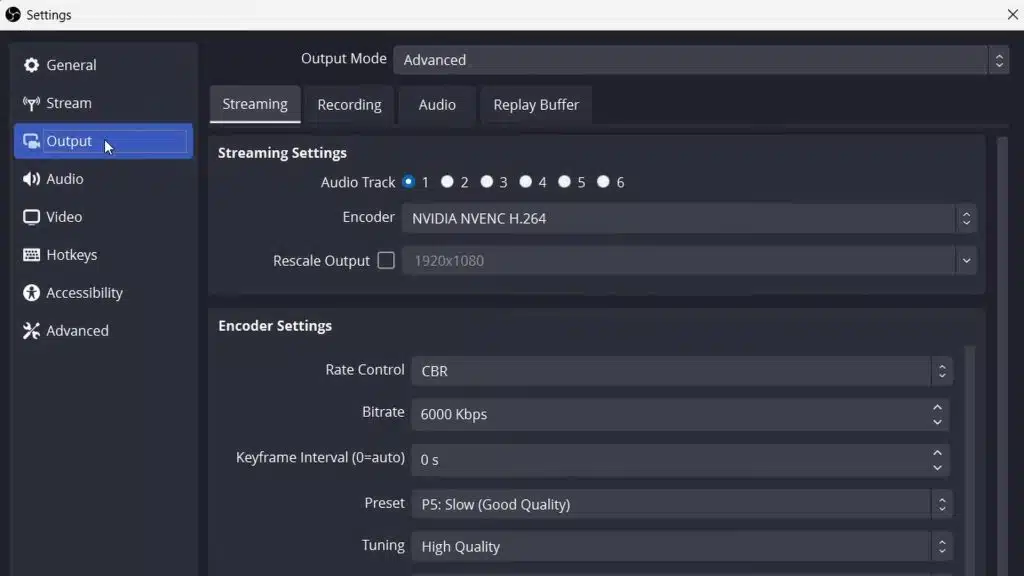
Step 5: Confirm Your OBS Studio Settings
Source: Obsproject.com
In the “Output” tab of OBS Studio’s settings, make sure your encoder is set to “Nvidia NVENC H.264” (if you have it) and your rate control is set to “CBR”. Your bitrate should be set to 6000, but adjust this based on your internet speed and PC specs.
In the “Audio” tab, set your sample rate to 48 kHz. For your desktop audio, leave it at default or adjust it based on your setup.
And it’s done! Now you know how to stream on Kick mobile or PC with OBS Studio.
Boosting your Kick Stream viewership isn’t easy, as it requires consistency. You can follow these 5 fundamental tips to keep in mind every time you want to stream on Kick:
Plan Ahead: Prepare your content, duration, and structure. Planning helps you stay organized and promote your stream effectively.
Promote Wisely: Use social media to post teaser content and create buzz about your upcoming stream. You can also explore Eklipse for easy and fast content creation with its AI highlights tool.
Repurpose Your Content: Use your livestream VOD as social media content for TikTok, Reels, and Shorts to expand your audience even more.
Equipment Matters: Invest in a good camera, microphone, and lighting for quality production.
Engage Actively: Interact with your audience by responding to comments, seeking feedback, and creating interactive segments.
Implementing these tips will help you attract and retain viewers, building a thriving Kick Stream community.
FAQ – Kick Stream using OBS
Here are some frequently asked questions (FAQ) related to “how to stream Kick using OBS”:
1. Can you stream on Kick with OBS?
Certainly! You can seamlessly go live on Kick by adding it as a “Custom destination” in OBS. Just input your Kick Stream key and server URL.
2. What are the best settings for OBS streaming for Kick?
For the best results, set your “Base Resolution” to 1920 x 1080, “Output Resolution” to 1920 x 1080, and choose “Common FPS Values” at 60.
3. How do I add Kick alerts to OBS?
Navigate to the “Sources” menu, click the (+) button, select “Browser,” create a new source labeled “Alerts,” paste your Kick live URL, and click “OK.”
Conclusion
That’s everything on how to stream on Kick and Twitch with OBS Studio. Now that you’ve set up OBS Studio and added your chat, you’re ready to start streaming on Kick. Remember to test your stream before you go live.
To take your streams further, check out Eklipse.gg. It uses AI to simplify video editing tasks, like automatically creating highlights from your Kick streams. This helps you create polished content effortlessly, giving you more time to connect with your audience. Visit Eklipse.gg now to see how AI can transform your content creation process and elevate your streaming journey.
Want to take your Twitch streams to the next level? Eklipse offers a powerful and easy-to-use solution for editing your Twitch videos. With a focus on AI-powered tools, Eklipse helps you create engaging and entertaining content to keep your audience hooked.
In this guide, we’ll explore the world of Eklipse editing and show you how to use its features to transform your Twitch streams into must-watch content. Let’s dive in!
Eklipse – Best Free AI-powered Highlight Tool for Streamers
Source: Eklipse.gg
Eklipse is an innovative app that uses artificial intelligence to automatically generate highlight clips from your Twitch, YouTube, or Facebook Gaming streams.
Whether you’re a seasoned streamer or just starting, Eklipse can save time and effort by capturing the most exciting and engaging moments from your broadcasts.
Editing Twitch Videos with Eklipse: A Quick Guide
Eklipse focuses on using AI to automatically generate clips and convert them into social media-friendly formats, rather than in-depth video editing. However, it does offer some light editing features for these clips. Here’s how to use Eklipse for basic editing of your Twitch clips:
1. Connect Your Twitch Account and Generate Clips
Sign up for an Eklipse account.
Head to your profile settings and connect your Twitch account.
Source: Eklipse Blog
You can enable “Auto-processing” to automatically clip highlights after your streams.
Source: Eklipse Blog
Alternatively, you can import past VODs (Video on Demand) from Twitch for clipping.
2. Accessing and Editing Clips
Navigate to the “Clips” section and choose “Streams” from the menu.
Source: Eklipse Blog
Select the “Processed” tab to see your automatically generated clips.
Pick the clip you want to edit.
3. Editing Options in Eklipse
Eklipse offers some basic editing features:
Trim: Shorten the clip by dragging the start and end points of the video timeline.
AI Edit (Beta): This feature is currently in beta testing. It automatically adds memes, sound effects, and visual effects to create a more engaging clip.
4. Converting Clips for Social Media
Eklipse excels at converting your clips into vertical formats ideal for platforms like TikTok, Instagram Reels, and YouTube Shorts.
You can add captions, and stickers, and customize the title and resolution of the converted video.
5. Downloading or Sharing
Once you’re happy with your edits, you can download the clip or directly share it to your connected social media accounts through Eklipse’s scheduler.
Why use Eklipse to edit your Twitch VODs for other social media channels:
Manually combing through hours of Twitch VODs to create clips for other social media platforms can be a time-consuming chore. Eklipse offers a streamlined solution with several advantages:
Key Features:
Eklipse automatically analyzes your streams and videos to identify the best clips, eliminating the need for manual editing.
Connect your Twitch, YouTube, or Facebook Gaming account to Eklipse to automatically import your streams.
Manage your clips, download them, and share them directly to social media platforms using the Eklipse mobile app.
Eklipse offers tools to customize your clips for specific social media platforms, ensuring they meet the correct size and format requirements.
Pros:
Eklipse automates the highlight creation process, freeing up your time to focus on streaming and content creation.
The platform is user-friendly and doesn’t require any editing experience.
Easily share your best moments across various social media platforms to grow your audience.
Eklipse can provide insights into what types of content resonate most with your viewers, helping you refine your future streams.
Eklipse offers a free plan with basic features, making it accessible to all streamers.
Cons:
While Eklipse offers some customization tools, it may not be suitable for creators who require advanced editing capabilities.
The accuracy of the automatically generated highlights depends on the effectiveness of Eklipse’s AI algorithms.
Some advanced features, such as longer clip durations and cloud storage, are only available with paid subscriptions.
Pricing:
Eklipse offers a free plan with limited features. Paid plans start at $9.99 per month and offer increased clip duration, cloud storage, and additional customization options.
Availability:
Eklipse is available as a web app and a mobile app for iOS and Android devices.
Alternative Video Editing Software
While Eklipse offers a convenient way to generate highlights from your streams, you might want more control over the editing process. Here are some popular video editing software options if you’re looking for an alternative to Eklipse:
DaVinci Resolve
Source: Newshooter
Da Vinci Resolve stands as a comprehensive post-production software designed for professional video editing, color correction, visual effects, and audio post-production.
Originally developed by Blackmagic Design, it has gained immense popularity due to its robust feature set, intuitive interface, and powerful capabilities.
Used by both amateur enthusiasts and seasoned professionals, Da Vinci Resolve covers the spectrum of filmmaking needs, from independent projects to Hollywood blockbusters.
Key Features:
Da Vinci Resolve is renowned for its industry-leading color grading tools, providing users with precise control over every aspect of color manipulation.
With a sophisticated editing interface, including timeline-based editing, multi-cam editing, and trimming, users can efficiently craft their narratives.
Offering a wide array of built-in visual effects and motion graphics capabilities, Da Vinci Resolve enables users to enhance their projects with stunning visuals.
Integrated audio editing tools allow users to refine soundtracks, mix audio, and apply effects directly within the software.
Pros:
Offers a complete suite of post-production tools within a single application.
Ensures high-quality output with support for up to 8K resolution and industry-standard formats.
Facilitates collaborative workflows with features like shared projects and timeline integration.
Regularly updated with new features and improvements, ensuring users stay ahead in the industry.
Offers a robust free version with many professional features, making it accessible to users of all levels.
Cons:
Due to its extensive feature set, Da Vinci Resolve has a steep learning curve, especially for beginners.
Demanding system resources, requiring high-performance hardware for optimal performance.
While improving, Da Vinci Resolve still has some limitations in terms of third-party plugin support compared to other industry-standard software.
Pricing:
Da Vinci Resolve is available in two versions: Da Vinci Resolve (Free) and Da Vinci Resolve Studio (Paid). Da Vinci Resolve Studio is priced at $299, offering additional features and support.
Availability:
Da Vinci Resolve is available on Windows, macOS, and Linux platforms.
Streamladder
Source: Hitpaw
StreamLadder is a free online platform designed to help streamers easily repurpose their Twitch clips for social media, particularly TikTok. It offers a user-friendly interface with intuitive tools to transform your landscape Twitch clips into captivating, vertical-format videos perfect for grabbing attention on TikTok and other social media platforms.
StreamLadder empowers streamers of all experience levels to expand their audience reach by creating engaging content specifically tailored for short-form video formats. Whether you’re a seasoned streamer with a loyal following or just starting, StreamLadder can help you leverage your existing content to connect with a wider audience and grow your online presence.
Key Features:
Allows you to import Twitch clips directly or upload local video files. With a few clicks, you can choose a pre-designed template to automatically resize and reformat your Twitch clip for TikTok or other social media platforms.
Easily integrate your face cam feed into your edited clip, creating a more interactive and engaging experience for viewers.
Offers various layout options to personalize your videos from split-screen layouts or full-screen options depending on your preference and the type of content you’re highlighting.
Add personality and context to your videos with StreamLadder’s text and sticker overlays. Highlight key moments, add captions, or personalize your videos with a variety of fun and engaging stickers.
StreamLadder can automatically generate captions for your videos, making them more accessible to a wider audience, especially viewers who may be watching with the sound off.
Pros:
Offers a free plan with all the essential tools to create high-quality social media clips from your Twitch content.
StreamLadder simplifies the editing process, allowing you to quickly transform your Twitch clips into engaging social media content in minutes.
Repurposing your Twitch clips for social media platforms like TikTok allows you to connect with a wider audience and potentially attract new viewers to your streams.
StreamLadder’s editing tools help you create more visually appealing and engaging content, keeping viewers hooked and wanting more.
From layout choices to text overlays, StreamLadder empowers you to personalize your videos and reflect your unique style.
Cons:
Some advanced features, like automatic caption generation for longer videos, might be limited in the free plan.
StreamLadder focuses on editing existing Twitch clips. It doesn’t offer functionalities for creating entirely new content from scratch.
StreamLadder is designed for quick and easy social media clip creation. It may not offer all the advanced editing capabilities found in professional video editing software.
Pricing:
StreamLadder is free to use.
Availability:
StreamLadder is a web-based platform accessible through any web browser on your computer. There is currently no mobile app available.
Filmora
Source: Wondershare Filmora
Filmora, by Wondershare, is a user-friendly video editing software program designed for both Windows and Mac users. It caters to beginners and hobbyists who want to create and edit videos without getting bogged down by complex features.
Key Features:
Filmora boasts a drag-and-drop editing style, making it easy to learn and use for beginners.
Access a vast collection of royalty-free effects, transitions, titles, and sound effects to enhance your videos.
Cut, trim, split, adjust speed, and add fades to your video and audio clips with user-friendly tools.
Explore features like green screen editing, motion tracking, color correction, and audio mixing for more creative control over your projects.
Pros:
Filmora’s intuitive interface and learning resources make it perfect for those new to video editing.
Despite its ease of use, Filmora offers a surprising amount of functionality for basic and even some advanced editing tasks.
Filmora provides a free version with basic features, while the paid version unlocks additional effects, titles, and editing tools.
Wondershare frequently updates Filmora with new features and bug fixes, ensuring a smooth and up-to-date experience.
Edit your videos on the go with Filmora’s mobile app available for Android and iOS devices.
Cons:
Compared to professional editing software, Filmora offers less flexibility for customizing the editing interface and workflows.
The free version of Filmora adds a watermark to your exported videos.
Editing complex projects with a large number of effects or high-resolution footage might strain your computer’s resources.
Pricing:
Free plan: Includes basic editing features and exports videos with a watermark.
Paid plans (individual and business options available): Start at $49.99 per year for access to a larger library of effects, and titles, and no watermark on exports.
Availability:
Windows and macOS desktops
Android and iOS mobile devices (FilmoraGo app)
Final Thoughts
Eklipse is a great option for streamers who want to easily create highlight clips from their Twitch streams and convert them into social media-friendly formats. It uses AI to automatically generate clips and offers some basic editing features.
However, for those who need more advanced editing capabilities, there are other software options available, such as DaVinci Resolve, Streamlabs OBS, and Filmora.
Still hesitating? Try Eklipse for free and experience the impressive power of AI editing. Don’t miss out—sign up now and watch your content go viral!